Introduction
The aroma of freshly baked focaccia—especially when it’s loaded with gooey cheese, roasted garlic, and flecks of garden herbs—has a way of making the whole house feel alive. Honestly, the first time I made these cheesy garlic herb focaccia rolls, the buttery smell wafted through my kitchen and I knew instantly this was going to be something special. It was one of those moments I wish I could bottle up—the oven humming, kids sneaking peeks around the corner, everyone waiting for that first taste.
I stumbled upon this pull-apart focaccia recipe years ago while searching for a way to jazz up a classic bread for a potluck. My grandma was a focaccia fanatic (she always said it tasted like Italy in a pan), but I wanted something with a little more wow factor—something you could tear, share, and smother with extra cheese. The first batch disappeared so fast, I barely managed to snag a roll for myself! (Let’s face it, when bread is warm and cheesy, self-control goes out the window.)
There’s something about these rolls that feels like pure, nostalgic comfort. They’re dangerously easy to whip up, perfect for Sunday brunches, game day spreads, or just as a cozy side to soup. You know what? I’ve tested this recipe over a dozen times, all for “research.” It’s now a staple for family gatherings and, honestly, every time I bake them, it’s like a warm hug for your taste buds. If you want a bread recipe that brings everyone running to the table, you’re going to want to bookmark these cheesy garlic herb focaccia rolls for sharing.
Why You’ll Love This Recipe
Let me give you the real scoop on why these cheesy garlic herb focaccia rolls are a must-try. I’ve baked a lot of breads over the years, and this one is a clear winner—trust me, I’ve got the empty pans to prove it! These rolls combine the pillowy softness of classic focaccia with a pull-apart format that’s perfect for sharing, making it the star of any gathering. Here’s what sets this recipe apart:
- Quick & Easy: Ready in just about 90 minutes with minimal fuss—ideal for busy weeknights or those last-minute “what can I bring?” moments.
- Simple Ingredients: No fancy grocery runs required. Everything you need is probably already in your kitchen—flour, yeast, garlic, cheese, olive oil, and a handful of herbs.
- Perfect for Sharing: These rolls are designed for pulling apart and passing around. Great for potlucks, family dinners, holiday brunches, or just because.
- Crowd-Pleaser: Kids love the cheesy bits, adults can’t get enough of the garlicky flavor, and everyone ends up asking for seconds. (Even my picky cousin gave this a thumbs up!)
- Unbelievably Delicious: The combination of melted cheese, roasted garlic, and fresh herbs baked into pillowy focaccia is comfort food at its best. It’s the kind of bread that makes you pause, close your eyes, and just savor.
What makes this focaccia roll recipe different? For starters, I use a blend of mozzarella and sharp cheddar for that perfect cheese pull. Garlic is roasted to mellow perfection, so it doesn’t overpower but still packs a punch. The dough gets a boost from olive oil and a sprinkle of flaky salt—classic Italian touches that keep things authentic. I’ve also got a trick for infusing the herbs right into the dough, so every bite tastes fresh.
This isn’t just another focaccia—it’s my best version. It’s faster, easier, and seriously more fun than shaping a giant loaf. Whether you want a bread centerpiece for your next dinner or just a cozy snack with soup, these cheesy garlic herb focaccia rolls bring soul-soothing satisfaction without the stress.
What Ingredients You Will Need
This recipe uses simple, wholesome ingredients to deliver bold flavor and a satisfying texture—no complicated prep or weird substitutions needed. Most are pantry staples, and the rest are easy to swap or tweak to your liking. Here’s what you’ll need to bake cheesy garlic herb focaccia rolls for sharing:
- For the Dough:
- 3 1/2 cups (450g) all-purpose flour (King Arthur or Bob’s Red Mill works great)
- 1 packet (2 1/4 tsp / 7g) instant yeast
- 1 1/4 cups (300ml) warm water (about 110°F/43°C)
- 2 tbsp (30ml) extra virgin olive oil (plus more for greasing)
- 2 tsp (10g) granulated sugar
- 1 tsp (5g) sea salt
- For the Cheesy Garlic Herb Filling:
- 1 cup (120g) shredded mozzarella cheese (for melty goodness)
- 1/2 cup (60g) shredded sharp cheddar cheese (adds depth of flavor)
- 4-5 cloves garlic, minced or roasted (use roasted for a milder, sweeter flavor)
- 2 tbsp (8g) fresh parsley, finely chopped (or 2 tsp dried parsley)
- 1 tbsp (4g) fresh rosemary, finely chopped (or 1 tsp dried rosemary)
- 1 tbsp (4g) fresh thyme leaves (or 1 tsp dried thyme)
- 1/4 tsp black pepper
- 1/2 tsp flaky sea salt (for sprinkling on top)
- Optional Add-Ins:
- Red pepper flakes (for subtle heat)
- Grated parmesan cheese (for savory finish)
- Chopped sun-dried tomatoes (for tang and color)
Ingredient tips: If you need to swap out the flour for a gluten-free blend, I’ve had good luck with King Arthur’s GF mix. Dairy-free cheeses also work for lactose-free folks—just look for brands that melt well. For the herbs, fresh is best, but dried will do in a pinch (just use less). If you’re making these focaccia rolls in the summer, toss in some fresh basil for a burst of brightness. And trust me, the olive oil really brings out that classic focaccia flavor, so use the good stuff if you can.
Equipment Needed

You don’t need fancy gadgets to make these cheesy garlic herb focaccia rolls. Here’s what I use every time:
- Large mixing bowl: For combining dough ingredients.
- Wooden spoon or stand mixer: I prefer kneading by hand, but a mixer with a dough hook is a time-saver.
- Baking pan: A 9×13-inch (23x33cm) pan works perfectly. If you only have a round cake pan, that’ll do too—just pack the rolls in snugly.
- Measuring cups and spoons: Accuracy matters, especially for yeast breads.
- Kitchen scale (optional): For perfect flour measurement (I’m a bit obsessive about this—one too many dense loaves taught me!).
- Clean kitchen towel or plastic wrap: For covering the dough during proofing.
- Pastry brush: For brushing olive oil on top (fingers work in a pinch, but a brush gets it even).
If you don’t have a stand mixer, don’t sweat it—hand mixing works fine. For budget-friendly options, I’ve found thrift store bowls and pans hold up just as well as pricier brands. Just make sure to grease your pan well, and always check that your yeast is fresh (I store mine in the fridge for longer shelf life).
Preparation Method
- Mix the Dough: In a large mixing bowl, combine 3 1/2 cups (450g) flour, 2 1/4 tsp (7g) instant yeast, 2 tsp (10g) sugar, and 1 tsp (5g) salt. Stir to blend. Add in 1 1/4 cups (300ml) warm water and 2 tbsp (30ml) olive oil. Mix with a wooden spoon until a shaggy dough forms. If using a stand mixer, fit with the dough hook and mix on low for 1-2 minutes.
- Knead: Turn out dough onto a lightly floured surface and knead for 8-10 minutes until smooth and elastic. If the dough feels sticky, sprinkle with a little extra flour—but don’t overdo it, or the rolls will be dry. The dough should bounce back when lightly pressed.
- First Rise: Place dough back in the bowl, cover with a clean towel or plastic wrap, and let rise in a warm spot for 45-60 minutes, until doubled in size. (Tip: I set mine on top of the fridge—the warmth speeds things up!)
- Prepare the Filling: While the dough rises, combine 1 cup (120g) mozzarella, 1/2 cup (60g) cheddar, minced garlic, 2 tbsp parsley, 1 tbsp rosemary, and 1 tbsp thyme in a small bowl. Add 1/4 tsp black pepper. Set aside.
- Shape the Rolls: Once dough is risen, punch it down gently. Divide into 12 equal pieces (about 65-70g each if using a scale). Flatten each piece into a small circle with your hands.
- Fill and Shape: Spoon about 2 tbsp of cheese-herb filling into the center of each circle. Gather the edges and pinch tightly to seal, then roll gently into a ball. Place seam side down in a greased 9×13-inch pan, spacing evenly.
- Second Rise: Cover rolls and let rise again for 20-30 minutes, until puffy. Preheat the oven to 375°F (190°C).
- Top and Bake: Brush rolls with olive oil. Sprinkle with flaky sea salt and extra herbs if you like. Bake for 25-30 minutes, until golden brown and bubbling. You’ll know they’re ready when the tops are deep golden and the cheese is oozing out.
- Cool and Serve: Let rolls cool for 10 minutes before pulling apart (if you can wait that long). Serve warm for maximum cheese stretch.
Troubleshooting: If the dough isn’t rising, your yeast may be old or water too hot (kills yeast). If the rolls split open, try sealing the edges tighter next time. For super gooey centers, add a bit more cheese in each roll—no one’s complaining! My top tip: Don’t rush the second rise; it gives the rolls their signature fluff.
Cooking Tips & Techniques
Through plenty of trial and error (and a few burnt batches), I’ve picked up some handy tricks for perfect cheesy garlic herb focaccia rolls every time:
- Proofing: Always let your dough rise in a warm, draft-free spot. If your kitchen is chilly, the oven (turned off) with the light on works wonders.
- Proper Sealing: When shaping the rolls, pinch the edges tightly so cheese doesn’t leak during baking. If some escapes, that’s okay—crispy cheese bits are the best!
- Herb Infusion: Mix fresh herbs right into the filling, but also sprinkle some on top for big flavor and visual appeal. Dried herbs work, but fresh is unbeatable.
- Olive Oil Finish: Don’t skimp on the olive oil before baking. It keeps the crust soft and gives that classic focaccia sheen.
- Timing: For multitasking, prep your filling while the dough rises. If you’re in a rush, use rapid-rise yeast and skip the first proof (the rolls will be a bit less fluffy, but still tasty).
- Consistency: Use a kitchen scale for dividing dough—makes all the rolls bake evenly. If you’re eyeballing it, don’t stress; just try to keep sizes close.
I’ve over-floured the dough before and ended up with hockey pucks, so trust your touch more than your measuring cup. And if the cheese bubbles over, just scoop it up for crispy snacking. Remember, it’s homemade bread—it’s supposed to look a little rustic!
Variations & Adaptations
One of the best things about this recipe is how easy it is to customize for different diets, seasons, and tastes. Here are some fun ways to switch up your cheesy garlic herb focaccia rolls:
- Gluten-Free: Substitute the all-purpose flour with a 1:1 gluten-free blend. You may need a splash more water, but the rolls still turn out fluffy.
- Dairy-Free: Use your favorite shredded non-dairy cheese and skip the parmesan topping. I’ve tried Daiya and Violife—both melt well.
- Seasonal Flavors: For spring, add chopped chives or dill. In autumn, swap in sage and a sprinkle of nutmeg for a cozy twist.
- Spicy Kick: Mix in red pepper flakes or diced jalapeños to the filling. My brother loves these with a bit of heat!
- Roasted Veggie Add-In: Toss in roasted bell peppers or caramelized onions to the cheese-herb mix for extra flavor.
- Cooking Methods: If you’re camping or grilling, these rolls bake beautifully in a cast iron skillet over indirect heat.
I once made a batch with sun-dried tomatoes and basil for a summer picnic—total crowd favorite. For allergies, skip the nuts and swap out dairy as needed. There’s no wrong way to make these focaccia rolls your own!
Serving & Storage Suggestions
These cheesy garlic herb focaccia rolls are best served warm, fresh from the oven—the cheese is melty, the herbs are fragrant, and the pull-apart format is irresistible. Arrange them on a rustic platter or straight from the baking pan for casual gatherings. (Honestly, they never last long enough for fancy plating in my house!)
Pair with tomato soup, a fresh green salad, or alongside a pasta dinner. For brunch, serve them with scrambled eggs and fruit. A chilled white wine or sparkling lemonade makes the perfect drink match.
To store, let rolls cool completely and place in an airtight container. Keep in the fridge for up to 3 days. Reheat in a 350°F (175°C) oven for 8-10 minutes, or microwave for 20 seconds per roll. You can freeze baked rolls for up to 2 months—just thaw and reheat as above. The flavors deepen over time, so leftovers taste even better the next day!
Nutritional Information & Benefits
Each cheesy garlic herb focaccia roll is about 180 calories, with 7g fat, 22g carbohydrates, and 6g protein. The olive oil adds heart-healthy fats, and fresh herbs bring antioxidants and flavor without extra calories. If you go light on cheese or use dairy-free alternatives, the rolls can fit into lower-calorie or lactose-free diets.
This recipe is vegetarian and easily adaptable for gluten-free or dairy-free folks. Allergens include wheat and dairy—just swap those key ingredients as needed. Personally, I love knowing exactly what’s in my bread, and the fresh herbs always make me feel a little healthier (even if I eat three rolls in one sitting!).
Conclusion
If you’re searching for a bread recipe that’s easy, comforting, and guaranteed to make any meal special, these cheesy garlic herb focaccia rolls for sharing are your answer. They’re warm, gooey, and full of flavor—honestly, every bite feels like a little celebration. Whether you’re a bread newbie or a seasoned baker, you’ll find these rolls come together with minimal fuss and maximum reward.
Feel free to tweak the herbs, cheeses, or fillings to match your family’s tastes. That’s the fun of homemade bread—it’s all about making it your own. I love this recipe because it’s brought so many smiles to my table, and I bet it’ll do the same for you.
Give these cheesy garlic herb focaccia rolls a try, then let me know in the comments how you adapted them! Share your photos, tips, or family stories—and don’t forget to pin this recipe for your next get-together. Happy baking, friends!
FAQs
Can I make these cheesy garlic herb focaccia rolls ahead of time?
Yes! You can prepare the rolls and refrigerate the shaped dough overnight. Bake fresh the next day for best results.
What’s the best cheese for maximum meltiness?
Mozzarella is the classic choice, but mixing in cheddar or provolone adds flavor and a great cheese pull.
Can I use dried herbs instead of fresh?
Absolutely. Use about 1/3 the amount for dried herbs. Fresh gives brighter flavor, but dried works in a pinch.
How do I prevent the rolls from sticking to the pan?
Generously grease your baking pan with olive oil or line with parchment paper. This keeps the rolls soft and easy to pull apart.
Are these focaccia rolls freezer-friendly?
Yes! Once baked and cooled, freeze rolls in an airtight bag. Reheat in the oven to restore that fresh-baked texture.
Pin This Recipe!
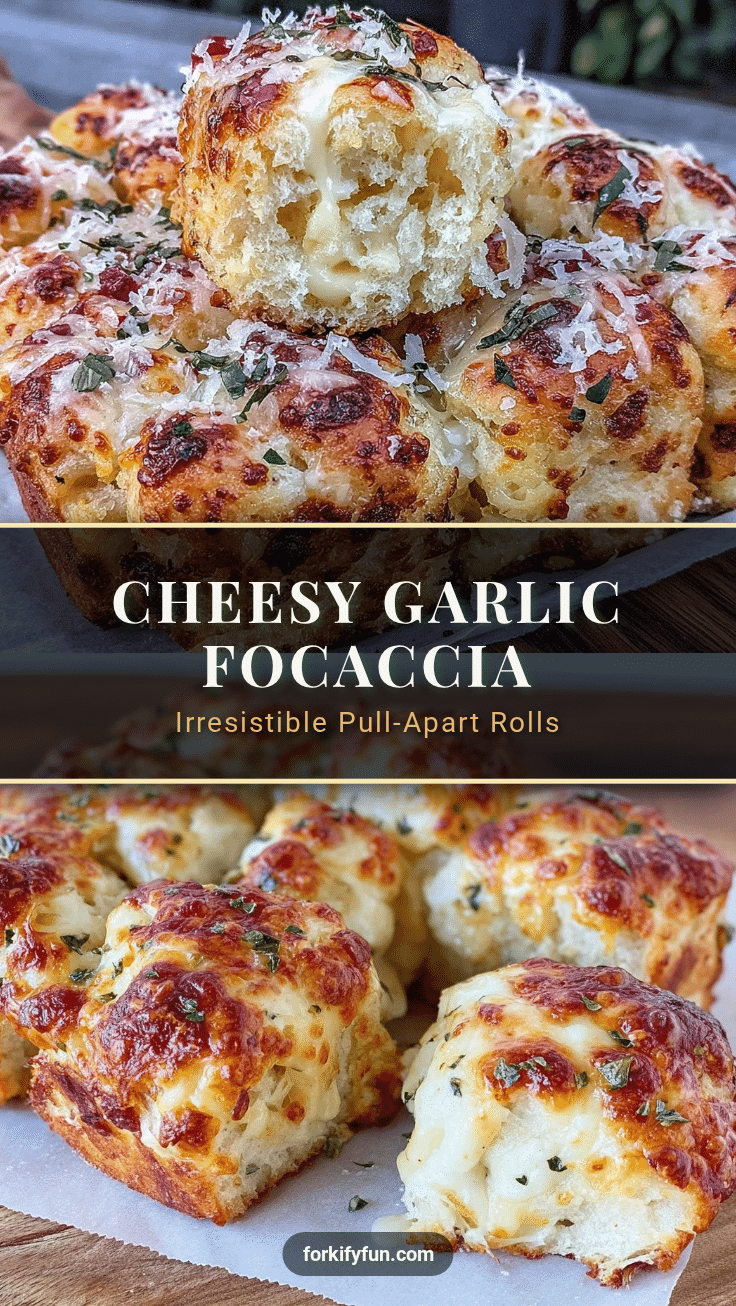
Cheesy Garlic Herb Focaccia Rolls

These pull-apart focaccia rolls are loaded with gooey cheese, roasted garlic, and fresh herbs, making them the perfect comfort bread for sharing at gatherings or cozy family meals. Quick to prepare and irresistibly soft, they’re a crowd-pleaser for brunch, dinner, or snacking.
- Prep Time: 25 minutes
- Cook Time: 30 minutes
- Total Time: 1 hour 30 minutes
- Yield: 12 rolls 1x
- Category: Bread
- Cuisine: Italian
Ingredients
- 3 1/2 cups all-purpose flour
- 1 packet (2 1/4 tsp) instant yeast
- 1 1/4 cups warm water (about 110°F)
- 2 tbsp extra virgin olive oil (plus more for greasing)
- 2 tsp granulated sugar
- 1 tsp sea salt
- 1 cup shredded mozzarella cheese
- 1/2 cup shredded sharp cheddar cheese
- 4–5 cloves garlic, minced or roasted
- 2 tbsp fresh parsley, finely chopped (or 2 tsp dried parsley)
- 1 tbsp fresh rosemary, finely chopped (or 1 tsp dried rosemary)
- 1 tbsp fresh thyme leaves (or 1 tsp dried thyme)
- 1/4 tsp black pepper
- 1/2 tsp flaky sea salt (for sprinkling on top)
- Red pepper flakes (optional)
- Grated parmesan cheese (optional)
- Chopped sun-dried tomatoes (optional)
Instructions
- In a large mixing bowl, combine flour, instant yeast, sugar, and salt. Stir to blend.
- Add warm water and olive oil. Mix with a wooden spoon until a shaggy dough forms. If using a stand mixer, mix on low for 1-2 minutes.
- Turn out dough onto a lightly floured surface and knead for 8-10 minutes until smooth and elastic.
- Place dough back in the bowl, cover, and let rise in a warm spot for 45-60 minutes, until doubled in size.
- While dough rises, combine mozzarella, cheddar, garlic, parsley, rosemary, thyme, and black pepper in a small bowl for the filling.
- Once dough is risen, punch it down gently. Divide into 12 equal pieces. Flatten each piece into a small circle.
- Spoon about 2 tbsp of cheese-herb filling into the center of each circle. Gather edges and pinch tightly to seal, then roll gently into a ball. Place seam side down in a greased 9×13-inch pan.
- Cover rolls and let rise again for 20-30 minutes, until puffy. Preheat oven to 375°F.
- Brush rolls with olive oil. Sprinkle with flaky sea salt and extra herbs if desired.
- Bake for 25-30 minutes, until golden brown and bubbling.
- Let rolls cool for 10 minutes before serving. Serve warm for maximum cheese stretch.
Notes
For best results, use fresh herbs and good-quality olive oil. Seal rolls tightly to prevent cheese from leaking. Dough can be made gluten-free or dairy-free with appropriate substitutions. Rolls freeze well and can be reheated for fresh-baked texture.
Nutrition
- Serving Size: 1 roll
- Calories: 180
- Sugar: 2
- Sodium: 250
- Fat: 7
- Saturated Fat: 3
- Carbohydrates: 22
- Fiber: 1
- Protein: 6
Keywords: focaccia rolls, cheesy bread, garlic herb bread, pull-apart bread, Italian bread, vegetarian bread, party bread, brunch bread