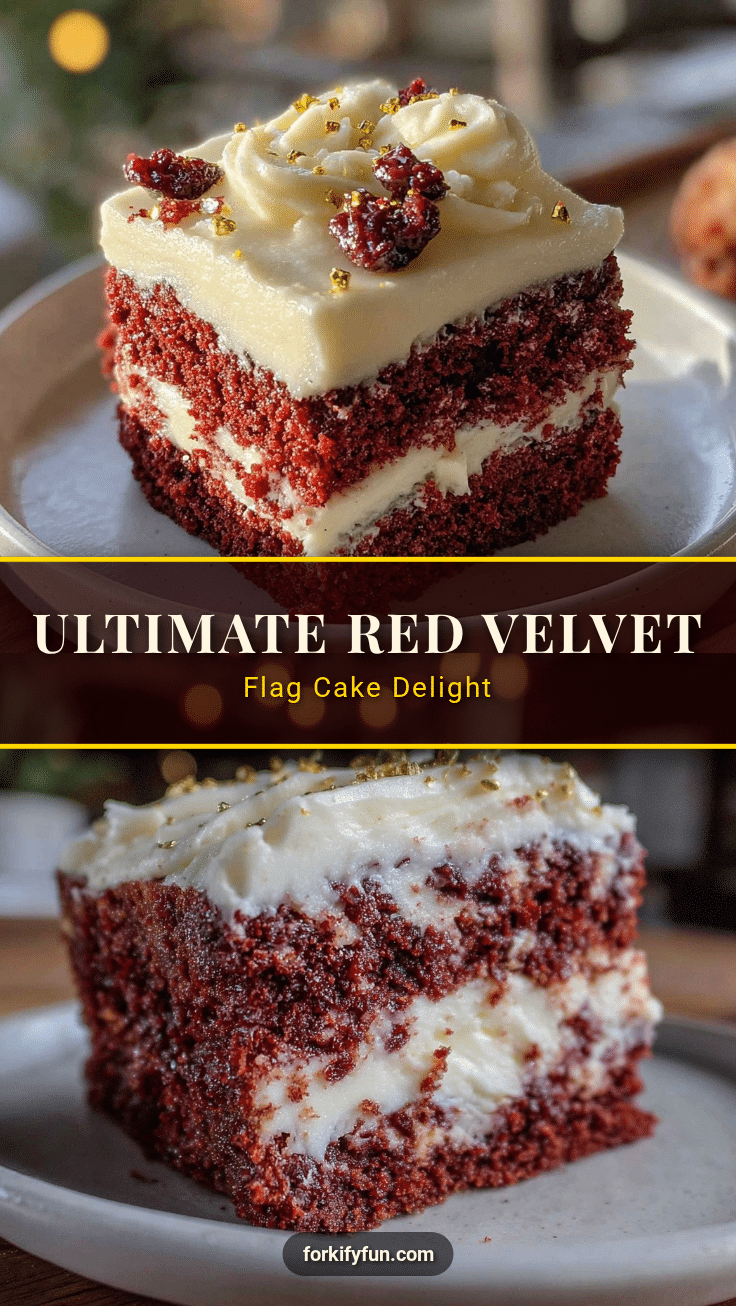
“Hey, can you make that flag cake again for the picnic?” That text popped up just as I was wrapping up a chaotic morning, juggling errands and a too-loud playlist. Honestly, the last time I whipped up this Perfect Red Velvet Flag Cake with Cream Cheese Frosting, it was a bit of a happy accident — a blend of leftover batter, a splash of creativity, and a craving for something festive but easy. Skeptical at first about attempting a visually striking cake on a busy day, I figured, why not? Turns out, it was the kind of win that had everyone asking for seconds and the recipe.
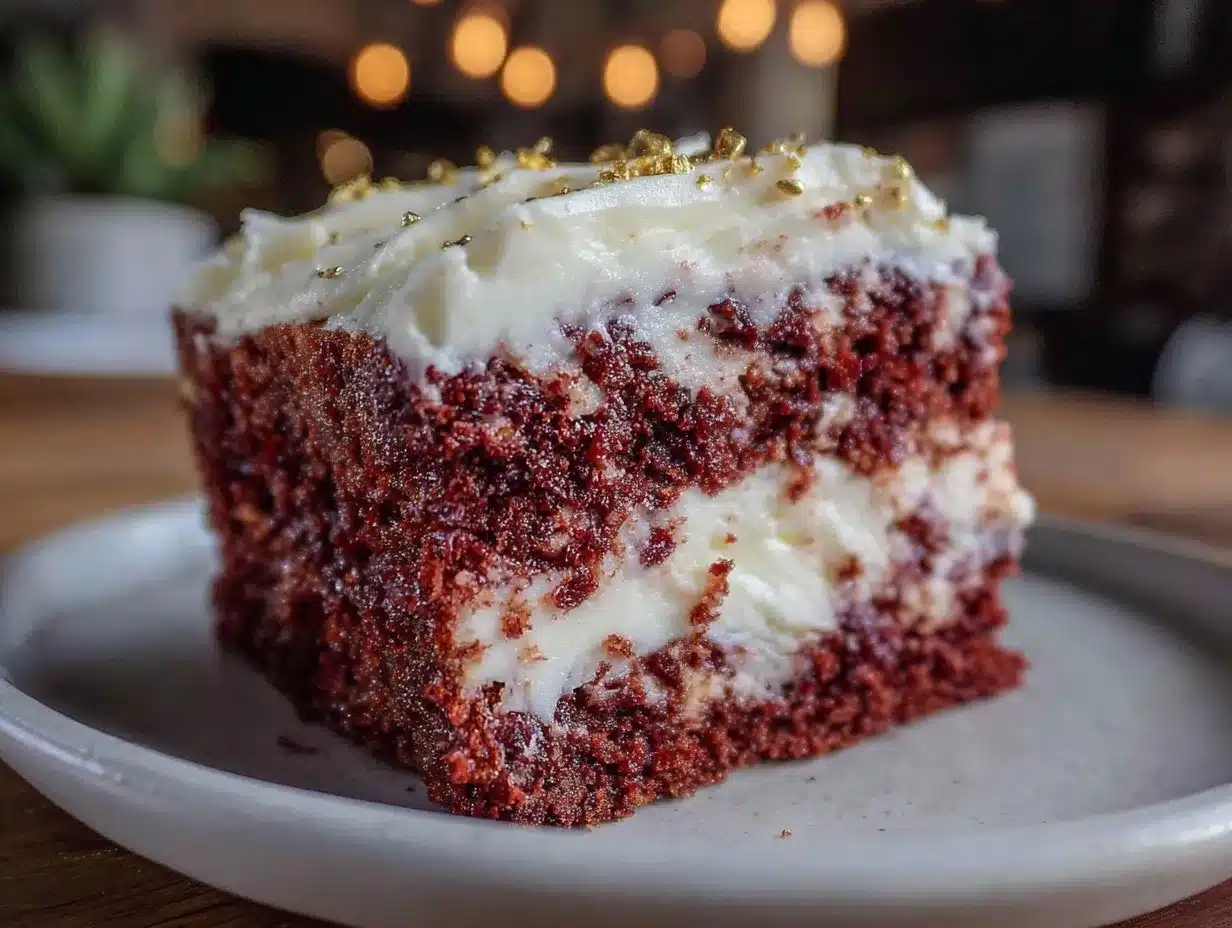
The vibrant red layers against creamy white frosting, arranged like the stars and stripes, brought an unexpected calm to the day. It wasn’t just about the look — though, let’s be real, that caught a lot of eyes — but the moist, tender crumb paired with tangy cream cheese frosting that felt like a small celebration in every bite. I remember thinking, this recipe deserves a spot in the rotation, not just for holidays but whenever I want a bit of joy on a plate.
What’s stuck with me is how approachable this cake is — no complicated piping or fussy decorations, just simple layers and a little patience to get the flag design right. It’s the kind of dessert that feels special and homemade, with enough room for you to put your own spin on it. So, here’s the story and the step-by-step to my go-to Perfect Red Velvet Flag Cake with Cream Cheese Frosting, a recipe that’s as friendly to beginners as it is impressive on any table.
Why You’ll Love This Perfect Red Velvet Flag Cake Recipe
After making this cake multiple times (yes, more than once in a week during patriotic season), I can say it’s one of the few recipes that balances ease and wow-factor beautifully. If you’ve been hunting for that sweet spot between festive and fuss-free, this one ticks a lot of boxes.
- Quick & Easy: From mixing to frosting, it comes together in about 1.5 hours, making it great for last-minute celebrations or casual get-togethers.
- Simple Ingredients: No need for specialty stores — most components are pantry staples or easy to find, like buttermilk and good-quality cocoa powder.
- Perfect for Any Occasion: While it screams patriotic parties, it’s just as fitting for birthdays, potlucks, or when you want a slice of something special.
- Crowd-Pleaser: Kids and adults alike fall for this cake, thanks to its tender crumb and creamy frosting that’s not overly sweet.
- Unbelievably Delicious: The classic red velvet flavor — mild cocoa with a subtle tang — combined with silky cream cheese frosting makes each bite memorable.
What sets this cake apart? It’s the layering technique that forms the flag pattern without fancy tools, plus the frosting’s smooth texture achieved by whipping cream cheese just right (I found Philadelphia brand works wonders). Unlike many red velvet recipes that can be dry or overly sweet, this one balances moisture and flavor perfectly, thanks to the buttermilk and a touch of vinegar that reacts with baking soda for that signature tender crumb.
Honestly, this cake is a little celebration you can slice up and share, the kind that makes you pause and savor, whether you’re hosting a backyard BBQ or surprising someone just because. If you want something festive without the stress, this recipe’s got your back.
What Ingredients You Will Need for the Perfect Red Velvet Flag Cake
This recipe uses straightforward, wholesome ingredients to deliver that classic red velvet taste and a luscious cream cheese frosting that’s smooth and spreadable. Most are pantry staples, making this cake approachable for any home baker.
- For the Cake Batter:
- All-purpose flour – 2 ½ cups (310g), sifted for a light crumb
- Unsweetened cocoa powder – 2 tablespoons (15g), for subtle chocolate flavor
- Baking soda – 1 teaspoon (5g), reacts with vinegar for rise
- Salt – ½ teaspoon (3g), balances sweetness
- Granulated sugar – 1 ½ cups (300g), the right amount for sweetness
- Vegetable oil – 1 cup (240ml), keeps the cake moist
- Large eggs – 2, room temperature for better mixing
- Buttermilk – 1 cup (240ml), adds tang and tenderness
- Red food coloring – 2 tablespoons (30ml), for that signature vibrant hue
- White vinegar – 1 tablespoon (15ml), reacts with baking soda to lighten texture
- Pure vanilla extract – 1 teaspoon (5ml), enhances all flavors
- For the Cream Cheese Frosting:
- Cream cheese – 16 oz (450g), softened (I trust Philadelphia for creaminess)
- Unsalted butter – ½ cup (115g), softened, adds richness
- Powdered sugar – 4 cups (480g), sifted to avoid lumps
- Pure vanilla extract – 1 teaspoon (5ml), rounds out flavors
- Pinch of salt, to balance sweetness
If you’re feeling adventurous, you can swap buttermilk with a mix of milk and lemon juice or use almond milk for a dairy-free version. For a gluten-free twist, almond flour works well but expect a denser texture. I’ve tried adding a teaspoon of espresso powder once to intensify the cocoa notes — it’s subtle but lovely.
Equipment Needed
To make this Perfect Red Velvet Flag Cake, you’ll want a few basics on hand. Nothing too fancy, but a couple of tools make life easier:
- Two 9-inch (23cm) round cake pans – nonstick or well-greased helps with clean layers
- Mixing bowls – one large for batter, medium for frosting
- Electric mixer or stand mixer – for smooth, lump-free batter and frosting (a handheld mixer works fine too!)
- Measuring cups and spoons – accuracy is key in baking
- Offset spatula – for spreading frosting smoothly
- Cooling racks – essential to cool layers evenly and prevent sogginess
- Sharp serrated knife – to level cakes for even flag layers
If you don’t have two cake pans, you can bake layers one at a time — just adjust baking times slightly. I’ve also used parchment paper rounds to line pans for easier release. For budget-friendly alternatives, silicone spatulas and mixing bowls from any kitchen supply store work perfectly well. Just keep a clean, dry workspace and patience!
Preparation Method
- Preheat & Prep: Heat your oven to 350°F (175°C). Grease two 9-inch round pans with butter or nonstick spray, then dust lightly with flour or line with parchment paper. This step saves you from any cake sticking disasters later. (Approx. 10 mins)
- Mix Dry Ingredients: In a large bowl, sift together 2 ½ cups (310g) flour, 2 tablespoons (15g) cocoa powder, 1 teaspoon (5g) baking soda, and ½ teaspoon (3g) salt. This ensures even distribution and a fine crumb.
- Combine Wet Ingredients: In another bowl, whisk 1 ½ cups (300g) sugar, 1 cup (240ml) vegetable oil, and 2 large eggs (at room temperature) until smooth. Add 1 cup (240ml) buttermilk, 2 tablespoons (30ml) red food coloring, 1 tablespoon (15ml) white vinegar, and 1 teaspoon (5ml) vanilla extract. Mix gently but thoroughly.
- Bring It Together: Slowly add the dry ingredients into the wet, mixing just until combined. Don’t overmix — you want a smooth batter but not tough cake. The batter should be thick, velvety, and bright red. (Warning: batter might look runny, but it bakes into moist layers.)
- Divide & Bake: Evenly split the batter between the two prepared pans. Smooth the tops with a spatula. Bake for 25-30 minutes, or until a toothpick inserted in the center comes out clean. Oven times vary — start checking at 25 minutes. (Approx. 30 mins)
- Cool Completely: Let cakes cool in the pans for 10 minutes, then transfer to wire racks to cool fully before frosting. This step is crucial to avoid frosting melting or sliding off.
- Prepare Frosting: Beat 16 oz (450g) softened cream cheese and ½ cup (115g) softened butter on medium speed until creamy (about 2-3 minutes). Gradually add 4 cups (480g) sifted powdered sugar, mixing on low to avoid powder clouds, then increase speed until fluffy. Add 1 teaspoon (5ml) vanilla extract and a pinch of salt. Taste and adjust sweetness accordingly.
- Level & Layer: Using a serrated knife, trim the domed tops of cakes to create flat layers. Slice each cake horizontally into two equal layers, giving you four layers total. This is the foundation for your “flag” design.
- Assemble the Flag: Spread a thin layer of frosting between each cake layer. Arrange the layers so the top two form the stripes, and one corner of the bottom layer is reserved for the “stars” section. Use a small amount of frosting to mark the star box area.
- Frost the Outside: Cover the assembled cake with a thin crumb coat of frosting. Chill for 15-20 minutes to set. Then apply a thicker, smooth layer of frosting all over. Use an offset spatula or bench scraper for clean edges.
- Finish the Flag Design: Use fresh blueberries or edible star-shaped sprinkles in the corner “star” box, and create red stripes by piping or layering thin strips of red velvet crumbs or red-colored frosting. The contrast of creamy white frosting and vibrant red velvet layers makes the flag pop.
Patience during assembly pays off here. I’ve found chilling between frosting layers helps maintain clean lines and prevents sliding. Don’t rush this part — it’s what gives the cake its signature look.
Cooking Tips & Techniques for Perfect Results
Baking a show-stopping cake like this can feel intimidating, but a few tricks from experience make it manageable. First, always sift your cocoa powder and flour. It prevents lumps and gives your cake a fine crumb. I once skipped this step and ended up with a patchy, uneven crumb — lesson learned.
Temperature matters. Room temperature eggs and cream cheese blend better, creating a smooth batter and frosting without lumps. Cold ingredients can cause curdling or uneven mixing.
Don’t overmix the batter once the dry ingredients are added. Overworking gluten leads to a dense cake, and you want tender, fluffy layers.
When frosting, crumb coating is a lifesaver. It traps loose crumbs so your final frosting layer stays clean and smooth. I usually chill the crumb-coated cake in the fridge for 20 minutes before the final coat — trust me, it’s worth the wait.
For the flag effect, keep the design simple. Use blueberries or star sprinkles for stars and alternate frosting or red velvet crumbs for stripes. No fancy piping skills needed here. I’ve tried intricate designs, but the straightforward approach not only looks better but tastes just as amazing.
Timing is key — plan your baking and frosting steps so the cake has time to cool completely. Rushing to frost a warm cake? That’s a recipe for frosting meltdown.
Variations & Adaptations for Your Perfect Red Velvet Flag Cake
This recipe is a great base to tweak depending on your preferences or dietary needs. Here are a few ideas I’ve tried or thought up:
- Gluten-Free: Use a 1-to-1 gluten-free flour blend instead of all-purpose flour. The texture is slightly different but still moist and tender.
- Vegan Version: Swap eggs with flax eggs (1 tablespoon ground flaxseed + 3 tablespoons water per egg), use plant-based milk with vinegar in place of buttermilk, and replace cream cheese and butter with vegan alternatives like vegan cream cheese and margarine.
- Berry-Infused Star Section: Instead of blueberries for stars, try fresh raspberries or blackberries for a tart contrast and a fresh twist.
- Chocolate Lover’s Edition: Add mini chocolate chips to the batter or spread a thin layer of ganache between layers for extra richness.
Personally, I once swapped the cream cheese frosting for a whipped mascarpone topping for a lighter finish — it was a hit at a summer party. If you want to get creative, try layering with the red, white, and blue layer cake for even more festive fun.
Serving & Storage Suggestions
This cake is best served chilled or at room temperature. I like to slice it about 30 minutes before serving to let the layers soften just a bit. It pairs beautifully with a simple cup of coffee or a refreshing iced tea — perfect for summer gatherings or a cozy indoor celebration.
For storage, cover the cake loosely with plastic wrap or store in an airtight cake container. It keeps well in the refrigerator for 3-4 days. If you want to freeze it, slice into portions and wrap each piece tightly in plastic wrap and foil; store in the freezer for up to 2 months.
When reheating, thaw frozen slices overnight in the fridge, then bring to room temperature for best flavor. The frosting firms up when cold but softens delightfully when served.
Flavors actually deepen after a day, so if you can wait, the next-day slices taste even better. This cake can be the star of your Fourth of July spread or an unexpected treat alongside a fresh Mediterranean chickpea quinoa bowl for a balanced meal day.
Nutritional Information & Benefits
Estimated per slice (1/12th of cake):
| Calories | 350 kcal |
|---|---|
| Fat | 18 g |
| Saturated Fat | 8 g |
| Carbohydrates | 45 g |
| Sugar | 35 g |
| Protein | 4 g |
While this cake is a treat, the cream cheese frosting offers some calcium and protein. The buttermilk contributes a tender crumb and adds a bit of probiotics. Red velvet’s subtle cocoa powder contains antioxidants, though in small amounts here.
This recipe is gluten-containing by default but can be adapted for gluten-free diets. It contains dairy and eggs, so those with allergies should consider substitutions. I find it balances indulgence with everyday ingredients, making it a realistic dessert option for most families.
Conclusion
This Perfect Red Velvet Flag Cake with Cream Cheese Frosting has become my go-to for turning ordinary days into small celebrations. It’s approachable, visually stunning without fuss, and utterly delicious — a combination that made me fall for it again and again. Whether you’re baking for a holiday, a birthday, or just because, this cake offers room for creativity and plenty of joy.
Don’t hesitate to tweak the frosting sweetness or try different berries in the star section to make it your own. I love how the layers come together like a little edible flag waving on a plate — it’s a reminder that sometimes simple ingredients and a little patience can make magic happen.
If you try this recipe, I’d love to hear how it turns out or what personal twists you add. Sharing food stories and favorite recipes is what makes cooking so special, after all. Happy baking!
FAQs About Perfect Red Velvet Flag Cake
Can I make this cake ahead of time?
Absolutely! You can bake the layers up to 2 days ahead and store them wrapped in the fridge. Assemble and frost the day you plan to serve for best freshness.
What if I don’t have buttermilk?
Mix 1 tablespoon of white vinegar or lemon juice with 1 cup of milk, let it sit for 5 minutes, and use as a buttermilk substitute. It works well to tenderize the cake.
How do I get the red color without artificial food coloring?
Natural alternatives include beet juice or powdered freeze-dried strawberries, but the color may be less vibrant. If you want bold red, food coloring is your best bet.
Can I freeze the whole cake?
Freezing the whole cake is possible if wrapped tightly, but it’s better to freeze individual slices to maintain texture and flavor. Thaw in the fridge overnight before serving.
What’s the best way to decorate the flag design without special tools?
Use fresh blueberries or star-shaped sprinkles for stars and either red velvet crumbs or piped red frosting for stripes. Keep it simple—this gives a charming, homemade look without complicated decorating skills.
Pin This Recipe!
Perfect Red Velvet Flag Cake with Cream Cheese Frosting
A festive and easy-to-make red velvet cake with moist layers and smooth cream cheese frosting, designed to resemble a flag with simple layering and decoration techniques.
- Prep Time: 20 minutes
- Cook Time: 30 minutes
- Total Time: 1 hour 30 minutes
- Yield: 12 servings 1x
- Category: Dessert
- Cuisine: American
Ingredients
- 2 ½ cups (310g) all-purpose flour, sifted
- 2 tablespoons (15g) unsweetened cocoa powder
- 1 teaspoon (5g) baking soda
- ½ teaspoon (3g) salt
- 1 ½ cups (300g) granulated sugar
- 1 cup (240ml) vegetable oil
- 2 large eggs, room temperature
- 1 cup (240ml) buttermilk
- 2 tablespoons (30ml) red food coloring
- 1 tablespoon (15ml) white vinegar
- 1 teaspoon (5ml) pure vanilla extract
- 16 oz (450g) cream cheese, softened
- ½ cup (115g) unsalted butter, softened
- 4 cups (480g) powdered sugar, sifted
- 1 teaspoon (5ml) pure vanilla extract
- Pinch of salt
Instructions
- Preheat oven to 350°F (175°C). Grease two 9-inch round pans and dust with flour or line with parchment paper.
- In a large bowl, sift together flour, cocoa powder, baking soda, and salt.
- In another bowl, whisk sugar, vegetable oil, and eggs until smooth. Add buttermilk, red food coloring, vinegar, and vanilla extract; mix gently.
- Slowly add dry ingredients to wet ingredients, mixing just until combined. Batter will be thick and bright red.
- Divide batter evenly between prepared pans and smooth tops. Bake 25-30 minutes or until a toothpick comes out clean.
- Cool cakes in pans for 10 minutes, then transfer to wire racks to cool completely.
- Beat cream cheese and butter until creamy. Gradually add powdered sugar, mixing on low then high speed until fluffy. Add vanilla and salt; adjust sweetness.
- Level cakes by trimming domed tops. Slice each cake horizontally into two layers, creating four layers total.
- Spread thin layer of frosting between each layer. Arrange layers to form flag pattern, reserving a corner for stars.
- Apply a thin crumb coat of frosting to outside of cake. Chill 15-20 minutes to set.
- Apply a thicker, smooth layer of frosting all over. Use offset spatula for clean edges.
- Decorate star section with fresh blueberries or star-shaped sprinkles. Create red stripes with red velvet crumbs or red-colored frosting.
Notes
Use room temperature eggs and cream cheese for smooth mixing. Sift dry ingredients to avoid lumps. Chill crumb-coated cake before final frosting to prevent sliding. For flag decoration, keep it simple with blueberries and red velvet crumbs or frosting. Cake layers can be baked one at a time if only one pan is available.
Nutrition
- Serving Size: 1 slice (1/12th of c
- Calories: 350
- Sugar: 35
- Fat: 18
- Saturated Fat: 8
- Carbohydrates: 45
- Protein: 4
Keywords: red velvet cake, flag cake, cream cheese frosting, patriotic dessert, easy cake recipe, homemade cake, festive cake


