“You seriously have to try making these mochi ice cream balls,” my friend texted me one rainy afternoon, right when I was juggling a mountain of work and a cranky toddler. Honestly, I was skeptical — mochi seemed like one of those fancy desserts reserved for specialty shops, not something I could whip up in a cramped kitchen between Zoom calls and snack runs. But curiosity got the better of me.
So, one evening after bedtime chaos settled into a quiet hum, I pulled out the ingredients and gave it a shot. The texture was unlike anything I’d expected — chewy and soft on the outside, with pockets of rich, creamy ice cream that just melted in my mouth. I couldn’t stop tinkering with different flavors that week. Somehow, making these easy homemade mochi ice cream balls transformed a hectic week into a little joyful ritual.
That moment stuck with me because this recipe isn’t just dessert; it’s a small, satisfying adventure you can share with whoever’s around. Plus, it’s a neat way to bring a bit of unexpected delight to your everyday, especially when you want something sweet but not complicated. After all, isn’t it nice to have a treat that feels special but actually fits into your busy life?
Why You’ll Love This Recipe
Having tried my fair share of mochi ice cream over the years from shops and ready-made packs, this homemade version quickly became a favorite for a few reasons. It’s one of those recipes that feels fancy but really isn’t, making it perfect whether you’re impressing guests or just craving a fun snack. Here’s why it might just become your go-to too:
- Quick & Easy: You can get these mochi balls made in under 45 minutes, including chilling time — perfect for last-minute dessert plans or a weekend treat.
- Simple Ingredients: No weird or hard-to-find items here. Most are pantry staples or easy to grab at your local grocery store.
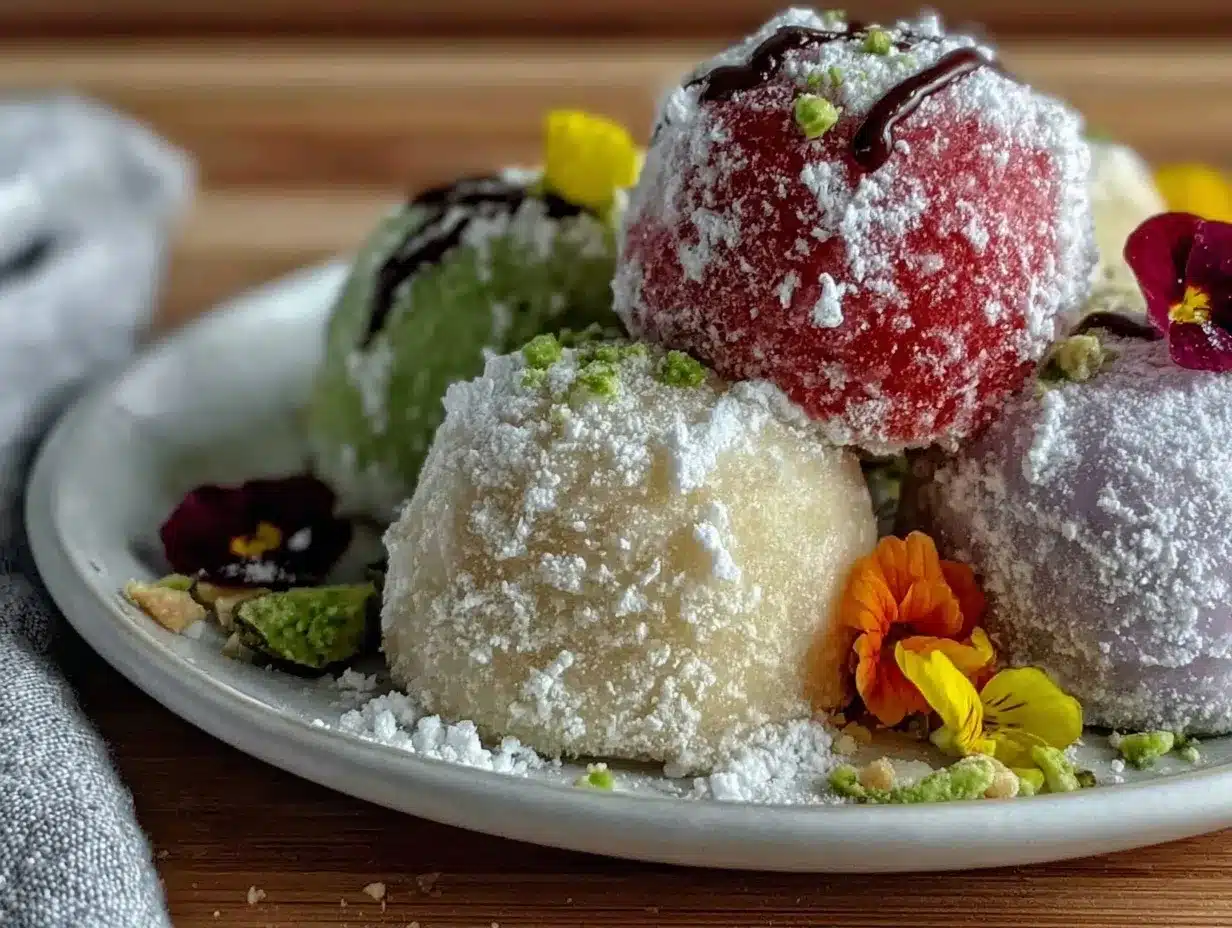
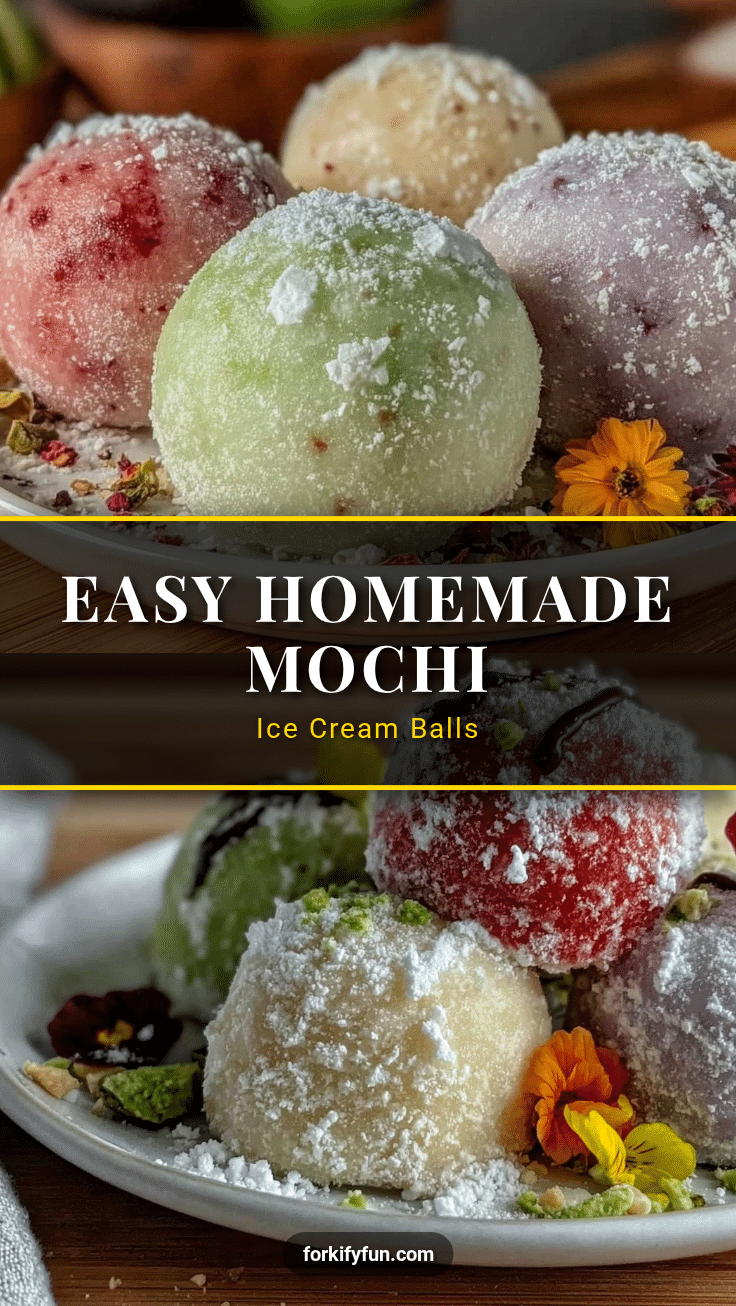
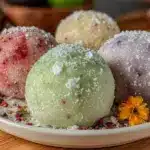
- Four Flavor Fun: Matcha, strawberry, mango, and classic vanilla – a variety that suits different moods and palettes, making it great for sharing.
- Crowd-Pleaser: Kids and adults alike love the chewy outside paired with creamy ice cream inside. It’s a textural combo that’s just irresistible.
- Unique Homemade Twist: Unlike store-bought varieties, you get to customize the sweetness, pick your favorite ice cream, and experiment with coatings — it’s your recipe to play with.
What really sets this apart is the balance between chewy mochi and creamy ice cream that doesn’t get icy or hard over time. Plus, the process of shaping these little balls is oddly satisfying — trust me, after making a batch, you might find yourself smiling at your kitchen mess in a whole new way. If you’ve enjoyed funfetti sprinkles treats or have a soft spot for easy homemade snacks, you’ll appreciate how straightforward and rewarding this recipe is.
What Ingredients You Will Need
This recipe calls for a handful of simple, wholesome ingredients that come together to create a delightful contrast in texture and flavor. The magic is in the mochi dough’s chewy softness paired with the creamy ice cream inside. Here’s what you’ll need:
- Sweet Rice Flour (Mochiko): This glutinous rice flour is essential for the chewy texture. I like the Shirakiku brand for consistent results.
- Sugar: Just a touch to sweeten the mochi dough without overpowering the ice cream’s flavor.
- Water: Lukewarm, to help the dough come together smoothly.
- Cornstarch or Potato Starch: For dusting the work surface and preventing stickiness while shaping the mochi.
- Ice Cream: Four flavors of your choice — I went with matcha green tea, strawberry, mango, and vanilla bean. Use your favorite brand or homemade ice cream for best flavor.
- Food Coloring or Natural Powders (optional): For a little color boost if you want to tint the mochi dough (like green tea powder for matcha or beet powder for pink strawberry).
For substitutions, if you’re aiming for a dairy-free or vegan version, coconut or almond milk ice cream works well, though the texture of the ice cream inside might vary slightly. Also, if you can’t find sweet rice flour, some Asian markets or online stores will have it, but avoid regular rice flour — it won’t give you the right chew.
These ingredients keep it approachable and flexible, so you can make mochi ice cream balls that fit your pantry and taste buds without fuss.
Equipment Needed
To whip up these mochi ice cream balls, you don’t need anything fancy, but a few kitchen basics will help make the process smoother:
- Microwave-safe bowl or heatproof bowl: For steaming or microwaving the mochi dough mixture.
- Mixing spoon or spatula: To stir the sticky dough.
- Rolling pin (optional): Helpful if you want to thin out the mochi dough evenly, but your hands work just fine too.
- Plastic wrap: To cover the dough while it rests and to help shape the mochi without sticking.
- Cookie scoop or small ice cream scoop: For portioning the ice cream into consistent balls.
- Baking sheet or tray: Lined with parchment paper or dusted with starch to hold the mochi balls while they chill.
Personally, I like using a silicone mat for dusting instead of parchment—it sticks less and cleans up easier. If you don’t have a microwave, you can steam the mochi dough in a steamer basket over boiling water, which works just as well. Keeping your tools lightly dusted with starch is key to avoid that frustrating sticking.
Preparation Method
- Prepare the ice cream balls: Scoop the ice cream into small, bite-sized balls (about 1.5 inches or 3.8 cm diameter) using a cookie scoop. Place them on a parchment-lined tray and freeze for at least 2 hours until firm.
- Make the mochi dough: In a microwave-safe bowl, combine 1 cup (120 g) sweet rice flour, 1/4 cup (50 g) sugar, and 3/4 cup (180 ml) lukewarm water. Stir well until smooth with no lumps.
- Cook the dough: Cover the bowl loosely with plastic wrap and microwave on high for 1 minute. Remove and stir quickly, then microwave again for 1 more minute. Stir once more, then microwave a final 30 seconds. The dough should be sticky, translucent, and slightly shiny.
- Cool and dust: Transfer the dough onto a cornstarch-dusted surface or silicone mat. Dust your hands with starch and flatten the dough gently to about 1/4-inch (6 mm) thickness. Let it cool slightly but not completely—warm dough is easier to work with.
- Cut the dough: Using a round cookie cutter or drinking glass (about 3 inches or 7.5 cm diameter), cut out circles of dough. If the dough sticks, dust with more starch.
- Assemble the mochi balls: Quickly place a frozen ice cream ball in the center of a mochi circle. Pinch the edges together to seal the ice cream inside, forming a ball. Work swiftly to avoid melting the ice cream.
- Freeze the finished mochi: Place the sealed mochi balls seam side down on a tray dusted with starch. Freeze for at least 2 hours before serving to firm up.
One tip I learned the hard way: keep your hands and work surface well dusted with starch to prevent sticking, but not so much that it coats the mochi excessively. Also, if the dough cools too much, it gets tough to stretch and seal, so work in small batches if needed. If your mochi tears, just patch it gently with a little extra dough and starch.
Cooking Tips & Techniques
Making mochi ice cream balls at home might seem intimidating, but a few tricks make it manageable:
- Temperature matters: Keep the ice cream balls very cold and the mochi dough just warm enough to be pliable. This balance helps seal the mochi without melting the ice cream.
- Don’t rush the dough cooking: Stirring between microwaving intervals ensures even cooking and prevents tough spots.
- Use starch generously: Cornstarch or potato starch prevents stickiness but avoid over-coating to keep the mochi chewy and not dry.
- Seal carefully: Pinch the mochi edges firmly but gently to avoid tearing. If you get little holes, patch them quickly before freezing.
- Freeze well: Letting the finished mochi balls chill thoroughly helps maintain their shape and texture when served.
My first attempts involved a lot of frustration with sticking and tearing. I found that using a silicone mat and keeping my hands dusted with starch helped immensely. Also, prepping all ice cream balls in advance and keeping them well frozen made assembly faster and less messy. If you want a shortcut for a quick sweet fix, pairing these with easy homemade treats like single-serving mug brownies makes for a cozy combo.
Variations & Adaptations
This recipe is pretty versatile and lends itself well to some fun twists depending on your preferences or what you have on hand:
- Dairy-Free or Vegan: Use coconut or almond milk-based ice creams and ensure your starch and flour are vegan-friendly.
- Flavor Swaps: Instead of the four flavors I chose, try chocolate, coffee, or even fruity sorbets for a lighter take.
- Coatings: Roll the finished mochi balls in toasted coconut flakes, finely chopped nuts, or matcha powder for an extra flavor boost and texture.
- Alternative Cooking: If you prefer not to use a microwave, steam the dough over a pot of boiling water for about 15 minutes, stirring halfway.
- Mini Mochi Bites: Use smaller ice cream scoops to make bite-sized mochi for parties or kid-friendly snacks.
One time, I made a batch with creamy peanut butter ice cream and dusted the mochi with crushed roasted peanuts — it was a hit at a game night. If you want to explore more fun, easy-to-make desserts with an international flair, you might enjoy trying this crispy sourdough discard pizza dough — a totally different vibe but equally satisfying to make from scratch.
Serving & Storage Suggestions
These mochi ice cream balls are best served straight from the freezer for that perfect chewy and creamy texture. Let them sit out for 2-3 minutes if they’re too firm (you know, that sweet spot before too soft) to make biting easier.
Presentation-wise, a simple dusting of starch or a sprinkle of matcha powder adds a lovely touch. You can serve them on a pretty plate, maybe with a side of fresh berries or a drizzle of chocolate sauce for a little extra flair.
To store, keep the mochi balls tightly covered in an airtight container in the freezer. They’ll last up to 2 weeks without losing quality. Avoid refreezing once thawed, as the texture can suffer.
Reheat? No way — mochi ice cream is best cold. But if you want a warm-cold combo, try pairing them with a warm dessert like French onion soup for an unexpected but homey contrast.
Nutritional Information & Benefits
Each mochi ice cream ball contains roughly 100-130 calories depending on the ice cream used, making it a lighter dessert option compared to cakes or pies. The sweet rice flour is gluten-free, which is great for those with sensitivities.
Matcha mochi offers a little antioxidant boost from the green tea powder, while fruit-flavored mochi can add small amounts of vitamins. Keep in mind, this is a treat, so moderation is key.
For those watching sugar intake, choosing low-sugar or sugar-free ice cream varieties can help reduce overall sweetness. If you’re interested in balanced snacks, pairing your mochi with a protein-rich bite like a healthy no-bake protein ball works well.
Conclusion
Making easy homemade mochi ice cream balls in four flavors isn’t just a recipe—it’s a fun, tactile experience that brings a little sweetness and whimsy to any day. Whether you’re treating yourself after a long one or sharing with friends, the chewy outside and creamy inside combination hits all the right notes.
Feel free to experiment with flavors, textures, and coatings to make this recipe truly yours. I love how this simple dessert invites creativity and offers a playful break from the usual sweets. So, grab your sweet rice flour and ice cream, and start mixing — your next favorite treat awaits!
If you give this a try, I’d love to hear how you made it your own or what flavors you picked. Sharing those little kitchen wins always makes the day better.
FAQs About Easy Homemade Mochi Ice Cream Balls
How do I prevent the mochi dough from sticking to my hands?
Dust your hands generously with cornstarch or potato starch before handling the dough. Also, keep your work surface well-coated to minimize sticking.
Can I make mochi ice cream balls ahead of time?
Absolutely! Once assembled, freeze the mochi balls in an airtight container for up to 2 weeks. Just remember to let them thaw for a couple of minutes before eating.
What if I don’t have a microwave to cook the mochi dough?
You can steam the dough in a heatproof bowl over boiling water for about 15 minutes, stirring halfway through to cook evenly.
Can I use regular rice flour instead of sweet rice flour?
Regular rice flour won’t give you the chewy texture mochi is known for. It’s best to use sweet rice flour (mochiko) specifically for this recipe.
How do I choose the best ice cream for mochi balls?
Pick ice creams with a firm texture that freeze well, like premium or homemade ice cream. Softer, more aerated ice creams might melt too quickly during assembly.
Pin This Recipe!
Easy Homemade Mochi Ice Cream Balls Recipe 4 Flavors to Try Now
This recipe shows you how to make chewy and soft mochi ice cream balls with four delicious flavors: matcha, strawberry, mango, and vanilla. It’s a quick and fun dessert perfect for sharing or a sweet treat.
- Prep Time: 15 minutes
- Cook Time: 5 minutes
- Total Time: 2 hours 20 minutes
- Yield: 12 mochi ice cream balls 1x
- Category: Dessert
- Cuisine: Japanese
Ingredients
- 1 cup (120 g) sweet rice flour (mochiko)
- 1/4 cup (50 g) sugar
- 3/4 cup (180 ml) lukewarm water
- Cornstarch or potato starch for dusting
- Ice cream in four flavors of your choice (matcha green tea, strawberry, mango, vanilla bean)
- Optional: food coloring or natural powders (e.g., green tea powder, beet powder)
Instructions
- Scoop the ice cream into small, bite-sized balls (about 1.5 inches or 3.8 cm diameter) using a cookie scoop. Place them on a parchment-lined tray and freeze for at least 2 hours until firm.
- In a microwave-safe bowl, combine 1 cup sweet rice flour, 1/4 cup sugar, and 3/4 cup lukewarm water. Stir well until smooth with no lumps.
- Cover the bowl loosely with plastic wrap and microwave on high for 1 minute. Remove and stir quickly, then microwave again for 1 more minute. Stir once more, then microwave a final 30 seconds until the dough is sticky, translucent, and slightly shiny.
- Transfer the dough onto a cornstarch-dusted surface or silicone mat. Dust your hands with starch and flatten the dough gently to about 1/4-inch (6 mm) thickness. Let it cool slightly but not completely.
- Using a round cookie cutter or drinking glass (about 3 inches or 7.5 cm diameter), cut out circles of dough. Dust with more starch if dough sticks.
- Quickly place a frozen ice cream ball in the center of a mochi circle. Pinch the edges together to seal the ice cream inside, forming a ball. Work swiftly to avoid melting the ice cream.
- Place the sealed mochi balls seam side down on a tray dusted with starch. Freeze for at least 2 hours before serving to firm up.
Notes
Keep hands and work surface well dusted with starch to prevent sticking but avoid over-coating. Work with warm dough for easier shaping. Freeze ice cream balls well before assembly to prevent melting. If no microwave, steam dough over boiling water for 15 minutes, stirring halfway. Store mochi balls in airtight container in freezer up to 2 weeks. Let sit 2-3 minutes before eating for best texture.
Nutrition
- Serving Size: 1 mochi ice cream ba
- Calories: 100130
- Sugar: 12
- Sodium: 15
- Fat: 4
- Saturated Fat: 2.5
- Carbohydrates: 20
- Fiber: 0.5
- Protein: 1
Keywords: mochi ice cream, homemade mochi, easy dessert, chewy dessert, matcha mochi, strawberry mochi, mango mochi, vanilla mochi, gluten-free dessert


