“Are you sure that’s supposed to look like that?” I remember asking my friend over the phone as I nervously peeked into the oven. The top was charred, almost blackened in parts, and the edges looked a bit uneven. Honestly, I’d stumbled onto the Creamy Burnt Basque Cheesecake San Sebastian Style by accident, trying to whip up something simple on a chaotic weeknight when I forgot to lower the oven temperature after preheating. My skepticism was sky-high—how could a burnt-looking cheesecake turn out delicious? But when that slightly cracked, deeply caramelized top slid off the pan and the creamy, almost pudding-like center emerged, I was hooked for good.
That rich, smoky caramel note from the burnt crust paired with the luscious, silky interior offered a texture and flavor combo I hadn’t expected but couldn’t resist. It reminded me of the way simple mistakes sometimes lead to the best discoveries—like when I tried making cozy French onion soup for one and ended up with a quicker, more flavorful broth by toasting the onions longer. This cheesecake quickly became my go-to for impressing friends without fuss, thanks to its straightforward ingredients and that unforgettable burnt edge.
What really stuck with me was how this recipe felt both rustic and elegant—comfort food with a bit of a rebellious twist. It’s not your typical polished dessert; it’s a little wild, a little imperfect, but always creamy and deeply satisfying. If you’re the kind of person who loves a dessert that’s cozy yet has personality, this burnt Basque cheesecake is a quiet celebration in every bite.
Why You’ll Love This Creamy Burnt Basque Cheesecake Recipe
After making this cheesecake so many times, I can say with confidence it’s one of those recipes that just clicks. Here’s why it’s become a favorite in my kitchen:
- Quick & Easy: This recipe comes together in under an hour, making it perfect for those last-minute dessert cravings or when you want to impress without stress.
- Simple Ingredients: You likely have cream cheese, eggs, sugar, and cream on hand — no fancy shopping required.
- Perfect for Any Occasion: Whether it’s a cozy night in or a special brunch, this cheesecake fits right in.
- Crowd-Pleaser: I’ve served it at dinner parties and everyone asks for the recipe — even those who don’t usually go for cheesecake.
- Unbelievably Delicious: The slightly burnt top adds a caramelized depth, while the center stays luxuriously creamy. It’s comfort food with an edge.
This isn’t just any cheesecake recipe. The secret lies in the baking technique that creates that signature burnt top — it’s what makes the texture unique, almost custardy inside, without the dense heaviness of traditional cheesecakes. Honestly, it’s how I got hooked, and why I keep making it over and over (sometimes twice in a week, no joke!). If you want to try a cheesecake that’s both rustic and refined, this one’s your best bet.
What Ingredients You Will Need
This recipe uses simple, wholesome ingredients to deliver bold flavor and satisfying texture without the fuss. Most of these are pantry staples, and if you want to swap or tweak, I’ve got you covered.
- Cream Cheese: 24 ounces (680 grams), softened. I personally like using Philadelphia for its smooth texture.
- Granulated Sugar: 1 cup (200 grams). Regular white sugar works best for that classic sweetness.
- Large Eggs: 4, at room temperature. This helps the batter blend smoothly.
- Heavy Cream: 1 1/2 cups (360 ml). Use full-fat cream for the creamiest results.
- All-Purpose Flour: 1/4 cup (30 grams), sifted. This adds just enough structure without weighing the cheesecake down.
- Vanilla Extract: 1 teaspoon. Pure vanilla extract adds depth.
- Salt: A pinch to balance flavors.
Optional: A tablespoon of lemon zest or a splash of bourbon for a subtle twist. In summer, I sometimes add fresh raspberries on top for a pop of color and tartness.
For a gluten-free version, you can swap the all-purpose flour with almond flour, but expect a slightly different texture. If you want to experiment with dairy-free options, substituting the cream cheese and heavy cream with coconut-based alternatives can work, but the classic creamy texture might shift a bit.
Equipment Needed
- Springform Pan: 9-inch (23 cm) diameter is ideal. This helps with easy removal and shows off that rustic, cracked top.
- Mixing Bowls: Medium and large, preferably glass or stainless steel for easy cleanup.
- Electric Mixer: Handheld or stand mixer. Cream cheese can be stubborn—mixers save your arm.
- Rubber Spatula: For scraping sides and folding in ingredients gently.
- Oven Thermometer: Optional but handy to confirm your oven’s heat since this cheesecake needs high heat for the perfect burnt finish.
- Parchment Paper: To line the pan for easy release and that signature crinkled edge.
If you don’t have a springform pan, a regular cake pan lined with parchment will do, but removing the cheesecake can be trickier. I’ve used disposable aluminum pans when in a pinch — they’re budget-friendly and work fine if you’re careful with removal.
Preparation Method

- Prepare the Pan and Oven (10 minutes): Preheat your oven to 400°F (200°C). Line the springform pan with parchment paper, making sure the paper goes up the sides about 2 inches (5 cm) higher than the rim — this helps contain the batter and creates that iconic rustic look.
- Beat the Cream Cheese (5 minutes): In a large bowl, beat the softened cream cheese with an electric mixer until smooth and creamy. No lumps here — patience pays off.
- Add Sugar and Eggs (5 minutes): Gradually add the sugar and beat until well combined and fluffy. Then add the eggs, one at a time, mixing just until incorporated after each addition. Overmixing can add too much air, which might cause cracking.
- Mix in Cream, Flour, Vanilla, and Salt (5 minutes): Slowly pour in the heavy cream, then sift in the flour, and add vanilla extract and a pinch of salt. Fold gently with a spatula or mix on low until everything is combined and smooth. The batter should be pourable but thick.
- Pour Batter and Bake (50-60 minutes): Pour the batter into the prepared pan. Bake at 400°F (200°C) for about 50-60 minutes. The top will darken to a deep brown or almost black, and the center will still jiggle slightly — that’s the creamy custard you want. Check at 50 minutes; every oven varies.
- Cool and Chill (3-4 hours): Let the cheesecake cool completely at room temperature, then refrigerate for at least 3 hours or overnight. The chilling helps the cheesecake set perfectly.
- Serve: Run a thin knife around the edges before releasing the springform. Slice with a hot, wet knife for clean cuts and serve chilled or at room temperature.
Tips: If the top cracks too much, don’t worry — it’s part of the charm. For a little extra depth, I sometimes torch the top lightly before serving to add smoky notes. And if you want a quicker set, try chilling it longer.
Cooking Tips & Techniques
The secret to a perfect Creamy Burnt Basque Cheesecake San Sebastian Style is high heat baking and trusting the process. Here are some pro tips I’ve learned:
- Don’t Overmix the Batter: Mixing too aggressively can incorporate too much air, leading to cracks or a less creamy texture.
- Use Room Temperature Ingredients: This helps the batter blend smoothly and bake evenly.
- Line the Pan Generously: The parchment paper needs to go above the rim to contain the batter as it rises and crackles.
- Watch the Bake Time Closely: The burnt top is crucial, but keep an eye so it doesn’t turn to ash. The center should still wobble slightly when you jiggle the pan.
- Cooling Is Key: Let the cheesecake cool fully at room temperature before refrigerating. Rushing this can affect texture.
- Knife Trick: Heat your knife under hot water and wipe dry before slicing. This gives clean, smooth slices every time.
Honestly, the first time I tried this, I was nervous about the burnt look, but once I got the hang of the timing and oven heat, it became foolproof. I even find multitasking easier with this recipe — while it bakes, I prep dinner or even whip up a quick treat like my quick fudgy single-serving mug brownie for an afternoon pick-me-up.
Variations & Adaptations
This Basque cheesecake is versatile, so feel free to make it your own:
- Flavor Twists: Add orange zest or a teaspoon of espresso powder to the batter for subtle flavor changes.
- Fruit Toppings: Fresh berries, a drizzle of honey, or a compote make lovely complements.
- Gluten-Free: Swap all-purpose flour with almond flour or a gluten-free blend. The texture will be a bit different but still delicious.
- Dairy-Free: Use vegan cream cheese and coconut cream, though expect a slightly different richness and flavor.
- Mini Cheesecakes: Make individual portions in muffin tins lined with parchment — adjust bake time to 25-30 minutes.
One variation I tried recently was adding a thin layer of salted caramel sauce on top after baking for a perfect balance of sweet and salty. It’s become a new favorite twist I often bring to potlucks, much like my beloved pecan pie cheesecake bars.
Serving & Storage Suggestions
This cheesecake is best served chilled or at room temperature. The creamy center shines when it’s not too cold, but the texture firms up nicely after refrigeration.
For a simple presentation, slice and serve as is — the burnt top gives it a rustic, artisanal look that needs no embellishment. Pair it with a cup of coffee or a glass of dessert wine to bring out the caramelized notes.
Store leftovers tightly wrapped in the refrigerator for up to 4 days. It also freezes well — wrap in plastic wrap and aluminum foil, then thaw overnight in the fridge before serving. The texture stays creamy, though the top won’t be quite as crisp.
Flavors tend to deepen after a day or two, so if you can resist eating it all at once, you might find the cheesecake tastes even better the next day.
Nutritional Information & Benefits
This cheesecake is a rich treat, with about 400-450 calories per serving (1/8th of the cake), including around 35 grams of fat and 6 grams of protein. The cream cheese and heavy cream provide a good dose of calcium and vitamin A.
If you’re mindful of carbs, the sugar amount can be reduced slightly without losing much flavor, or you can try a natural sugar substitute.
While it’s not a low-calorie dessert, the recipe uses simple, real ingredients without additives or preservatives, making it a wholesome option for special occasions.
For those curious about dietary restrictions, substituting gluten-free flour or dairy-free cream cheese can make this cheesecake accessible to more people.
Conclusion
The Creamy Burnt Basque Cheesecake San Sebastian Style holds a special place in my recipe collection because it’s proof that sometimes, the most unexpected results turn into favorites. Its rustic appearance and creamy interior make it uniquely comforting yet exciting to eat.
Feel free to play around with flavors or presentation — this cheesecake invites creativity. I hope it becomes your go-to when you want something simple but memorable.
If you give this recipe a try, I’d love to hear how it turns out or what variations you come up with. Sharing kitchen wins always makes the experience sweeter.
Happy baking and savor every creamy, slightly smoky bite!
Frequently Asked Questions About Burnt Basque Cheesecake
What makes Basque cheesecake different from traditional cheesecake?
Basque cheesecake is baked at a high temperature to create a deeply caramelized, almost burnt top while keeping the inside creamy and custard-like. It’s less dense and often doesn’t have a crust.
Can I use a regular cake pan instead of a springform pan?
Yes, but removing the cheesecake can be tricky. Lining the pan well with parchment paper helps, and you may want to serve it directly from the pan.
Why does the cheesecake crack on top?
Cracks are common due to the high baking temperature and the cheesecake’s custardy texture. They don’t affect flavor and add to the rustic look.
How long should I chill the cheesecake before serving?
At least 3 hours in the fridge is recommended to let it set properly, though overnight chilling is even better for texture and flavor.
Can I make this cheesecake ahead of time?
Absolutely! It keeps well in the fridge for up to 4 days and can be frozen for longer storage. Just thaw it in the fridge before serving.
Pin This Recipe!
Creamy Burnt Basque Cheesecake Recipe Easy San Sebastian Style

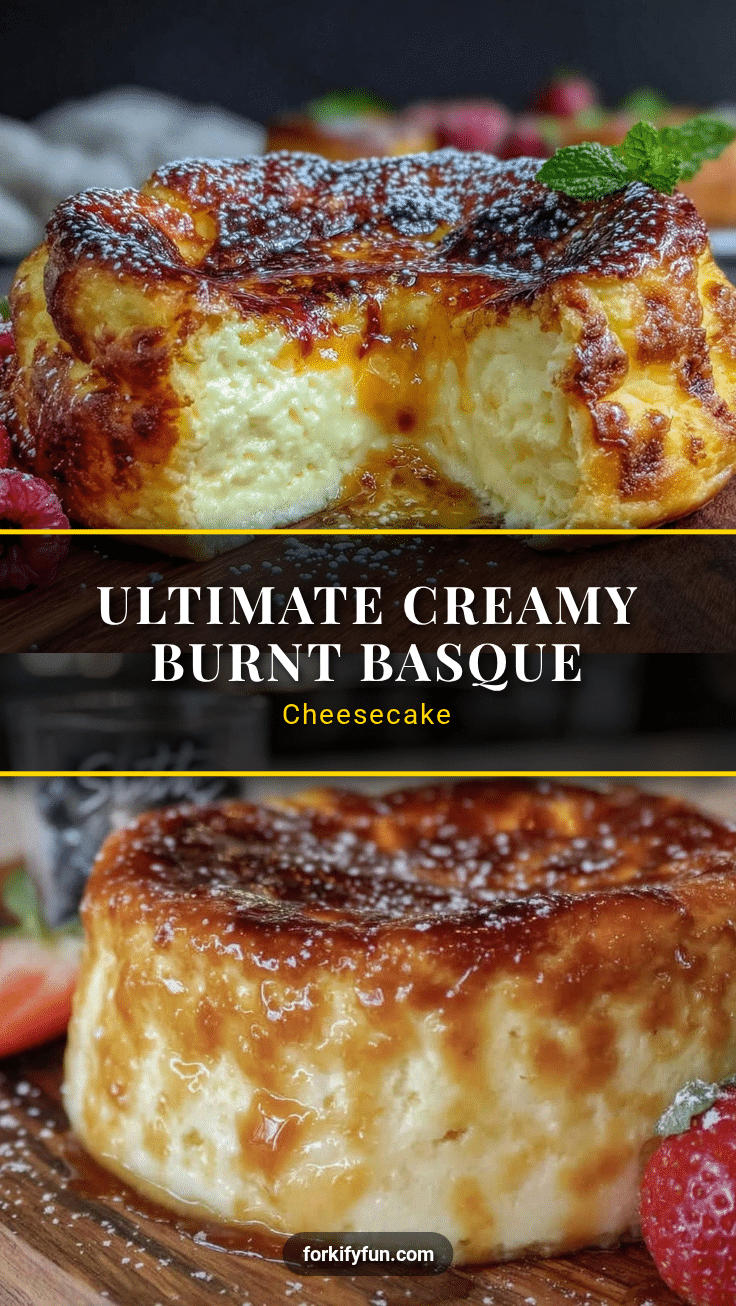
A rustic yet elegant cheesecake with a deeply caramelized burnt top and a creamy, custard-like center. This quick and easy recipe uses simple ingredients and high heat baking for a unique texture and flavor.
- Prep Time: 20 minutes
- Cook Time: 50-60 minutes
- Total Time: 3 hours 30 minutes to overnight (including chilling)
- Yield: 8 servings 1x
- Category: Dessert
- Cuisine: Spanish
Ingredients
- 24 ounces (680 grams) cream cheese, softened
- 1 cup (200 grams) granulated sugar
- 4 large eggs, at room temperature
- 1 1/2 cups (360 ml) heavy cream
- 1/4 cup (30 grams) all-purpose flour, sifted
- 1 teaspoon vanilla extract
- Pinch of salt
- Optional: 1 tablespoon lemon zest or a splash of bourbon
- Optional: fresh raspberries for topping
Instructions
- Preheat your oven to 400°F (200°C). Line a 9-inch springform pan with parchment paper, extending the paper about 2 inches (5 cm) above the rim.
- In a large bowl, beat the softened cream cheese with an electric mixer until smooth and creamy.
- Gradually add the sugar and beat until well combined and fluffy. Add the eggs one at a time, mixing just until incorporated after each addition.
- Slowly pour in the heavy cream, sift in the flour, then add vanilla extract and a pinch of salt. Fold gently or mix on low until combined and smooth.
- Pour the batter into the prepared pan. Bake at 400°F (200°C) for 50-60 minutes until the top is deeply browned or almost blackened and the center jiggles slightly.
- Let the cheesecake cool completely at room temperature, then refrigerate for at least 3 hours or overnight to set.
- Run a thin knife around the edges before releasing the springform. Slice with a hot, wet knife and serve chilled or at room temperature.
Notes
Do not overmix the batter to avoid cracks. Use room temperature ingredients for smooth blending. Line the pan generously with parchment paper extending above the rim to contain the batter. The burnt top is essential for flavor and texture. Chill the cheesecake for at least 3 hours or overnight for best results. Use a hot, wet knife for clean slices. Optional torching of the top before serving adds smoky notes.
Nutrition
- Serving Size: 1/8th of the cheesec
- Calories: 425
- Sugar: 20
- Sodium: 250
- Fat: 35
- Saturated Fat: 22
- Carbohydrates: 22
- Protein: 6
Keywords: Basque cheesecake, burnt cheesecake, San Sebastian cheesecake, creamy cheesecake, easy cheesecake recipe, rustic dessert


