“Hey, do you think we can actually pull off a donut wall for graduation?” my sister asked out of the blue, right when I was juggling a million last-minute details for her party. Honestly, I hesitated—donut walls sounded fancy, maybe a bit too Pinterest-perfect for our laid-back backyard bash. But you know, as I started gathering those glossy, golden glazed donuts, something clicked.
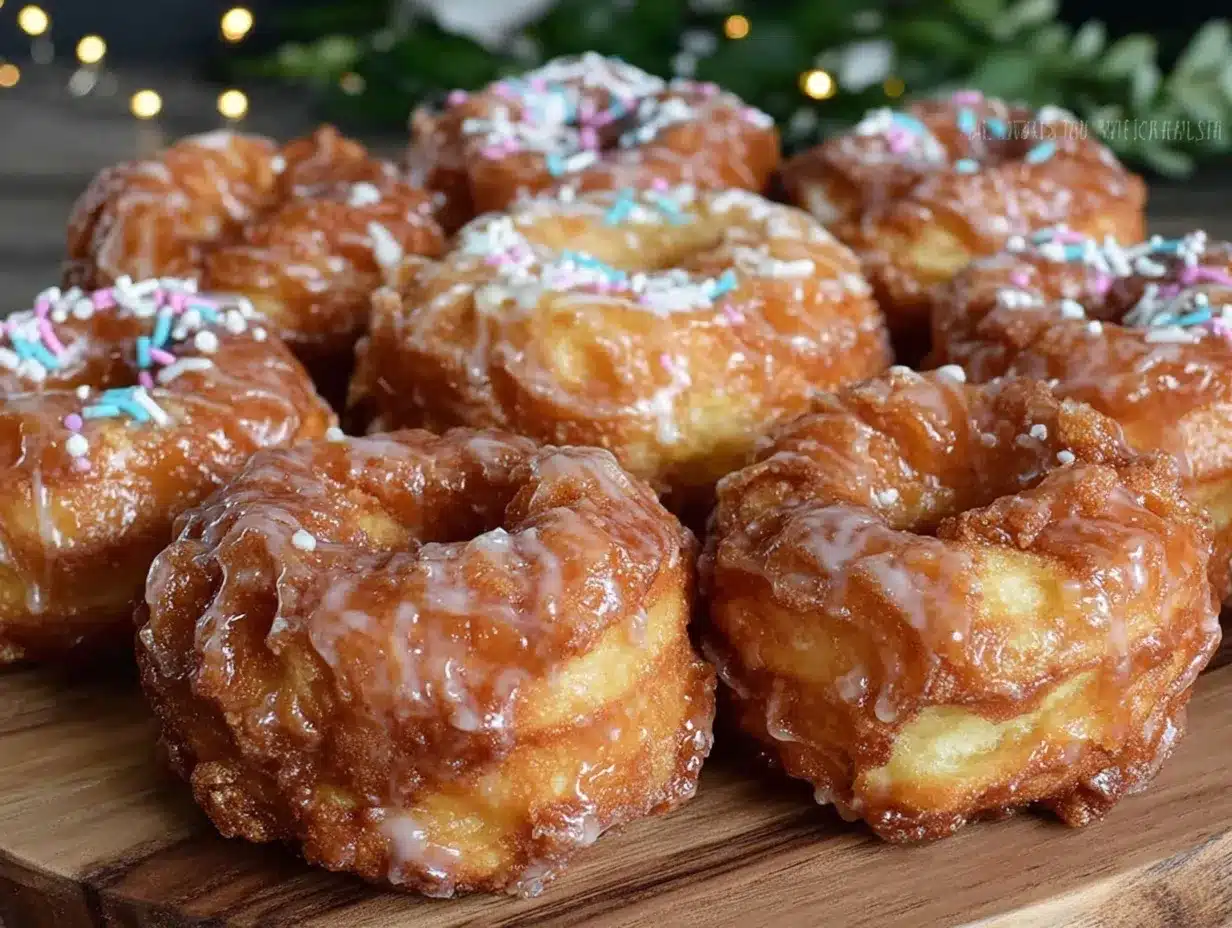
The smell of warm glaze clinging to soft dough, the way the light caught each donut’s sheen—it was oddly calming amidst the chaos. Setting up that donut wall turned into a quiet, satisfying ritual. It wasn’t just about the centerpiece; it was the moment I paused, smiled, and realized this simple, sweet idea was exactly what the party needed. People kept coming back for more, and suddenly, that “maybe too much” idea became the highlight of the celebration.
That’s how the concept for the Perfect Glazed Graduation Donut Wall Party Centerpiece stuck with me. It’s a bit quirky, a touch unexpected, and totally delightful. You don’t need to be a party planner or a baker to make it happen. This idea brings that comforting, sugary nostalgia with a fresh, fun twist that anyone can pull off. And, well, it turns out donuts on a wall are just as festive as confetti—if not more. So if you’re thinking about adding a little magic to your graduation celebration, this might just be the easiest, happiest way to do it.
Why You’ll Love This Recipe
There’s something about a donut wall that instantly lifts the vibe of any graduation party, and this Perfect Glazed Graduation Donut Wall Party Centerpiece recipe has been tested, tweaked, and applauded in my circle more times than I can count. Here’s why it’s become my go-to for celebrations:
- Quick & Easy: The setup takes less than an hour, so even if you’re scrambling last minute, this is totally doable.
- Simple Ingredients: No weird or hard-to-find stuff here—just classic glazed donuts that you can grab from your favorite local bakery or store.
- Perfect for Graduation Parties: The visual wow factor is next-level, making it a natural conversation starter and photo op.
- Crowd-Pleaser: Kids, teens, adults—you name it, everyone loves grabbing a donut right off the wall.
- Unbelievably Delicious: It’s the perfect balance of soft, sweet, and shiny glaze that feels like a little celebration in every bite.
What makes this donut wall different from others is the careful attention to how the donuts are displayed—not just stuck on a board but arranged in a way that looks effortlessly chic and inviting. I’ve played around with spacing, layering, and even the height of the board to make sure it’s stable and visually pleasing.
Honestly, it’s the kind of party centerpiece that doesn’t just decorate the room—it pulls people together. After all, isn’t that what graduation celebrations are all about?
What Ingredients You Will Need
This donut wall recipe leans on simple, classic ingredients that bring that sweet, nostalgic vibe without any fuss. The focus is really on the glazed donuts themselves, but here’s a quick rundown:
- Glazed Donuts: Approximately 30 to 40 standard-sized glazed yeast donuts (about 3.5 inches / 9 cm diameter). I often pick these up fresh from my local bakery, but store-bought ones work just fine too.
- Donut Wall Board: A sturdy foam board or plywood panel, around 24 inches by 36 inches (60 x 90 cm) is a sweet spot for this many donuts.
- Wooden Pegs or Dowels: 3/8 inch (about 1 cm) diameter, cut into 2-inch (5 cm) lengths. These will hold the donuts in place.
- Strong Adhesive or Glue Gun: To secure the pegs onto the board safely.
- Paint or Wrapping Paper: Optional, for decorating the board background—white or pastel shades work great for graduation colors.
- Hooks or Hanging Hardware: For wall mounting or propping the board up securely.
- Decorative Accents: Fresh flowers, greenery, or a custom banner to personalize your graduation theme.
If you want to get creative, you can swap in mini powdered sugar donuts or chocolate-glazed ones for variety. Also, I’ve found that using a trusted brand like Krispy Kreme for the glazed donuts gives a consistent shine and softness that really helps the wall pop visually.
For those who need gluten-free options, shops like Entenmann’s or local bakeries often carry tasty gluten-free glazed donuts that hold up well on the wall—just double-check the size to ensure peg fit.
Equipment Needed
Setting up your donut wall requires just a handful of tools, most of which you might already have around the house:
- Foam Board or Plywood Panel: The base for your wall. Foam board is lightweight and easy to work with, while plywood offers sturdiness if you want a more permanent setup.
- Wooden Pegs or Dowels: These act as pegs to hold the donuts. You can find these at most craft stores or hardware shops.
- Glue Gun or Strong Adhesive: To attach the pegs firmly. I prefer a hot glue gun because it dries fast and holds well, but a strong wood glue works too.
- Drill or Awl: To create holes for the pegs in plywood or foam board. If you use foam board, a sharp knife can work instead.
- Measuring Tape and Pencil: For marking peg placement evenly.
- Paint Brushes or Rollers (Optional): In case you want to paint or decorate the board.
If you don’t have a drill, no worries—foam boards and wooden skewers can be a lightweight alternative to pegs. Just be careful with weight distribution; I learned the hard way that uneven peg lengths can make the donuts slide off!
Preparation Method
- Prepare Your Board (15-20 minutes): Start by painting or wrapping your foam board or plywood with decorative paper. Let it dry completely before moving on. This adds a clean, festive base for the donuts.
- Mark Peg Placement (10 minutes): Using a pencil and measuring tape, draw a grid of evenly spaced dots across the board. Aim for about 3 inches (7.5 cm) between each peg to fit the donut size comfortably.
- Drill Holes or Puncture Foam (15 minutes): Drill or puncture holes at each marked spot to fit your wooden pegs snugly. For foam, a sharp knife or awl works well; for plywood, a drill with a 3/8 inch (1 cm) bit is perfect.
- Attach Wooden Pegs (20 minutes): Insert wooden pegs into each hole and secure them with hot glue or wood adhesive. Hold each peg steady for a few seconds to ensure it sticks well. Avoid skipping this step—loose pegs mean donuts falling off mid-party!
- Let Glue Dry Completely (30 minutes): Give your setup time to dry fully so everything is sturdy. Use this time to prep donuts or add decorative touches to the board.
- Hang or Prop Up the Board (5-10 minutes): Attach hooks or stands to keep the board upright and stable. Test it gently to make sure it won’t tip over when donuts are added.
- Arrange the Donuts (10-15 minutes): Start slipping glazed donuts onto each peg. The donuts should slide on easily but not wobble. If any donuts feel loose, adjust peg length or spacing slightly.
Pro tip: I suggest setting up the donut wall a few hours before the party to keep donuts fresh and the glaze shiny. If you need to prepare it a day ahead, cover it loosely with plastic wrap and store in a cool, dry place.
Cooking Tips & Techniques
While this isn’t a traditional “cooked” recipe, there are definitely some tricks I picked up to make the donut wall assembly smooth and stress-free:
- Choose Fresh Donuts: Freshly glazed donuts have that perfect softness and shine that makes the wall look irresistible. Stale donuts tend to crumble or look dull.
- Test Peg Lengths: Before gluing all your pegs, try a few donuts on pegs of different lengths. You want them long enough to hold the donut securely but not so long they stick out awkwardly.
- Spacing Is Key: Too close, and donuts squish each other; too far, and you waste space. I found a 3-inch gap strikes the best balance.
- Keep It Stable: The board should be sturdy with a solid base or wall mount. I once had a wobble that sent a donut flying—lesson learned!
- Decorate Smartly: Add flowers or a banner after the donuts are in place to avoid knocking them off during setup.
Also, multitasking while assembling the wall can help: wrapping the board while donuts are cooling or prepping pegs while paint dries keeps things moving efficiently.
Variations & Adaptations
This donut wall idea is super flexible, so feel free to make it your own with these variations:
- Flavor Swaps: Mix glazed with chocolate, cinnamon sugar, or powdered donuts for a colorful twist. I once made a mini version for a birthday with rainbow-sprinkled glazed donuts—major hit!
- Dietary-Friendly: Use gluten-free or vegan donuts if needed. Just double-check the peg fit and donut firmness; some alternatives are softer and might need shorter pegs.
- Seasonal Themes: For spring or summer graduations, add fresh edible flowers or fruit slices between donuts on the wall for a fresh look. In fall, cinnamon sticks and leaves work beautifully.
- Alternative Display Boards: Try using a vintage window pane or wire grid if you want a rustic or industrial vibe. Just attach pegs or hooks securely.
- Interactive Wall: Add small tags or mini chalkboards on the board with guests’ names or graduation quotes for a personalized touch.
One time, I swapped the wooden pegs for sturdy ribbons tied through each donut hole and hung them from a frame. It was a slower setup but looked whimsical and charming. Experiment with what suits your style and space!
Serving & Storage Suggestions
The donut wall is best served fresh and at room temperature so the glaze stays glossy and the donuts soft. Here are some tips to keep your centerpiece looking and tasting perfect:
- Serving Temperature: Take the wall out of the fridge about 30 minutes before guests arrive to bring donuts to room temp.
- Presentation: Add colorful napkins and small plates nearby so guests can easily grab and go. A few coffee or punch stations nearby complement the sweetness nicely.
- Storage: If you have leftovers, gently remove donuts and store in an airtight container at room temperature for up to 2 days. Refrigeration dries them out.
- Reheating: Warm leftover donuts in a microwave for 8-10 seconds to refresh that soft texture before eating.
- Flavor Development: Glazed donuts don’t really improve with time, so best enjoyed fresh, but the visual impact of the wall lasts as long as the donuts hold up.
This setup pairs well with lighter savory snacks like the blackened shrimp tacos with zesty mango slaw if you want to balance sweet and savory at your party.
Nutritional Information & Benefits
While glazed donuts are definitely a treat and not exactly health food, here’s a rough nutritional overview for one standard glazed donut (about 75g):
| Nutrient | Amount |
|---|---|
| Calories | 250-300 kcal |
| Carbohydrates | 30-35 g |
| Sugars | 10-15 g |
| Fat | 12-15 g |
| Protein | 3-4 g |
These donuts are gluten-rich and contain eggs and dairy, so they’re not suitable for those with allergies or intolerances unless using specific alternatives. Enjoying them in moderation is key, especially for those mindful of sugar intake.
On the bright side, this centerpiece encourages sharing and social interaction, which is a sweet kind of nourishment all on its own. For lighter party fare, pairing the donut wall with dishes like the spinach and feta egg muffin cups offers a nice balance between indulgence and nutrition.
Conclusion
So there it is—the Perfect Glazed Graduation Donut Wall Party Centerpiece that’s surprisingly simple to create but packs a big punch in style and fun. It’s not just a dessert display, it’s a little celebration of its own, inviting everyone to pause, smile, and enjoy a sweet moment together.
Feel free to tweak the design, donut types, or decorations to suit your vibe. That’s the beauty of this concept—easy to personalize and hard to forget.
Honestly, this donut wall has become my favorite party trick for making guests feel special without stress. If you try it, I’d love to hear how it goes or what twists you add to make it your own. Here’s to sweet celebrations that stick with you long after the last crumb disappears!
Frequently Asked Questions
How many donuts do I need for a standard donut wall?
About 30 to 40 standard-sized glazed donuts fit well on a 24 x 36 inch board, depending on the spacing and peg size.
Can I use gluten-free or vegan donuts for the wall?
Yes! Just make sure the donuts are firm enough to hold on pegs and check the size to fit your setup.
What type of board works best for a donut wall?
Foam boards are lightweight and easy for DIY setups, while plywood is sturdier for larger or longer-lasting displays.
How long before the party should I assemble the donut wall?
Assemble it a few hours before serving to keep donuts fresh and the glaze shiny. If prepping a day ahead, cover it loosely and store in a cool, dry place.
Can I customize the donut wall for other occasions?
Absolutely! Just swap donut flavors, decorations, and colors to match birthdays, baby showers, or holidays.
Pin This Recipe!
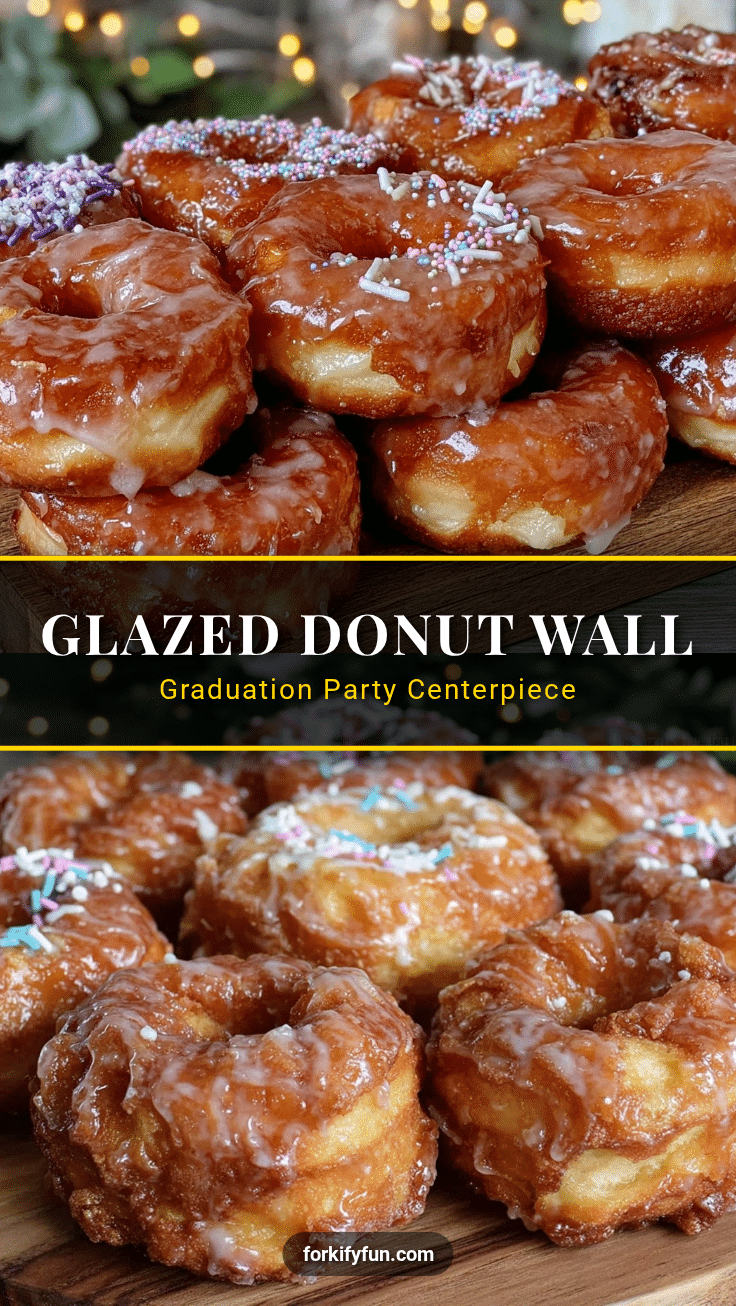
Perfect Glazed Graduation Donut Wall Party Centerpiece
A simple and delightful glazed donut wall centerpiece perfect for graduation parties, offering a quick, easy, and visually stunning way to celebrate with friends and family.
- Prep Time: 45 minutes
- Cook Time: 0 minutes
- Total Time: 45 minutes
- Yield: 30 to 40 servings 1x
- Category: Party Centerpiece
- Cuisine: American
Ingredients
- 30 to 40 standard-sized glazed yeast donuts (about 3.5 inches / 9 cm diameter)
- Donut wall board (sturdy foam board or plywood panel, around 24 x 36 inches)
- Wooden pegs or dowels (3/8 inch diameter, cut into 2-inch lengths)
- Strong adhesive or glue gun
- Paint or wrapping paper (optional, for decorating the board background)
- Hooks or hanging hardware
- Decorative accents such as fresh flowers, greenery, or a custom banner
Instructions
- Prepare your board by painting or wrapping your foam board or plywood with decorative paper. Let it dry completely.
- Mark peg placement using a pencil and measuring tape, drawing a grid of evenly spaced dots about 3 inches apart.
- Drill holes or puncture foam at each marked spot to fit wooden pegs snugly.
- Insert wooden pegs into each hole and secure them with hot glue or wood adhesive. Hold each peg steady until it sticks well.
- Let the glue dry completely for about 30 minutes to ensure sturdiness.
- Attach hooks or stands to keep the board upright and stable.
- Arrange the glazed donuts by slipping each onto a peg, adjusting peg length or spacing if donuts feel loose.
Notes
Set up the donut wall a few hours before the party to keep donuts fresh and glaze shiny. If preparing a day ahead, cover loosely with plastic wrap and store in a cool, dry place. Test peg lengths before gluing to ensure donuts fit securely. Use fresh donuts for best appearance and taste. Decorate after donuts are placed to avoid knocking them off.
Nutrition
- Serving Size: One standard glazed
- Calories: 275
- Sugar: 12.5
- Sodium: 250
- Fat: 13.5
- Saturated Fat: 3.5
- Carbohydrates: 32.5
- Fiber: 0.5
- Protein: 3.5
Keywords: donut wall, glazed donuts, graduation party, party centerpiece, easy DIY, dessert display, celebration


