The first time I attempted making eyeball cake pops, I was nowhere near a cake pop maker. Honestly, I’d been scrolling through Halloween party ideas, thinking, “How hard can it be to shape cake into creepy eyeballs?” Spoiler: it’s easier than you think, even without fancy gadgets. I remember standing in my tiny kitchen, cake crumbs all over the counter, and a pile of melted chocolate that looked more like a science experiment gone wrong. But by the end of the night, those imperfect little eyeballs had everyone asking for the recipe. I never expected to nail the texture and decoration without the typical cake pop tools, but something about the hands-on, no-frills approach made it feel more personal—like crafting tiny edible art rather than just baking.
What stuck with me was how these eyeball cake pops brought a little spooky fun without the stress. No special equipment, no complicated molds—just a few tricks, a bit of patience, and a lot of chocolatey goodness. They became my go-to treat for last-minute Halloween gatherings or when I wanted to surprise the kids with something playful yet homemade. It turns out, you don’t need a cake pop maker to get that perfect round shape and creepy-cool detail. This recipe is a kind of gentle rebellion against the gadget-heavy baking world, and honestly, that’s why I keep making these eyeball cake pops—simple, fun, and surprisingly impressive.
Why You’ll Love This Recipe
- Quick & Easy: You can whip up these eyeball cake pops in about an hour, perfect for those last-minute costume parties or Halloween treat cravings.
- Simple Ingredients: No need for specialty items—just cake crumbs, frosting, candy melts, and a few decorating essentials you probably have on hand.
- Perfect for Halloween: These eyeball cake pops steal the spotlight at spooky gatherings, potlucks, or even as a fun after-school project.
- Crowd-Pleaser: Kids and adults alike get a kick out of these eerie little bites, and they always spark conversations (and a few laughs).
- Unbelievably Delicious: The combination of moist cake and creamy frosting covered in smooth chocolate makes for a texture and flavor that’s just right—not too sweet, perfectly balanced.
This isn’t just eyeball cake pops any recipe. The trick lies in how you mix your cake crumbs and frosting to get the ideal consistency, making shaping easier without any molds. Also, the way the candy melts are tempered (or, well, gently handled) ensures a smooth coating that cracks just enough for that homemade charm. I’ve tweaked the decorating steps to be beginner-friendly without sacrificing the creepy vibes—because, let’s face it, some of us aren’t born decorators! If you’ve ever struggled with skillet cookies or frosting consistency, you’ll find this method refreshingly approachable.
At heart, this recipe is about having some fun with food—whether you’re a last-minute host or just craving a sweet treat that’s a little out of the ordinary. It’s a recipe that makes you feel like a Halloween hero in your own kitchen.
What Ingredients You Will Need
This recipe uses simple, pantry-friendly ingredients to create bold flavor and that perfectly moist, moldable texture without fuss. Most are staples you probably already have, and substitutions are easy if you want to adapt for dietary needs.
- Cake: About 3 cups of crumbled cake (homemade or store-bought boxed cake works fine; chocolate or vanilla is great for contrast)
- Frosting: 1/2 cup of your favorite frosting (cream cheese or buttercream adds richness; store-bought works well for convenience)
- Candy Melts: 12 oz (340 g) white candy melts or white chocolate chips (I recommend Wilton brand for smooth melting)
- Food Coloring: Black, red, and blue gel food coloring for decorating the iris and blood vessels
- Edible Markers or Black Icing: For drawing the pupil and adding details (optional but handy for precision)
- Lollipop Sticks: 12-15 sticks to hold your cake pops (available at most craft stores)
- Sprinkles or Edible Glitter: Optional, for a spooky shimmer effect
- Non-stick spray or vegetable shortening: To lightly grease hands and tools for easier shaping
Ingredient tips: Using a dense cake helps the pops hold their shape better. If you’re using a lighter cake, add a bit more frosting to bind. For a dairy-free version, swap regular frosting for a coconut-based alternative and use vegan candy melts. During summer months, I’ve even swapped out the cake crumbs for crushed gingerbread cookies for a seasonal twist!
Equipment Needed
- Mixing bowls (medium and small sizes recommended)
- Measuring cups and spoons for precise ingredient amounts
- Microwave-safe bowl or double boiler for melting candy melts
- Baking sheet lined with parchment paper or a silicone mat to place cake pops while drying
- Cooling rack (optional but helpful for drying)
- Small paintbrush or toothpicks for decorating details
- Styrofoam block or cake pop stand for drying (if unavailable, a glass or mug works as a makeshift holder)
If you don’t have a double boiler, no worries—melting candy melts in short bursts in the microwave works just fine. I learned that the hard way when I tried making crispy air fryer wings last year without my usual equipment. Patience is key! Also, if you’re on a budget, using a regular baking sheet with parchment paper is just as effective as a silicone mat.
Preparation Method
- Prepare the cake crumbs: Start by crumbling your cake into fine pieces in a large bowl. Aim for uniform crumbs, roughly the size of coarse sand—this helps your cake pops hold together better. This should take about 5 minutes.
- Mix in frosting: Add 1/2 cup (120 ml) of frosting to the crumbs and gently fold together. Your goal is a dough-like consistency that sticks together when pressed but isn’t too sticky. Add a teaspoon more frosting if needed. This step usually takes around 3-5 minutes.
- Shape the eyeballs: Lightly grease your hands with non-stick spray or shortening to prevent sticking. Roll the mixture into 1.5-inch (4 cm) balls, placing them on a parchment-lined baking sheet. Press slightly to flatten the bottom so they won’t roll away. This can take about 10-15 minutes depending on your batch size.
- Insert the sticks: Dip the tip of each lollipop stick into melted candy melts, then insert halfway into each ball. This acts like glue to keep the sticks in place. Pop the tray into the fridge for 15 minutes to let the cake balls firm up.
- Melt the candy coating: Melt your white candy melts in 30-second bursts in the microwave, stirring between each, or use a double boiler. It should be smooth and pourable but not hot—around 110°F (43°C) is ideal.
- Coat the cake pops: Holding the stick, dip each cake ball into the melted candy coating, gently tapping off excess. Spin slightly to get even coverage. Place the coated pops upright in a Styrofoam block or stand to dry. Repeat for all balls. Drying takes about 30 minutes.
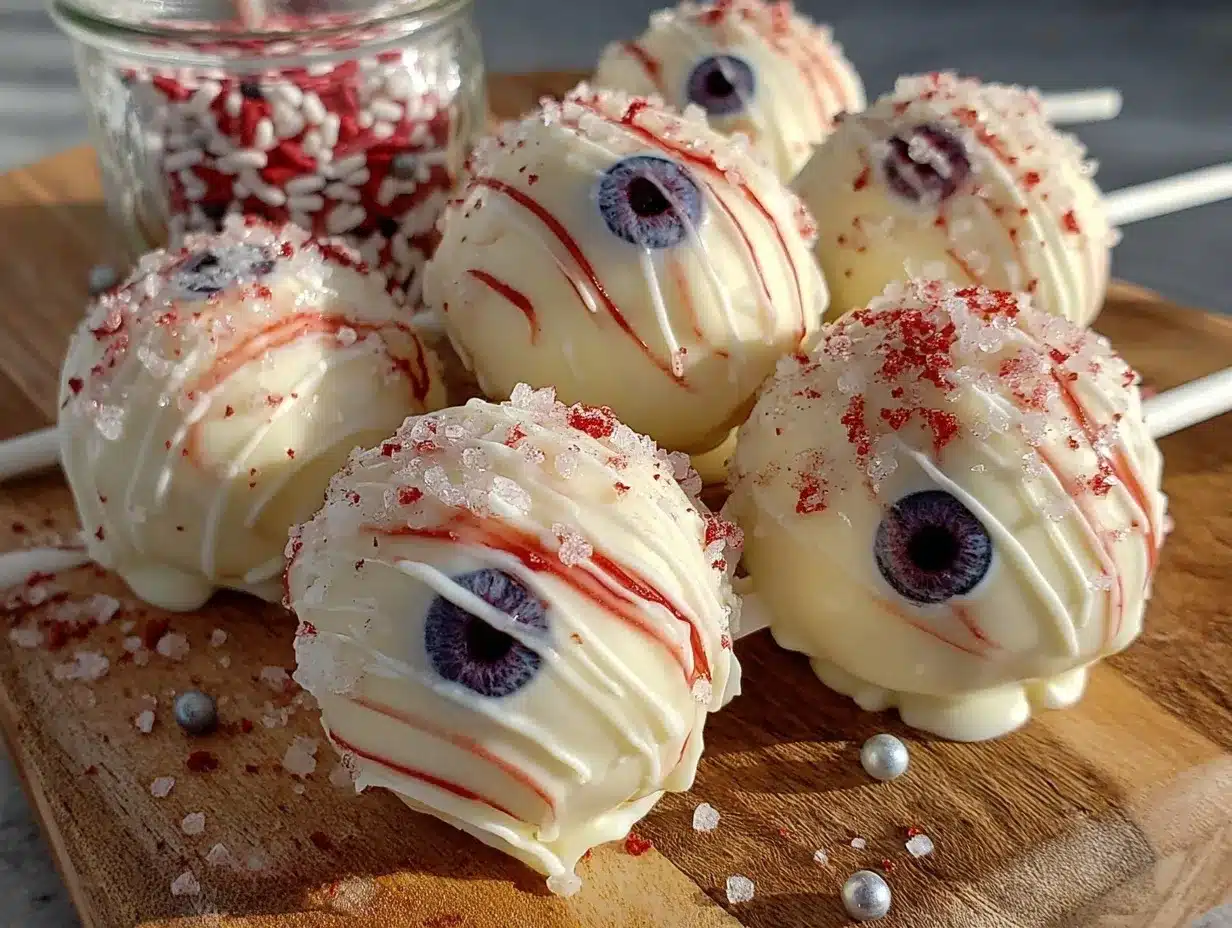
- Decorate the eyeballs: Use food coloring gels thinned with a drop of water and a small paintbrush to paint on the iris in blue or green. Add thin red lines for blood vessels using a fine brush or toothpick. Use edible markers or black icing to add the pupil and any creepy details. Allow decorations to set, about 15 minutes.
- Final touches: Optionally, sprinkle edible glitter or shimmer dust for an eerie glow. Store cake pops in an airtight container at room temperature if serving the same day, or refrigerate for up to 3 days.
Pro tip: If your cake balls feel too dry or crumbly, add a tablespoon of frosting at a time until you achieve the perfect moldable texture. Also, avoid overheating the candy melts—they can burn quickly and get grainy, which ruins the smooth finish.
Cooking Tips & Techniques
One of the biggest challenges with eyeball cake pops is getting that smooth, even candy coating without lumps or cracks. From my experience, stirring gently and melting the candy in short bursts prevents overheating, which can cause the coating to seize up.
When shaping the cake balls, don’t compact them too tightly—you want them firm but still light enough that the coating sticks nicely. I’ve learned this the hard way after my first batch came out too dense and heavy, cracking the candy shell.
Also, chilling the cake balls after inserting the sticks is a game-changer. It makes the coating step so much easier and prevents the cake from falling apart. Multitasking here really helps—while your cake balls chill, you can prep your decorations or melt the candy melts.
For decorating, thin your food coloring gel with a tiny bit of water to get fine, paint-like strokes for veins and iris details. If you’re new to edible markers, practice on parchment paper first to get comfortable with the pressure and flow.
Lastly, remember that these eyeball cake pops are meant to look a bit homemade and spooky—not perfect. Imperfections add character and charm, especially for Halloween. If you prefer a more polished look, checking out my brown butter chocolate chunk skillet cookie recipe might give you some inspiration for smoother textures in baked goods.
Variations & Adaptations
- Flavor Variations: Swap vanilla cake for red velvet to add a creepy blood-red hue inside the eyeball. You can also mix in cocoa powder with the cake crumbs for a chocolatey twist.
- Dietary Swaps: Use gluten-free boxed cake mix and dairy-free frosting to make these cake pops allergy-friendly. Vegan candy melts are widely available now and work just as well.
- Decorating Style: For a glow-in-the-dark effect, try edible glow dust or neon food coloring gels to paint the iris and veins. Alternatively, create monster eyeballs by adding extra “veins” with red piping gel or edible glitter for a sparkly finish.
- Cooking Method: If you want a sturdier shell, temper white chocolate instead of candy melts, but be aware it’s a bit more sensitive to heat and humidity.
- Personal Twist: I once added a tiny piece of gummy worm crawling out from one eyeball for a fun surprise—kids loved the gross-out factor!
Serving & Storage Suggestions
These eyeball cake pops are best served at room temperature to enjoy the smooth candy coating and moist cake interior. Arrange them standing upright on a platter with a few spooky props like fake spider webs or mini pumpkins for effect.
For a party, they pair surprisingly well with a bowl of punch or a creamy hot chocolate, creating a fun contrast of creepy and cozy. If you want to serve a themed snack platter, include some crispy chicken bites or high-protein chicken burrito bowls to balance sweet and savory.
Store leftover cake pops in an airtight container in the fridge for up to 3 days. Before serving, take them out about 20 minutes ahead to come to room temperature. Reheating isn’t necessary and can cause the coating to sweat or melt.
Flavors tend to develop slightly over time, making them even more moist the next day. Just avoid storing them in warm places to keep the candy coating intact.
Nutritional Information & Benefits
Each eyeball cake pop contains roughly 150-180 calories, depending on cake and frosting choices. While these treats are definitely on the indulgent side, using homemade cake and frosting allows you to control sugar and fat levels.
The key ingredients like butter and cream cheese (if used) provide some calcium and essential fats, but the cake pops are mainly a fun treat rather than a health snack. For gluten-free or vegan adaptations, you can find options that fit those diets without sacrificing flavor.
From a personal wellness perspective, I find that recipes like this, which focus on simple, recognizable ingredients, help me enjoy treats mindfully. There’s something satisfying about making spooky eyeball cake pops from scratch rather than grabbing pre-packaged sweets.
Conclusion
Making perfect eyeball cake pops without a cake pop maker is proof that you don’t need fancy tools to create fun, memorable treats. This recipe balances ease, flavor, and festive flair, making it a standout for Halloween or themed parties. I love how it lets me get creative with decorations while relying on simple, accessible ingredients.
Feel free to tweak the flavors, colors, and decorating styles to suit your taste or holiday mood. Whether you’re hosting a spooky bash or just looking for a hands-on baking project, these eyeball cake pops deliver playful satisfaction every time.
Give them a try—I’d love to hear how your spooky creations turn out or any twists you add! Sharing your results always makes the kitchen feel a little more connected and fun.
FAQs
- Can I use store-bought cake for these cake pops? Absolutely! Boxed or bakery cake works fine as long as you crumble it finely and mix well with frosting.
- What if I don’t have candy melts? You can use white chocolate chips, but melt gently and watch the temperature closely to avoid burning.
- How do I prevent cake pops from falling off the sticks? Dipping the stick tip in melted candy before inserting into the cake ball helps secure them. Also, chilling the pops before coating is key.
- Can I make these in advance? Yes, make and decorate them up to 2 days before your event. Keep refrigerated and bring to room temp before serving.
- What’s the best way to store leftover cake pops? Store in an airtight container in the fridge for up to 3 days. Avoid freezing as it can change texture and coating quality.
Pin This Recipe!
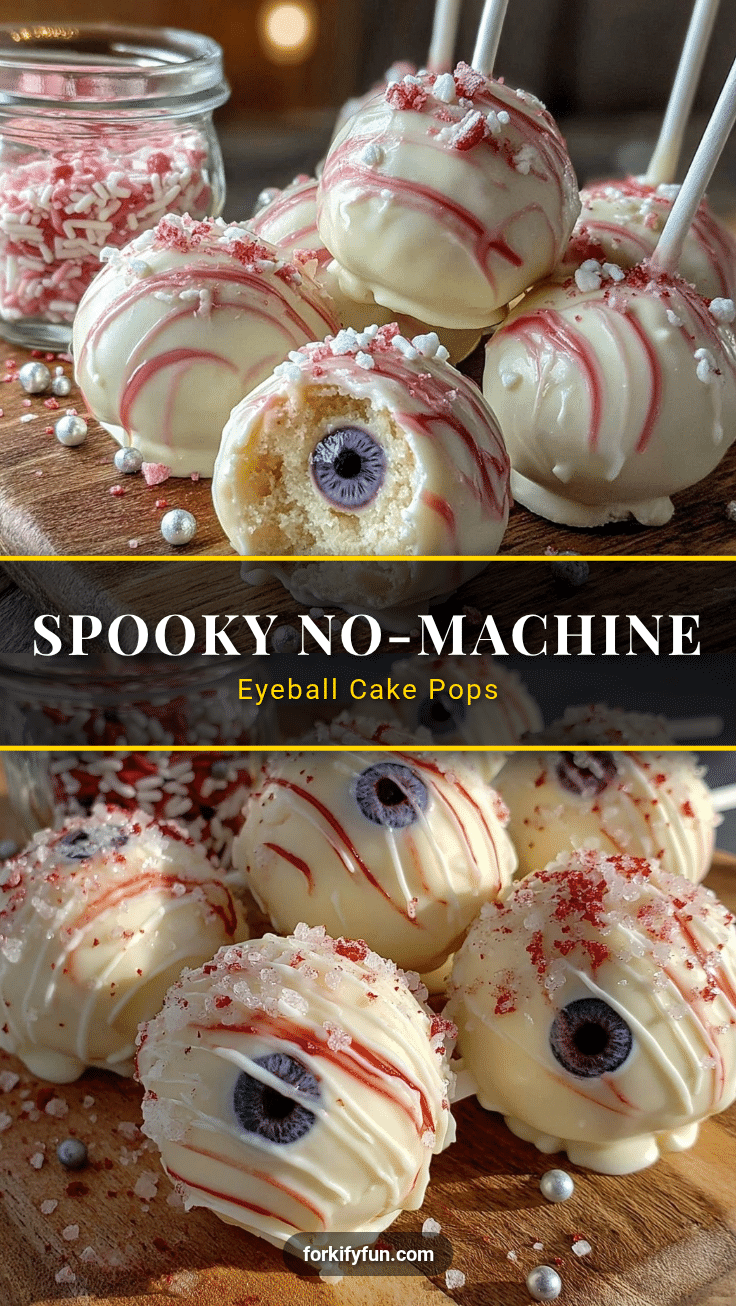
Perfect Eyeball Cake Pops Recipe Easy Homemade No Cake Pop Maker Needed
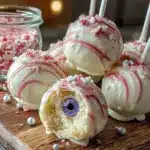
These eyeball cake pops are a fun and spooky treat perfect for Halloween, made easily without a cake pop maker using simple ingredients and hands-on techniques.
- Prep Time: 20 minutes
- Cook Time: 40 minutes
- Total Time: 1 hour
- Yield: 12-15 cake pops 1x
- Category: Dessert
- Cuisine: American
Ingredients
- About 3 cups of crumbled cake (homemade or store-bought boxed cake; chocolate or vanilla recommended)
- 1/2 cup of your favorite frosting (cream cheese or buttercream recommended)
- 12 oz (340 g) white candy melts or white chocolate chips
- Black, red, and blue gel food coloring
- Edible markers or black icing (optional)
- 12–15 lollipop sticks
- Sprinkles or edible glitter (optional)
- Non-stick spray or vegetable shortening
Instructions
- Crumble the cake into fine pieces in a large bowl, aiming for uniform crumbs about the size of coarse sand (about 5 minutes).
- Add 1/2 cup (4 fl oz) of frosting to the crumbs and gently fold together until dough-like consistency is achieved; add more frosting if needed (3-5 minutes).
- Lightly grease hands with non-stick spray or shortening and roll mixture into 1.5-inch (4 cm) balls; flatten bottom slightly and place on parchment-lined baking sheet (10-15 minutes).
- Dip tip of each lollipop stick into melted candy melts and insert halfway into each cake ball; refrigerate tray for 15 minutes to firm up.
- Melt white candy melts in 30-second bursts in microwave or use double boiler until smooth and pourable, about 110°F (43°C).
- Dip each cake ball into melted candy coating, tap off excess, and place upright in Styrofoam block or stand to dry for about 30 minutes.
- Decorate eyeballs using thinned gel food coloring to paint iris and blood vessels; use edible markers or black icing for pupils and details; allow to set for 15 minutes.
- Optionally, sprinkle edible glitter or shimmer dust for effect; store cake pops in airtight container at room temperature if serving same day or refrigerate up to 3 days.
Notes
Use dense cake for better shaping; add frosting gradually to achieve moldable consistency. Melt candy melts gently to avoid burning. Chill cake balls after inserting sticks to prevent falling off. Decorations can be customized with edible glitter or glow dust. Store in airtight container and bring to room temperature before serving.
Nutrition
- Serving Size: 1 cake pop
- Calories: 150180
- Sugar: 18
- Sodium: 90
- Fat: 7
- Saturated Fat: 4
- Carbohydrates: 24
- Fiber: 0.5
- Protein: 2
Keywords: eyeball cake pops, Halloween treats, no cake pop maker, easy cake pops, spooky desserts, homemade cake pops, candy melts, party snacks