“Did you ever think a cookie could capture the feeling of a milestone? I certainly didn’t—until I found myself elbow-deep in royal icing, trying to recreate tiny graduation caps for my niece’s party. Honestly, I was skeptical at first; I mean, how hard could it be to make mini graduation cap cookies? Turns out, it’s a mix of patience, a pinch of creativity, and some trial and error. The first batch looked more like abstract art than caps, but by the third try, the little hats were so charming I couldn’t stop smiling.
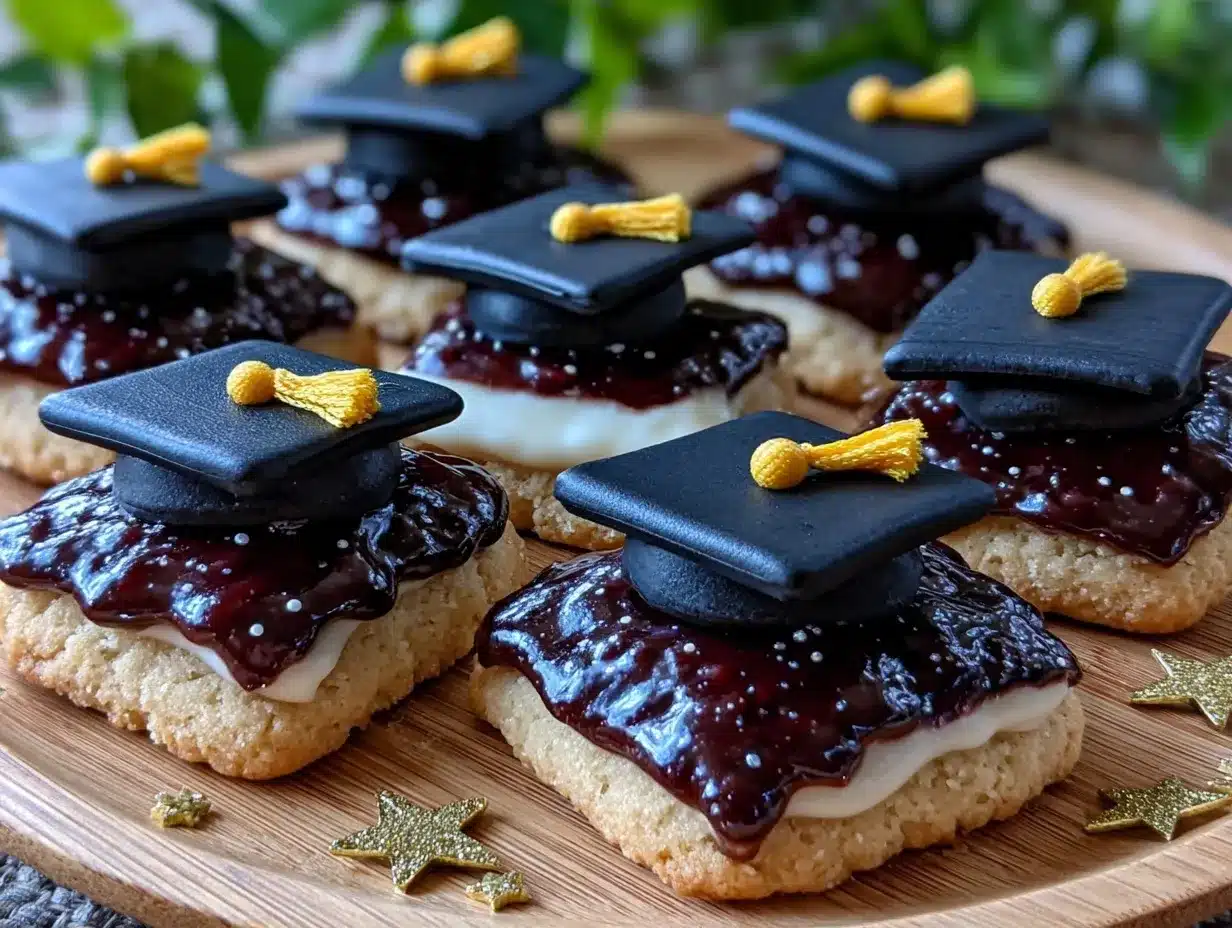
There’s something about these perfect mini graduation cap cookies with royal icing that feels just right for celebrating achievements. The crisp edges of the cookie, the smooth, glossy icing, and that tiny tassel detail bring a quiet joy to the occasion. I remember standing in the kitchen late at night, the soft hum of the mixer and the smell of vanilla filling the air, feeling surprisingly calm amidst the chaos of party prep. These cookies aren’t just treats—they’re little symbols of pride and accomplishment, baked into sweet bites.
What really made this recipe stick for me was how approachable it became after a few rounds—no fancy equipment, just some simple ingredients and a bit of guidance. Whether you’re baking for a big graduation bash or a small family gathering, these cookies bring a slice of celebration that’s both playful and polished. And honestly? Once you get the hang of the royal icing, you might find yourself making them over and over, just like I did (and still do) every graduation season.”
Why You’ll Love This Recipe
After testing countless cookie recipes and royal icing techniques, I can confidently say these mini graduation cap cookies are a winner. Here’s why I keep coming back to this recipe:
- Quick & Easy: The cookie dough comes together in under 15 minutes, and the royal icing sets nicely within a couple of hours—perfect for busy hosts or last-minute celebrations.
- Simple Ingredients: No specialty flours or exotic flavors here. Most of these ingredients are pantry staples like all-purpose flour, powdered sugar, and vanilla extract.
- Perfect for Graduation Parties: These bite-sized treats add a festive touch to any graduation spread, making them ideal for potlucks, school events, or family celebrations.
- Crowd-Pleaser: Kids and adults alike love these. The cookies have a tender crumb and the royal icing adds just the right sweetness and that satisfying snap.
- Unbelievably Delicious: The combination of buttery cookies with smooth royal icing is comfort food meets celebration—something you’ll want to make year after year.
- Unique Touch: This isn’t just about cutting shapes and slapping on icing. The royal icing tutorial included here will help you master that perfectly smooth finish and charming tassel detail that sets these cookies apart.
Honestly, these cookies have that “close your eyes and savor” kind of effect. They’re the kind of treat that turns casual gatherings into memorable moments without the fuss. Whether you’re balancing party prep around other dinner plans—like a quick shrimp stir fry or creamy pasta—you’ll find these cookies are a sweet way to celebrate without stress.
What Ingredients You Will Need
This recipe uses simple, wholesome ingredients to deliver bold flavor and satisfyingly crisp texture without any fuss. Most of these are pantry staples, and substitutions are easy if needed.
- For the Cookie Dough:
- All-purpose flour – 2 ½ cups (300 g), sifted for lightness
- Unsalted butter – 1 cup (227 g), softened (I prefer using Plugrá for its rich flavor)
- Granulated sugar – ¾ cup (150 g)
- Large egg – 1, room temperature
- Pure vanilla extract – 1 ½ teaspoons (adds warmth and aroma)
- Baking powder – 1 teaspoon
- Salt – ¼ teaspoon
- For the Royal Icing:
- Powdered sugar – 4 cups (480 g), sifted to avoid lumps
- Pasteurized egg whites or meringue powder – 3 tablespoons (for safety and stability)
- Fresh lemon juice or water – 5 tablespoons (adjust for consistency)
- Black gel food coloring – enough to tint the icing a deep, matte black
- Optional: white gel food coloring or edible gold dust for tassel accents
If you want gluten-free cookies, swapping the all-purpose flour with a 1:1 gluten-free baking flour blend works well, just be sure the blend contains xanthan gum. For dairy-free, substitute butter with a plant-based spread (I recommend Earth Balance for baking). You can also swap lemon juice with apple cider vinegar in the royal icing if you prefer a subtler tang.
Equipment Needed
- Mixing bowls – glass or stainless steel preferred for easy cleaning
- Electric hand mixer or stand mixer – makes dough and royal icing smooth quickly
- Rolling pin – a smooth surface helps roll dough evenly
- Mini graduation cap cookie cutter or a sharp knife – if you don’t have a cutter, a small square cutter plus a circle for the head works fine
- Baking sheets lined with parchment paper or silicone mats – prevents sticking and ensures even baking
- Piping bags with small round tips (size 1 or 2) – for precise royal icing work
- Toothpicks or scribe tools – perfect for fixing small icing details
You don’t need fancy equipment to get great results. I’ve used everything from disposable piping bags to simple zip-top bags with a tiny snip in the corner. If you’re thinking about investing, a stand mixer can save your wrists, but the hand mixer does just fine. And always keep your tools clean and dry for the best royal icing consistency.
Preparation Method
- Make the Cookie Dough: In a large bowl, cream together the softened butter and granulated sugar until light and fluffy, about 3–4 minutes with an electric mixer. This step is key to tender cookies.
- Add Egg and Vanilla: Beat in the egg and vanilla extract until fully incorporated. The batter will look smooth and glossy here.
- Mix Dry Ingredients: In a separate bowl, whisk together the all-purpose flour, baking powder, and salt. Gradually add this to the wet ingredients, mixing on low speed just until combined. Don’t overmix; the dough should hold together but not be sticky.
- Chill the Dough: Form the dough into a disk, wrap it tightly in plastic wrap, and refrigerate for at least 1 hour. This helps the dough firm up for cleaner cuts.
- Roll Out the Dough: On a lightly floured surface, roll the dough to about ¼ inch (6 mm) thickness. Try to keep it even for uniform baking.
- Cut Out Mini Graduation Caps: Use your cookie cutter or knife to shape the caps. For the mortarboard, a small square about 1.5 inches (4 cm) wide works well; for the head, a tiny circle about ¾ inch (2 cm) diameter. Transfer to prepared baking sheets.
- Bake: Bake in a preheated oven at 350°F (175°C) for 8–10 minutes. Edges should be firm but not browned. Let cool completely on the baking sheet to avoid breakage.
- Prepare Royal Icing: In a mixing bowl, combine powdered sugar and meringue powder. Add lemon juice or water gradually, mixing on medium speed until icing holds stiff peaks (about 5–7 minutes). Adjust liquid to get two consistencies: one thicker for details, one thinner for flooding.
- Color the Icing: Tint most of the icing black with gel food coloring. Reserve a small portion white or gold for the tassels.
- Outline and Flood: Using a piping bag with thick black icing, outline the square mortarboard and the circle head. Then flood inside the outlines with thinned icing. Use a toothpick to gently spread and pop bubbles.
- Add Tassel Detail: Once the black icing is set (about 30 minutes), pipe the tassel with white or gold icing. This tiny detail makes all the difference.
- Dry and Store: Let the cookies dry completely (2–3 hours or overnight) before stacking or packaging.
Don’t rush the drying process! A common mistake is trying to move or stack while icing is tacky, which can smudge your hard work. Keep a damp cloth nearby to wipe your hands and tools to avoid accidental smears.
Cooking Tips & Techniques
Royal icing can be intimidating, but a few tips make it manageable. First, always sift your powdered sugar—it keeps the icing smooth and lump-free. When mixing, start slow to avoid a powdered sugar cloud filling your kitchen (trust me, been there!).
For consistent piping, practice steady pressure on the bag and keep your wrist relaxed. If you mess up a line, a toothpick dipped in water can gently fix small mistakes before the icing sets. Also, keep the icing covered with a damp towel when not in use to prevent drying out.
When shaping the cookies, chill the dough well. Warm dough stretches and loses shape, which is frustrating when you want those crisp edges. Another trick is to bake on the middle rack for even heat—too close to the top and they brown unevenly.
For tassels, I’ve learned that less is more. A tiny detail piped carefully makes a big impact. If you want a bit of shimmer, edible gold dust brushed on while icing is still tacky adds a subtle festive glow.
Finally, multitask by preparing your royal icing while the cookies bake and cool—that way, you’re not waiting around and your workflow stays smooth.
Variations & Adaptations
- Flavor Twist: Add a teaspoon of almond extract to the cookie dough for a nutty depth that pairs beautifully with the vanilla icing.
- Dietary Adaptation: Use gluten-free flour blends and aquafaba (chickpea water) instead of egg whites for a vegan, gluten-free version of the royal icing and cookies.
- Color Customization: Swap the black icing for your school’s colors or metallic shades to match the graduation theme. I once tried navy blue and silver for a friend’s ceremony, and they looked stunning.
- Different Shapes: Instead of mini caps, try larger cookie sizes or add diploma scrolls made from rolled fondant for variety.
- Alternative Icing Technique: For less effort, use store-bought royal icing mixes but thin them carefully to suit flooding and piping consistency.
Serving & Storage Suggestions
These mini graduation cap cookies are best served at room temperature, allowing the royal icing to reveal its glossy finish without cracking. Arrange them on a festive platter alongside other desserts for a charming dessert table highlight.
They pair beautifully with light drinks like iced tea or sparkling lemonade to balance the sweetness. For a heartier celebration, these cookies complement savory dishes like a quick chicken and vegetable stir-fry or creamy spaghetti carbonara perfectly.
To store, keep the cookies in an airtight container at room temperature for up to 5 days. Avoid the fridge, as moisture can soften the royal icing. For longer storage, freeze the cookies in a single layer on a baking sheet, then transfer to a freezer-safe container. Thaw at room temperature before serving.
Flavors tend to mellow and deepen after a day, so if you can resist, letting them rest overnight improves texture and taste.
Nutritional Information & Benefits
Each mini graduation cap cookie contains approximately 120 calories, 6 grams of fat, 15 grams of carbohydrates, and 1 gram of protein. The butter provides rich flavor and a satisfying mouthfeel, while the powdered sugar and egg whites in the royal icing add sweetness without heaviness.
This recipe is adaptable for gluten-free and vegan diets with simple substitutions, making it accessible for many guests. Though a treat, it’s portion-controlled by size, so you can enjoy a few without guilt.
Using real vanilla extract and fresh lemon juice in the icing adds natural flavor without artificial additives, which is always a plus in my book.
Conclusion
These perfect mini graduation cap cookies with royal icing are more than just desserts—they’re little celebrations you can hold in your hand. The process, while requiring some patience, is rewarding and approachable for bakers of all levels. Plus, the smile these cookies bring at a graduation party? Priceless.
Feel free to tweak the colors, flavors, or sizes to suit your celebration style. I’ve made them as simple black and white classics, but also in bright school colors and metallics, depending on the occasion. Each batch is a little project that brings a huge payoff.
So grab your rolling pin and piping bags, and create some sweet memories. And if you ever find yourself juggling party prep and dinner, I totally recommend pairing these treats with quick dishes like the quick shrimp stir fry or the fresh pesto pasta with cherry tomatoes. Happy baking!
FAQs
Can I make the cookie dough ahead of time?
Yes! The dough keeps well wrapped in the fridge for up to 3 days or frozen for up to 1 month. Just thaw and roll before cutting.
How long does royal icing take to dry completely?
Royal icing usually sets to the touch within 30–60 minutes, but for full drying and hardening, plan on 2–3 hours or overnight.
What if I don’t have a graduation cap cookie cutter?
No worries! You can use a small square cutter or knife for the mortarboard and a round cutter or bottle cap for the head. Assemble them on the baking sheet before baking.
Can I use store-bought royal icing instead of making it from scratch?
Yes, store-bought royal icing can work, but you may need to thin it with a bit of water or lemon juice to get the right flooding consistency.
How do I prevent the royal icing from cracking?
Keep the icing thickness balanced—not too thick or too thin. Avoid sudden temperature changes and cover the cookies while drying to keep humidity stable.
Pin This Recipe!
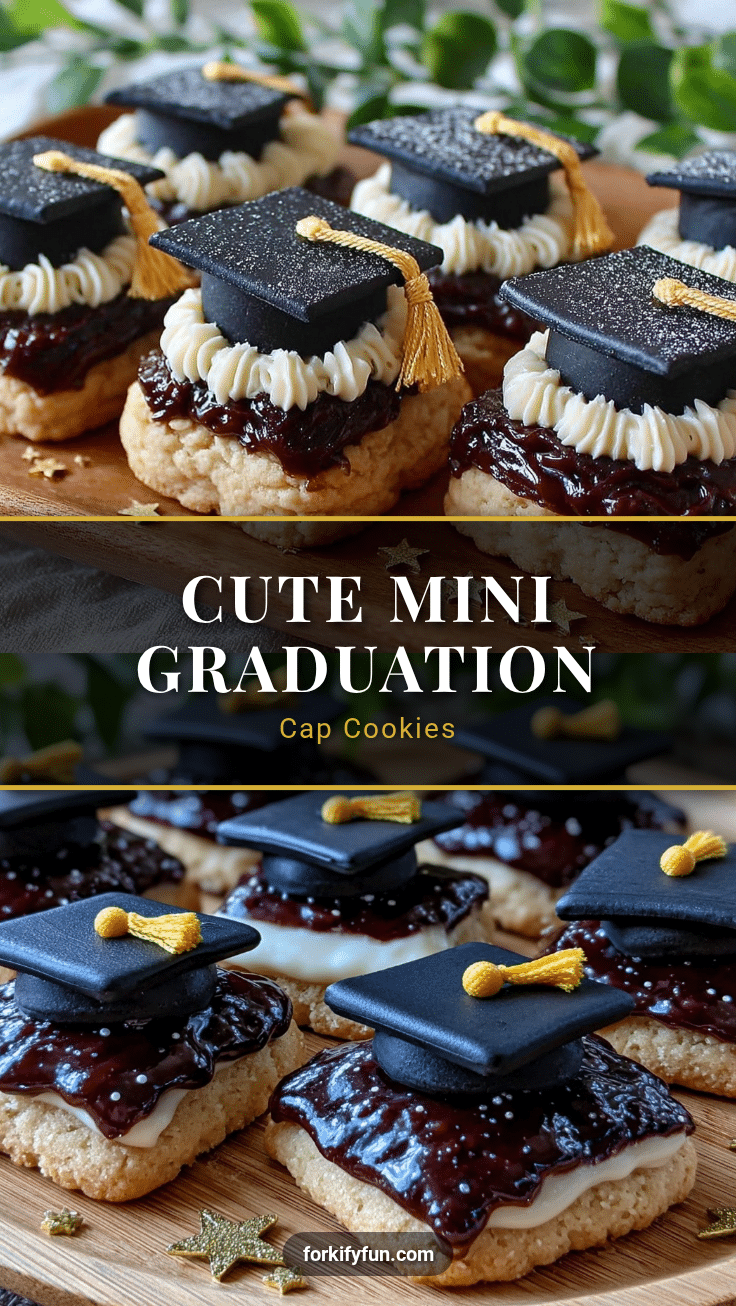
Perfect Mini Graduation Cap Cookies

These mini graduation cap cookies feature tender buttery cookies topped with smooth, glossy royal icing and charming tassel details, perfect for celebrating milestones.
- Prep Time: 15 minutes
- Cook Time: 10 minutes
- Total Time: 1 hour 25 minutes (including chilling and drying time)
- Yield: About 24 mini cookies 1x
- Category: Dessert
- Cuisine: American
Ingredients
- 2 ½ cups (300 g) all-purpose flour, sifted
- 1 cup (227 g) unsalted butter, softened
- ¾ cup (150 g) granulated sugar
- 1 large egg, room temperature
- 1 ½ teaspoons pure vanilla extract
- 1 teaspoon baking powder
- ¼ teaspoon salt
- 4 cups (480 g) powdered sugar, sifted
- 3 tablespoons pasteurized egg whites or meringue powder
- 5 tablespoons fresh lemon juice or water
- Black gel food coloring
- Optional: white gel food coloring or edible gold dust for tassel accents
Instructions
- Make the Cookie Dough: In a large bowl, cream together the softened butter and granulated sugar until light and fluffy, about 3–4 minutes with an electric mixer.
- Add Egg and Vanilla: Beat in the egg and vanilla extract until fully incorporated.
- Mix Dry Ingredients: In a separate bowl, whisk together the all-purpose flour, baking powder, and salt. Gradually add this to the wet ingredients, mixing on low speed just until combined.
- Chill the Dough: Form the dough into a disk, wrap it tightly in plastic wrap, and refrigerate for at least 1 hour.
- Roll Out the Dough: On a lightly floured surface, roll the dough to about ¼ inch (6 mm) thickness.
- Cut Out Mini Graduation Caps: Use a cookie cutter or knife to shape the caps—a small square about 1.5 inches (4 cm) wide for the mortarboard and a tiny circle about ¾ inch (2 cm) diameter for the head. Transfer to prepared baking sheets.
- Bake: Bake in a preheated oven at 350°F (175°C) for 8–10 minutes until edges are firm but not browned. Let cool completely on the baking sheet.
- Prepare Royal Icing: In a mixing bowl, combine powdered sugar and meringue powder. Add lemon juice or water gradually, mixing on medium speed until icing holds stiff peaks (about 5–7 minutes). Adjust liquid to get two consistencies: thicker for details, thinner for flooding.
- Color the Icing: Tint most of the icing black with gel food coloring. Reserve a small portion white or gold for tassels.
- Outline and Flood: Using a piping bag with thick black icing, outline the square mortarboard and circle head. Flood inside outlines with thinned icing. Use a toothpick to spread and pop bubbles.
- Add Tassel Detail: Once black icing is set (about 30 minutes), pipe tassels with white or gold icing.
- Dry and Store: Let cookies dry completely (2–3 hours or overnight) before stacking or packaging.
Notes
Chill dough well before rolling to maintain shape. Sift powdered sugar for smooth royal icing. Let royal icing dry completely before stacking to avoid smudging. Use a damp cloth to keep tools clean. For gluten-free, use a 1:1 gluten-free flour blend with xanthan gum. For dairy-free, substitute butter with plant-based spread. Adjust lemon juice with apple cider vinegar for subtler royal icing tang. Store cookies in airtight container at room temperature up to 5 days; freeze for longer storage.
Nutrition
- Serving Size: 1 mini cookie
- Calories: 120
- Fat: 6
- Carbohydrates: 15
- Protein: 1
Keywords: graduation cookies, mini cookies, royal icing, graduation party treats, homemade cookies, easy cookie recipe, celebration cookies


