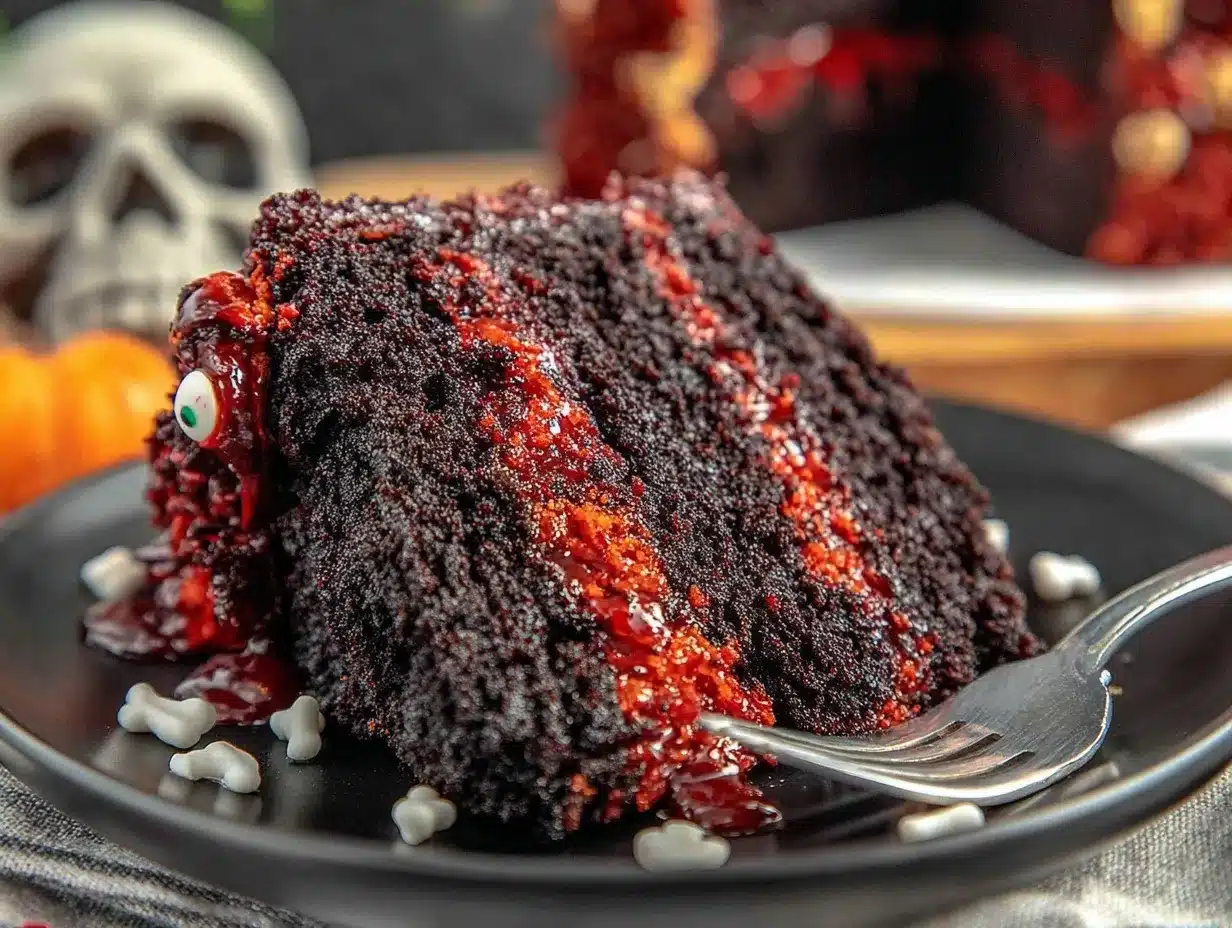
Let me paint you a picture—you walk into your kitchen, and the aroma of deep cocoa and warm vanilla is swirling through the air. There’s a hint of something mysterious, almost magical, as you pull out a cake so strikingly dark, it looks like it belongs at a midnight masquerade. The first time I made this Black Velvet Halloween Marble Cake, I was swept up by how the rich, velvety crumb shimmered against vivid orange swirls (I mean, come on, this is straight-up Pinterest gold). And let’s not forget those candy eyeballs perched on top, staring right back at you—my kids giggled so much, they nearly knocked the cooling rack over.
This cake isn’t just a dessert—it’s an experience. I remember that rainy October weekend, when I was knee-high to a grasshopper, watching my grandma swirl together two batters for marble cake. The anticipation of seeing those marbled slices always made me bounce on my toes (patience was not my strong suit). Years later, I stumbled on the idea of adding jet-black cocoa powder for a dramatic twist, and that was it—the kind of moment where you pause, take a deep breath, and just smile because you know you’re onto something truly special.
Honestly, if you’re searching for the perfect Halloween centerpiece, this cake checks all the boxes—moist, mysterious, and playful, with a nostalgic hit of old-fashioned marble cake comfort. I wish I’d thought to make this for every childhood Halloween party; it has become a staple for family gatherings and spooky movie nights, not to mention the talk of every bake sale. My husband (an unapologetic chocoholic) said it was “dangerously easy” to eat three slices in one sitting. And in the name of research, of course, I’ve tested this recipe more times than I care to admit. So whether you’re baking for a crowd or just want something festive for your little ghouls, you’re going to want to bookmark this one—it’s pure, nostalgic comfort with a wickedly fun twist.
Why You’ll Love This Black Velvet Halloween Marble Cake
You know what makes this Black Velvet Halloween Marble Cake stand out? It’s not just about the deep, dramatic color (though that’s a showstopper). It’s the texture, the flavor, and the playful candy eyeballs that turn an ordinary dessert into a seasonal sensation. Here’s why you’ll fall head over heels for it (trust me—I’ve baked this more times than I can count):
- Quick & Easy: Comes together in under 90 minutes—perfect for last-minute party prep or a weeknight baking adventure.
- Simple Ingredients: No need for fancy specialty stores; you probably have most of what you need in your pantry right now.
- Perfect for Halloween Parties: This cake brings drama and fun to any spooky gathering, and those candy eyeballs? They always get a laugh.
- Crowd-Pleaser: I’ve watched kids and adults alike reach for seconds (sometimes thirds). It’s just that good.
- Unbelievably Delicious: The black velvet crumb is moist and rich, while the orange marble layer adds a gentle vanilla lift. It’s comfort food, but with a Halloween twist.
What sets this cake apart is the use of black cocoa powder—this stuff is like magic, creating a color so deep, it makes regular chocolate cakes look pale in comparison. You don’t have to rely on food coloring alone to get that iconic look. Plus, the marbling technique creates a pattern that looks impressive but is actually easy to pull off (even if your swirling skills aren’t perfect, those imperfections are part of the charm!).
This isn’t just another marble cake—it’s my best version, perfected over countless trials (and a few spectacular fails). I blend buttermilk into the batter for ultra-moist results and use just enough orange zest to keep things lively. You can whip it up fast, serve it to a crowd, and still have time to sneak a slice before anyone notices. Honestly, if you love cakes that make you close your eyes and savor each bite, this is for you. It’s comfort food reimagined for Halloween—healthier, faster, and with all the soul-soothing satisfaction you crave.
What Ingredients You Will Need
This recipe uses simple, wholesome ingredients to deliver bold flavor and a satisfyingly moist texture—without any fussy steps. Most of these are pantry staples, and you can easily swap a few if needed.
- For the black velvet cake batter:
- 1 cup (200g) granulated sugar
- 1/2 cup (115g) unsalted butter, softened (adds richness)
- 2 large eggs, room temperature
- 1 cup (240ml) buttermilk (for ultra-moist crumb)
- 1 1/2 cups (190g) all-purpose flour
- 1/2 cup (50g) black cocoa powder (I recommend King Arthur for best color)
- 1/2 tsp baking soda
- 1/2 tsp baking powder
- 1/4 tsp salt
- 1 tsp pure vanilla extract
- For the orange marble batter:
- 1/2 cup (115g) unsalted butter, softened
- 1 cup (200g) granulated sugar
- 2 large eggs, room temperature
- 1 cup (240ml) buttermilk
- 1 1/2 cups (190g) all-purpose flour
- 1/2 tsp baking soda
- 1/2 tsp baking powder
- 1/4 tsp salt
- 1 tsp pure vanilla extract
- 1 tbsp orange zest (freshly grated, for bright flavor)
- Orange food coloring (gel works best for vibrant color)
- For decoration:
- Candy eyeballs (Wilton or Sweet Tooth Fairy work well)
- Optional: orange and black sprinkles
- Optional: powdered sugar for a light dusting
Ingredient Tips: For the black cocoa powder, try to source the darkest you can find—it really does make a difference. If you need to keep things gluten-free, swap in a good 1:1 gluten-free flour blend (I’ve had success with Bob’s Red Mill). For dairy-free, use plant-based butter and coconut yogurt in place of buttermilk (it’s not identical, but still delicious). If you can’t find candy eyeballs, mini marshmallows with a dab of chocolate work in a pinch!
Equipment Needed
You won’t need a professional bakery setup for this Black Velvet Halloween Marble Cake—just a few trusty tools from your kitchen:
- 9-inch round cake pan (or a bundt pan for a dramatic look—just adjust your baking time!)
- Hand mixer or stand mixer (a whisk works if you’re feeling strong, but electric mixers save time)
- Rubber spatula (for folding and swirling batters—don’t skimp here!)
- Large mixing bowls (at least two, since you’ll prep both batters separately)
- Measuring cups and spoons (accuracy really matters in baking)
- Wire cooling rack (if you skip this, your cake might get soggy)
- Toothpick or skewer (for testing doneness and swirling)
- Parchment paper (for lining the pan, especially if you want easy release)
If you don’t have a stand mixer, don’t worry—a hand mixer or even a sturdy whisk will do the trick. I’ve used IKEA spatulas and high-end silicone ones, and honestly, as long as it’s flexible, you’re good. For budget-friendly pans, I’ve had luck with Wilton and Baker’s Secret. Just remember to grease and line your pan well—cake sticking is the worst.
How to Make Black Velvet Halloween Marble Cake
- Prep Your Pan: Line a 9-inch round cake pan with parchment paper and lightly grease the sides. Preheat your oven to 350°F (175°C). If using a bundt pan, grease thoroughly and dust with cocoa powder.
- Mix the Black Velvet Batter: In a large bowl, cream together 1/2 cup (115g) unsalted butter and 1 cup (200g) sugar until light and fluffy (about 2 minutes with a mixer). Add 2 eggs, one at a time, mixing well after each. Pour in 1 cup (240ml) buttermilk and 1 tsp vanilla. In a separate bowl, whisk 1 1/2 cups (190g) flour, 1/2 cup (50g) black cocoa, 1/2 tsp baking soda, 1/2 tsp baking powder, and 1/4 tsp salt. Gradually add dry ingredients to wet, mixing just until combined. Batter should be thick and glossy—almost midnight black!
- Mix the Orange Marble Batter: In another bowl, cream 1/2 cup (115g) butter and 1 cup (200g) sugar until fluffy. Add 2 eggs, one at a time. Stir in 1 cup (240ml) buttermilk, 1 tsp vanilla, and 1 tbsp orange zest. In a separate bowl, whisk together 1 1/2 cups (190g) flour, 1/2 tsp baking soda, 1/2 tsp baking powder, and 1/4 tsp salt. Gradually add dry ingredients to wet, mixing gently. Add orange food coloring until you reach your desired shade (start with a few drops).
- Layer and Marble: Spoon alternating blobs of black and orange batters into the pan, layering as you go. Use a skewer or butter knife to gently swirl the batters together—don’t overmix, or you’ll lose the marble effect. Aim for 3-4 gentle figure-eight motions.
- Bake: Place cake in the oven and bake for 40-50 minutes. Check after 40 minutes—a toothpick should come out clean or with a few moist crumbs. If using a bundt pan, you may need up to 55 minutes.
- Cool: Allow cake to cool in the pan for 10-15 minutes, then turn out onto a wire rack to cool completely. The cake is delicate while warm—don’t rush this step.
- Decorate: Once fully cool, arrange candy eyeballs over the top. For extra festivity, scatter orange and black sprinkles or dust lightly with powdered sugar.
Troubleshooting: If the cake cracks, that’s okay—just cover with extra eyeballs! If your marbling isn’t perfect, remember: every slice will look different and that’s part of the fun. Batter too thick? Add a tablespoon of buttermilk. Batter too runny? Add a spoonful of flour. Trust your senses—if it smells rich and chocolatey and feels springy, you’re on the right track.
Pro Tips for Baking the Perfect Black Velvet Cake
Baking this cake is straightforward, but a few insider tricks can help guarantee a show-stopping result. Here’s what I’ve learned (sometimes the hard way!):
- Room Temperature Ingredients: Eggs and buttermilk blend better when not cold. If you’re in a hurry, set them in a bowl of warm water for 10 minutes.
- Don’t Overmix: Once you add flour, mix gently. Overmixing toughens the crumb—trust me, I’ve baked more than a few hockey-puck cakes in my day.
- Swirling Technique: Use a skewer or thin knife and make gentle, sweeping motions. Too many swirls and you’ll end up with a muddy color.
- Bake on the Middle Rack: This ensures even heating and a tender crumb. If your oven runs hot, check the cake early.
- Cake Release: Line your pan and let the cake cool before removing. Rushing this step leads to heartbreak (and broken cake).
- Test for Doneness: A toothpick should come out with a few moist crumbs, not wet batter. If you’re unsure, tap the top—the cake should spring back.
- Decorate When Cool: Candy eyeballs melt if the cake is warm, so wait until it’s fully cooled.
Let’s face it, baking can be unpredictable—humidity, oven quirks, or just plain old distractions. The good news? This cake forgives a lot. Even my “oops” batches got gobbled up in minutes. The key is to relax, trust the process, and have fun with the marbling (it’s like edible art!).
Variations & Adaptations
The beauty of this Black Velvet Halloween Marble Cake is how flexible it can be. Whether you’re working around allergies or just want to try something new, here are my favorite ways to mix things up:
- Gluten-Free: Use a 1:1 gluten-free flour blend like Cup4Cup or Bob’s Red Mill. I’ve made it this way for my best friend and it’s still perfectly moist.
- Dairy-Free: Substitute the buttermilk with unsweetened coconut yogurt mixed with a splash of lemon juice. Plant-based butter works great for the fat.
- Flavor Twists: Swap orange zest for lemon or lime for a citrusy surprise. Add a pinch of cinnamon or pumpkin spice to the orange batter for extra autumn vibes.
- Different Pan Shapes: Make cupcakes for individual treats—just reduce baking time to 18-22 minutes. A loaf pan works too, but watch for a longer bake.
- Homemade Candy Eyes: Use mini marshmallows with chocolate chips pressed in—this is a lifesaver when the store runs out!
My favorite twist? Adding a swirl of raspberry jam to the orange layer—sweet, tart, and extra Halloween-y. Honestly, don’t be afraid to experiment. This cake is sturdy enough to handle mix-ins and flavor swaps, so make it your own!
Serving & Storage Suggestions
Serve this Black Velvet Halloween Marble Cake at room temperature for the best flavor and texture. Slice thick wedges and arrange on a platter—those swirls and eyeballs deserve to be seen! For a party, pair with hot apple cider or a big mug of cocoa. It’s awesome alongside salty snacks like popcorn balls or a cheese board, balancing sweet and savory.
To store, wrap the cake tightly in plastic wrap or place in an airtight container. It keeps well at room temperature for up to 2 days, or in the fridge for up to 5 days (just let it come to room temp before serving for best texture). You can freeze slices for up to a month—wrap individually and thaw overnight.
Reheating is easy: microwave a slice for 10-15 seconds, or warm in a low oven for 5 minutes. The flavors actually deepen after a day or two, so it’s perfect for making ahead. The candy eyeballs hold up surprisingly well, though you might want to add them fresh if you’re freezing the cake.
Nutritional Information & Benefits
Each slice of Black Velvet Halloween Marble Cake (1/12 of the cake) has approximately:
- Calories: 320
- Fat: 14g
- Carbohydrates: 45g
- Protein: 5g
- Sugar: 28g
This cake is rich in flavor thanks to black cocoa powder, which is lower in fat than traditional cocoa and delivers deep taste. Buttermilk provides calcium and aids digestion (if dairy isn’t an issue). You can make it gluten-free or dairy-free as noted above. Allergens include wheat, dairy, and eggs—always check candy eyeballs for ingredient info if you’re baking for sensitive eaters.
From my wellness perspective, this cake is a treat—it’s festive, fun, and totally worth it for a celebration. Moderation is key, and honestly, the joy it brings is half the nutrition in my book.
Conclusion
To sum it all up, this Black Velvet Halloween Marble Cake with Candy Eyeballs is more than just a dessert—it’s a moment, a memory, and a conversation starter. It’s spooky, delicious, and easy enough for any home baker to master. You can switch up flavors, make it allergy-friendly, or go wild with decorations. I love it because it brings people together, and every slice is a little surprise.
Give it a try, make it your own, and let me know how it goes! Drop a comment below if you add a fun twist, or share your cake on social media (I’d love to see those marbled swirls!). Whether you’re baking for Halloween or just want a cake that makes people smile, this recipe is here for you. Happy baking, and may your kitchen be filled with laughter and chocolatey goodness!
FAQs about Black Velvet Halloween Marble Cake
Can I make this cake ahead of time?
Absolutely! Bake the cake up to two days in advance, wrap tightly, and store at room temp. Decorate with candy eyeballs just before serving for best results.
Can I substitute regular cocoa powder for black cocoa?
You can, but the cake won’t be as dark or dramatic. Black cocoa powder gives it that signature velvet look—if you use Dutch-process cocoa, add a bit of black food coloring for a similar effect.
How do I keep the marble pattern from blending together?
Don’t over-swirl the batters. Use gentle, figure-eight motions with a skewer or knife and stop before it looks uniform. Imperfections are part of the charm!
Are candy eyeballs safe for young children?
Yes, but supervise kids under three—candy eyeballs can be a choking hazard. You can use marshmallows with chocolate chips for a softer option.
Can I freeze this cake?
Yep! Slice and wrap pieces tightly, then freeze for up to a month. Thaw overnight and add candy eyeballs after thawing for the freshest look.
Pin This Recipe!
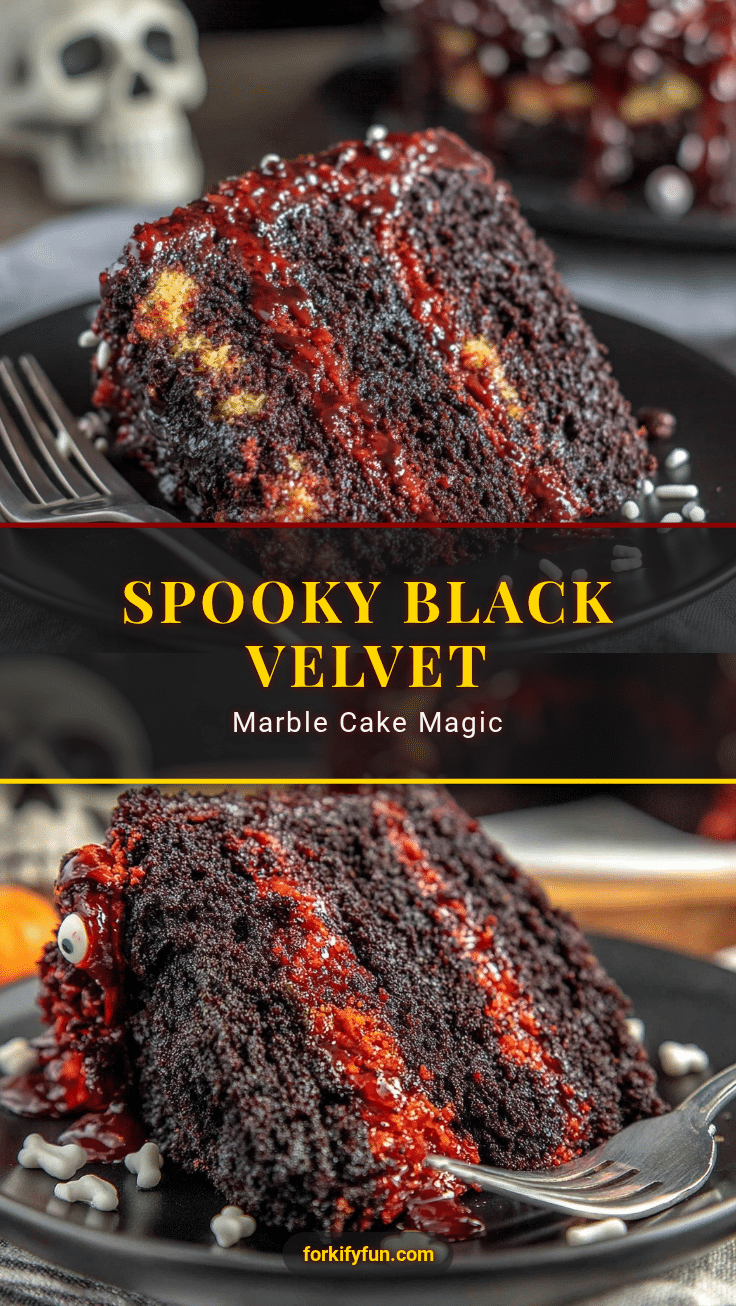
Black Velvet Halloween Marble Cake: Easy Spooky Recipe with Candy Eyeballs
This striking black velvet marble cake features dramatic swirls of deep cocoa and vibrant orange, topped with playful candy eyeballs for a festive Halloween centerpiece. Moist, rich, and easy to make, it’s perfect for parties and spooky gatherings.
- Prep Time: 20 minutes
- Cook Time: 40-50 minutes
- Total Time: 1 hour 10 minutes
- Yield: 12 servings 1x
- Category: Dessert
- Cuisine: American
Ingredients
- 1 cup (200g) granulated sugar (black velvet batter)
- 1/2 cup (115g) unsalted butter, softened (black velvet batter)
- 2 large eggs, room temperature (black velvet batter)
- 1 cup (240ml) buttermilk (black velvet batter)
- 1 1/2 cups (190g) all-purpose flour (black velvet batter)
- 1/2 cup (50g) black cocoa powder
- 1/2 tsp baking soda (black velvet batter)
- 1/2 tsp baking powder (black velvet batter)
- 1/4 tsp salt (black velvet batter)
- 1 tsp pure vanilla extract (black velvet batter)
- 1/2 cup (115g) unsalted butter, softened (orange marble batter)
- 1 cup (200g) granulated sugar (orange marble batter)
- 2 large eggs, room temperature (orange marble batter)
- 1 cup (240ml) buttermilk (orange marble batter)
- 1 1/2 cups (190g) all-purpose flour (orange marble batter)
- 1/2 tsp baking soda (orange marble batter)
- 1/2 tsp baking powder (orange marble batter)
- 1/4 tsp salt (orange marble batter)
- 1 tsp pure vanilla extract (orange marble batter)
- 1 tbsp orange zest, freshly grated
- Orange food coloring (gel preferred)
- Candy eyeballs
- Optional: orange and black sprinkles
- Optional: powdered sugar for dusting
Instructions
- Line a 9-inch round cake pan with parchment paper and lightly grease the sides. Preheat oven to 350°F (175°C). If using a bundt pan, grease thoroughly and dust with cocoa powder.
- In a large bowl, cream together 1/2 cup butter and 1 cup sugar until light and fluffy (about 2 minutes). Add 2 eggs, one at a time, mixing well after each. Pour in 1 cup buttermilk and 1 tsp vanilla. In a separate bowl, whisk 1 1/2 cups flour, 1/2 cup black cocoa, 1/2 tsp baking soda, 1/2 tsp baking powder, and 1/4 tsp salt. Gradually add dry ingredients to wet, mixing just until combined.
- In another bowl, cream 1/2 cup butter and 1 cup sugar until fluffy. Add 2 eggs, one at a time. Stir in 1 cup buttermilk, 1 tsp vanilla, and 1 tbsp orange zest. In a separate bowl, whisk together 1 1/2 cups flour, 1/2 tsp baking soda, 1/2 tsp baking powder, and 1/4 tsp salt. Gradually add dry ingredients to wet, mixing gently. Add orange food coloring until desired shade is reached.
- Spoon alternating blobs of black and orange batters into the pan, layering as you go. Use a skewer or butter knife to gently swirl the batters together with 3-4 figure-eight motions.
- Bake for 40-50 minutes (check after 40 minutes). A toothpick should come out clean or with a few moist crumbs. If using a bundt pan, bake up to 55 minutes.
- Allow cake to cool in the pan for 10-15 minutes, then turn out onto a wire rack to cool completely.
- Once fully cool, arrange candy eyeballs over the top. Optionally, scatter orange and black sprinkles or dust lightly with powdered sugar.
Notes
For best marbling, use gentle swirling motions and avoid overmixing. Room temperature ingredients blend better. Cake can be made gluten-free or dairy-free with substitutions. Decorate only after cake is fully cool to prevent candy eyeballs from melting. Store tightly wrapped at room temperature for up to 2 days, or refrigerate for up to 5 days. Freeze slices for up to a month.
Nutrition
- Serving Size: 1/12 of cake
- Calories: 320
- Sugar: 28
- Sodium: 220
- Fat: 14
- Saturated Fat: 8
- Carbohydrates: 45
- Fiber: 2
- Protein: 5
Keywords: Halloween cake, black velvet cake, marble cake, candy eyeballs, spooky dessert, party cake, easy Halloween recipe, chocolate cake, orange cake, festive baking


