There used to be a little ice cream shop on the corner of Elm and 4th in my old neighborhood that made a chocolate ice cream so intense, so creamy, and so deeply satisfying that I’d walk there even in the middle of a snowstorm. When they closed suddenly two summers ago—a “for lease” sign appeared overnight—I honestly felt a little lost. I mean, that pint had gotten me through a breakup, a promotion, and three separate heatwaves. After fifteen attempts—some so icy they belonged in a slushy machine, others so chalky they tasted like sad protein powder—I finally cracked the code. This Crowd-Pleasing Ninja Creami Chocolate Protein Ice Cream is the exact recreation of that memory. The first time I spun it up, I actually texted my sister a photo with the caption, “I did it.” She didn’t get it, but you will. Let me tell you, this recipe is the kind of victory you can taste.
I’m not someone who usually brags about kitchen experiments, but this one? It’s a game-changer. The trick was balancing the protein powder with real cocoa and a touch of something creamy to mimic that shop’s signature texture. You know that feeling when you take a bite and you just know you’ve nailed it? That’s this recipe. Whether you’re hosting a summer BBQ or just need a dessert that won’t derail your goals, this ice cream delivers. It’s rich, it’s scoopable straight from the freezer, and it has that nostalgic chocolate punch without the sugar crash. Honestly, I’ve served it to friends who swore they hated protein ice cream, and they went back for seconds. That’s the kind of magic we’re talking about here.
So if you’ve been hunting for a dessert that impresses a crowd without requiring a culinary degree, you’ve found it. This recipe is built for hosting—easy to prep ahead, quick to spin, and impossible to resist. Let’s get into it.
Why You’ll Love This Recipe
- Quick & Easy: Comes together in under 10 minutes of active prep, then the Ninja Creami does the heavy lifting. Perfect for last-minute dinner party desserts.
- Simple Ingredients: No weird stabilizers or hard-to-find items. You probably have most of these in your pantry right now.
- Perfect for Hosting: Make the base the night before, then spin it fresh when guests arrive. It’s a showstopper that looks like you spent hours on it.
- Crowd-Pleaser: I’ve served this at potlucks, birthday parties, and casual get-togethers. Kids love it, adults love it, even the dairy-free folks can get in on it.
- Unbelievably Delicious: The texture is creamy and dense—not icy or chalky. It’s the kind of dessert that makes people close their eyes and go “mmm.”
What makes this recipe different from the rest? It’s the combination of whole milk and a touch of cream cheese. That might sound weird, but trust me—it’s the secret to that ultra-smooth, scoopable texture that doesn’t freeze rock-solid. Plus, using a high-quality cocoa powder ensures that deep, dark chocolate flavor that cuts through the protein powder taste. This isn’t just another protein ice cream recipe; it’s the one I’ve tweaked and tested until it was perfect for sharing with a crowd.
This recipe is the kind that makes you feel like a rockstar host. It’s comfort food reimagined—healthier, faster, but with the same soul-soothing satisfaction. Perfect for impressing guests without stress, or turning a simple weeknight into something memorable.
What Ingredients You Will Need
This recipe uses simple, wholesome ingredients to deliver bold chocolate flavor and a creamy texture that rivals traditional ice cream. Most of these are pantry staples, and I’ll even share a few swaps for dietary needs.
- 1 cup whole milk (adds richness; use 2% or oat milk if needed)
- 1/2 cup heavy cream (for that indulgent mouthfeel; coconut cream works for dairy-free)
- 1/3 cup chocolate protein powder (I prefer Orgain or Ghost for best flavor; avoid plant-based blends that get gritty)
- 2 tablespoons unsweetened cocoa powder (Dutch-processed gives a deeper chocolate taste)
- 1/4 cup granulated sugar (or 3 tablespoons maple syrup for natural sweetness)
- 1 teaspoon vanilla extract (pure, not imitation, for a clean flavor)
- 1 tablespoon cream cheese, softened (the secret to creamy texture; use dairy-free cream cheese if needed)
- Pinch of salt (enhances chocolate flavor)
- Optional: 2 tablespoons mini chocolate chips (for mix-ins; I love Lily’s sugar-free chips for a lower-sugar option)
A quick note on protein powder: I’ve tested this with whey, casein, and plant-based blends. Whey gives the smoothest result, but casein works well too. Avoid powders with artificial sweeteners that can leave a bitter aftertaste. If you’re using a flavored protein powder, you can reduce the sugar slightly. And for the cocoa powder, I recommend Ghirardelli or Valrhona for that deep, almost fudge-like flavor. Trust me, it makes a difference.
Equipment Needed
- Ninja Creami ice cream maker (any model works; I use the NC300)
- Ninja Creami pint container (the one that comes with the machine)
- Immersion blender or regular blender (for mixing the base; a whisk works but takes more effort)
- Measuring cups and spoons
- Spatula (for scraping every last bit of the base into the pint)
- Freezer-safe bowl or container (if making the base ahead of time)
If you don’t have an immersion blender, no worries—just use a regular blender or even a shaker bottle. I’ve done it with a whisk, and it just takes a little more elbow grease to get the cocoa powder fully incorporated. For the Ninja Creami, make sure your pint is completely frozen—24 hours is ideal. I’ve learned the hard way that a partially frozen base leads to a sad, slushy result. Also, keep your machine’s blade clean; a dull blade can make the ice cream grainy.
Preparation Method
- Combine the wet ingredients: In a medium bowl or blender, add 1 cup whole milk, 1/2 cup heavy cream, and 1 teaspoon vanilla extract. Whisk or blend until smooth.
- Add the dry ingredients: Sift in 1/3 cup chocolate protein powder, 2 tablespoons unsweetened cocoa powder, 1/4 cup sugar, and a pinch of salt. If using a blender, pulse a few times until combined. If whisking, stir vigorously to avoid lumps. The mixture should look like a thick, glossy chocolate milk.
- Incorporate the cream cheese: Add 1 tablespoon softened cream cheese to the mixture. Blend or whisk until completely smooth. This step is crucial—if you see tiny white specks, keep mixing. The cream cheese is what gives that dense, creamy texture that doesn’t freeze into a brick.
- Pour into the Ninja Creami pint: Use a spatula to scrape every drop into the pint container. Leave about 1/2 inch of headspace at the top for expansion. Put the lid on tightly.
- Freeze for 24 hours: Place the pint on a flat surface in your freezer. Don’t rush this—18 hours minimum, but 24 is best. I’ve tried 12 hours and ended up with a icy mess. Patience pays off here.
- Spin in the Ninja Creami: Remove the pint from the freezer and take off the lid. Place it in the outer bowl of the Ninja Creami and lock it in place. Select the “Ice Cream” setting. The machine will spin for about 2-3 minutes. You’ll hear it whirring—that’s the sound of success.
- Check the texture: After the first spin, open the lid and check. It should look like soft-serve. If it’s still powdery or crumbly, run the “Re-spin” function once more. I usually need one re-spin for the perfect scoopable texture.
- Add mix-ins (optional): If you’re using mini chocolate chips, make a small well in the center of the ice cream with a spoon, add the chips, then run the “Mix-in” function for 30 seconds. This distributes them evenly without crushing them.
- Serve immediately: Scoop into bowls or cones. The texture is best right after spinning—it’s creamy and soft. If you freeze leftovers, let it sit at room temperature for 5-10 minutes before scooping.
A few notes from my trial-and-error days: If your base looks separated after freezing, don’t panic—just give it a good stir before spinning. And if you’re making this for a party, you can double the recipe and freeze two pints. Just make sure your freezer is cold enough (0°F or -18°C) for that perfect freeze.
Cooking Tips & Techniques
One thing I’ve learned the hard way is that temperature matters more than you think. If your freezer is too warm (like those fancy French-door fridges that barely freeze), your base won’t set properly. I actually bought a freezer thermometer after my third failed batch. Aim for a steady 0°F (-18°C).
Another pro tip: don’t skip the cream cheese. I know it sounds odd in ice cream, but it’s the secret to that dense, gelato-like texture. The fat and stabilizers in cream cheese prevent large ice crystals from forming. I’ve tried using cornstarch and xanthan gum, but cream cheese wins every time. Plus, you can’t taste it—promise.
If you’re in a rush, you can freeze the base in a shallow dish for a faster freeze, then transfer it to the pint. But honestly, the 24-hour freeze is worth the wait. And if you forget to soften the cream cheese, just microwave it for 10 seconds. I’ve done that more times than I’ll admit.
For the smoothest result, always sift your cocoa powder and protein powder. Lumps are the enemy of creamy ice cream. I use a fine-mesh strainer right over the mixing bowl—it takes 30 seconds and saves you from gritty bites later.
Variations & Adaptations
- Dairy-Free Version: Swap whole milk with oat milk (it’s creamier than almond), use coconut cream instead of heavy cream, and use dairy-free cream cheese. The texture will be slightly less dense but still delicious.
- Peanut Butter Chocolate: Add 2 tablespoons of peanut butter to the base before blending. Swirl in extra peanut butter after spinning for a marbled effect. This is my go-to for potlucks.
- Mint Chocolate Chip: Add 1/2 teaspoon peppermint extract and a drop of green food coloring (optional). Fold in chocolate chips during the mix-in cycle. It’s like a Thin Mint in ice cream form.
- High-Protein Boost: Use two scoops of protein powder instead of one, and reduce the sugar to 2 tablespoons. The texture will be a bit firmer, but it’s perfect for post-workout recovery.
- Low-Sugar Option: Replace sugar with 2 tablespoons of allulose or monk fruit sweetener. The ice cream will freeze a little harder, so let it sit out for 10 minutes before serving.
I’ve personally tried the peanut butter version at a family barbecue, and it was gone in 20 minutes. My cousin, who’s a self-proclaimed ice cream snob, asked for the recipe. That’s when I knew I had something special.
Serving & Storage Suggestions
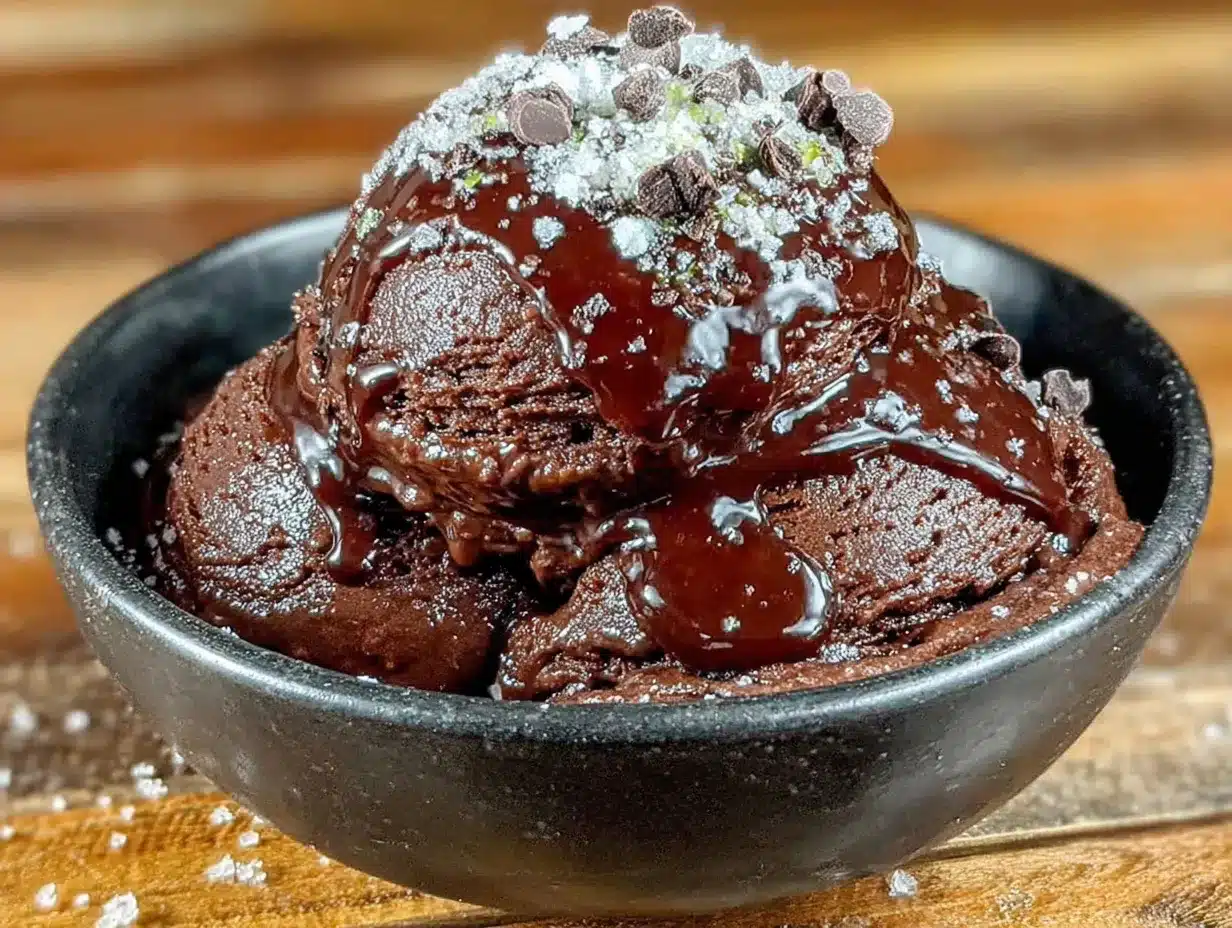
Serve this ice cream straight from the Ninja Creami for the best texture—it’s soft, creamy, and perfect for scooping. I like to serve it in chilled bowls (pop them in the freezer for 10 minutes) to keep it from melting too fast. For a dinner party, top it with fresh raspberries, a drizzle of warm chocolate sauce, or a sprinkle of flaky sea salt. It also pairs beautifully with a warm brownie or a slice of chocolate cake.
If you have leftovers, transfer the ice cream to an airtight container and press a piece of parchment paper directly onto the surface before sealing. This prevents ice crystals from forming. Store in the coldest part of your freezer for up to 2 weeks. When you’re ready to eat, let it sit at room temperature for 10-15 minutes to soften. You can also re-spin it in the Ninja Creami if it gets too hard—just run the “Ice Cream” setting again.
Flavors actually deepen after a day or two in the freezer. The chocolate becomes more pronounced, and the texture gets even smoother. So don’t be afraid to make it ahead of time for your next gathering.
Nutritional Information & Benefits
Per serving (1/2 cup, based on 4 servings per pint):
- Calories: 210
- Protein: 12g
- Fat: 12g
- Carbohydrates: 18g
- Fiber: 3g
- Sugar: 12g
This ice cream is a great source of high-quality protein, thanks to the whey protein powder. Cocoa powder is rich in antioxidants called flavonoids, which support heart health and reduce inflammation. The cream cheese adds a small amount of calcium and vitamin A. If you use dairy-free alternatives, the fat content will vary, but the protein stays high. This recipe is naturally gluten-free and can be made low-carb with sugar substitutes. Potential allergens include dairy and milk protein, so adjust accordingly for your guests.
Conclusion
This Crowd-Pleasing Ninja Creami Chocolate Protein Ice Cream is the dessert I’ve been chasing for two years, and now it’s yours. It’s rich, creamy, and packed with protein—everything you want in a guilt-free indulgence. Whether you’re hosting a summer party, a birthday bash, or just need a sweet treat after a long week, this recipe delivers. I love how versatile it is; you can dress it up with toppings or keep it simple. It’s the kind of recipe that makes you look like a pro, even if you’re just starting out.
So go ahead—grab your Ninja Creami and give it a try. Customize it with your favorite mix-ins, serve it to your friends, and watch their faces light up. I’d love to hear how it turns out! Drop a comment below with your favorite variation, or share a photo of your creation on social media. Happy spinning, friends!
Frequently Asked Questions
Can I use a different protein powder?
Yes, but results vary. Whey protein gives the smoothest texture, while plant-based powders can make the ice cream slightly grainier. If using plant-based, add an extra tablespoon of cream cheese to help with creaminess.
Do I need to use cream cheese?
It’s highly recommended. Cream cheese prevents ice crystals and gives that dense, gelato-like texture. You can substitute with 1 tablespoon of cornstarch mixed with 2 tablespoons of milk, but the texture won’t be as rich.
How long does the base need to freeze?
At least 18 hours, but 24 hours is ideal. A shorter freeze leads to a icy, slushy result. Make sure your freezer is set to 0°F (-18°C) for best results.
Can I double the recipe?
Absolutely. Just double all ingredients and freeze in two separate Ninja Creami pint containers. You can spin them one after the other for a party.
Why is my ice cream crumbly after spinning?
This usually means the base wasn’t frozen solid enough, or your freezer is too warm. Try freezing for the full 24 hours, and run the “Re-spin” function once or twice. If it’s still crumbly, add an extra tablespoon of heavy cream to the base next time.
Pin This Recipe!
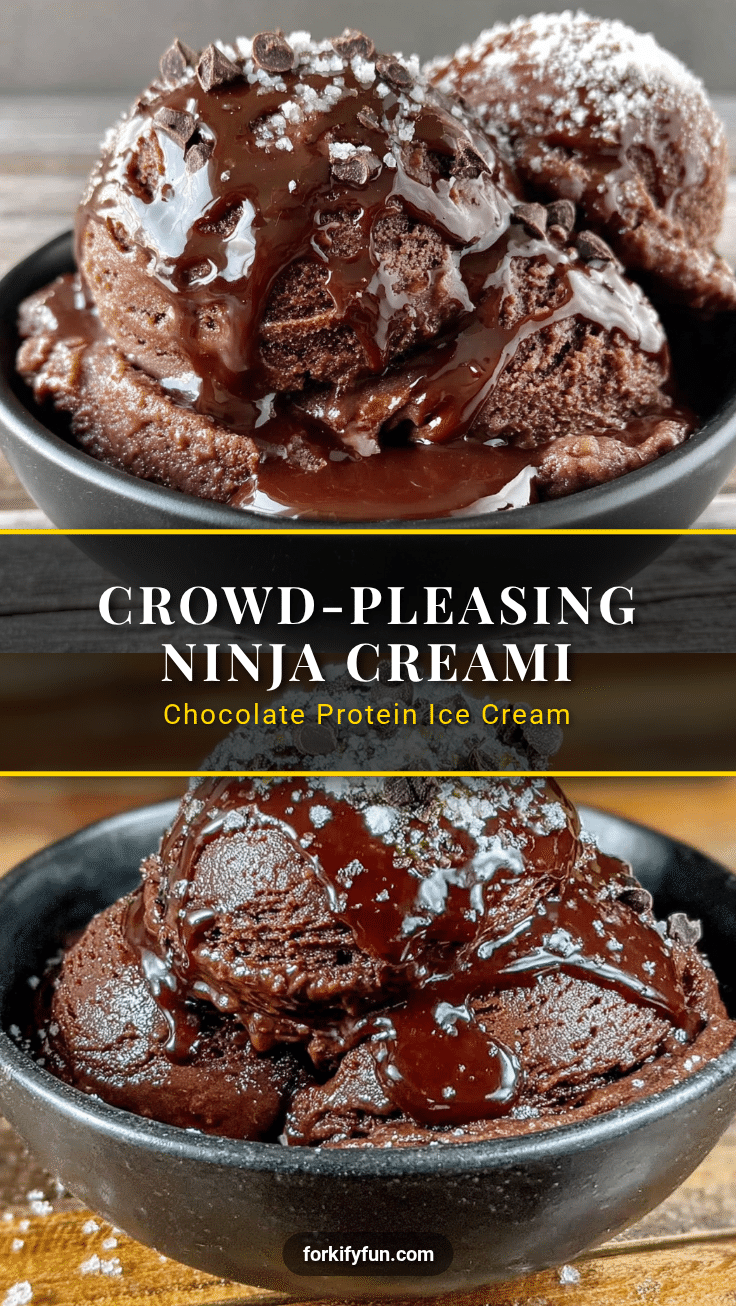
Crowd-Pleasing Ninja Creami Chocolate Protein Ice Cream

A rich, creamy, and protein-packed chocolate ice cream made in the Ninja Creami. This crowd-pleasing dessert is easy to prepare, uses simple ingredients, and delivers a deep chocolate flavor with a smooth, scoopable texture that rivals traditional ice cream.
- Prep Time: 10 minutes
- Cook Time: 0 minutes
- Total Time: 24 hours 10 minutes
- Yield: 4 servings 1x
- Category: Dessert
- Cuisine: American
Ingredients
- 1 cup whole milk
- 1/2 cup heavy cream
- 1/3 cup chocolate protein powder
- 2 tablespoons unsweetened cocoa powder
- 1/4 cup granulated sugar
- 1 teaspoon vanilla extract
- 1 tablespoon cream cheese, softened
- Pinch of salt
- Optional: 2 tablespoons mini chocolate chips
Instructions
- Combine the wet ingredients: In a medium bowl or blender, add 1 cup whole milk, 1/2 cup heavy cream, and 1 teaspoon vanilla extract. Whisk or blend until smooth.
- Add the dry ingredients: Sift in 1/3 cup chocolate protein powder, 2 tablespoons unsweetened cocoa powder, 1/4 cup sugar, and a pinch of salt. If using a blender, pulse a few times until combined. If whisking, stir vigorously to avoid lumps. The mixture should look like a thick, glossy chocolate milk.
- Incorporate the cream cheese: Add 1 tablespoon softened cream cheese to the mixture. Blend or whisk until completely smooth. This step is crucial—if you see tiny white specks, keep mixing. The cream cheese is what gives that dense, creamy texture that doesn’t freeze into a brick.
- Pour into the Ninja Creami pint: Use a spatula to scrape every drop into the pint container. Leave about 1/2 inch of headspace at the top for expansion. Put the lid on tightly.
- Freeze for 24 hours: Place the pint on a flat surface in your freezer. Don’t rush this—18 hours minimum, but 24 is best. I’ve tried 12 hours and ended up with a icy mess. Patience pays off here.
- Spin in the Ninja Creami: Remove the pint from the freezer and take off the lid. Place it in the outer bowl of the Ninja Creami and lock it in place. Select the “Ice Cream” setting. The machine will spin for about 2-3 minutes. You’ll hear it whirring—that’s the sound of success.
- Check the texture: After the first spin, open the lid and check. It should look like soft-serve. If it’s still powdery or crumbly, run the “Re-spin” function once more. I usually need one re-spin for the perfect scoopable texture.
- Add mix-ins (optional): If you’re using mini chocolate chips, make a small well in the center of the ice cream with a spoon, add the chips, then run the “Mix-in” function for 30 seconds. This distributes them evenly without crushing them.
- Serve immediately: Scoop into bowls or cones. The texture is best right after spinning—it’s creamy and soft. If you freeze leftovers, let it sit at room temperature for 5-10 minutes before scooping.
Notes
For best results, freeze the base for a full 24 hours. The cream cheese is essential for a creamy texture—do not skip it. If using plant-based protein powder, add an extra tablespoon of cream cheese. For dairy-free version, use oat milk, coconut cream, and dairy-free cream cheese. Let leftovers sit at room temperature for 5-10 minutes before scooping.
Nutrition
- Serving Size: 1/2 cup
- Calories: 210
- Sugar: 12
- Sodium: 150
- Fat: 12
- Saturated Fat: 7
- Carbohydrates: 18
- Fiber: 3
- Protein: 12
Keywords: chocolate protein ice cream, ninja creami, high protein dessert, healthy ice cream, chocolate ice cream, protein ice cream recipe


