I was standing in line at the post office—a Tuesday, I think, during that weird gray hour between lunch and when the day actually starts moving again—when the woman ahead of me turned around and started talking about cookies. Not just any cookies. She was describing the exact texture I’d been chasing for months: chewy, deeply spiced, with that particular molasses warmth that feels like a hug from the inside out. She was maybe seventy, wearing a cardigan with a small hole near the elbow, and she had just mailed a care package to her granddaughter. “She can’t have gluten,” she said, like it was the most obvious thing in the world. “So I had to figure out how to make them right.”
I wasn’t expecting baking advice from a stranger at the post office, but there I was, clutching a package of my own, listening to her describe exactly how to get that perfect chew without a speck of regular flour. She told me about the three batches she’d ruined—one that turned into hockey pucks, one that spread into a single giant cookie, and one that was so dry it practically crumbled when she looked at it. Honestly, I’ve been there. If you’ve ever tried to make gluten-free cookies that actually taste like the real thing, you know the struggle is real. She laughed about the hockey puck batch, and I laughed with her, and by the time I reached the counter, I had her recipe scribbled on the back of a deposit slip.
That was two winters ago. I’ve made these cozy gluten-free chewy molasses gingerbread cookies at least a dozen times since, tweaking the ratios, testing different flour blends, and finally landing on a version that makes me close my eyes after the first bite. They’re the kind of cookie that fills your kitchen with the smell of ginger and cinnamon and something almost like nostalgia. The kind you make on a cold Sunday afternoon when the world feels a little too loud. The kind that stays soft for days—if they last that long. Let me tell you, that post office lady knew what she was talking about.
Why You’ll Love This Recipe
These aren’t your average gluten-free cookies. I’ve tested this recipe more times than I care to admit, tweaking the flour ratio, the molasses amount, and the chill time until everything clicked. Here’s why this version is the one you’ll come back to again and again:
- Perfectly Chewy Texture : No dry, crumbly disasters here. These cookies have that soft, bendy chew that gluten-filled gingerbread is famous for. The secret is in the blend of flours and the exact chill time—trust me on this one.
- Simple Ingredients : You probably already have most of these in your pantry. No weird gums or obscure starches that require a special trip to the health food store. Just real, recognizable ingredients.
- Deep, Cozy Flavor : The molasses isn’t shy here. Paired with ginger, cinnamon, and a hint of clove, these cookies taste like December in a single bite. They’re warming, spiced, and just sweet enough without being overwhelming.
- Naturally Gluten-Free : No complicated substitutions or weird aftertastes. I’ve had friends who eat gluten tell me these are better than the “real” version—and I’m not going to argue with that.
- Crowd-Pleaser : Bring these to a holiday party or a casual gathering, and watch them disappear. Kids love them. Adults love them. Even the gluten-free skeptics come back for seconds.
- Make-Ahead Friendly : The dough freezes beautifully, so you can prep ahead and bake fresh cookies whenever the craving hits. Perfect for those last-minute cozy evenings.
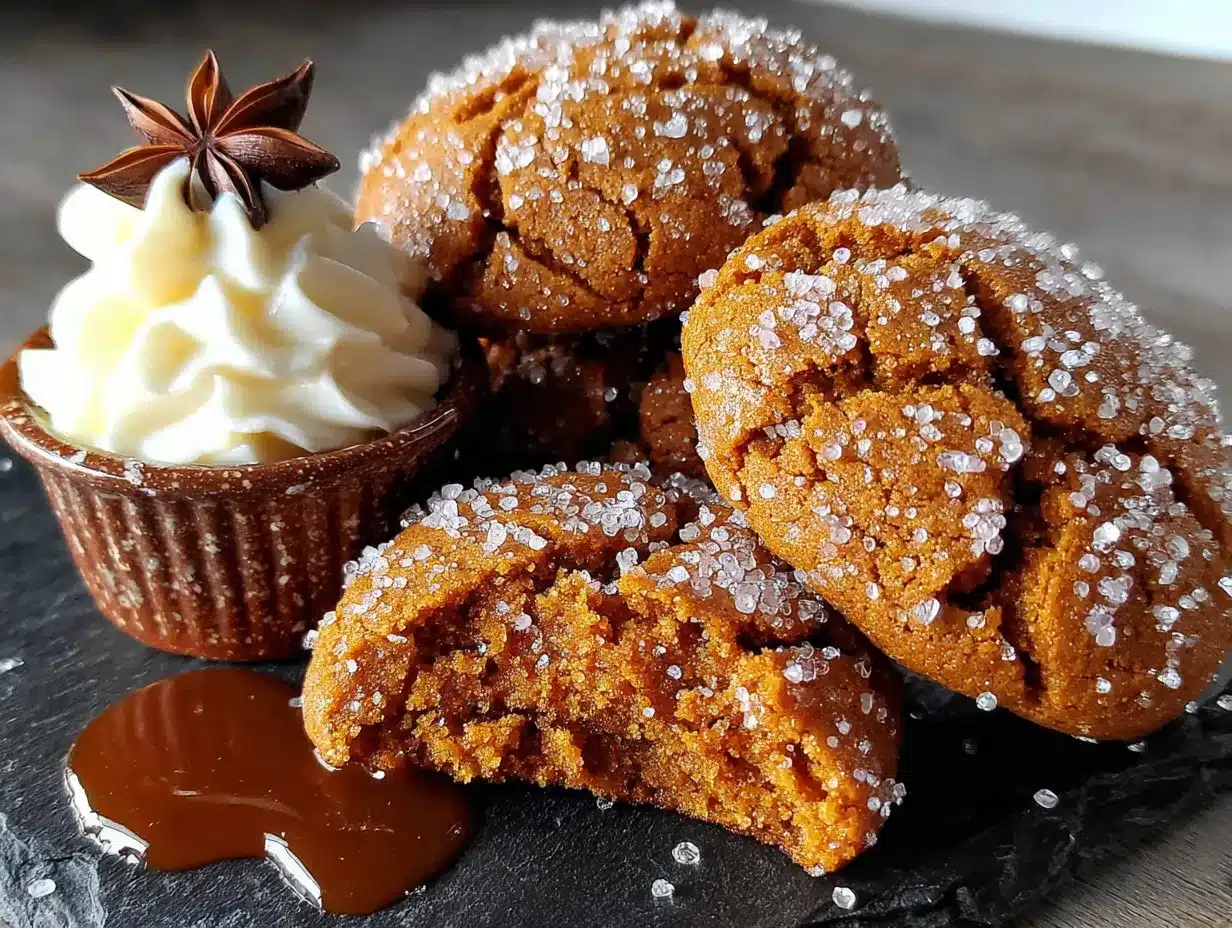
What makes these cookies different from every other gluten-free gingerbread recipe out there? It’s the texture, honestly. Most gluten-free cookies end up either cakey or rock-hard. These strike that perfect middle ground—chewy around the edges, soft in the center, with just a little crackle on top from the sugar coating. I spent weeks testing different flour combinations, different molasses brands, different chill times, and this version is the one that finally made me stop tweaking. It’s comfort food reimagined—healthier, faster, but with the same soul-soothing satisfaction.
What Ingredients You Will Need
This recipe uses simple, wholesome ingredients to deliver that bold, spiced flavor and satisfying chewy texture without any fuss. Most of these are pantry staples, and the ones that aren’t are easy to find at any grocery store.
- Gluten-Free Flour Blend (2 ¼ cups / 280g) – I recommend Bob’s Red Mill 1-to-1 Baking Flour or King Arthur Measure for Measure. These blends already contain xanthan gum, which is crucial for structure. If your blend doesn’t have it, add 1 teaspoon of xanthan gum separately.
- Almond Flour (½ cup / 50g) – This is my secret weapon for tenderness. It adds moisture and a slight nuttiness that complements the molasses beautifully. Don’t skip it—it makes a real difference.
- Unsalted Butter (½ cup / 113g, softened) – Use good-quality butter here. It’s the backbone of the flavor. If you need dairy-free, use a plant-based butter stick (not margarine from a tub).
- Dark Brown Sugar (¾ cup / 150g, packed) – The molasses content in dark brown sugar adds extra depth. Light brown sugar works too, but dark gives you that richer, more complex flavor.
- Molasses (⅓ cup / 110ml) – Use unsulphured molasses, not blackstrap. Blackstrap is too bitter and will throw off the sweetness. Grandma’s or Brer Rabbit are my go-to brands.
- Large Egg (1, room temperature) – Room temperature eggs incorporate more evenly into the batter. If you forgot to take it out ahead of time, place it in a bowl of warm water for 5 minutes.
- Vanilla Extract (1 teaspoon) – Pure vanilla extract, not imitation. It rounds out the spicy notes and adds warmth.
- Ground Ginger (2 teaspoons) – This is the star spice. Use fresh, fragrant ginger powder—old spices lose their punch. I like Simply Organic brand for consistent quality.
- Ground Cinnamon (1 ½ teaspoons) – Sweet and warming, cinnamon pairs perfectly with ginger. Saigon cinnamon is especially fragrant if you can find it.
- Ground Cloves (½ teaspoon) – A little goes a long way. Cloves add that unmistakable holiday depth.
- Baking Soda (1 teaspoon) – This helps the cookies spread just enough and gives them a slight lift. Make sure it’s fresh—test it by dropping a bit into vinegar; it should fizz vigorously.
- Salt (½ teaspoon) – Fine sea salt, not kosher. Salt balances the sweetness and enhances the spices.
- Granulated Sugar (for rolling, about ¼ cup / 50g) – Regular white sugar creates that sparkly, crackly exterior. Turbinado or demerara sugar works too for extra crunch.
One thing I’ve learned the hard way: measure your flour correctly. Spoon it into your measuring cup and level it off with a knife. Scooping directly from the bag packs in too much flour and leads to dry cookies. I ruined an entire batch this way once, and let me tell you, hockey puck cookies are not a good look.
Equipment Needed
You don’t need a fancy kitchen to make these cookies. Here’s what you’ll need:
- Mixing Bowls (one medium, one large) – Glass or stainless steel works best. Avoid plastic bowls that can retain odors.
- Electric Hand Mixer or Stand Mixer – A hand mixer is perfectly fine. A stand mixer with the paddle attachment is even easier. You can do this by hand with a wooden spoon, but your arm will get a workout.
- Baking Sheets (2) – Light-colored, rimmed baking sheets work best. Dark sheets can cause the bottoms to burn before the centers are done.
- Parchment Paper or Silicone Baking Mat – Essential for preventing sticking and ensuring even baking. I prefer parchment for easy cleanup.
- Cooling Rack – Wire racks let air circulate around the cookies so they cool evenly without getting soggy bottoms.
- Cookie Scoop (1.5 tablespoon size) – Not required, but it makes portioning the dough consistent and quick. A regular spoon works too.
- Measuring Cups and Spoons – Accurate measurements are key in gluten-free baking. Use dry measuring cups for dry ingredients and liquid measuring cups for molasses and vanilla.
- Plastic Wrap – For chilling the dough. Reusable beeswax wrap works great too.
I bought a cheap set of cookie scoops from a discount store years ago, and they’re still going strong. You don’t need to spend a fortune on equipment. A good baking sheet, though—that’s worth investing in. I use Nordic Ware aluminum half-sheets, and they’ve never let me down.
Preparation Method
Let’s get baking. This dough needs to chill for at least an hour, so plan ahead. The waiting is worth it, I promise.
-
Cream the butter and sugar. In a large mixing bowl, beat the softened butter and packed dark brown sugar together on medium speed for 2-3 minutes, until light and fluffy. Scrape down the sides of the bowl with a spatula halfway through. The mixture should look pale and aerated—this is where the texture starts coming together.
-
Add the wet ingredients. Pour in the molasses, room temperature egg, and vanilla extract. Beat on medium-low until everything is well combined, about 30 seconds. The mixture might look slightly separated at this point—that’s normal. Don’t panic. Scrape the bowl again to make sure the molasses isn’t hiding at the bottom.
-
Whisk the dry ingredients together. In a separate medium bowl, whisk together the gluten-free flour blend, almond flour, ground ginger, cinnamon, cloves, baking soda, and salt. Whisking ensures the spices and leavening are evenly distributed. Nobody wants a cookie with a pocket of pure baking soda—trust me on this one.
-
Combine wet and dry. Gradually add the dry ingredients to the wet mixture, mixing on low speed. Stop as soon as the flour disappears. Overmixing at this stage can make the cookies tough. The dough will be thick, slightly sticky, and smell absolutely incredible.
-
Chill the dough. This step is non-negotiable. Cover the bowl with plastic wrap and refrigerate for at least 1 hour, or up to 3 days. Chilling firms up the butter, prevents excessive spreading, and allows the flour to fully hydrate. If you skip this, your cookies will turn into flat, sad puddles. I learned this the hard way during a late-night baking session when I was too impatient to wait.
-
Preheat and prep. When you’re ready to bake, preheat your oven to 350°F (175°C). Line two baking sheets with parchment paper or silicone mats.
-
Shape the cookies. Place the granulated sugar for rolling in a small bowl. Using a cookie scoop or tablespoon, portion out rounded tablespoons of dough (about 1.5 tablespoons each). Roll each portion into a smooth ball between your palms, then roll it in the sugar until fully coated. Place the sugared dough balls on the prepared baking sheets, spacing them about 2 inches apart—they spread a little, but not excessively.
-
Bake. Bake one sheet at a time in the center of the oven for 10-12 minutes. The cookies should look puffed, cracked on top, and slightly set around the edges but still soft in the center. They will continue to set as they cool. For chewier cookies, pull them at 10 minutes. For slightly firmer cookies, go to 12 minutes. My sweet spot is 11 minutes.
-
Cool properly. Let the cookies rest on the baking sheet for 5 minutes. This allows them to firm up enough to transfer without breaking. Then move them to a wire cooling rack to cool completely. The smell in your kitchen right now is pure magic.
One thing I always do: press a few extra granules of sugar onto the top of each cookie right after they come out of the oven. It gives them that sparkly, bakery-style finish. Totally optional, but pretty.
Cooking Tips & Techniques
I’ve made more batches of these cookies than I can count, and I’ve learned a few things along the way. Here are the tips that actually matter:
Don’t skip the chill time. I know it’s tempting to rush, but cold dough is the difference between beautiful, thick cookies and flat, greasy messes. The butter needs to be solid when it hits the oven so it melts slowly, creating that perfect chewy texture. If you’re in a hurry, pop the dough in the freezer for 20 minutes instead—but honestly, the fridge is better.
Use a cookie scoop for even sizing. This isn’t just about aesthetics. Cookies that are the same size bake evenly. If some are bigger than others, you’ll end up with a mix of overdone and underdone. A simple 1.5-tablespoon scoop costs a few dollars and makes your life so much easier.
Rotate your baking sheet halfway through. Ovens have hot spots. At the 5-minute mark, quickly turn the baking sheet 180 degrees. This ensures even browning and prevents the back row from getting darker than the front. I forgot to do this once and ended up with cookies that looked like they had a tan line.
Watch the edges, not the center. The centers will look soft and slightly underdone when you pull them out. That’s exactly what you want. Overbaked cookies are dry cookies. Trust the process—they’ll firm up as they cool on the sheet.
Test your baking soda. If your cookies aren’t spreading at all or are spreading too much, your baking soda might be old. Drop a teaspoon of it into a small bowl of vinegar. If it fizzes enthusiastically, it’s good. If it barely bubbles, toss it and buy fresh. This simple test has saved me from countless ruined batches.
Room temperature ingredients matter. Cold butter doesn’t cream properly with sugar. Cold egg can seize the batter. Take everything out of the fridge 30 minutes before you start. Your future self will thank you.
Variations & Adaptations
This recipe is wonderfully flexible. Here are some ways to make it your own:
Vegan Version : Replace the butter with a high-quality plant-based butter stick and use a flax egg (1 tablespoon ground flaxseed mixed with 3 tablespoons water, let sit for 5 minutes). The texture will be slightly less tender, but still delicious. I tested this for a friend who’s vegan, and she said they were “dangerously good.”
Spice It Up : Add ¼ teaspoon of black pepper or cardamom for a more complex spice profile. Black pepper might sound weird, but it actually enhances the ginger and adds a subtle warmth. I tried this on a whim one Christmas, and now I can’t go back.
Chocolate-Dipped : Once the cookies are completely cool, dip half of each cookie in melted dark chocolate and let it set on parchment paper. The combination of spicy gingerbread and rich chocolate is absolutely addictive. I did this for a cookie exchange last year, and people literally asked for the recipe.
Gluten-Free Flour Swap : If you don’t have almond flour, you can substitute it with an additional ½ cup of your gluten-free flour blend. The cookies will be slightly less tender but still good. Coconut flour won’t work here—it absorbs too much moisture and will dry things out.
Add Mix-Ins : Fold in ½ cup of crystallized ginger pieces (chopped small) or ½ cup of dark chocolate chips after the dough comes together. The crystallized ginger adds little bursts of spicy sweetness that are absolutely lovely.
Cut-Out Cookies : If you want to use cookie cutters, increase the flour by 2 tablespoons and chill the dough for at least 2 hours. Roll it out between two sheets of parchment paper to ¼-inch thickness, then cut and bake. These won’t be as chewy, but they hold their shape beautifully for decorating.
Serving & Storage Suggestions
These cookies are best enjoyed slightly warm, when the edges are still soft and the center is perfectly tender. Let them cool on the baking sheet for 5 minutes, then transfer to a cooling rack. If you can wait that long, that is.
Serving Ideas:
- Serve with a tall glass of cold milk or a warm mug of chai tea. The spiced flavors complement each other perfectly.
- Pair with a scoop of vanilla ice cream for an indulgent dessert. The warm cookie + cold ice cream thing? Pure magic.
- Stack them on a pretty plate and dust with powdered sugar for a simple, elegant presentation. Perfect for holiday gatherings.
- Crumble them over a bowl of vanilla yogurt or oatmeal for a quick breakfast treat. Not that I’ve done that. Okay, I’ve done that.
Storage Instructions:
- Room Temperature : Store in an airtight container at room temperature for up to 5 days. Place a slice of bread in the container to keep them extra soft—the cookies will absorb the moisture from the bread. Replace the bread slice every other day.
- Refrigerator : These cookies actually stay soft in the fridge for up to 10 days. Let them come to room temperature before serving for the best texture.
- Freezer : Baked cookies freeze beautifully for up to 3 months. Layer them between sheets of parchment paper in a freezer-safe container. Thaw at room temperature for about 30 minutes. You can also freeze the unbaked dough balls—just portion them, roll in sugar, and freeze on a baking sheet before transferring to a freezer bag. Bake directly from frozen, adding 1-2 minutes to the bake time.
The flavors actually deepen after a day or two in the container. These are the rare cookies that taste even better on day three. If they last that long in your house, that is.
Nutritional Information & Benefits
Per cookie (based on 24 cookies):
- Calories: 145
- Total Fat: 6g
- Saturated Fat: 3g
- Carbohydrates: 21g
- Fiber: 1g
- Sugar: 13g
- Protein: 2g
These numbers are estimates and will vary based on your specific ingredients and portion sizes.
Health Highlights:
- Molasses is a good source of iron, calcium, and magnesium. It’s also lower on the glycemic index than refined sugar, meaning it doesn’t spike your blood sugar as dramatically.
- Ginger has anti-inflammatory properties and can help with digestion. It’s also warming and soothing—perfect for cold weather.
- Almond flour adds healthy fats, vitamin E, and a bit of protein. It also keeps the cookies tender without needing extra butter.
Dietary Notes: These cookies are gluten-free, nut-free (if you omit the almond flour and use an extra ½ cup of gluten-free flour blend), and can be made dairy-free and vegan with the substitutions mentioned above. They contain eggs and butter in the standard version.
I’m not a nutritionist, and I don’t pretend to be one. But I do believe that food should make you feel good—both while you’re eating it and after. These cookies strike that balance. They’re a treat, but they’re made with real, recognizable ingredients that have actual nutritional value. That’s a win in my book.
Conclusion
These cozy gluten-free chewy molasses gingerbread cookies are everything I want in a winter recipe: warm, spiced, comforting, and surprisingly easy to make. They came to me from an unexpected source—a stranger in a post office line—and they’ve become a staple in my kitchen ever since. That’s the thing about good recipes, isn’t it? They find you when you least expect them.
I hope you give these cookies a try. Don’t be afraid to play with the spices or add your own twist—that’s what makes cooking fun. Maybe you’ll add a pinch of cardamom like I sometimes do, or dip them in chocolate, or turn them into ice cream sandwiches. The possibilities are endless, and that’s the beauty of a solid base recipe.
If you make these, I’d love to hear about it. Drop a comment below and let me know how they turned out. Did you make any changes? What did your family think? Sharing recipes is how we connect, and I genuinely love hearing your stories. Until next time, happy baking—and may your kitchen always smell like ginger and molasses.
Frequently Asked Questions
Can I use blackstrap molasses instead of unsulphured molasses?
I wouldn’t recommend it. Blackstrap molasses is much more bitter and less sweet than regular unsulphured molasses. It will dramatically change the flavor and texture of the cookies, making them taste almost burnt. Stick with unsulphured molasses for the best results.
Why did my cookies spread too much?
This usually happens for one of three reasons: the dough wasn’t chilled long enough, the butter was too soft when you mixed it, or your gluten-free flour blend doesn’t have enough binder (xanthan gum). Make sure you chill the dough for at least an hour, and if your flour blend doesn’t contain xanthan gum, add 1 teaspoon to the dry ingredients.
Can I make these cookies dairy-free?
Yes! Use a high-quality plant-based butter stick (like Miyoko’s or Earth Balance) in place of the regular butter. Just make sure it’s a stick, not a spread from a tub—spreads have too much water and will ruin the texture. The cookies will be slightly less tender but still delicious.
How do I know when the cookies are done baking?
Look for puffed, cracked tops and slightly set edges. The centers will look soft and a little underdone—that’s exactly what you want. If the edges are browning too much, your oven might run hot. Try reducing the temperature by 25°F and baking a test cookie to check.
Can I freeze the cookie dough?
Absolutely. Portion the dough into balls, roll them in sugar, and place them on a baking sheet lined with parchment paper. Freeze until solid, then transfer to a freezer bag. Bake directly from frozen, adding 1-2 minutes to the bake time. You’ll have fresh cookies whenever the craving strikes.
Pin This Recipe!
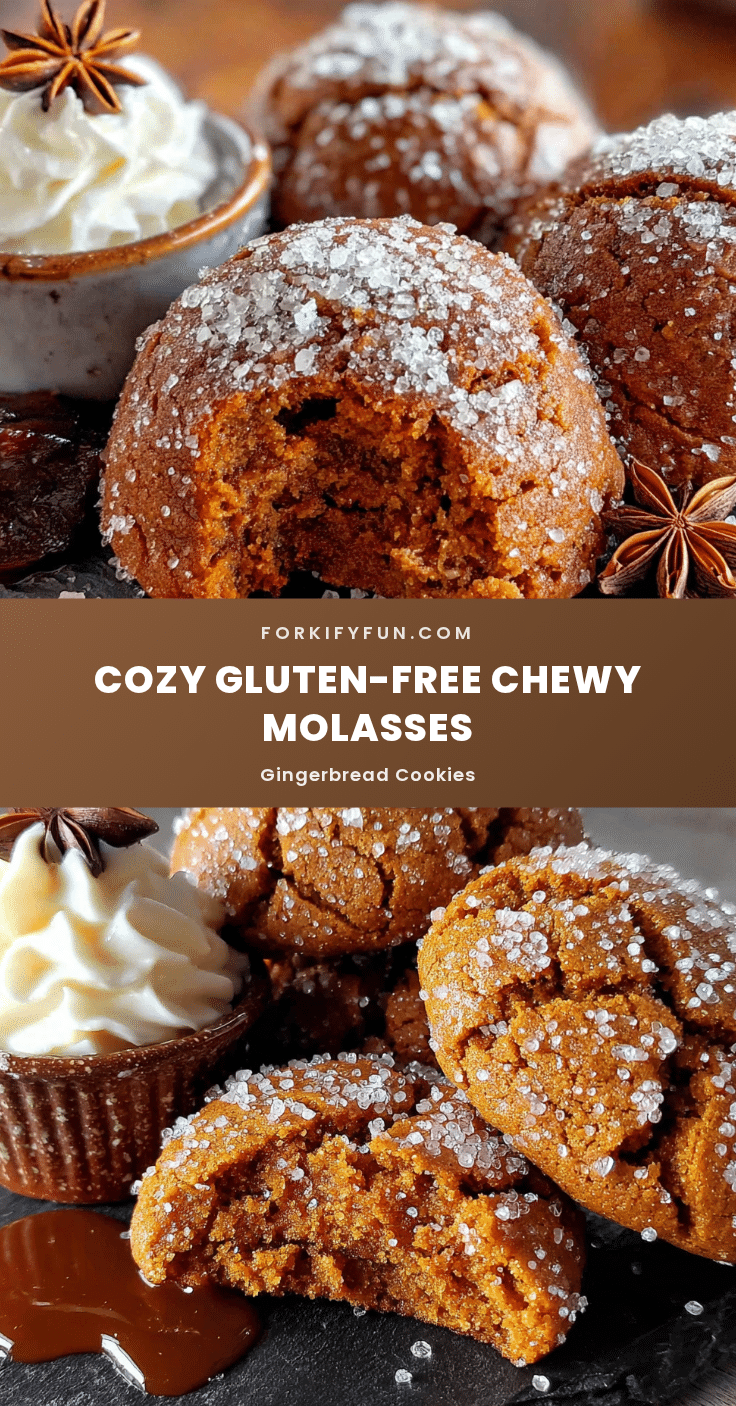
Cozy Gluten-Free Chewy Molasses Gingerbread Cookies

These gluten-free molasses gingerbread cookies are perfectly chewy, deeply spiced, and made with simple ingredients. They deliver that classic gingerbread flavor with a soft, bendy texture that stays fresh for days.
- Prep Time: 15 minutes
- Cook Time: 11 minutes
- Total Time: 1 hour 26 minutes (includes 1 hour chilling)
- Yield: 24 cookies 1x
- Category: Dessert
- Cuisine: American
Ingredients
- 2 ¼ cups (280g) gluten-free flour blend (e.g., Bob’s Red Mill 1-to-1 Baking Flour or King Arthur Measure for Measure)
- ½ cup (50g) almond flour
- ½ cup (113g) unsalted butter, softened
- ¾ cup (150g) dark brown sugar, packed
- ⅓ cup (110ml) unsulphured molasses
- 1 large egg, room temperature
- 1 teaspoon vanilla extract
- 2 teaspoons ground ginger
- 1 ½ teaspoons ground cinnamon
- ½ teaspoon ground cloves
- 1 teaspoon baking soda
- ½ teaspoon fine sea salt
- ¼ cup (50g) granulated sugar (for rolling)
Instructions
- In a large mixing bowl, beat the softened butter and packed dark brown sugar together on medium speed for 2-3 minutes until light and fluffy. Scrape down the sides of the bowl halfway through.
- Add the molasses, room temperature egg, and vanilla extract. Beat on medium-low until well combined, about 30 seconds. The mixture may look slightly separated; that’s normal.
- In a separate medium bowl, whisk together the gluten-free flour blend, almond flour, ground ginger, cinnamon, cloves, baking soda, and salt.
- Gradually add the dry ingredients to the wet mixture, mixing on low speed until just combined. Do not overmix. The dough will be thick, slightly sticky, and fragrant.
- Cover the bowl with plastic wrap and refrigerate for at least 1 hour, or up to 3 days. Chilling is essential for texture.
- When ready to bake, preheat the oven to 350°F (175°C). Line two baking sheets with parchment paper or silicone mats.
- Place the granulated sugar for rolling in a small bowl. Using a cookie scoop or tablespoon, portion out rounded tablespoons of dough (about 1.5 tablespoons each). Roll each portion into a smooth ball, then roll in sugar until fully coated. Place on prepared baking sheets, spacing about 2 inches apart.
- Bake one sheet at a time in the center of the oven for 10-12 minutes. The cookies should look puffed, cracked on top, and slightly set around the edges but still soft in the center.
- Let the cookies rest on the baking sheet for 5 minutes, then transfer to a wire cooling rack to cool completely.
Notes
Don’t skip the chill time—it prevents spreading and ensures a chewy texture. For extra sparkle, press a few extra sugar granules on top of each cookie right after baking. The flavors deepen after a day or two.
Nutrition
- Serving Size: 1 cookie
- Calories: 145
- Sugar: 13
- Sodium: 120
- Fat: 6
- Saturated Fat: 3
- Carbohydrates: 21
- Fiber: 1
- Protein: 2
Keywords: gluten-free cookies, molasses gingerbread, chewy gingerbread, gluten-free gingerbread, holiday cookies, gingerbread cookies


