I had claimed to hate gingerbread houses for about fifteen years. Maybe that sounds dramatic, but honestly, the sticky, crumbly walls, the way the roof always slid off, the royal icing that refused to set—I just didn’t see the point. Then last December, my sister-in-law texted me a photo at 10 PM on a Tuesday. It was a gingerbread cottage, sitting crooked on a parchment-lined sheet, with a tiny chimney made of a pretzel stick. And the caption read: “This one didn’t collapse. I used your dough logic.”
My dough logic. That got me thinking. I mean, I’d spent years developing recipes for cookies that held their shape, for doughs that didn’t spread in the oven. Why had I never applied that same stubbornness to a gingerbread house? So I went back to the kitchen, determined to crack this thing. Not for the nostalgia, not for the holiday cheer—just to prove that a gingerbread house could actually, you know, stand up.
The first batch was too soft. The second one tasted like cardboard. But the third? That was the one. The dough rolled out like a dream, cut cleanly, and baked up sturdy enough to hold a second story. And the royal icing? It finally worked like actual glue, not just sugary disappointment. Let me tell you, there’s a quiet satisfaction in watching something you built stay standing. Maybe you’ve been there—that moment when a kitchen project finally clicks. This recipe is that click.
Why You’ll Love This Recipe
This isn’t just another gingerbread house recipe. I’ve tested this dough six times across three different ovens, and I can tell you with confidence: it works. The walls don’t warp, the roof doesn’t crack, and the icing sets hard enough to hold a candy-cane fence. Here’s what makes it different:
- Sturdy & Reliable: This dough is engineered to hold its shape. No more sagging walls or sliding roofs.
- Simple Ingredients: You probably have everything in your pantry right now—flour, butter, sugar, molasses, spices.
- Perfect for Beginners & Pros: The dough rolls out easily, cuts cleanly, and bakes flat. Even if you’ve never built a house before, you’ll feel like a pro.
- Delicious Enough to Eat: Let’s be honest—most gingerbread houses taste like cardboard. This one is actually good. Spicy, buttery, with a soft snap when you bite into it.
- Royal Icing That Actually Works: This icing sets like cement. You can glue walls together, pipe snow on the roof, and it won’t budge.
I’ve had friends use this recipe for school projects, holiday parties, and even a gingerbread wedding cake topper. It’s the kind of recipe that makes you look like a hero without all the stress. And honestly, that’s the best kind of recipe to have in your back pocket.
What Ingredients You Will Need
This recipe uses simple, pantry-friendly ingredients to deliver a dough that’s strong enough to build with but tasty enough to snack on. Here’s what you’ll need, plus a few notes from my testing sessions.
For the Gingerbread Dough
- All-purpose flour, 4 cups (500g): This is the backbone. Don’t substitute bread flour—it makes the dough too tough to roll. I use King Arthur Flour for consistent results.
- Unsalted butter, 1 cup (226g), cold and cubed: Cold butter is key. It creates a flaky, sturdy dough that doesn’t spread. If you only have salted butter, reduce the added salt by half.
- Brown sugar, packed, 1 cup (200g): Light or dark works. Dark brown sugar gives a deeper molasses flavor and a slightly softer dough—good if you want to eat the scraps.
- Molasses, 1 cup (340g): Use unsulphured molasses, not blackstrap. Blackstrap is too bitter and makes the dough dry. Grandma’s brand is my go-to.
- Large egg, 1: This binds the dough. If your kitchen is warm, use the egg cold from the fridge to keep the butter solid.
- Ground ginger, 2 teaspoons: Fresh ginger won’t work here—it adds too much moisture. Stick with ground.
- Ground cinnamon, 2 teaspoons: For warmth and that classic gingerbread smell.
- Ground cloves, 1/2 teaspoon: A little goes a long way. Too much and it tastes like potpourri.
- Salt, 1/2 teaspoon: Balances the sweetness and strengthens the dough structure.
- Baking soda, 1/2 teaspoon: Just enough to give a slight lift without causing spreading.
For the Royal Icing Glue
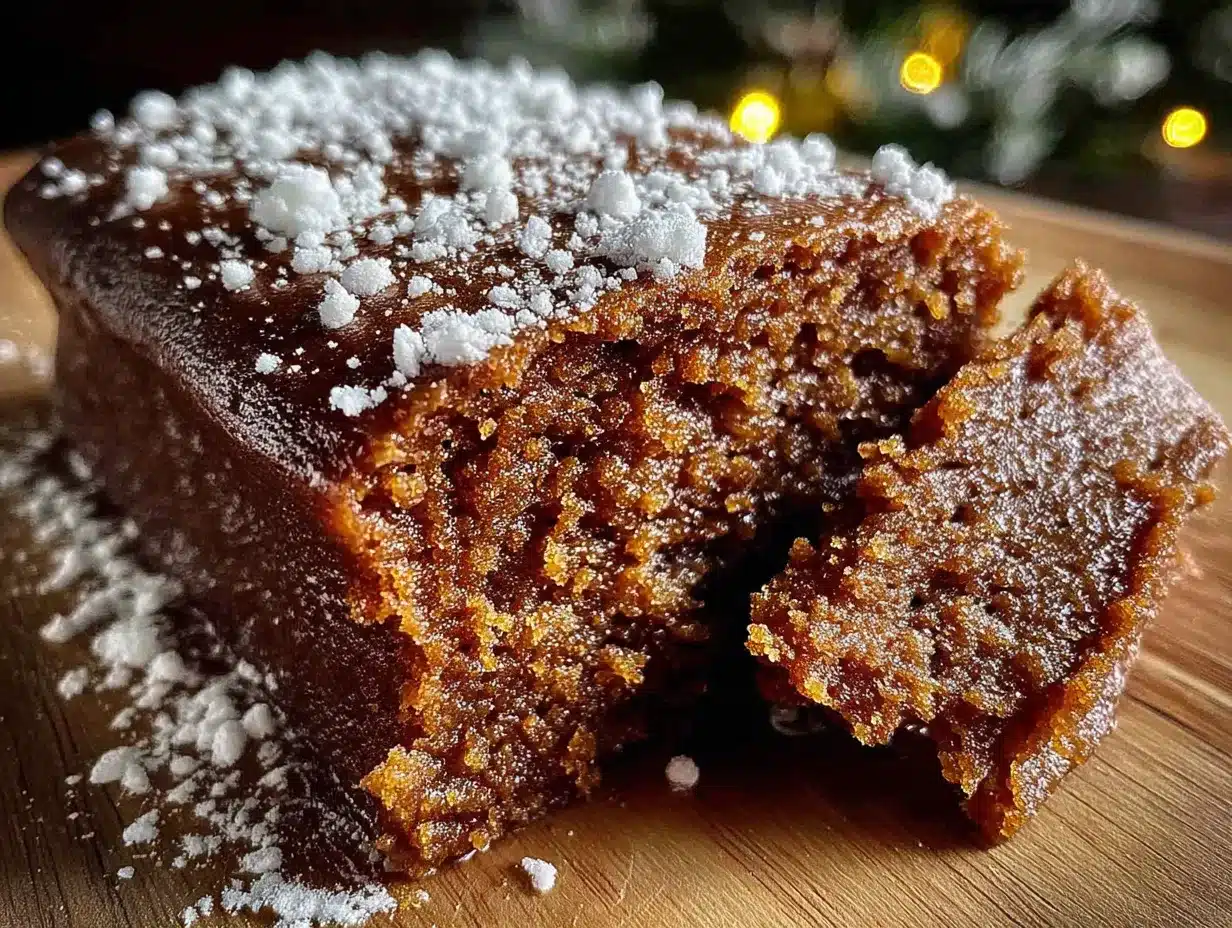
- Powdered sugar, 4 cups (480g): Sift it first if it’s lumpy. Lumps mean clogged piping tips.
- Meringue powder, 3 tablespoons: This is non-negotiable for structural icing. It makes the icing hard and waterproof. You can find it at craft stores or online.
- Warm water, 6-7 tablespoons: Start with 6 and add more if needed. The consistency should be thick but pipeable—think toothpaste, not glue.
- Vanilla extract, 1/2 teaspoon: Optional, but it masks the meringue powder taste.
Substitution Notes: For a dairy-free version, use vegan butter sticks (not tub margarine). The dough will be slightly softer, so chill it an extra 30 minutes. For a gluten-free option, use a 1:1 gluten-free flour blend with xanthan gum. The dough will be more fragile, so handle it gently.
Equipment Needed
You don’t need fancy tools, but a few specific items make this project much easier. Here’s what I use and what you can substitute.
- Rolling pin: A heavy wooden or marble pin works best. If you only have a thin pin, you’ll need to press harder—just be careful not to warp the dough.
- Parchment paper: Essential for rolling and baking. I roll the dough between two sheets to prevent sticking and make transferring easy.
- Sharp knife or pizza cutter: A pizza cutter gives the cleanest edges. If using a knife, make sure it’s razor-sharp—dull knives drag the dough.
- Ruler: For measuring walls and roof pieces. I use a standard 12-inch ruler. A metal one is easier to clean.
- Baking sheets: At least two, so you can bake multiple pieces at once. If you only have one, let it cool completely between batches.
- Piping bags and tips: A small round tip (size 2 or 3) is perfect for gluing and decorating. If you don’t have piping bags, use a zip-top bag with a tiny corner snipped off.
- Cooling rack: Wire racks allow air to circulate, preventing soggy bottoms. If you don’t have one, a clean dish towel works in a pinch.
- Parchment templates: I trace my house pieces onto parchment paper first, then cut around them. This ensures all walls are identical.
Budget Tip: Skip the fancy gingerbread house cookie cutters. A ruler and a sharp knife do the same job for free.
Preparation Method
This recipe takes time, but each step is straightforward. I’ve broken it down so you can follow along without stress. The key is patience—rushing leads to cracked walls and crooked roofs.
Make the Dough
- Cream the butter and sugar: In a large bowl, beat the cold cubed butter with the brown sugar until just combined. You don’t want it fluffy—just mixed. About 2 minutes on medium speed. (I learned this the hard way: over-creaming makes the dough spread.)
- Add the wet ingredients: Beat in the molasses and egg until smooth. The mixture will look a bit separated—that’s normal. Scrape the bowl once.
- Mix the dry ingredients: In a separate bowl, whisk together the flour, ginger, cinnamon, cloves, salt, and baking soda. Slowly add this to the wet mixture, mixing on low until a stiff dough forms. It will be dry and crumbly at first—keep mixing. When it starts to clump together, stop.
- Chill the dough: Divide the dough into two discs, wrap tightly in plastic wrap, and refrigerate for at least 2 hours, or overnight. This is crucial. The dough needs to firm up so it rolls cleanly. I once skipped this step and ended up with a sticky mess that tore apart.
Roll and Cut
- Preheat and prep: Heat your oven to 350°F (175°C). Line two baking sheets with parchment paper.
- Roll the dough: Place one disc between two sheets of parchment paper. Roll to 1/4-inch thickness. If the dough cracks at the edges, let it sit at room temperature for 5 minutes. If it sticks, pop it back in the fridge for 10 minutes.
- Cut the pieces: Using your ruler and knife (or templates), cut out the house pieces. For a standard house, you’ll need:
- 2 side walls (4 x 5 inches)
- 2 front/back walls (5 x 5 inches, with a 3-inch peak)
- 2 roof pieces (4 x 6 inches)
You can also cut a base (6 x 6 inches) from the scraps.
- Transfer carefully: Lift the parchment paper with the cut pieces onto the baking sheet. If a piece breaks, don’t panic—just press the dough back together. It bakes fine.
Bake
- Bake the pieces: Bake for 12-15 minutes, rotating the sheets halfway through. The edges should be firm and slightly darker. The centers will look dry but not browned.
- Cool completely: Let the pieces cool on the baking sheet for 5 minutes, then transfer to a wire rack. Do not move them while they’re hot—they’re fragile. Let them cool for at least 30 minutes before handling.
- Trim if needed: If any edges have spread slightly, use a sharp knife to trim them while the pieces are still warm. This ensures straight walls.
Make the Royal Icing Glue
- Combine ingredients: In a large bowl, whisk together the powdered sugar and meringue powder. Add 6 tablespoons of warm water and the vanilla. Beat on medium-high for 5 minutes, until the icing is thick, glossy, and forms stiff peaks.
- Check consistency: The icing should hold its shape when you lift the beater. If it’s too runny, add more powdered sugar, 1 tablespoon at a time. If too thick, add water, 1 teaspoon at a time.
- Keep covered: Royal icing dries fast. Cover the bowl with a damp paper towel while you work. If it crusts over, just stir it back to life.
Assemble the House
- Pipe the glue: Fit your piping bag with a small round tip. Pipe a thick line of icing along the bottom edge of one side wall. Press it onto the base. Hold for 30 seconds—it’ll start to set.
- Build the walls: Pipe icing along the side edges of the front wall and attach it to the side wall. Repeat for the back wall and second side wall. Let the walls set for 15 minutes before adding the roof.
- Add the roof: Pipe a thick line of icing along the top edges of all four walls. Press one roof piece on, holding for 30 seconds. Repeat with the second roof piece, making sure they meet at the peak. Let the whole thing dry for at least 1 hour before decorating.
Cooking Tips & Techniques
I’ve made every mistake you can imagine with gingerbread houses. Here’s what I learned so you don’t have to repeat my errors.
Chill the dough twice: The first chill is for rolling, the second is for the cut pieces. After cutting, pop the baking sheet in the fridge for 15 minutes before baking. This prevents spreading and keeps your walls straight. I forgot this step once and ended up with walls that looked like melted candles.
Use a ruler for everything: Eyeballing wall sizes is a recipe for a lopsided house. Measure twice, cut once. I keep a ruler on my counter and check every piece before baking.
Bake in batches if needed: If your oven is small, bake the walls first, then the roof pieces. Don’t overcrowd the baking sheet—pieces need space for air to circulate. I once tried to fit everything on one sheet and the edges touched, fusing two walls together.
Test the icing consistency: Before you start gluing, pipe a small dot on a plate. If it holds its shape without flattening, you’re good. If it spreads, add more powdered sugar. Royal icing that’s too runny is the number one reason houses collapse.
Work in stages: Don’t try to assemble the whole house in one go. Build the walls, let them set for 15 minutes, then add the roof. Rushing leads to sliding walls and a frustrated cook. I’ve been there—it’s not fun.
Keep a damp towel handy: Royal icing crusts quickly. Cover your piping tip with a damp paper towel when you’re not using it. Otherwise, you’ll be unclogging tips every five minutes.
Variations & Adaptations
This recipe is flexible. Here are a few ways to make it your own, depending on what you have on hand or what you’re craving.
Spice It Up: Add 1/2 teaspoon of cardamom or allspice to the dough for a more complex flavor. I tried this last year with a batch for a friend who loves chai tea, and it was a hit. The spices don’t affect the structure, so go wild.
Chocolate Gingerbread: Replace 1/4 cup of the flour with unsweetened cocoa powder. The dough will be slightly darker and richer. The cocoa adds a bit of bitterness that balances the sweet icing. I made a chocolate version for a Halloween haunted house and it looked amazing against orange candy corn.
Gluten-Free Option: Use a 1:1 gluten-free flour blend that contains xanthan gum. The dough will be more crumbly, so handle it gently. Chill it for an extra 30 minutes before rolling. I’ve tested this with Bob’s Red Mill blend and it works—just expect a slightly softer bite.
Vegan Version: Substitute the butter with vegan butter sticks and the egg with a flax egg (1 tablespoon ground flaxseed + 3 tablespoons water, let sit for 5 minutes). The dough will be a bit more fragile, so roll it between parchment and chill thoroughly. The royal icing is naturally vegan if you use meringue powder (which is egg-free).
Mini Houses: Cut the pieces half the size for tiny gingerbread cottages. They bake faster—8 to 10 minutes—and are perfect for party favors or gift tags. I made a batch of these for my niece’s class and they were gone in minutes.
Serving & Storage Suggestions
Gingerbread houses are more about display than eating, but this one actually tastes good. Here’s how to serve, store, and keep it looking fresh.
Serving: Display your house on a cake stand or a large platter. It’s the centerpiece of any holiday table. If you’re serving it as a dessert, break it apart with a heavy knife—the walls are sturdy but not unbreakable. Serve with hot cocoa or mulled cider for the full effect.
Storage: An assembled gingerbread house will last for weeks if stored properly. Keep it in a cool, dry place away from direct sunlight. Humidity is the enemy—it softens the dough and makes the icing sticky. If your kitchen is humid, store the house in a cardboard box with a loose lid. I once left a house on a counter near a steaming kettle and the roof drooped within hours.
Freezing: You can freeze the baked pieces (unassembled) for up to 3 months. Wrap each piece tightly in plastic wrap, then foil. When you’re ready to assemble, let them come to room temperature for 30 minutes. The royal icing should be made fresh—frozen icing loses its structure.
Reheating: Don’t. The gingerbread is meant to be eaten at room temperature. If you want a warm treat, bake a separate batch of gingerbread cookies from the same dough (just roll and cut into shapes, bake for 10 minutes).
Flavor Development: The gingerbread actually tastes better after a day or two. The spices mellow and the texture firms up. If you’re planning a party, bake the pieces a week ahead and assemble the day before. The flavors will be perfectly balanced.
Nutritional Information & Benefits
Let’s be honest—gingerbread houses aren’t health food. But this recipe uses real ingredients, and there are a few silver linings. Here’s the breakdown per serving (1 wall piece, about 1/12 of the house):
Estimated Nutrition (per piece, without icing): 220 calories, 8g fat, 35g carbohydrates, 3g protein, 1g fiber, 18g sugar. The royal icing adds about 60 calories per tablespoon.
Health Highlights: Molasses is a good source of iron and calcium. Ginger has anti-inflammatory properties. Cinnamon may help regulate blood sugar. So while this isn’t a health food, it’s not empty calories either.
Dietary Considerations: This recipe contains gluten, dairy, and eggs. For gluten-free and vegan options, see the variations section. The royal icing is naturally nut-free and soy-free if you use meringue powder (check the label).
Allergen Note: If you’re serving a crowd, label the house clearly. I once had a friend with a nut allergy assume the candy decorations were safe—they weren’t. Stick with plain candies like gumdrops and peppermints if allergies are a concern.
My Perspective: I believe in balance. This gingerbread house is a once-a-year indulgence, made with real butter and molasses, not artificial flavors. Enjoy it for what it is: a fun project that tastes good and brings people together. That’s worth a few extra calories.
Conclusion
This sturdy gingerbread house dough with royal icing glue is the recipe I wish I’d had fifteen years ago. It’s the one that finally made me stop hating gingerbread houses and start enjoying the process. The dough rolls like a dream, bakes flat, and holds its shape. The icing sets like cement. And honestly, the whole thing tastes pretty great too.
I hope you give this recipe a try—not because it’s perfect, but because it’s forgiving. If a wall cracks, you can glue it. If the roof slides, you can prop it up with a candy cane. There’s no wrong way to build a gingerbread house, as long as you’re having fun. And if you end up eating more scraps than you decorate? That’s part of the tradition.
I’d love to see what you create. Share your gingerbread house photos in the comments, or tag me on social media. Tell me about your own kitchen disasters and victories. And if you have a variation that works better than mine, let me know—I’m always learning. Happy building!
Frequently Asked Questions
Why did my gingerbread dough spread in the oven?
This usually happens if the dough wasn’t chilled enough before baking. After cutting your pieces, pop the baking sheet in the fridge for 15 minutes. Also, make sure your butter was cold when you started—room-temperature butter causes spreading.
Can I use this recipe for gingerbread cookies?
Absolutely! Roll the dough to 1/4-inch thickness, cut into shapes, and bake for 10-12 minutes at 350°F (175°C). The cookies will be slightly softer than the house pieces but still hold their shape perfectly.
How long does the royal icing take to dry?
Royal icing sets in about 15 minutes for gluing walls, but it takes 1-2 hours to fully harden. For best results, let the assembled house dry overnight before adding heavy decorations. Humidity affects drying time, so be patient.
My house collapsed during assembly. What went wrong?
Most collapses happen because the icing was too thin or the walls weren’t supported long enough. Make sure your icing is thick enough to hold a stiff peak. Hold each wall in place for 30 seconds, and let the walls set for 15 minutes before adding the roof.
Can I make the dough ahead of time?
Yes! The dough keeps in the refrigerator for up to 5 days, wrapped tightly in plastic. You can also freeze it for up to 3 months. Thaw overnight in the fridge before rolling. The baked pieces can also be frozen for up to 3 months.
Pin This Recipe!
Easy Sturdy Gingerbread House Dough with Royal Icing Glue

This gingerbread house dough is engineered to hold its shape, with walls that don’t warp, a roof that doesn’t crack, and royal icing that sets like cement. It’s a forgiving recipe that’s perfect for beginners and pros alike, and it actually tastes delicious.
- Prep Time: 30 minutes
- Cook Time: 15 minutes
- Total Time: 2 hours 45 minutes (includes chilling and cooling)
- Yield: 1 standard gingerbread house (about 12 servings) 1x
- Category: Dessert
- Cuisine: American
Ingredients
- 4 cups (500g) all-purpose flour
- 1 cup (226g) unsalted butter, cold and cubed
- 1 cup (200g) packed brown sugar (light or dark)
- 1 cup (340g) unsulphured molasses
- 1 large egg
- 2 teaspoons ground ginger
- 2 teaspoons ground cinnamon
- 1/2 teaspoon ground cloves
- 1/2 teaspoon salt
- 1/2 teaspoon baking soda
- 4 cups (480g) powdered sugar
- 3 tablespoons meringue powder
- 6–7 tablespoons warm water
- 1/2 teaspoon vanilla extract (optional)
Instructions
- Make the dough: In a large bowl, beat cold cubed butter with brown sugar until just combined (about 2 minutes on medium speed). Beat in molasses and egg until smooth. In a separate bowl, whisk together flour, ginger, cinnamon, cloves, salt, and baking soda. Slowly add dry ingredients to wet mixture, mixing on low until a stiff dough forms. Divide dough into two discs, wrap tightly in plastic wrap, and refrigerate for at least 2 hours or overnight.
- Roll and cut: Preheat oven to 350°F (175°C). Line two baking sheets with parchment paper. Roll one disc between two sheets of parchment paper to 1/4-inch thickness. Using a ruler and sharp knife or pizza cutter, cut out house pieces: 2 side walls (4×5 inches), 2 front/back walls (5×5 inches with a 3-inch peak), and 2 roof pieces (4×6 inches). Transfer cut pieces to baking sheets.
- Bake: Bake for 12-15 minutes, rotating sheets halfway through. Edges should be firm and slightly darker. Cool on baking sheet for 5 minutes, then transfer to a wire rack to cool completely (at least 30 minutes). Trim any spread edges while still warm if needed.
- Make royal icing: In a large bowl, whisk together powdered sugar and meringue powder. Add 6 tablespoons warm water and vanilla. Beat on medium-high for 5 minutes until thick, glossy, and forms stiff peaks. Adjust consistency if needed (add more powdered sugar if too runny, more water if too thick). Keep covered with a damp paper towel.
- Assemble the house: Pipe a thick line of icing along the bottom edge of one side wall and press onto the base. Hold for 30 seconds. Pipe icing along side edges of front wall and attach to side wall. Repeat for back wall and second side wall. Let walls set for 15 minutes. Pipe icing along top edges of all walls, press one roof piece on (hold 30 seconds), then repeat with second roof piece. Let dry for at least 1 hour before decorating.
Notes
Chill the dough twice: once before rolling and again after cutting (15 minutes in fridge before baking) to prevent spreading. Use a ruler for precise measurements. Work in stages when assembling—let walls set before adding roof. Royal icing dries quickly; keep covered with a damp towel. For best flavor, bake pieces a day ahead and assemble the day before serving.
Nutrition
- Serving Size: 1 wall piece (about
- Calories: 220
- Sugar: 18
- Sodium: 150
- Fat: 8
- Saturated Fat: 5
- Carbohydrates: 35
- Fiber: 1
- Protein: 3
Keywords: gingerbread house, gingerbread dough, royal icing, holiday baking, Christmas recipe, sturdy gingerbread, gingerbread house recipe


