Linda wasn’t trying to impress anyone. I’d stopped by to drop off a casserole dish she’d lent me, and the smell of chocolate and mint hit me before I even got through the front door. She looked up from the stove, spoon in hand, and said, “Oh, you’re just in time. I’m making a mess.”
That’s the thing about people who cook without thinking about it. They don’t realize they’re doing something special. Linda was just throwing together a batch of her “winter mix” for holiday gifts. No fancy labels, no Pinterest-worthy jars. Just a big bowl on the counter and a kid’s measuring cup. And honestly? It was the best hot cocoa I’d ever tasted.
I stood there watching her, trying to memorize what she was doing. She’d grab a handful of this, a pinch of that, all while telling me about her son’s soccer game. The whole thing took maybe ten minutes. When I asked for the recipe, she actually laughed. “There’s no recipe. I just make it.”
So I went home and spent the next week figuring it out. Measuring, tasting, adjusting. Maybe you’ve been there — that moment when something so simple is so good you can’t let it go. This peppermint hot cocoa mix in a jar is the result of that obsession. And let me tell you, it’s become my go-to gift for everyone I know.
It’s the kind of recipe that makes you look like you put in way more effort than you actually did. Which, honestly, is my favorite kind of recipe.
Why You’ll Love This Recipe
This isn’t just another hot cocoa mix. I’ve tested this version more times than I care to admit, tweaking the ratios until the chocolate-to-mint balance was absolutely perfect. Here’s why this one stands out:
- Quick & Easy : Comes together in about 10 minutes flat. No baking, no complicated steps, no special skills needed.
- Simple Ingredients : You probably have most of these in your pantry right now. No weird additives or hard-to-find items.
- Perfect for Gifting : These jars make the most thoughtful homemade presents for neighbors, teachers, coworkers, and holiday hosts.
- Crowd-Pleaser : Kids and adults both go crazy for it. I’ve yet to meet someone who doesn’t love a good cup of peppermint cocoa.
- Unbelievably Delicious : The combination of rich chocolate and cool peppermint is next-level comfort in a mug.
What makes this recipe different from all the others? It’s the ratio. Most mixes are too sweet or too minty. I spent a ridiculous amount of time perfecting the balance so every sip tastes like a cozy winter afternoon. Plus, the addition of powdered milk means you just add hot water — no need to heat up milk on the stove. That’s a game-changer when you’re hosting a crowd or just want cocoa in your pajamas.
This recipe is the kind that makes you close your eyes after the first sip. It’s comfort in a cup — simple, warm, and exactly what you need on a cold day.
What Ingredients You Will Need
This peppermint hot cocoa mix uses simple, pantry-friendly ingredients to deliver that rich, creamy, minty flavor without any fuss. Most of these are staples you might already have, and the rest are easy to find at any grocery store.
For the Hot Cocoa Mix
- 2 cups powdered sugar (adds sweetness and helps the mix dissolve smoothly)
- 1 ½ cups unsweetened cocoa powder (I prefer Ghirardelli or Hershey’s Special Dark for a richer chocolate flavor)
- 2 ½ cups powdered milk (creates that creamy texture without needing fresh milk — Carnation works great)
- 1 cup powdered non-dairy creamer (adds extra creaminess; use a flavored vanilla creamer for more depth)
- ½ cup granulated sugar (balances the bitterness of the cocoa)
- 1 teaspoon salt (trust me on this — it enhances the chocolate flavor)
- 1 cup crushed peppermint candies (about 30-40 hard peppermint candies, crushed finely. You can also use candy canes)
For Serving
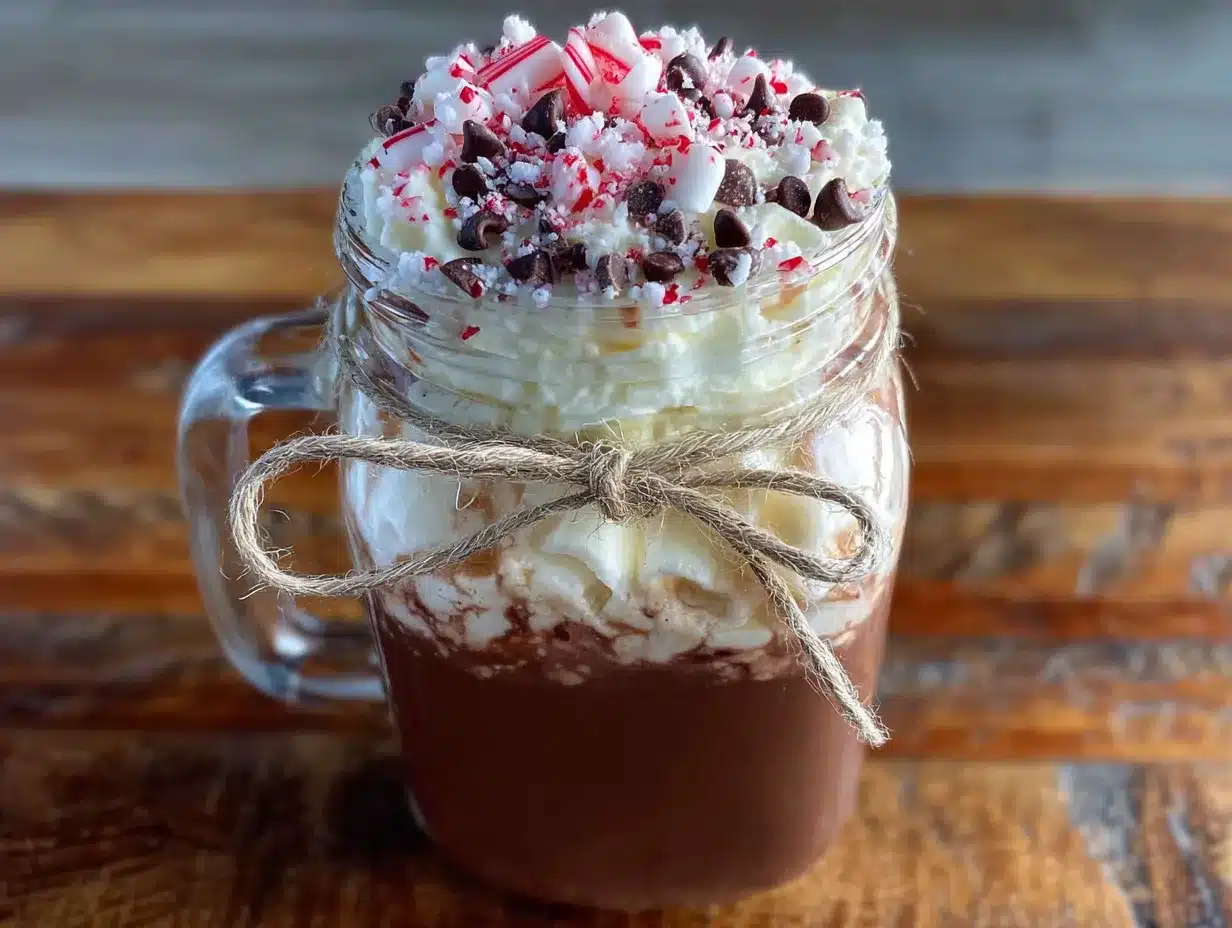
- Hot water or hot milk (water works fine with the powdered milk in the mix, but hot milk makes it extra decadent)
- Whipped cream (optional, but highly recommended for that coffee shop feel)
- Extra crushed peppermint (for garnish)
- Mini marshmallows (because why not?)
Ingredient Tips: Look for high-quality cocoa powder — it makes a real difference in the final taste. If you can find Dutch-processed cocoa, even better. For the peppermint candies, I like using the starlight mints or candy canes that are starting to get a little stale in the back of the cupboard. They crush easier! If you’re making this for someone who avoids dairy, you can substitute the powdered milk and creamer with dairy-free alternatives like coconut milk powder and soy creamer. Just keep in mind the flavor will be slightly different — still delicious, just different.
Equipment Needed
You don’t need much for this recipe, which is part of its charm. Here’s what you’ll need:
- Mixing bowl (a large one — things can get dusty)
- Whisk (for combining everything evenly)
- Measuring cups and spoons
- Plastic zip-top bag or food processor (for crushing the peppermint candies)
- Rolling pin or mallet (if using the bag method)
- Fine-mesh sieve (optional, but helps sift the cocoa powder if it’s lumpy)
- Funnel (makes filling jars much less messy)
- Glass jars with tight-fitting lids (quart-sized mason jars work perfectly — one batch fills about 3-4 jars)
- Labels or tags (for gift-giving, plus attaching serving instructions)
I’ve made this mix using just a fork and a bowl when I couldn’t find my whisk. It works, but a whisk really does make the blending easier. If you don’t have a food processor for the peppermint, the old-fashioned bag-and-rolling-pin method is oddly satisfying. Just be careful not to crush the bag too aggressively — I’ve had a few peppermint explosions in my kitchen!
Preparation Method
This comes together in about 10 minutes, maybe 15 if you’re taking your time. Here’s how to do it:
- Crush the peppermint candies. Place them in a sturdy plastic zip-top bag and seal it tight. Use a rolling pin or mallet to crush them into small pieces. You want them fine enough to dissolve easily but with a few tiny chunks for texture. Aim for a mix of powder and small bits. (Pro tip: put the bag on a towel to muffle the noise — your family will thank you.)
- Sift the cocoa powder. If your cocoa powder has lumps (and it probably does), sift it into your large mixing bowl using a fine-mesh sieve. This step isn’t strictly necessary, but it makes the final mix smoother and prevents clumps in your cocoa.
- Add the dry ingredients. To the sifted cocoa, add the powdered sugar, powdered milk, non-dairy creamer, granulated sugar, and salt. Whisk everything together until well combined. Really get in there — you want all the colors to blend into a uniform light brown.
- Add the crushed peppermint. Pour in your crushed candies and whisk again until they’re evenly distributed throughout the mix. The peppermint pieces should be visible but spread out.
- Test the mix. Before you fill your jars, make a test cup. Stir 3 tablespoons of the mix into 6-8 ounces of hot water. Taste it. Need more chocolate? Add a bit more cocoa. Too sweet? Next time, cut back on the powdered sugar. This is your chance to adjust before committing to jars.
- Fill the jars. Use your funnel to pour the mix into clean, dry glass jars. Leave about an inch of headspace at the top so you can shake the jar before using it. Tap the jar gently on the counter to settle the mix.
- Seal and label. Screw the lids on tight. If you’re giving these as gifts, attach a tag with the serving instructions: “Stir 3 tablespoons of mix into 6-8 ounces of hot water or milk. Stir well and enjoy!”
A note on timing: The actual hands-on time is about 10 minutes. The crushing takes the longest, but it’s also the most fun. I usually put on a podcast and zone out while I’m smashing candy. Very therapeutic.
Cooking Tips & Techniques
After making this mix more times than I can count, I’ve picked up a few tricks that make the process smoother and the results better.
Crush the peppermint in batches. If you try to crush too many candies at once, they don’t break evenly. I do about 10-15 at a time in the bag. Also, be careful not to over-crush. You want some texture, not just powder. I learned this the hard way when I got too enthusiastic and ended up with peppermint dust. It still tasted fine, but the visual appeal was missing.
Use a fork to break up lumps. Even after sifting, the powdered milk and creamer can form small clumps. A fork works better than a whisk for breaking these up. Just run it through the mix like you’re fluffing rice.
Don’t skip the salt. I know it sounds weird in a sweet drink, but salt is a flavor enhancer. It makes the chocolate taste more chocolatey and balances the sweetness. You won’t taste it directly, but you’ll notice if it’s missing.
Make a double batch. Seriously. This mix disappears fast. I always make at least double what I think I need. One batch for gifting, one batch for the pantry. And maybe a third batch because you’ll want to keep sipping it all winter long.
Store in a cool, dark place. The mix will keep for up to 6 months in an airtight container. But let’s be real — it won’t last that long. Keep it away from heat and moisture, which can cause clumping. If you live in a humid climate, add a food-grade silica gel packet to the jar to absorb excess moisture.
Variations & Adaptations
This recipe is incredibly flexible. Here are some of my favorite ways to change it up:
- Dark Chocolate Peppermint: Swap half the regular cocoa powder for dark cocoa powder (like Hershey’s Special Dark). The deeper chocolate flavor pairs beautifully with the mint. This is my personal favorite version.
- White Chocolate Peppermint: Replace the cocoa powder with an equal amount of white chocolate powdered drink mix (like Swiss Miss White Chocolate). You’ll get a creamy, vanilla-mint flavor that’s totally different but equally delicious.
- Spicy Mexican Hot Cocoa: Add 1 teaspoon of cinnamon, ¼ teaspoon of cayenne pepper, and a pinch of nutmeg to the mix. The heat from the spices contrasts with the cool peppermint in a way that’s surprisingly addictive.
- Vegan Version: Use powdered coconut milk instead of powdered dairy milk, and a dairy-free powdered creamer. Most peppermint candies are already vegan, but double-check the label. The texture will be slightly thinner, but still creamy and satisfying.
- Extra Minty: Add ½ teaspoon of peppermint extract (not oil) to the mix. Stir it in thoroughly and let it dry for a few hours before jarring. This gives an intense mint kick that mint lovers will adore.
I once made a batch with crushed chocolate-mint candies instead of plain peppermint. It was a happy accident — I grabbed the wrong bag at the store — but it turned out amazing. The chocolate coating on the candies melted into the mix, making it even richer. So don’t be afraid to experiment!
Serving & Storage Suggestions
This peppermint hot cocoa mix is perfect for cozy nights in, holiday gatherings, or as a thoughtful homemade gift. Here’s how to serve and store it:
Serving Temperature: For the best experience, use hot milk instead of water. Heat it on the stove or in the microwave until steaming (not boiling), then stir in 3 tablespoons of mix per 6-8 ounces. Top with whipped cream, a sprinkle of crushed peppermint, and maybe a mini candy cane for that coffee shop look.
Presentation Tips: When gifting, layer the mix in the jar for a pretty striped effect. Start with a layer of the cocoa mix, then a layer of crushed peppermint, then more mix. Repeat until the jar is full. Tie a ribbon around the neck and attach a tag with instructions. It looks beautiful and shows you put thought into it.
What to Serve Alongside: This cocoa pairs beautifully with buttery shortbread cookies, gingerbread, or a slice of peppermint bark. For a full dessert spread, serve it alongside a plate of assorted Christmas cookies. It’s also fantastic with a scoop of vanilla ice cream floating on top — trust me on this one.
Storage Instructions: Keep the mix in an airtight container in a cool, dark place. It will stay fresh for up to 6 months. If you notice clumping, just break them up with a fork before using. Do not refrigerate — the moisture in the fridge will cause the powdered milk to clump.
Reheating Tips: If your cocoa gets cold, reheat it gently on the stove or in the microwave. Stir well before drinking, as the mix can settle. The flavor actually deepens a bit as it sits, so leftover cocoa (if you have any) tastes even better the next day.
Nutritional Information & Benefits
While this is definitely a treat, there are a few bright spots worth mentioning. Here’s the approximate nutrition for one serving (3 tablespoons of mix prepared with water):
| Nutrient | Amount Per Serving |
|---|---|
| Calories | 180 |
| Total Fat | 4g |
| Saturated Fat | 3g |
| Cholesterol | 5mg |
| Sodium | 220mg |
| Total Carbohydrates | 34g |
| Dietary Fiber | 2g |
| Sugars | 28g |
| Protein | 4g |
| Calcium | 150mg (15% DV) |
| Iron | 1.5mg (8% DV) |
Health Highlights: Cocoa powder is rich in antioxidants called flavonoids, which can support heart health and improve blood flow. The powdered milk adds calcium and vitamin D, which are important for bone health. Peppermint has been shown to aid digestion and provide a natural energy boost without caffeine.
Dietary Considerations: This recipe contains dairy from the powdered milk and creamer. It can be made vegan with substitutions as noted above. It is gluten-free as written, but always check labels on your peppermint candies. The sugar content is significant, so this is best enjoyed as an occasional treat rather than an everyday beverage.
I like to think of this as a “makes you feel good” drink — not just because of the flavor, but because of the memories attached to sharing a warm cup with someone you care about.
Conclusion
This easy DIY peppermint hot cocoa mix in a jar is more than just a recipe — it’s a way to share warmth and comfort with the people you love. It takes ten minutes to make, uses simple ingredients, and produces a drink that tastes like a hug in a mug. What’s not to love?
I encourage you to make a batch for yourself and a few for the people who make your life brighter. Customize it with dark chocolate, spice it up, or keep it classic. However you make it, know that you’re creating something special — a little jar of winter magic that anyone can enjoy.
This recipe has become a December tradition in my house. I hope it becomes one in yours too. When you make it, drop a comment below and let me know how it turned out. Did you try a fun variation? Give it as a gift? Drink the whole batch yourself? (No judgment here.) I’d love to hear your stories.
Now go crush some candy and make someone’s day a little warmer.
Frequently Asked Questions
Can I use chocolate milk powder instead of cocoa and sugar?
You can, but the flavor won’t be as rich or balanced. Chocolate milk powder is designed for drinking straight, not as a concentrated mix. You’d need to adjust the sugar and milk powder ratios significantly. I recommend sticking with the recipe as written for the best results.
How long does the mix last in the jar?
Stored in an airtight container in a cool, dark place, this mix will stay fresh for up to 6 months. After that, the powdered milk can start to lose its flavor. But honestly, I’ve never had a jar last that long — it gets used up way faster!
Can I use fresh milk instead of water?
Absolutely! Using hot milk instead of water makes the cocoa extra creamy and rich. Just heat your milk on the stove or in the microwave until steaming, then stir in the mix. The powdered milk in the recipe still helps with texture, but fresh milk takes it to another level.
What if I don’t have a food processor for the peppermint?
No problem at all! The classic method is to put the candies in a sturdy zip-top bag and crush them with a rolling pin or even a heavy pan. You can also place them in a clean kitchen towel and tap them with a hammer. Just be careful not to break the bag or towel. It’s a little messy, but oddly satisfying.
Can I freeze the hot cocoa mix?
I don’t recommend freezing it. The moisture in the freezer can cause the powdered milk to clump and the mix to lose its texture. It’s best stored at room temperature in a sealed container. If you want to keep it longer, just make a fresh batch when you need it — it only takes 10 minutes!
Pin This Recipe!
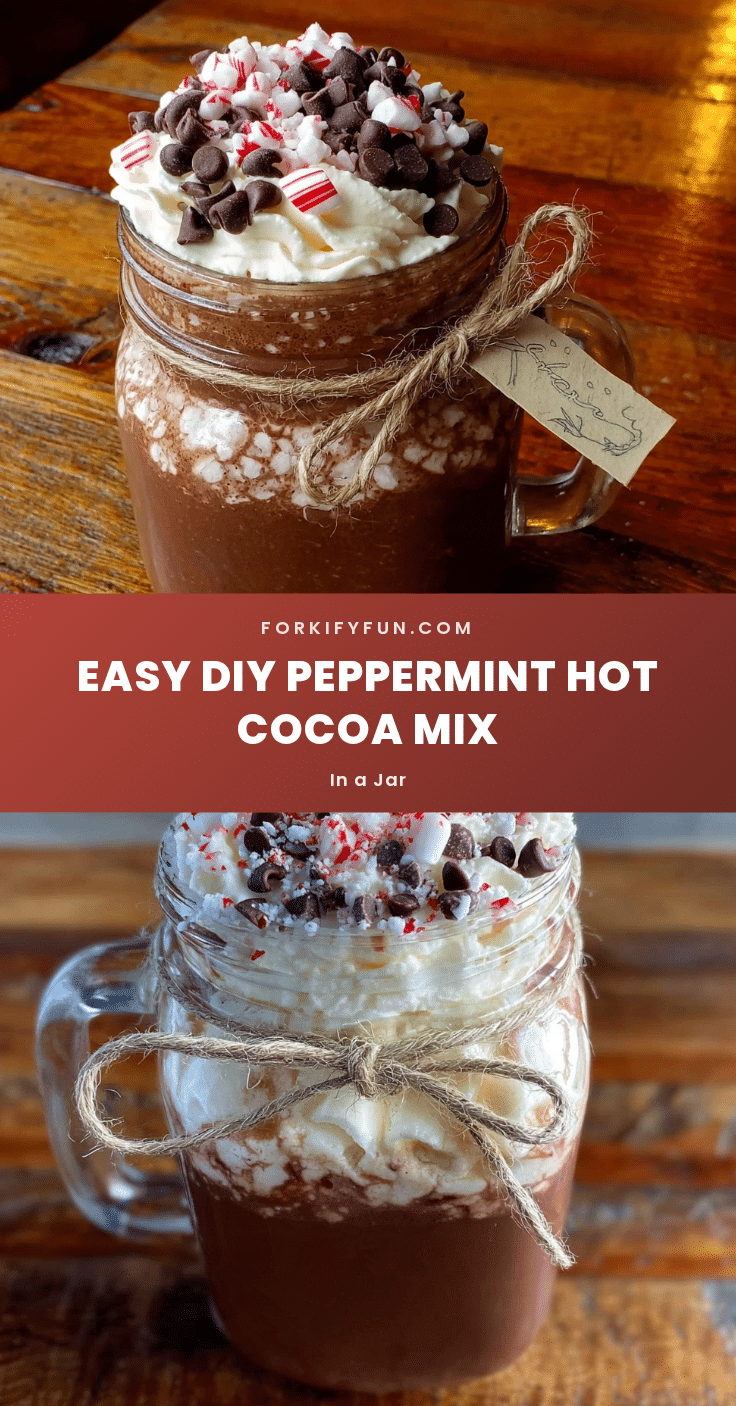
Easy DIY Peppermint Hot Cocoa Mix in a Jar

This easy DIY peppermint hot cocoa mix in a jar is more than just a recipe — it’s a way to share warmth and comfort with the people you love. It takes ten minutes to make, uses simple ingredients, and produces a drink that tastes like a hug in a mug.
- Prep Time: 10 minutes
- Cook Time: 0 minutes
- Total Time: 10 minutes
- Yield: 24 servings (about 3-4 quart-sized jars) 1x
- Category: Beverage
- Cuisine: American
Ingredients
- 2 cups powdered sugar
- 1 ½ cups unsweetened cocoa powder
- 2 ½ cups powdered milk
- 1 cup powdered non-dairy creamer
- ½ cup granulated sugar
- 1 teaspoon salt
- 1 cup crushed peppermint candies (about 30–40 hard peppermint candies or candy canes)
- Hot water or hot milk (for serving)
- Whipped cream (optional, for serving)
- Extra crushed peppermint (for garnish)
- Mini marshmallows (optional, for serving)
Instructions
- Crush the peppermint candies. Place them in a sturdy plastic zip-top bag and seal it tight. Use a rolling pin or mallet to crush them into small pieces. You want them fine enough to dissolve easily but with a few tiny chunks for texture.
- Sift the cocoa powder. If your cocoa powder has lumps, sift it into your large mixing bowl using a fine-mesh sieve.
- Add the dry ingredients. To the sifted cocoa, add the powdered sugar, powdered milk, non-dairy creamer, granulated sugar, and salt. Whisk everything together until well combined into a uniform light brown.
- Add the crushed peppermint. Pour in your crushed candies and whisk again until they’re evenly distributed throughout the mix.
- Test the mix. Before you fill your jars, make a test cup. Stir 3 tablespoons of the mix into 6-8 ounces of hot water. Taste it and adjust if needed.
- Fill the jars. Use your funnel to pour the mix into clean, dry glass jars. Leave about an inch of headspace at the top so you can shake the jar before using it. Tap the jar gently on the counter to settle the mix.
- Seal and label. Screw the lids on tight. If giving as gifts, attach a tag with serving instructions: ‘Stir 3 tablespoons of mix into 6-8 ounces of hot water or milk. Stir well and enjoy!’
Notes
Crush peppermint in batches for even texture. Don’t skip the salt — it enhances the chocolate flavor. Store in a cool, dark place for up to 6 months. For a vegan version, use powdered coconut milk and dairy-free creamer. For extra minty flavor, add ½ teaspoon peppermint extract.
Nutrition
- Serving Size: 3 tablespoons of mix
- Calories: 180
- Sugar: 28
- Sodium: 220
- Fat: 4
- Saturated Fat: 3
- Carbohydrates: 34
- Fiber: 2
- Protein: 4
Keywords: peppermint hot cocoa, hot cocoa mix, DIY gift, homemade hot chocolate, peppermint cocoa, winter drink, Christmas gift, easy recipe


