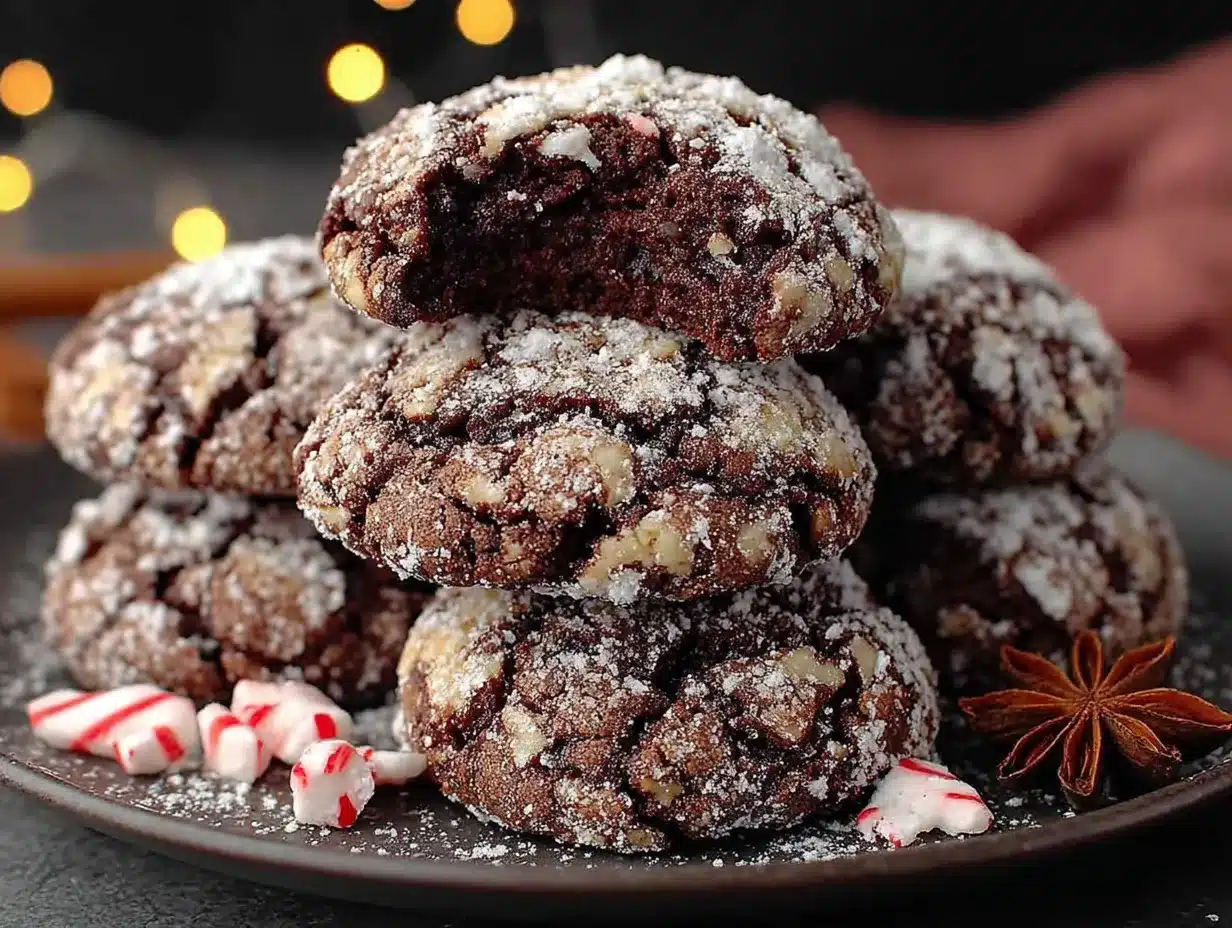
I swore I didn’t need another Christmas cookie. For years, I held this position with the kind of stubborn pride you only have about things that don’t actually matter. My grandmother’s spritz, my aunt’s thumbprints, the cut-out sugar cookies my mom and I spend an entire Saturday decorating—our holiday cookie platter was full, and honestly, it was perfect. Then last December, my friend Jen showed up to our annual cookie swap holding a container of these dark, cracked cookies dusted in snowy powdered sugar, and I watched her walk in looking way too pleased with herself. “You’re going to change your mind about peppermint and chocolate together,” she said, setting them down next to my carefully arranged tray. I rolled my eyes. I mean, peppermint is fine, but it’s not exactly a revelation, right? I waited until she was across the room talking to someone else before I grabbed one, just to be polite. The first bite had this unexpected moment—the cookie was soft and fudgy on the inside, with that signature crinkled top that looks like a winter landscape, and the peppermint wasn’t shouting. It was just there, cool and bright against the deep chocolate. I ate three before she came back. “Told you,” she said, and I couldn’t even argue. Maybe you’ve been there—stubborn about a food you think you’ve figured out, only to have one perfect version prove you completely wrong. That’s what these chocolate peppermint crinkle cookies do. They quietly changed my entire stance on holiday baking, and now I make them every single year without fail.
Why You’ll Love This Recipe
Let me tell you why these cookies have earned a permanent spot on my holiday baking list. After testing this recipe about six times (my coworkers were very patient volunteers), I landed on a version that checks every box for a stress-free, show-stopping Christmas cookie.
- Quick & Easy: The dough comes together in about 15 minutes, and after a quick chill, you’re just 10-12 minutes away from fresh cookies. Perfect for those evenings when you realize you need something for tomorrow’s party.
- Simple Ingredients: No hunting down specialty stores. You probably have most of these in your pantry right now—cocoa powder, flour, sugar, eggs, butter. The peppermint extract is the only “special” ingredient, and it’s in every grocery store this time of year.
- Perfect for Cookie Swaps: These cookies travel beautifully, they look gorgeous on a platter, and they’re different enough from the usual suspects to get people talking. I’ve watched them disappear first at three separate gatherings.
- Crowd-Pleaser: Kids love the snowy look, adults appreciate the sophisticated chocolate-peppermint combo, and even the “I don’t like peppermint” folks (like I used to be) end up reaching for seconds.
- Unbelievably Delicious: The texture is what gets everyone. That crackly, crunchy exterior gives way to a soft, almost brownie-like center. It’s the kind of cookie that makes you close your eyes after the first bite.
What makes this recipe different from the rest? It’s the technique. Most crinkle cookie recipes use oil, which makes them greasy. I use melted butter for richer flavor, and I chill the dough just long enough to make rolling easy without making it rock-hard. The result is a cookie that tastes like a cross between a brownie and a peppermint patty—without any complicated steps.
This recipe isn’t just good—it is the kind that makes you pause mid-bite and wonder why you waited so long to try it. It’s comfort food reimagined: festive enough for Christmas morning, but easy enough for a random Tuesday in December when you just need something sweet.
What Ingredients You Will Need
This recipe uses simple, wholesome ingredients to deliver that perfect balance of rich chocolate and cool peppermint. Here’s what you’ll need to gather before you start.
- All-purpose flour, 2 cups (250g) – Spoon and level your flour for the best texture. Too much flour makes dry cookies.
- Unsweetened cocoa powder, 1/2 cup (50g) – I prefer Ghirardelli or Hershey’s Special Dark for a deeper chocolate flavor. Natural cocoa powder works best here.
- Granulated sugar, 1 cup (200g) – Regular white sugar gives the cookies their structure and sweetness.
- Light brown sugar, 1/2 cup (100g), packed – Adds moisture and a hint of molasses that deepens the chocolate flavor.
- Unsalted butter, 1/2 cup (113g), melted – Melted butter creates a chewier texture than softened butter. Let it cool slightly before using.
- Large eggs, 2, room temperature – Room temperature eggs incorporate more evenly into the batter. Set them out 30 minutes ahead.
- Vanilla extract, 1 teaspoon – Pure vanilla extract makes a difference. Skip the imitation stuff for this recipe.
- Peppermint extract, 1 teaspoon – Use pure peppermint extract, not peppermint oil. The oil is too concentrated and can ruin your cookies. I like Nielsen-Massey brand.
- Baking powder, 2 teaspoons – This gives the cookies their lift and helps create those signature crinkles.
- Salt, 1/2 teaspoon – Balances the sweetness and enhances the chocolate flavor.
- Powdered sugar, 1/2 cup (60g), for rolling – This creates the snowy, crackled exterior. You’ll need extra for re-rolling between batches.
- Crushed candy canes or peppermint candies, 1/4 cup (optional, for topping) – Adds a little extra crunch and festive sparkle. Crush them in a zip-top bag with a rolling pin.
Ingredient Substitution Notes: If you need a dairy-free version, use melted coconut oil or vegan butter in place of the butter. For a gluten-free option, swap the all-purpose flour with a 1:1 gluten-free baking flour blend—I’ve had good results with King Arthur’s Measure for Measure. And if you’re out of brown sugar, you can substitute all granulated sugar, though the cookies will be slightly less moist.
Ingredient Selection Tip: Look for peppermint extract in the baking aisle near the vanilla extract. Avoid “peppermint flavoring” which is often artificial and has a chemical aftertaste. A good peppermint extract should smell bright and natural, not like mouthwash.
Equipment Needed
You don’t need a fancy kitchen to make these cookies. Here’s what you’ll actually use.
- Large mixing bowl – Any medium-to-large bowl works. I use a glass one so I can see if the butter is fully incorporated.
- Whisk – For combining dry ingredients. A fork works in a pinch, but a whisk is faster.
- Electric hand mixer or stand mixer – You can mix by hand with a wooden spoon, but a mixer makes creaming the eggs and sugar much easier. I’ve done both—hand mixing works, but your arm will get tired.
- Rubber spatula – For scraping down the bowl and folding in the dry ingredients.
- Measuring cups and spoons – Accurate measurements matter in baking. Use the spoon-and-level method for flour.
- Baking sheets – Two rimmed baking sheets work best so you can rotate batches. I use Nordic Ware aluminum sheets for even baking.
- Parchment paper or silicone baking mats – Parchment paper prevents sticking and makes cleanup a breeze. Silicone mats work great too, but the cookies might spread slightly more.
- Small bowls – One for the powdered sugar, one for the crushed peppermint if you’re using it.
- Cooling rack – Essential for letting the cookies cool evenly. Stackable racks save counter space.
- Cookie scoop (1.5 tablespoon size) – Not mandatory, but it makes perfectly uniform cookies. I use a #40 scoop.
Budget-Friendly Tip: If you don’t have a cookie scoop, use two spoons to portion the dough. The cookies won’t be perfectly round, but they’ll taste just as good. And skip the stand mixer—a hand mixer or even a sturdy whisk will get the job done.
Preparation Method
Let’s walk through this step by step. I’ve tested this method multiple times, so trust the process and don’t skip the chill time.
- Melt the butter. Place 1/2 cup (113g) unsalted butter in a microwave-safe bowl and microwave in 20-second bursts until just melted. Set it aside to cool for 5 minutes. You don’t want it hot when it hits the eggs, or you’ll end up with scrambled eggs. I learned that the hard way.
- Mix the dry ingredients. In a medium bowl, whisk together 2 cups (250g) all-purpose flour, 1/2 cup (50g) unsweetened cocoa powder, 2 teaspoons baking powder, and 1/2 teaspoon salt. Make sure there are no lumps of cocoa—press them against the side of the bowl with your whisk if needed.
- Cream the sugars and butter. In a large mixing bowl, combine 1 cup (200g) granulated sugar, 1/2 cup (100g) packed light brown sugar, and the cooled melted butter. Beat with an electric mixer on medium speed for about 2 minutes until it looks like wet sand and is well combined.
- Add the eggs and extracts. Add 2 room-temperature eggs, one at a time, beating well after each addition. Scrape down the sides of the bowl with a rubber spatula. Add 1 teaspoon vanilla extract and 1 teaspoon peppermint extract. Beat on low just until combined. The mixture should look smooth and slightly glossy.
- Combine wet and dry ingredients. Gradually add the flour mixture to the wet ingredients, mixing on low speed. Add it in three additions, mixing just until the flour disappears after each one. Don’t overmix—stop as soon as you don’t see any more white flour streaks. The dough will be soft and slightly sticky. That’s exactly what you want.
- Chill the dough. Cover the bowl with plastic wrap and refrigerate for at least 2 hours. This is non-negotiable. Chilled dough is much easier to roll, and it prevents the cookies from spreading too much in the oven. I’ve made the mistake of rushing this step, and I ended up with flat, sad discs instead of puffy, crinkled cookies. Overnight chilling works great if you want to prep ahead.
- Preheat the oven. About 20 minutes before you’re ready to bake, preheat your oven to 350°F (175°C). Line two baking sheets with parchment paper or silicone mats.
- Prepare the coating. Place 1/2 cup (60g) powdered sugar in a small bowl. If you’re using crushed peppermint, put it in a separate small bowl.
- Shape and roll the cookies. Using a cookie scoop or your hands, portion the dough into 1.5-tablespoon balls (about 25g each). Roll each ball between your palms until smooth. Drop the ball into the powdered sugar and roll it around until completely coated. The sugar coating is what creates the crinkled look, so be generous. For extra sparkle, roll the sugared ball in the crushed peppermint if using.
- Bake. Place the coated dough balls on the prepared baking sheets, spacing them about 2 inches apart. They will spread. Bake for 10-12 minutes. The cookies should look puffy and crackled, with the edges just set. The centers will look slightly soft—that’s okay. For fudgier cookies, bake for 10 minutes. For slightly crispier edges, go to 12 minutes.
- Cool. Let the cookies cool on the baking sheet for 5 minutes. They’re fragile when hot, so don’t try to move them right away. After 5 minutes, transfer them to a wire rack to cool completely. The cookies will continue to set as they cool.
- Repeat. Scoop, roll, and bake the remaining dough. You’ll need to re-roll each batch in fresh powdered sugar—the sugar from the first batch will get damp from the dough.
Yield: This recipe makes about 28-30 cookies, depending on how big you scoop them.
Cooking Tips & Techniques
After making these cookies more times than I care to count, I’ve picked up a few tricks that make a real difference.
Don’t skip the chill. I know, I know—you’re in a hurry. But warm dough spreads into flat, ugly cookies without the signature crinkles. Two hours is the minimum, but overnight is even better. The dough gets easier to handle and the flavors meld together beautifully.
Use a light hand with the peppermint extract. This is the mistake I made on my first batch. I thought “more peppermint = more festive,” and ended up with cookies that tasted like toothpaste. One teaspoon is perfect. If you love peppermint, you can bump it up to 1.5 teaspoons, but don’t go overboard.
Roll generously in powdered sugar. The crinkled effect happens because the dough spreads and the powdered sugar coating cracks. If you skimp on the sugar, you’ll get pale, barely-crackled cookies. I double-coat mine—roll once, then roll again in fresh sugar right before baking.
Watch the baking time. Every oven runs differently. My old oven baked these in exactly 10 minutes. My new one takes 12. Start checking at 9 minutes—the cookies are done when the edges are set and the tops are crackled but the centers still look slightly underdone. They’ll continue baking on the hot sheet after you pull them out.
Keep extra powdered sugar handy. The sugar in your rolling bowl will get clumpy after a few cookies as moisture from the dough transfers to it. Sift it or replace it with fresh sugar halfway through. Your cookies will thank you.
Multitasking strategy: While the dough chills, crush your candy canes and line your baking sheets. When the dough is ready, preheat the oven and start rolling. By the time the first batch is in the oven, you can have the second batch rolled and ready to go.
Variations & Adaptations
One of the best things about this recipe is how easily it adapts to different tastes and dietary needs. Here are a few variations I’ve tried and loved.
Dark Chocolate Mint Crinkle Cookies
Swap the regular cocoa powder for dark cocoa powder (like Hershey’s Special Dark or black cocoa). The cookies turn almost black with a deeper, more intense chocolate flavor. I made these for a friend who claims to “not like chocolate,” and she ate four before admitting she was wrong.
Gluten-Free Version
Substitute the all-purpose flour with a 1:1 gluten-free baking flour blend. I’ve tested this with both King Arthur’s Measure for Measure and Bob’s Red Mill 1:1, and both worked well. Make sure your baking powder is also gluten-free. The texture is slightly more delicate, so handle the cookies gently when transferring them to the cooling rack.
White Chocolate Peppermint Crinkles
After the cookies cool completely, drizzle them with melted white chocolate and sprinkle with extra crushed peppermint. The white chocolate adds a creamy sweetness that pairs beautifully with the dark chocolate and peppermint. This is my go-to version for holiday gift boxes.
Egg-Free Adaptation
Replace each egg with a flax egg (1 tablespoon ground flaxseed mixed with 3 tablespoons water, left to sit for 5 minutes). The cookies will be slightly less puffy but still delicious. I’ve made this version for a vegan friend, and she couldn’t tell the difference.
Spiced Chocolate Crinkles
Add 1/2 teaspoon cinnamon and 1/4 teaspoon cayenne pepper to the dry ingredients. The warmth of the spices plays off the cool peppermint in a way that’s surprisingly addictive. I stumbled onto this combination by accident when I grabbed the wrong jar, and now it’s my secret holiday party trick.
Serving & Storage Suggestions
These cookies are at their best the day they’re baked—the edges are slightly crisp, the centers are soft and fudgy, and the peppermint flavor is bright and fresh. But they’re still pretty fantastic the next day.
Serving Temperature: Serve at room temperature. If you’re making them for a party, arrange them on a festive platter with a light dusting of extra powdered sugar and a few whole candy canes for decoration. They look beautiful alongside gingerbread cookies and sugar cookies on a holiday cookie tray.
Pairing Suggestions: These cookies are wonderful with a cup of hot cocoa, a peppermint mocha, or a simple glass of cold milk. For an adult pairing, try them with a dark stout beer or a peppermint martini. I served them at a cookie swap last year with a hot chocolate bar, and people kept coming back for more cookies to dip.
Storage: Store the cookies in an airtight container at room temperature for up to 5 days. Layer them between sheets of parchment paper to prevent sticking. The powdered sugar coating will absorb some moisture over time, so they’ll look less snowy after a day or two—but they’ll still taste amazing.
Freezing Instructions: These cookies freeze beautifully. You have two options:
- Freeze the baked cookies: Cool completely, then place in a single layer in a freezer-safe container with parchment between layers. Freeze for up to 3 months. Thaw at room temperature for about 30 minutes before serving.
- Freeze the dough balls: Roll the dough into balls, coat in powdered sugar, and place on a parchment-lined baking sheet. Freeze until solid (about 2 hours), then transfer to a freezer bag. When you’re ready to bake, place the frozen dough balls on a baking sheet and add 2-3 minutes to the baking time. This is my favorite method for spontaneous cookie cravings.
Flavor Development: The peppermint flavor actually mellows and blends with the chocolate after a day or two. Some people prefer the cookies on day two when the flavors have settled. Try one fresh and one the next day to see which you prefer.
Nutritional Information & Benefits
Let’s be honest—these are holiday cookies, not health food. But here’s the nutritional breakdown per cookie (based on 30 cookies) so you can plan accordingly.
| Nutrient | Amount Per Cookie |
|---|---|
| Calories | 135 |
| Total Fat | 5g |
| Saturated Fat | 3g |
| Cholesterol | 22mg |
| Sodium | 75mg |
| Total Carbohydrates | 22g |
| Dietary Fiber | 1g |
| Sugars | 14g |
| Protein | 2g |
Health Highlights: Cocoa powder is rich in antioxidants called flavonoids, which can support heart health and reduce inflammation. Dark chocolate in moderation has been linked to improved mood—and let’s face it, that’s exactly what the holidays call for. Peppermint has natural digestive benefits and can help soothe an upset stomach after a big holiday meal.
Dietary Considerations: This recipe contains gluten, dairy, and eggs. For a gluten-free version, see the variations section above. For a dairy-free version, substitute the butter with melted coconut oil or vegan butter. The cookies are naturally nut-free (check your peppermint extract label to be sure).
My Personal Take: I believe in enjoying treats without guilt, especially during the holidays. One or two of these cookies with a cup of tea is a wonderful way to savor the season. Balance is everything—make the cookies, share them with people you love, and don’t stress about the numbers.
Conclusion
These chocolate peppermint crinkle cookies have honestly become my most-requested holiday recipe. Every year, someone asks me to bring them to a party or share the recipe, and I never get tired of watching people take that first bite and realize they’ve found something special. The combination of rich, fudgy chocolate and cool, bright peppermint wrapped in that beautiful crackled coating is just pure holiday magic.
I hope you’ll make these cookies your own. Maybe you’ll add extra peppermint, or skip the candy cane topping, or double the batch because one batch is never enough. Whatever you do, I’d love to hear about it. Drop a comment below and tell me how they turned out—did you make any substitutions? Did your family love them? Did you catch someone sneaking one before they cooled? (I won’t judge. I’ve been that person.)
Happy baking, friends. May your kitchen smell like chocolate and peppermint, and may your cookie platter be the first one empty at every party.
Frequently Asked Questions
Why didn’t my cookies crinkle?
The most common reason is that the dough wasn’t chilled long enough. Chilled dough spreads more slowly, which allows the powdered sugar coating to crack and create that signature crinkled look. Also, make sure you’re rolling the dough balls generously in powdered sugar—a thin coating won’t crackle as beautifully.
Can I use peppermint oil instead of extract?
I don’t recommend it. Peppermint oil is much more concentrated than extract, and it’s very easy to overdo it. A tiny drop too much and your cookies will taste like mouthwash. Stick with pure peppermint extract for the best results.
How do I crush candy canes without making a mess?
Place the candy canes in a sturdy zip-top bag and seal it tightly. Wrap the bag in a kitchen towel (this prevents punctures) and gently tap it with a rolling pin or the bottom of a heavy pan. You’ll get even pieces without candy shrapnel flying everywhere.
Can I make the dough ahead of time?
Absolutely. The dough can be refrigerated for up to 3 days before baking. You can also freeze the shaped, sugar-coated dough balls for up to 3 months. Bake from frozen, adding 2-3 minutes to the baking time.
My cookies spread too much. What went wrong?
Several things could cause excess spreading. The dough might not have been chilled enough, your butter might have been too warm when you mixed it, or your baking sheet might have been too warm from a previous batch. Always let your baking sheets cool completely between batches, and make sure your dough is properly chilled.
Pin This Recipe!

Perfect Chocolate Peppermint Crinkle Cookies: Easy Holiday Recipe

These chocolate peppermint crinkle cookies are soft and fudgy on the inside with a signature crinkled top dusted in snowy powdered sugar. The cool, bright peppermint perfectly complements the deep chocolate flavor, making them a must-have for holiday baking.
- Prep Time: 15 minutes
- Cook Time: 10-12 minutes
- Total Time: 2 hours 25 minutes (includes chilling)
- Yield: 28-30 cookies 1x
- Category: Dessert
- Cuisine: American
Ingredients
- 2 cups (250g) all-purpose flour
- 1/2 cup (50g) unsweetened cocoa powder
- 1 cup (200g) granulated sugar
- 1/2 cup (100g) light brown sugar, packed
- 1/2 cup (113g) unsalted butter, melted and cooled
- 2 large eggs, room temperature
- 1 teaspoon vanilla extract
- 1 teaspoon peppermint extract
- 2 teaspoons baking powder
- 1/2 teaspoon salt
- 1/2 cup (60g) powdered sugar, for rolling
- 1/4 cup crushed candy canes or peppermint candies (optional, for topping)
Instructions
- Melt the butter: Place 1/2 cup (113g) unsalted butter in a microwave-safe bowl and microwave in 20-second bursts until just melted. Set aside to cool for 5 minutes.
- Mix the dry ingredients: In a medium bowl, whisk together 2 cups (250g) all-purpose flour, 1/2 cup (50g) unsweetened cocoa powder, 2 teaspoons baking powder, and 1/2 teaspoon salt.
- Cream the sugars and butter: In a large mixing bowl, combine 1 cup (200g) granulated sugar, 1/2 cup (100g) packed light brown sugar, and the cooled melted butter. Beat with an electric mixer on medium speed for about 2 minutes until well combined.
- Add the eggs and extracts: Add 2 room-temperature eggs, one at a time, beating well after each addition. Scrape down the sides of the bowl. Add 1 teaspoon vanilla extract and 1 teaspoon peppermint extract. Beat on low until combined.
- Combine wet and dry ingredients: Gradually add the flour mixture to the wet ingredients, mixing on low speed in three additions, just until combined. Do not overmix. The dough will be soft and slightly sticky.
- Chill the dough: Cover the bowl with plastic wrap and refrigerate for at least 2 hours (or overnight).
- Preheat the oven: About 20 minutes before baking, preheat oven to 350°F (175°C). Line two baking sheets with parchment paper or silicone mats.
- Prepare the coating: Place 1/2 cup (60g) powdered sugar in a small bowl. If using crushed peppermint, place in a separate small bowl.
- Shape and roll the cookies: Using a cookie scoop or hands, portion dough into 1.5-tablespoon balls (about 25g each). Roll each ball between palms until smooth. Roll generously in powdered sugar until completely coated. For extra sparkle, roll in crushed peppermint if using.
- Bake: Place coated dough balls on prepared baking sheets, spacing 2 inches apart. Bake for 10-12 minutes. Cookies should look puffy and crackled with edges just set. For fudgier cookies, bake 10 minutes; for crispier edges, bake 12 minutes.
- Cool: Let cookies cool on baking sheet for 5 minutes, then transfer to a wire rack to cool completely.
- Repeat: Scoop, roll, and bake remaining dough, using fresh powdered sugar for each batch.
Notes
Don’t skip the chill time—it prevents spreading and creates the crinkled top. Use a light hand with peppermint extract; 1 teaspoon is perfect. Roll generously in powdered sugar for best crinkle effect. Start checking cookies at 9 minutes; they are done when edges are set and centers look slightly underdone. Keep extra powdered sugar handy as it gets clumpy. For best results, use pure peppermint extract, not peppermint oil.
Nutrition
- Serving Size: 1 cookie
- Calories: 135
- Sugar: 14
- Sodium: 75
- Fat: 5
- Saturated Fat: 3
- Carbohydrates: 22
- Fiber: 1
- Protein: 2
Keywords: chocolate peppermint crinkle cookies, holiday cookies, Christmas cookies, crinkle cookies, peppermint chocolate cookies, easy cookie recipe


