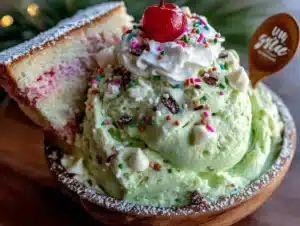
There used to be a little bakery tucked between a dry cleaner and a nail salon on the corner of Elm and 3rd that made the most ridiculous Christmas tree cake dip. When they closed suddenly two Decembers ago—the owner retired, I heard—I actually stood outside the locked door staring at the empty display case like a total weirdo. After twelve tries—twelve, let me tell you, some of them were straight-up disasters involving curdled cream cheese and way too much green food coloring—I finally got it.
The thing about that bakery’s dip was that it tasted exactly like the middle of a Little Debbie Christmas Tree Cake. You know that feeling when you bite into one of those iconic holiday treats and you get that perfect ratio of frosting to cake to cream filling? That’s what this dip captures. But here’s the kicker—it takes five minutes. I mean, five honest minutes from pulling ingredients out of the fridge to setting the bowl on the table. No baking, no chilling, no complicated steps.
Honestly, the first time I made the successful version, I texted my sister a photo with the caption “I DID IT” and she thought I’d adopted a puppy. But no—this was better. This was the taste of holiday nostalgia in a bowl, ready faster than it takes to argue about what movie to watch. Maybe you’ve been there, chasing a flavor memory from a place that no longer exists. This dip is that memory, finally recreated. And once you taste it, you’ll understand why I refused to give up.
Why You’ll Love This Recipe
Let’s be real for a second—the holidays are chaotic. Between the shopping, the decorating, the school concerts, and the endless to-do lists, who has time to spend hours in the kitchen? This Easy Christmas Tree Cake Dip in 5 Minutes is about to become your new best friend, and here’s exactly why:
- Five Minutes, No Joke: I’ve tested this recipe with a stopwatch. From fridge to table in under five minutes flat. That’s faster than waiting for delivery, faster than running to the store, and definitely faster than baking anything.
- Three Ingredients (Plus Garnish): You probably already have cream cheese and powdered sugar in your fridge. The only special purchase is the Little Debbie Christmas Tree Cakes themselves, which are everywhere from November through December.
- Perfect for Last-Minute Everything: Neighbor stopped by? Need something for the classroom party? Forgot about the office potluck? This dip saves you every single time.
- Kids Can Make It: My nephew made this by himself last week—he’s eight. No oven, no stove, no sharp knives. Just mixing and tasting.
- Tastes Like Childhood: Every single person who tries this dip closes their eyes after the first bite. It’s that specific, nostalgic flavor that takes you right back to opening your lunchbox in elementary school.
What makes this different from other dessert dips you’ve seen? It’s not just cream cheese and sugar thrown together. The secret is how you incorporate the actual Christmas tree cakes into the base. You’re not just dipping cakes into plain frosting—you’re creating a dip that tastes like the entire cake, inside and out. The texture is luscious, the flavor is spot-on, and it takes absolutely zero skill to pull off.
This is the kind of recipe that makes you look like a holiday hero with almost no effort. Perfect for when you want to bring something to the party but you’ve got exactly fifteen minutes between walking in the door and walking out again. Trust me, I’ve been there more times than I can count.
What Ingredients You Will Need
This recipe keeps things beautifully simple. You only need a handful of ingredients, and the magic happens when they come together. Here’s exactly what you’ll need and why each one matters:
For the Dip Base
- 8 ounces cream cheese, softened to room temperature: This is non-negotiable for that silky smooth texture. Cold cream cheese will give you lumps, and nobody wants lumpy dip. I recommend Philadelphia brand for consistent results, but any block-style cream cheese works. Set it out on the counter for about 30 minutes before you start.
- 1/4 cup powdered sugar: Also called confectioners’ sugar. This adds just enough sweetness without making things grainy. Regular granulated sugar won’t dissolve properly, so stick with powdered here.
- 1 teaspoon vanilla extract: Pure vanilla extract makes a noticeable difference. If you only have imitation vanilla, it’ll still work, but the flavor won’t be quite as rich. I’ve made it both ways, and pure vanilla wins every time.
For the Christmas Tree Cake Flavor
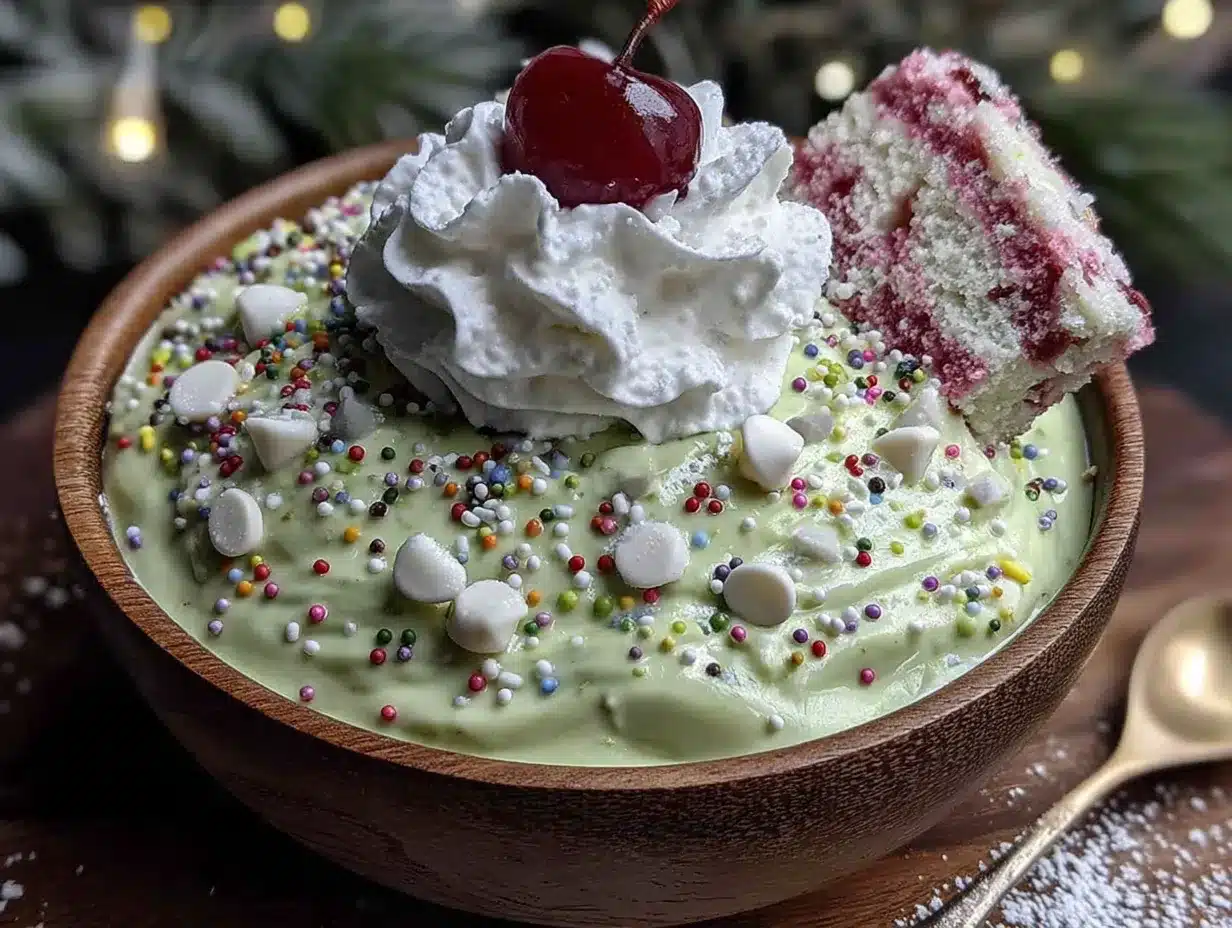
- 4 Little Debbie Christmas Tree Cakes: You’ll need two for mixing into the dip and two for crumbling on top. The green-frosted ones with the white squiggles are the classic choice. If you can find the double-decker ones, those work beautifully too—just use three instead of four since they’re bigger.
- Green food coloring (optional but recommended): A couple drops give the dip that festive green hue. Gel food coloring works best because it doesn’t thin out the dip. If you’re serving this to kids who might be sensitive to artificial colors, you can skip it entirely—the flavor is exactly the same.
For Garnish and Serving
- Holiday sprinkles: Red and green jimmies, star-shaped sprinkles, or even crushed candy canes all work beautifully. I personally love the little white雪花-shaped sprinkles for a snowy effect.
- Graham crackers, vanilla wafers, or pretzels for dipping: The slightly salty crunch of pretzels balances the sweetness perfectly. Graham crackers give that nostalgic s’mores vibe. Vanilla wafers are the closest thing to the actual cake texture. Honestly, I set out a mix of all three and let people choose their adventure.
Ingredient Selection Tip: When buying your Christmas tree cakes, look for boxes where the cakes aren’t crushed. I know it sounds obvious, but sometimes they get banged up during shipping. You want nice intact cakes for crumbling on top. Also, check the expiration date—these are shelf-stable for months, but fresher cakes have a better texture.
Substitution Guidance: If you can’t find Little Debbie Christmas Tree Cakes (they’re seasonal, after all), you can substitute with any frosted seasonal snack cake. The key is finding something with that signature soft cake, creamy filling, and sweet frosting. Some grocery store bakery sections sell similar tree-shaped cakes during the holidays. I’ve also made this using pumpkin-shaped cakes in October, and it works just as well—just switch up the sprinkle colors.
For a dairy-free version, use vegan cream cheese (I like Kite Hill or Violife) and check that your snack cakes are dairy-free. The texture will be slightly different, but the flavor is still fantastic. For a lower-sugar option, use a sugar-free powdered sweetener like Swerve Confectioners—just note that the sweetness level might need adjusting to your taste.
Equipment Needed
The best part about this recipe? You probably already own everything you need. Here’s the short list:
- Electric hand mixer or stand mixer: While you could technically mix this by hand with some serious elbow grease, an electric mixer gives you that perfectly smooth, fluffy texture in about 60 seconds. I use my trusty KitchenAid hand mixer that I’ve had for over a decade.
- Medium mixing bowl: Any bowl works, but a wider bowl makes it easier to get the mixer in there. I use a ceramic bowl because it looks pretty for serving, but glass or stainless steel are totally fine.
- Spatula: For scraping down the sides of the bowl and getting every last bit of dip out. A silicone spatula is ideal because it doesn’t scratch your bowl.
- Sharp knife and cutting board: For chopping the Christmas tree cakes. A serrated knife works best to cut through the frosting without smashing the cake.
- Serving bowl or platter: Something festive makes it extra special. I have a little green ceramic dish I only pull out in December, but even a regular bowl works.
- Measuring cups and spoons: For the powdered sugar and vanilla. If you’re feeling confident, you can eyeball it, but measuring gives you consistent results every time.
Budget-Friendly Option: Don’t have an electric mixer? No problem. Soften your cream cheese really well—like, leave it out for an hour—and mash it with a fork until smooth before stirring in the other ingredients. It takes a few extra minutes of arm work, but the result is still delicious. My grandmother used to make dips this way, and hers were always amazing.
Preparation Method
Alright, let’s make this happen. I promise you can do this with one hand while holding a cup of coffee in the other. Here’s exactly how it goes:
- Soften your cream cheese. This is the most important step, so don’t skip it. Take your 8 ounces of cream cheese out of the fridge at least 30 minutes before you start. If you forgot (I do this all the time), unwrap the cream cheese, cut it into cubes, and microwave it for 10 seconds at a time until it’s soft but not warm. You want it to give slightly when you press it, not be melted.
- Beat the cream cheese until smooth. Put the softened cream cheese in your mixing bowl. Beat it with your hand mixer on medium speed for about 30 seconds until it’s completely smooth with no lumps. Scrape down the sides of the bowl with your spatula. This little step makes a huge difference in the final texture.
- Add the powdered sugar and vanilla. Pour in the 1/4 cup of powdered sugar and 1 teaspoon of vanilla extract. Start mixing on low speed so the sugar doesn’t fly everywhere (learned that one the hard way). Once it’s incorporated, bump up to medium speed and beat for another 30 seconds until everything is combined and fluffy. The mixture should look like thick, creamy frosting.
- Add the green food coloring. Drop in 2 to 3 drops of green food coloring. Mix on low until the color is evenly distributed. You’re going for a light, festive green—not neon. If you want it more vibrant, add one drop at a time until you’re happy. Remember, you can always add more, but you can’t take it out.
- Chop and fold in two Christmas tree cakes. Take two of your Christmas tree cakes and chop them into small pieces—about 1/4-inch cubes. The frosting might stick to your knife, so wipe it off between cuts. Gently fold these pieces into your cream cheese mixture using your spatula. Be careful not to overmix; you want little pockets of cake throughout the dip.
- Transfer to serving bowl. Scoop the dip into your serving bowl and spread it out evenly with your spatula. Give it a nice swirl on top if you’re feeling fancy.
- Crumble the remaining two cakes on top. Take the last two Christmas tree cakes and crumble them over the top of the dip. I like to use my fingers for this—it gives you nice irregular pieces. Make sure you get some of the green frosting and white squiggles in there too. That’s where the visual magic happens.
- Add sprinkles. Sprinkle your holiday sprinkles generously over the top. Don’t be shy here—this is the part that makes people say “Wow!” when they see it.
- Serve immediately with dippers. Arrange your graham crackers, vanilla wafers, or pretzels around the bowl. That’s it. You’re done. In five minutes flat.
Sensory Cue: When you fold in the cake pieces, you should see little streaks of green and white throughout the creamy white base. The dip should be thick enough to hold its shape on a cracker but soft enough to scoop easily. If it seems too thick, let it sit at room temperature for five minutes—it’ll soften up perfectly.
Prep Note: This dip is best served within an hour of making it. The cake pieces stay soft and the texture is perfect. If you make it ahead (which you can), wait to add the crumbled cake topping until just before serving so it stays nice and visible.
Cooking Tips & Techniques
I’ve made this dip more times than I care to count, and I’ve learned a few things along the way. Here are the tips that will save you from my mistakes:
Temperature is everything. I cannot stress this enough. Cold cream cheese is the enemy of smooth dip. I once tried to rush this recipe with cold cream cheese and ended up with little white lumps throughout the dip. It still tasted fine, but the texture was off. Set your cream cheese out early, or use the microwave trick. Your dip will thank you.
Don’t overmix the cake pieces. When you fold in the chopped Christmas tree cakes, use a gentle hand. If you beat them with the mixer, you’ll end up with green-tinted dip and no visible cake chunks. You want those little pockets of cake to remain intact so every bite has that perfect texture contrast.
The color deepens over time. If you’re making this ahead, add just 1 to 2 drops of green food coloring initially. The color will deepen as the dip sits, especially if you’re storing it in the fridge. I learned this the hard way when I made a dip that looked perfect at noon but was practically radioactive green by dinner time.
Let it sit before serving if refrigerated. This dip firms up quite a bit in the fridge. If you make it ahead, take it out about 15 to 20 minutes before serving. This lets it soften to that perfect scoopable consistency. Serving it straight from the fridge is like trying to scoop cold butter—doable but frustrating.
Double the recipe for parties. This dip disappears fast. I mean, embarrassingly fast. For a party of 8 to 10 people, I always double the recipe. It’s the same amount of work, and you’ll be glad you have extra. Plus, it’s cheap enough that doubling doesn’t break the bank.
Common Mistake to Avoid: Don’t crush the Christmas tree cakes into crumbs for the topping. You want visible pieces—the green frosting, the white drizzle, the yellow cake layers. If you crush them too fine, it just looks like green dust. Aim for pieces about the size of your pinky fingernail.
Variations & Adaptations
One of the things I love about this recipe is how easy it is to switch things up. Here are some variations I’ve tried and loved:
The Peppermint Twist
Add 1/2 teaspoon of peppermint extract along with the vanilla, and top with crushed candy canes instead of sprinkles. The minty freshness cuts through the sweetness beautifully. I made this version for a cookie exchange and it was gone in ten minutes flat.
The Chocolate Lover’s Version
Melt 1/4 cup of white chocolate chips and swirl it into the dip after mixing. Then top with chocolate shavings or mini chocolate chips. The white chocolate adds another layer of sweetness and a gorgeous marbled look. My chocolate-obsessed nephew declared this one “the best thing I’ve ever eaten.”
The Dairy-Free Adaptation
Use vegan cream cheese and check that your snack cakes are dairy-free. Some store-brand versions are accidentally vegan. The texture will be slightly less fluffy, but the taste is still spot-on. I served this at a party where two guests had dairy allergies, and they were thrilled to have something they could eat.
The Gluten-Free Option
Little Debbie Christmas Tree Cakes contain wheat, so for a gluten-free version, look for gluten-free frosted snack cakes. Several brands make seasonal gluten-free options. Then serve with gluten-free graham crackers or rice cakes for dipping. The dip base itself is naturally gluten-free.
The Adult Version
Add 1 to 2 tablespoons of Irish cream liqueur or bourbon along with the vanilla. The boozy note adds warmth and complexity. Just be sure to label it clearly if you’re serving it at a party with kids around. I made this for a grown-up Christmas party and it was a huge hit.
The Funfetti Style
Fold in 2 tablespoons of rainbow sprinkles along with the cake pieces. The sprinkles add color and a slight crunch. This version is especially popular with kids—it looks like a party in a bowl.
Serving & Storage Suggestions
This dip is incredibly versatile when it comes to serving. Here’s how to make it shine:
Serving Temperature: Serve this dip at room temperature for the best texture and flavor. Cold dip is too firm and the flavors are muted. If you’ve refrigerated it, let it sit out for 15 to 20 minutes before serving. On a holiday buffet table, it stays at a good consistency for about 2 hours.
Presentation Ideas: For maximum visual impact, serve this dip in a festive bowl surrounded by a variety of dippers. I like to arrange graham crackers on one side, pretzels on another, and vanilla wafers on the third. It creates a beautiful grazing board effect. Add some fresh cranberries and rosemary sprigs around the edges for a holiday touch.
Complementary Dishes: This dip pairs beautifully with a warm drink bar. Set it out alongside hot cocoa, apple cider, or coffee. It also works great on a dessert table with other no-bake treats like chocolate-covered pretzels or peppermint bark. For a fun party idea, serve it as part of a “Christmas Sweets Board” with cookies, brownies, and fruit.
Storage Instructions: Store any leftover dip in an airtight container in the refrigerator for up to 3 days. The cake pieces will soften and the color may deepen slightly, but the flavor remains delicious. I actually kind of love the texture on day two—everything melds together into this creamy, cake-infused spread.
Reheating: This dip is served cold or at room temperature, so no reheating needed. If it seems too firm after refrigerating, just let it sit at room temperature for 20 minutes and give it a good stir. If you want to soften it faster, microwave it for 5 to 10 seconds, but watch it carefully—you don’t want it to get warm.
Make-Ahead Note: You can make the dip base (cream cheese, sugar, vanilla, and food coloring) up to 2 days ahead. Store it in the fridge, then fold in the cake pieces and add the topping just before serving. This keeps the cake pieces fresh and the presentation gorgeous.
Nutritional Information & Benefits
Let’s be honest—this is a treat, not a health food. But here’s what you need to know:
Estimated Nutritional Values (per serving, about 1/4 cup):
- Calories: 180-220
- Fat: 12g
- Carbohydrates: 20g
- Protein: 3g
- Sugar: 15g
Health Highlights: The cream cheese provides a small amount of calcium and protein. If you use the full-fat version, it’s also more satisfying, meaning you’ll likely eat less overall compared to a low-fat version that leaves you wanting more. The portion size is naturally controlled since it’s a dip—you’re eating it with crackers or pretzels, which adds some structure to your snacking.
Dietary Considerations: This recipe is vegetarian. It contains dairy and gluten (from the snack cakes and dippers). For a gluten-free version, use gluten-free snack cakes and dippers. For a dairy-free version, use vegan cream cheese and check your snack cakes. It’s not suitable for vegan diets unless you make both substitutions.
Personal Perspective: Look, I’m not going to pretend this is a health food. It’s a holiday treat meant to be enjoyed in moderation. But here’s what I love about it—because it’s so quick to make, you don’t have to stress about it. You’re not spending hours in the kitchen, so you have more time to actually enjoy the holidays. And honestly, sometimes that mental health benefit is just as important as what’s on your plate.
Conclusion
This Easy Christmas Tree Cake Dip in 5 Minutes is more than just a recipe—it’s a little piece of holiday magic that comes together faster than you can say “ho ho ho.” It captures that nostalgic flavor we all love from those iconic little cakes, but in a dippable, shareable form that’s perfect for parties, potlucks, or just a quiet night in with your family.
I love this recipe because it proves that you don’t need fancy techniques or hours of prep to create something truly special. It’s the kind of recipe that makes you look like a holiday hero, even on your busiest days. And honestly, isn’t that what we all need during the chaos of December?
I’d love to hear how yours turns out! Did you try any of the variations? Did your family fight over the last bite? Drop a comment below and let me know. And if you’re looking for more quick and easy holiday treats, check out my 5-Minute Christmas Fudge and No-Bake Peppermint Bark—they’re lifesavers during the busy season.
Now go make that dip. Your holiday party guests are counting on you.
Frequently Asked Questions
Can I make this dip ahead of time?
Absolutely! You can make the dip base up to 2 days ahead and store it in the fridge. Just fold in the chopped cake pieces and add the crumbled topping right before serving for the best texture and appearance.
Can I use a different brand of snack cakes?
Yes, you can. Any frosted seasonal snack cake will work. The key is finding one with soft cake, creamy filling, and sweet frosting. Store-brand versions or other holiday-shaped cakes work great.
How do I soften cream cheese quickly?
If you forgot to set it out, unwrap the cream cheese, cut it into cubes, and microwave it in 10-second intervals until soft but not warm. You can also place it in a bowl of warm water for about 10 minutes.
Can I freeze this dip?
I don’t recommend freezing this dip. The cream cheese texture changes when frozen and thawed, becoming grainy and watery. It’s best made fresh or stored in the fridge for up to 3 days.
What if I can’t find Christmas tree cakes after the holidays?
You can substitute with any frosted snack cake and adjust the theme. Use pumpkin-shaped cakes in fall, heart-shaped cakes for Valentine’s Day, or just use plain frosted cakes with seasonal sprinkles. The concept works year-round!
Pin This Recipe!
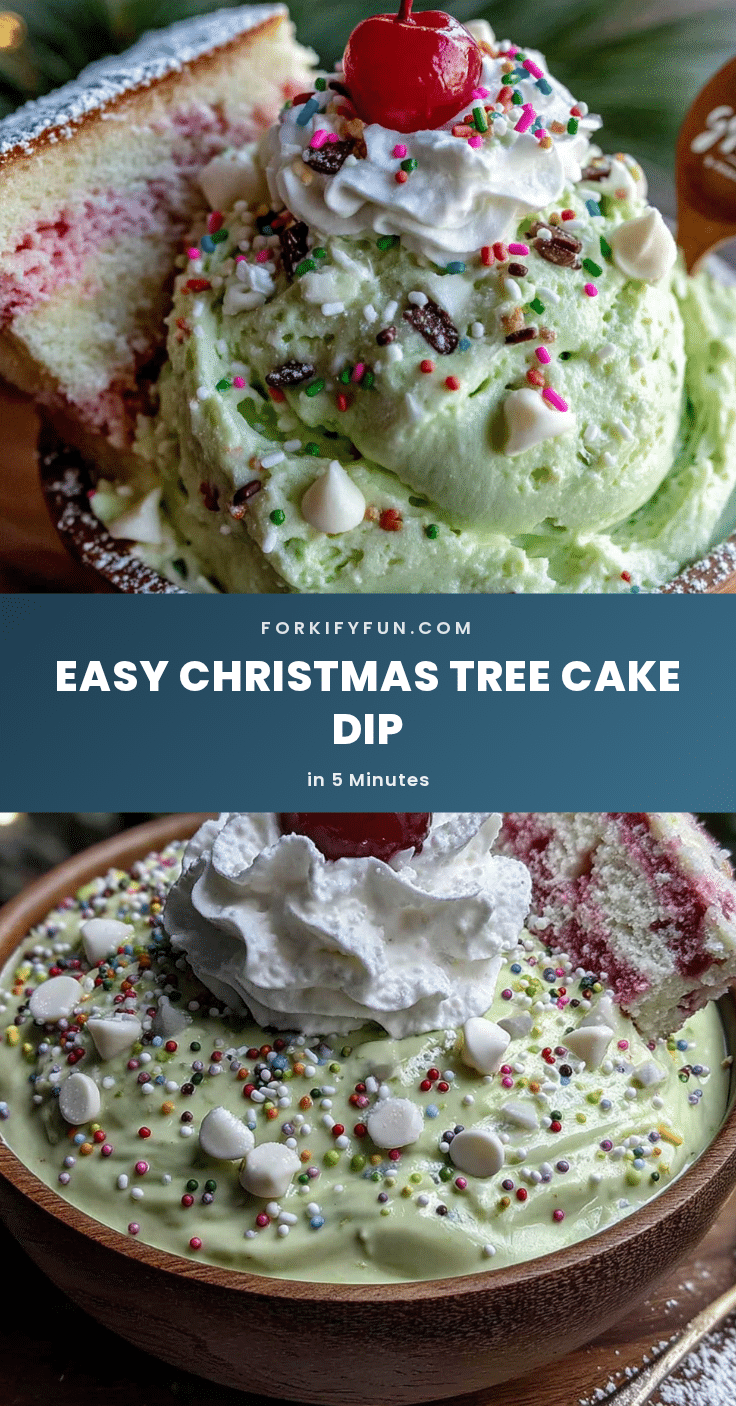
Easy 5-Minute Christmas Tree Cake Dip Recipe
This 5-minute Christmas Tree Cake Dip captures the nostalgic flavor of Little Debbie Christmas Tree Cakes in a creamy, dippable form. Perfect for holiday parties, potlucks, or last-minute gatherings, it requires just three main ingredients and no baking.
- Prep Time: 5 minutes
- Cook Time: 0 minutes
- Total Time: 5 minutes
- Yield: 8 servings 1x
- Category: Dessert
- Cuisine: American
Ingredients
- 8 ounces cream cheese, softened to room temperature
- 1/4 cup powdered sugar
- 1 teaspoon vanilla extract
- 4 Little Debbie Christmas Tree Cakes
- 2–3 drops green food coloring (optional)
- Holiday sprinkles for garnish
- Graham crackers, vanilla wafers, or pretzels for dipping
Instructions
- Soften cream cheese by leaving it at room temperature for 30 minutes, or microwave cubed cream cheese in 10-second intervals until soft but not warm.
- Beat softened cream cheese with an electric hand mixer on medium speed for 30 seconds until smooth. Scrape down sides of bowl.
- Add powdered sugar and vanilla extract. Mix on low speed until incorporated, then beat on medium speed for 30 seconds until fluffy.
- Add 2-3 drops green food coloring and mix on low until evenly distributed. Add more drops if desired for a deeper green.
- Chop 2 Christmas tree cakes into 1/4-inch cubes. Gently fold them into the cream cheese mixture with a spatula, being careful not to overmix.
- Transfer dip to a serving bowl and spread evenly.
- Crumble the remaining 2 Christmas tree cakes over the top, including the green frosting and white squiggles.
- Sprinkle holiday sprinkles generously over the top.
- Serve immediately with graham crackers, vanilla wafers, or pretzels.
Notes
For best texture, serve within an hour of making. If refrigerated, let sit at room temperature for 15-20 minutes before serving. The color deepens over time, so add food coloring sparingly if making ahead. Double the recipe for parties of 8-10 people.
Nutrition
- Serving Size: 1/4 cup
- Calories: 200
- Sugar: 15
- Sodium: 150
- Fat: 12
- Saturated Fat: 7
- Carbohydrates: 20
- Protein: 3
Keywords: Christmas tree cake dip, 5-minute dessert, no-bake holiday dip, Little Debbie dip, easy holiday recipe