My neighbor Margaret watched me wrestling with a bag of groceries on her front steps last December. I was trying to balance a carton of eggnog, a block of cream cheese, and my phone while simultaneously failing to open her screen door. She didn’t say anything at first—just shook her head with this knowing smile and came over to take the eggnog from my hands. “You’re overcomplicating it,” she said, leading me into her kitchen where the smell of ginger and cinnamon hung in the air like a warm blanket. She pulled out a worn recipe card, the edges soft and rounded from years of use, and told me about the cheesecake her mother used to make every Christmas Eve. The original version was a heavy, rich affair that left everyone loosening their belts before dessert was even finished. But Margaret, being Margaret, had spent years tinkering with it. She wanted something that felt just as special but didn’t leave you feeling like you’d swallowed a brick.
I remember standing in her kitchen, sneaking spoonfuls of the filling while she wasn’t looking—honestly, I couldn’t help myself. The texture was so silky, so perfectly balanced between creamy and light, that I knew I had to learn how to make it myself. She caught me mid-scoop and just laughed. “That’s how you know it’s right,” she said. “When you can’t keep your fingers out of it.”
That afternoon turned into a three-hour conversation about nutmeg, the difference between store-bought and homemade gingersnaps, and why you should always use room temperature eggs. Margaret’s version of this lightened-up eggnog cheesecake with gingersnap crust became my go-to holiday dessert. Maybe you’ve been there—scrolling through endless recipes, trying to find something that feels festive without derailing your healthy eating goals. This is that recipe. It’s the one that makes people close their eyes after the first bite and say, “Wait, this is actually good for me?”
Why You’ll Love This Lightened-Up Eggnog Cheesecake
Let me tell you something I learned the hard way: most “light” cheesecakes taste like a compromise. They’re dry, or they’re grainy, or they just don’t have that rich, indulgent mouthfeel that makes cheesecake worth eating in the first place. This lightened-up eggnog cheesecake with gingersnap crust is none of those things. It’s the real deal, just a little smarter about it.
- Quick & Easy: While cheesecake always needs some patience for chilling, the active prep time is only about 20 minutes. You can throw this together while the turkey rests on Thanksgiving or while you’re wrapping presents on Christmas Eve.
- Simple Ingredients: No weird protein powders or obscure health food store finds. Everything on the ingredient list is something you can grab at your regular grocery store—probably already have most of it in your pantry, honestly.
- Perfect for Holiday Gatherings: This is the dessert that satisfies both your aunt who’s doing Whole30 and your cousin who brings triple-fudge brownies. It’s festive enough for Christmas dinner, New Year’s Eve parties, or just a cozy night in with a mug of tea.
- Crowd-Pleaser: I’ve brought this to four different holiday parties now, and every single time, someone asks for the recipe. Even the self-proclaimed “I don’t like light desserts” people go back for seconds.
- Unbelievably Delicious: The texture is where this recipe really shines. It’s creamy without being heavy, rich without being cloying, and the gingersnap crust adds this warm, spicy crunch that perfectly complements the silky eggnog filling.
What makes this lightened-up eggnog cheesecake different from every other “healthy” cheesecake recipe out there? It’s the technique. Instead of cutting all the fat and ending up with something sad and rubbery, I use a combination of reduced-fat cream cheese and Greek yogurt to maintain that luxurious texture while slashing calories and saturated fat. The eggnog itself does most of the heavy lifting for flavor, so you don’t need a ton of added sugar. It’s comfort food reimagined—healthier, yes, but with the same soul-soothing satisfaction that makes a slice of cheesecake feel like a hug on a plate.
What Ingredients You Will Need
This lightened-up eggnog cheesecake uses simple, wholesome ingredients to deliver that holiday flavor without the usual heavy cream and mountains of sugar. Most of these are pantry staples during the holiday season, which makes this recipe dangerously easy to whip up on a whim.
For the Gingersnap Crust
- 1 ½ cups crushed gingersnap cookies (about 25-30 cookies) — I recommend Anna’s Ginger Thins or your favorite bakery-style gingersnaps. The spicier the cookie, the better the crust. You want that bold ginger-clove-nutmeg punch to stand up to the creamy filling.
- 2 tablespoons melted butter (use unsalted to control the sodium) — This binds the crust without making it greasy. You can substitute coconut oil for a dairy-free version, though the flavor will shift slightly.
- 1 tablespoon brown sugar — Just a touch of sweetness to complement the spicy gingersnaps. Dark brown sugar adds more molasses depth, but light brown works fine too.
- Pinch of salt — Don’t skip this! Salt balances the sweetness and makes the crust taste more complex.
For the Cheesecake Filling
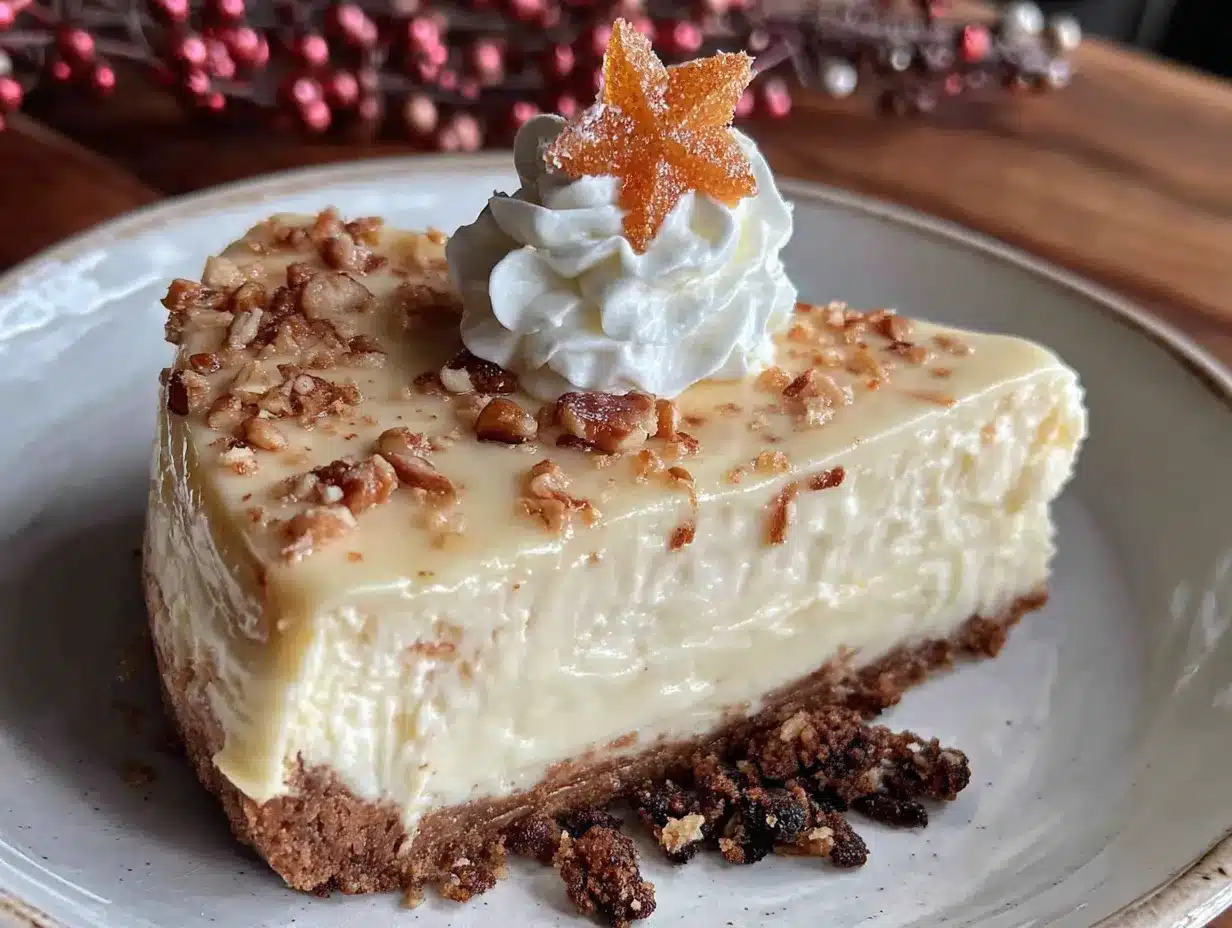
- 16 ounces reduced-fat cream cheese (Neufchâtel), softened — This is the secret to the lightened-up texture. Full-fat cream cheese makes the cheesecake too heavy, while nonfat makes it chalky. Reduced-fat is the Goldilocks option.
- 1 cup plain Greek yogurt (2% or full-fat) — Adds tang and creaminess without the calories of heavy cream. I prefer Fage or Chobani for their thick, stable texture. Drain any excess liquid before using.
- 1 cup eggnog — Use your favorite brand. I like the refrigerated stuff from the dairy aisle rather than the shelf-stable cartons. The real eggnog has better flavor and texture. If you’re feeling fancy, you can even use homemade eggnog.
- ⅔ cup granulated sugar — This is less sugar than most cheesecake recipes call for, but the eggnog brings natural sweetness. You can reduce to ½ cup if you prefer a less sweet dessert.
- 2 large eggs, room temperature — Room temperature eggs incorporate more smoothly into the batter, preventing lumps. Take them out of the fridge about 30 minutes before you start baking.
- 1 large egg yolk — The extra yolk adds richness and helps the cheesecake set up properly. Save the white for an omelet or add it to scrambled eggs.
- 2 tablespoons cornstarch — This stabilizes the filling and helps prevent cracking. It’s the secret to that smooth, professional-looking top.
- 1 teaspoon vanilla extract — Pure vanilla makes a difference here. Skip the imitation stuff for this recipe.
- 1 teaspoon ground nutmeg — Freshly grated is incredible if you have whole nutmeg. Pre-ground works perfectly fine too.
- ½ teaspoon ground cinnamon — Adds warmth and depth to the eggnog flavor.
- ¼ teaspoon ground cloves — Just a whisper. Cloves are potent, and too much can make the cheesecake taste medicinal.
For the Optional Topping
- Light whipped cream — A dollop on top makes it feel extra festive without adding too many calories. You can use store-bought or make your own with heavy cream and a touch of powdered sugar.
- Extra grated nutmeg — For garnish. It also makes the cheesecake look beautiful on a holiday table.
- Crushed gingersnap crumbs — Sprinkle on top for texture contrast.
Equipment Needed
You don’t need a professional bakery setup to make this lightened-up eggnog cheesecake. Most of these tools are standard kitchen equipment, and I’ve included alternatives for anything you might not have on hand.
- 9-inch springform pan — This is non-negotiable for cheesecake. The removable sides let you release the cheesecake without damaging it. If you don’t have one, you can use a deep-dish pie plate, but the slices won’t be as neat.
- Food processor or rolling pin — For crushing the gingersnaps. A food processor gives you even crumbs in seconds. If you don’t have one, put the cookies in a zip-top bag and go to town with a rolling pin. It’s therapeutic, honestly.
- Electric hand mixer or stand mixer — You need something to beat the cream cheese until it’s smooth. A whisk and some serious arm strength could work, but you’ll be tired before you even start baking.
- Large mixing bowls — One for the crust, one for the filling. Glass or stainless steel works best.
- Rubber spatula — For scraping down the bowl and folding the ingredients together. A silicone spatula is ideal because it won’t scratch your bowls.
- Measuring cups and spoons — Accurate measurements matter in cheesecake. Too much liquid and it won’t set properly.
- Roasting pan or large baking dish — For the water bath. You’ll place the springform pan inside this and fill it with hot water to create a steamy environment that prevents cracking.
- Aluminum foil — To wrap the outside of the springform pan so water doesn’t seep into the crust. Use heavy-duty foil and don’t skimp on the layers.
- Cooling rack — Allows air to circulate around the pan as the cheesecake cools. A wire rack is best, but you can use a folded kitchen towel in a pinch.
Budget-friendly tip: You can find springform pans at thrift stores for a few dollars. I got mine for $3 at a garage sale, and it’s still going strong five years later.
Preparation Method
Making this lightened-up eggnog cheesecake with gingersnap crust is a labor of love, but it’s not complicated. Follow these steps carefully, and you’ll end up with a dessert that looks like it came from a fancy bakery.
Step 1: Prepare the Crust
Preheat your oven to 350°F (175°C). While it’s heating up, crush your gingersnap cookies into fine crumbs. You want about 1 ½ cups of crumbs. If you’re using a food processor, pulse the cookies until they look like wet sand. If you’re using a rolling pin, put the cookies in a zip-top bag and crush them until no large pieces remain. In a medium bowl, combine the gingersnap crumbs, melted butter, brown sugar, and salt. Stir with a fork until the mixture looks like damp sand and holds together when you squeeze it in your fist. Press this mixture firmly into the bottom of your springform pan. Use the bottom of a measuring cup or a flat-bottomed glass to really pack it down tight. Bake the crust for 8-10 minutes, until it’s fragrant and just starting to darken at the edges. Set it aside to cool while you make the filling. Leave the oven on.
Step 2: Wrap the Pan
While the crust cools, take a large sheet of heavy-duty aluminum foil and wrap it around the outside of your springform pan. You want to cover the bottom and come up the sides by at least 3 inches. Use two layers of foil to be safe. This prevents water from the water bath from seeping into your crust. Trust me on this—I learned the hard way during my first cheesecake attempt, and a soggy crust is heartbreaking.
Step 3: Make the Filling
In a large mixing bowl, beat the softened reduced-fat cream cheese with an electric mixer on medium speed until it’s smooth and creamy, about 2 minutes. Scrape down the sides and bottom of the bowl with a rubber spatula. Add the Greek yogurt and beat for another minute until combined. Don’t overmix—you don’t want to incorporate too much air, which can cause cracks. In a separate small bowl, whisk together the eggnog, eggs, egg yolk, vanilla extract, and cornstarch until smooth. With the mixer on low speed, slowly pour the eggnog mixture into the cream cheese mixture. Add the sugar, nutmeg, cinnamon, and cloves. Mix just until everything comes together. Stop and scrape the bowl a couple of times, but don’t beat the filling more than necessary. The batter should be silky and smooth, with no lumps of cream cheese visible.
Step 4: Assemble and Bake
Pour the filling over the cooled crust. Use your spatula to gently smooth the top. Give the pan a gentle tap on the counter to release any air bubbles that might have formed. Place the wrapped springform pan into your roasting pan or large baking dish. Carefully pour hot water into the roasting pan until it reaches about halfway up the sides of the springform pan. This water bath creates a humid environment that helps the cheesecake bake evenly without cracking. Carefully transfer the whole setup to the preheated oven. Bake at 350°F (175°C) for 45-55 minutes. The edges should be set and slightly puffed, but the center should still jiggle when you gently shake the pan. It will look underdone in the middle—that’s exactly what you want. Overbaking is the number one cause of cracked cheesecake.
Step 5: Cool Gradually
Turn off the oven and crack the door open. Let the cheesecake sit in the warm oven for 1 hour. This gradual cooling prevents the sudden temperature change that causes cracks. After an hour, remove the cheesecake from the water bath and set it on a cooling rack. Run a thin knife around the edge of the pan to loosen the cheesecake (this also helps prevent cracking as it cools). Let it cool completely at room temperature, about 2 hours. Then cover the pan with plastic wrap and refrigerate for at least 6 hours, but preferably overnight. I know the wait is torture, but this is where the magic happens. The flavors meld together, the texture sets up perfectly, and the cheesecake becomes sliceable.
Cooking Tips & Techniques
After making this lightened-up eggnog cheesecake more times than I can count—and failing spectacularly at least twice—I’ve collected some hard-won wisdom that’ll save you from my early mistakes.
Room temperature ingredients matter more than you think. Cold cream cheese creates lumps that no amount of beating will fully smooth out. Cold eggs seize up the batter and make it grainy. I know it’s tempting to rush, but taking 30 minutes to let everything come to room temperature makes a noticeable difference in the final texture. If you’re in a hurry, you can cut the cream cheese into cubes and let it sit on the counter while you crush the cookies.
Don’t overmix the filling. This was my biggest mistake the first time. I thought more mixing would make the cheesecake fluffier, but all it did was incorporate too much air. Those air bubbles expand during baking and then collapse, leaving you with cracks and a sunken center. Mix on low speed and stop as soon as everything is combined. A few small lumps are better than a cracked top.
The water bath is your friend. I know it’s fussy and you might be tempted to skip it. Don’t. The water bath insulates the cheesecake and keeps the edges from baking faster than the center. Without it, you’ll end up with a puffy, cracked mess. If you’re worried about water seeping in, use two layers of heavy-duty foil and check for any tears before adding the water.
Let it chill overnight. I’ve made this cheesecake and tried to serve it after only 4 hours of chilling. It was fine, but it wasn’t great. Overnight chilling allows the cornstarch to fully thicken the filling and the flavors to develop. The difference between a 6-hour chill and a 12-hour chill is real. Plan ahead and make this the day before you need it.
Use fresh nutmeg if you can. I know it’s an extra step, but freshly grated nutmeg has this floral, aromatic quality that pre-ground nutmeg just can’t match. It makes the eggnog flavor pop in a way that feels brighter and more festive. A microplane or fine grater works perfectly.
Variations & Adaptations
One of the things I love most about this lightened-up eggnog cheesecake is how adaptable it is. You can tweak it to fit different dietary needs, seasonal cravings, or just whatever you have in your pantry.
Gluten-Free Version: Swap the gingersnap cookies for gluten-free gingersnaps. Several brands make excellent gluten-free versions now. The rest of the ingredients are naturally gluten-free, so this is an easy adaptation. Just double-check your eggnog label to make sure it doesn’t contain any wheat-derived thickeners.
Dairy-Free Adaptation: Use dairy-free cream cheese (I like Kite Hill or Miyoko’s) and a thick coconut yogurt instead of Greek yogurt. For the crust, use coconut oil instead of butter. The flavor will shift slightly—the coconut notes will come through—but it’s still delicious. Make sure your eggnog is also dairy-free; several brands make excellent oat or almond-based eggnog during the holidays.
Lower Sugar Option: Reduce the sugar to ⅓ cup and add a tablespoon of maple syrup or honey for extra depth of flavor. You can also use a sugar substitute like monk fruit sweetener or erythritol, but keep in mind that the texture might be slightly different. I’ve tested this with Lakanto monk fruit blend, and it worked surprisingly well.
Pumpkin Eggnog Cheesecake: For a fall twist, replace ¼ cup of the eggnog with pumpkin puree and add an extra teaspoon of pumpkin pie spice. The pumpkin adds moisture, so you might need to bake it 5-10 minutes longer. This version is incredible for Thanksgiving.
Individual Mini Cheesecakes: Press the crust into a muffin tin lined with paper liners and fill each cup about ¾ full. Bake for 18-22 minutes at 350°F (175°C). These are perfect for parties where you want individual portions. Plus, they bake faster and don’t need a water bath.
Serving & Storage Suggestions
This lightened-up eggnog cheesecake is beautiful on its own, but a few thoughtful touches take it from “homemade dessert” to “holiday centerpiece.”
Serving Temperature: Take the cheesecake out of the refrigerator about 15-20 minutes before serving. This takes the chill off and allows the flavors to open up. Cold cheesecake tastes less sweet and the spices are muted. Room temperature cheesecake is where the magic happens.
Presentation Ideas: Top each slice with a dollop of light whipped cream, a light dusting of freshly grated nutmeg, and a few crushed gingersnap crumbs. For an extra festive touch, add a cinnamon stick or a sprig of fresh mint. The green against the pale golden cheesecake is gorgeous on a holiday table.
Complementary Pairings: This cheesecake pairs beautifully with a cup of spiced chai, a mug of hot cocoa, or a glass of cold milk. For adult gatherings, a small glass of bourbon or spiced rum complements the eggnog flavor perfectly. I’ve also served it alongside fresh cranberry sauce, and the tart-sweet contrast is wonderful.
Storage Instructions: Store leftover cheesecake in the refrigerator, covered, for up to 5 days. The flavor actually improves after a day or two as the spices meld together. To prevent the crust from getting soggy, place a paper towel inside the container to absorb excess moisture. Change the paper towel every day if you’re storing it for more than a couple of days.
Freezing Instructions: This cheesecake freezes beautifully. Wrap individual slices tightly in plastic wrap, then place them in a freezer-safe container or zip-top bag. Freeze for up to 3 months. To thaw, transfer a slice to the refrigerator overnight. The texture will be just as creamy as the day you made it. I like to keep a few slices in the freezer for unexpected guests or late-night cravings.
Nutritional Information & Benefits
I’m not a nutritionist, but I’ve done the math on this lightened-up eggnog cheesecake, and the numbers are pretty impressive for a dessert that tastes this indulgent.
Per slice (based on 12 servings): approximately 285 calories, 14g fat, 28g carbohydrates, 9g protein, 3g fiber, 18g sugar. Compare that to traditional eggnog cheesecake, which can easily clock in at 450-500 calories per slice. You’re saving about 200 calories and a significant amount of saturated fat without sacrificing flavor or texture.
The Greek yogurt adds protein and probiotics, which support digestive health. The reduced-fat cream cheese cuts the saturated fat by almost half compared to regular cream cheese. Gingersnaps contain ginger, which has anti-inflammatory properties and can help with digestion—especially useful after a heavy holiday meal. The nutmeg and cinnamon are both rich in antioxidants and have been studied for their potential blood sugar-regulating effects.
Dietary considerations: This recipe is vegetarian and can be made gluten-free and dairy-free with the substitutions mentioned above. It’s lower in sugar than traditional cheesecake but still contains refined sugar. The main allergens are dairy, eggs, and wheat (from the gingersnaps).
Conclusion
This lightened-up eggnog cheesecake with gingersnap crust has become my signature holiday dessert, and I think it’s going to become yours too. It’s everything you want from a holiday cheesecake—creamy, spicy, festive, and satisfying—without the heavy, guilt-inducing aftermath of traditional recipes. Margaret’s original version was good, but this lighter adaptation is the one I keep coming back to year after year.
What I love most about this recipe is how it brings people together. Every time I serve it, someone asks for the recipe. Every time I share it, I think about that afternoon in Margaret’s kitchen, learning that good food doesn’t have to be complicated or heavy to be memorable. This cheesecake is proof that you can have your holiday dessert and eat it too—without loosening your belt afterward.
I’d love to hear how yours turns out! Leave a comment below and let me know if you tried any variations or if this became a new holiday tradition in your home. And if you’re looking for more lightened-up holiday desserts, check out my light pumpkin pie recipe or these healthy gingerbread cookies. Happy baking, and here’s to a holiday season filled with delicious food that actually makes you feel good!
Frequently Asked Questions
Can I use low-fat or nonfat cream cheese instead of reduced-fat?
I don’t recommend it. Nonfat cream cheese has a different chemical structure and can make the cheesecake rubbery or grainy. Reduced-fat cream cheese (Neufchâtel) has the perfect balance of creaminess and lower fat content. Stick with what the recipe calls for, and you’ll get the best texture.
Why did my cheesecake crack on top?
Cracks happen for a few reasons: overmixing the batter, overbaking, or cooling too quickly. Make sure you’re mixing on low speed and only until combined. Bake until the edges are set but the center still jiggles. And always cool the cheesecake gradually—first in the turned-off oven with the door cracked, then at room temperature, then in the fridge. If it still cracks, don’t worry! A dollop of whipped cream covers a multitude of sins.
Can I make this cheesecake without a water bath?
You can, but I really don’t recommend it. The water bath creates a gentle, even heat that prevents the edges from baking faster than the center. Without it, you’re much more likely to end up with cracks and a dry texture. If you absolutely can’t do a water bath, place a pan of hot water on the oven rack below the cheesecake to add moisture to the oven.
How do I know when the cheesecake is done baking?
The edges should be set and slightly puffy, but the center should still wobble when you gently shake the pan. It should look like Jell-O that’s just starting to set—not liquid, but definitely not firm. The internal temperature should be around 150°F (65°C) when tested with an instant-read thermometer. Remember, it will continue to set as it cools.
Can I use store-bought gingersnaps for the crust?
Absolutely! Store-bought gingersnaps work perfectly. I’ve used everything from fancy bakery cookies to budget-friendly store brands, and they all work. The key is to make sure they’re crispy, not soft. If your cookies are on the softer side, you might need to bake the crust a few minutes longer to get it properly set. Anna’s Ginger Thins are my personal favorite for their spicy kick and consistent texture.
Pin This Recipe!
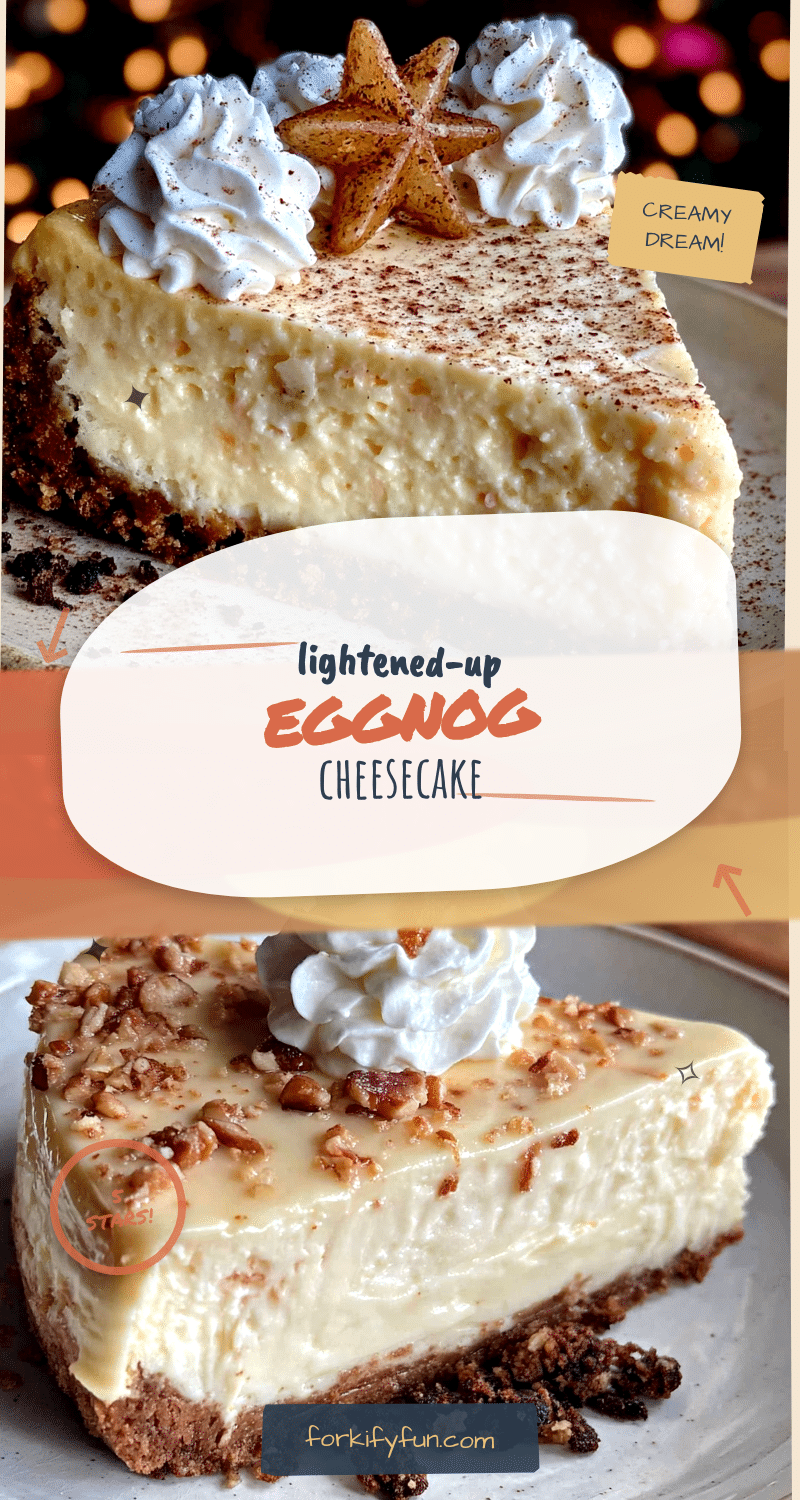
Lightened-Up Eggnog Cheesecake with Easy Gingersnap Crust
A creamy, festive cheesecake made with reduced-fat cream cheese and Greek yogurt for a lighter holiday dessert that doesn’t compromise on flavor. The spicy gingersnap crust perfectly complements the silky eggnog filling.
- Prep Time: 20 minutes
- Cook Time: 50 minutes
- Total Time: 8 hours 10 minutes (includes chilling)
- Yield: 12 servings 1x
- Category: Dessert
- Cuisine: American
Ingredients
- 1 ½ cups crushed gingersnap cookies (about 25–30 cookies)
- 2 tablespoons melted unsalted butter
- 1 tablespoon brown sugar
- Pinch of salt
- 16 ounces reduced-fat cream cheese (Neufchâtel), softened
- 1 cup plain Greek yogurt (2% or full-fat)
- 1 cup eggnog
- ⅔ cup granulated sugar
- 2 large eggs, room temperature
- 1 large egg yolk
- 2 tablespoons cornstarch
- 1 teaspoon vanilla extract
- 1 teaspoon ground nutmeg
- ½ teaspoon ground cinnamon
- ¼ teaspoon ground cloves
- Light whipped cream (for topping, optional)
- Extra grated nutmeg (for garnish, optional)
- Crushed gingersnap crumbs (for topping, optional)
Instructions
- Preheat oven to 350°F (175°C). Crush gingersnap cookies into fine crumbs. In a medium bowl, combine crumbs, melted butter, brown sugar, and salt. Press mixture firmly into bottom of a 9-inch springform pan. Bake 8-10 minutes until fragrant. Set aside to cool. Leave oven on.
- Wrap outside of springform pan with two layers of heavy-duty aluminum foil, covering bottom and coming up sides at least 3 inches.
- In a large bowl, beat softened cream cheese with electric mixer on medium speed until smooth, about 2 minutes. Add Greek yogurt and beat 1 minute until combined. In a separate bowl, whisk together eggnog, eggs, egg yolk, vanilla, and cornstarch. With mixer on low, slowly pour eggnog mixture into cream cheese mixture. Add sugar, nutmeg, cinnamon, and cloves. Mix just until combined. Do not overmix.
- Pour filling over cooled crust. Smooth top with spatula. Tap pan gently on counter to release air bubbles. Place wrapped pan in a roasting pan. Pour hot water into roasting pan until it reaches halfway up sides of springform pan. Bake 45-55 minutes until edges are set but center still jiggles.
- Turn off oven and crack door open. Let cheesecake sit in warm oven 1 hour. Remove from water bath and set on cooling rack. Run thin knife around edge of pan. Cool completely at room temperature, about 2 hours. Cover with plastic wrap and refrigerate at least 6 hours, preferably overnight.
- Before serving, let cheesecake sit at room temperature 15-20 minutes. Top with whipped cream, nutmeg, and gingersnap crumbs if desired.
Notes
Room temperature ingredients are crucial for smooth texture. Do not overmix filling to avoid cracks. Water bath is essential for even baking. Chill overnight for best flavor and texture. For gluten-free, use gluten-free gingersnaps. For dairy-free, use dairy-free cream cheese, coconut yogurt, and coconut oil.
Nutrition
- Serving Size: 1 slice
- Calories: 285
- Sugar: 18
- Sodium: 320
- Fat: 14
- Saturated Fat: 7
- Carbohydrates: 28
- Fiber: 3
- Protein: 9
Keywords: eggnog cheesecake, light cheesecake, holiday dessert, gingersnap crust, reduced-fat cheesecake, Christmas dessert


