My neighbor Jenna wasn’t trying to impress me. I’d stopped by to drop off a book I’d borrowed, and the smell hit me before I even knocked. It was a Tuesday night, nothing special—she had on sweatpants and a messy bun, and there was a pile of mail on her counter. But that smell. It was warm and savory, with this rich, cheesy edge that made my stomach actually growl out loud. She just shrugged and said, “Oh, it’s just that beef and rice thing I throw together when I don’t feel like cooking.” Just that. Like she hadn’t just created the coziest, most soul-hugging aroma I’d ever walked into.
I stood there in her doorway, book still in hand, and I think I said something intelligent like, “That smells… really good.” She laughed and offered me a bowl. Honestly, I didn’t even hesitate. I sat at her kitchen table—the one with the slightly wobbly leg you have to prop with a napkin—and took a bite. And let me tell you, it was one of those moments where you just close your eyes for a second. The rice was perfectly tender, the beef was seasoned just right, and the cheese was all melty and stretchy, pulling apart in these gorgeous ribbons. It was comfort in a bowl, the kind of meal that makes you forget whatever kind of day you had.
I asked her for the recipe, and she scribbled it on a sticky note. No measurements, just a list of things and a vague “cook until it looks right.” It took me three tries to get it exactly like hers, but this version? This is the one. It’s become my go-to for those nights when I need something warm, filling, and honestly, a little bit forgiving. Maybe you’ve been there—standing in your kitchen, tired, hungry, and just wanting something that feels like a hug. This skillet is that. And the best part? It’s all done in one pan, so cleanup is just as easy as the cooking. I’ve been making this Cozy Cheesy Beef Rice Skillet for years now, and it still hits the same way it did that Tuesday night at Jenna’s table.
Why You’ll Love This Recipe
This isn’t just another weeknight dinner. This is the kind of recipe that becomes a regular in your rotation, the one you text your friends about. I’ve tested this Cozy Cheesy Beef Rice Skillet more times than I can count, tweaking the seasoning, adjusting the liquid ratio, and trying different cheeses until it was absolutely perfect. It’s family-approved (my picky nephew devours it), and it’s honestly foolproof once you get the hang of it.
- Quick & Easy: From start to finish, this comes together in about 30 minutes. Perfect for those nights when you’re short on time but still want something homemade.
- Simple Ingredients: You probably have most of these in your pantry and fridge right now. No fancy grocery store trips required.
- Perfect for Cozy Nights: This is the ultimate comfort food for cold weather, rainy days, or any time you need a little pick-me-up.
- Crowd-Pleaser: Kids love the cheesy goodness, and adults appreciate the savory, satisfying flavors. It’s a win-win.
- Unbelievably Delicious: The combination of seasoned beef, tender rice, and melted cheese is pure magic. It’s simple, but it’s next-level cozy.
What makes this recipe different from all the others out there? It’s the technique. Instead of cooking the rice separately and then mixing everything together, we cook the rice right in the same pan with the beef and aromatics. This lets the rice absorb all those amazing flavors, making every single bite incredibly savory. Plus, using a blend of cheddar and Monterey Jack cheese gives it that perfect melt and a rich, creamy texture that you just can’t get from one cheese alone. It’s comfort food reimagined—faster, easier, but with the same soul-soothing satisfaction that makes you want to curl up on the couch with a big bowl.
What Ingredients You Will Need
This recipe uses simple, wholesome ingredients that come together to create something truly special. The beauty of this Cozy Cheesy Beef Rice Skillet is that everything works in harmony—the beef provides richness, the vegetables add depth, and the cheese brings it all together in a creamy, comforting blanket. Most of these are pantry staples, so you can whip this up anytime the craving strikes.
- 1 pound ground beef (85/15 lean): I prefer 85/15 for the best flavor—it has enough fat to keep the dish moist without being greasy. If you use leaner beef, you might need to add a tablespoon of olive oil.
- 1 medium yellow onion, diced: About 1 cup. Onion is the flavor base here. It adds sweetness and depth as it cooks down.
- 2 cloves garlic, minced: Fresh garlic is always best. Don’t use the jarred stuff—it just doesn’t have the same punch.
- 1 green bell pepper, diced: About 1 cup. This adds a subtle sweetness and a little bit of crunch. You can use red or orange bell pepper for a sweeter flavor.
- 1 cup long-grain white rice, uncooked: Do not use minute rice or instant rice—they won’t hold up to the cooking time. Long-grain rice gives the best texture. I recommend using a brand like Mahatma or Carolina.
- 2 cups beef broth: Use low-sodium broth so you can control the salt level. Better Than Bouillon roasted beef base is my go-to for the richest flavor.
- 1 can (14.5 ounces) diced tomatoes, undrained: Fire-roasted diced tomatoes add a lovely smoky flavor, but regular diced tomatoes work perfectly too.
- 1 teaspoon smoked paprika: This is the secret ingredient. It adds a warm, smoky depth that takes the whole dish up a notch.
- 1/2 teaspoon dried oregano: A little earthy, a little floral—it pairs beautifully with the beef and tomatoes.
- 1/2 teaspoon salt: Adjust to taste, especially if your broth is salted.
- 1/4 teaspoon black pepper: Freshly ground is always better.
- 1 1/2 cups shredded cheddar cheese: Sharp cheddar gives the best flavor. Shred it yourself from a block—it melts so much smoother than pre-shredded cheese, which often has anti-caking agents.
- 1/2 cup shredded Monterey Jack cheese: This adds incredible creaminess and helps the cheese sauce get that perfect, stretchy texture.
- 2 tablespoons chopped fresh parsley, for garnish (optional): A little pop of color and freshness at the end makes everything look more appetizing.
Substitution Guidance: You can use ground turkey or ground chicken instead of beef. Just add a tablespoon of olive oil to the pan first to prevent sticking. For a gluten-free option, this recipe is naturally gluten-free as long as you use certified gluten-free broth. If you want to swap the rice, use cauliflower rice for a low-carb version—just cook it separately and stir it in at the end, as cauliflower rice releases a lot of water.
Equipment Needed
One of the best things about this recipe is how little equipment it requires. You really only need a few basic tools, and I’ve tested this with different pans to see what works best.
- Large skillet or Dutch oven (12-inch with a lid): This is non-negotiable. You need a pan that’s wide enough to hold everything and has a tight-fitting lid. A cast-iron skillet works beautifully, but a good non-stick skillet is fine too. I use my 12-inch stainless steel skillet for this—it gives a nice fond on the bottom that adds flavor.
- Wooden spoon or spatula: For breaking up the beef and stirring everything together. A wooden spoon won’t scratch your pan, which is nice.
- Chef’s knife and cutting board: For dicing the onion, bell pepper, and mincing the garlic.
- Measuring cups and spoons: For accuracy. I’ve made this enough times to eyeball it, but for your first try, measure carefully.
- Box grater (optional but recommended): For shredding your own cheese. It takes an extra minute, but the difference in meltability is huge. Pre-shredded cheese has cellulose in it to prevent clumping, which also prevents it from melting smoothly.
If you don’t have a lid that fits your skillet, you can use a large piece of aluminum foil tightly crimped around the edges. It’s not elegant, but it works in a pinch.
Preparation Method
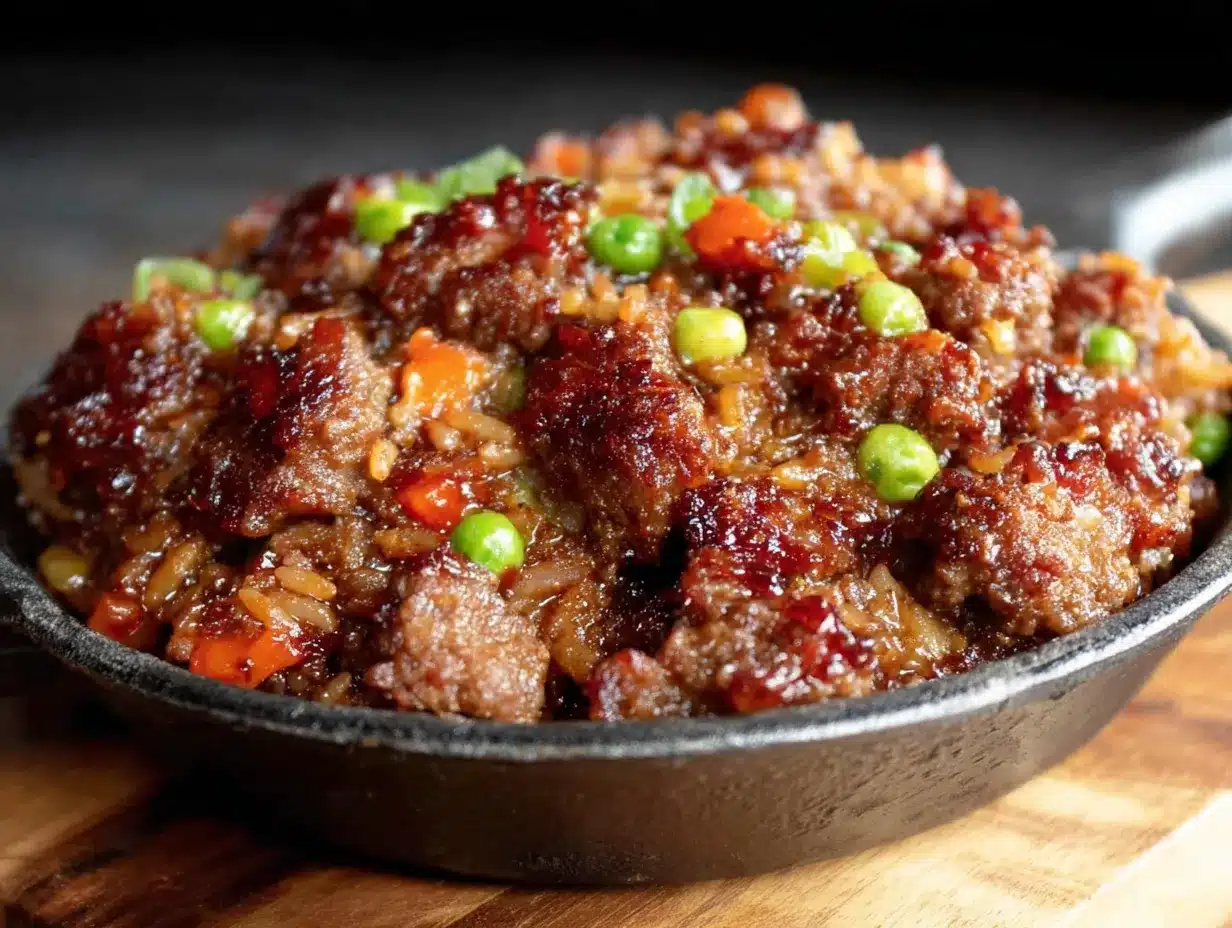
Let me walk you through this step by step. I’ve made this Cozy Cheesy Beef Rice Skillet more times than I can count, and I’ve learned a few tricks along the way to make it turn out perfectly every single time.
- Brown the beef: Place your large skillet over medium-high heat and add the ground beef. Break it up with your wooden spoon as it cooks. Let it get a nice brown color—don’t stir it constantly. Let it sit for a minute or two at a time so it can develop that deep, savory crust. This takes about 5-7 minutes. Once it’s browned, use a slotted spoon to transfer the beef to a plate, leaving about 1 tablespoon of drippings in the pan. If your beef is very lean and there’s no drippings, add a tablespoon of olive oil.
- Sauté the aromatics: Reduce the heat to medium. Add the diced onion and bell pepper to the pan with the drippings. Cook for about 4-5 minutes, stirring occasionally, until the onion is translucent and starting to soften. The smell at this point is already amazing. Add the minced garlic and cook for another 30 seconds, just until it’s fragrant. Be careful not to burn the garlic—it turns bitter quickly.
- Toast the rice: Add the uncooked rice to the pan with the vegetables. Stir it around for about 1-2 minutes. This is a step a lot of people skip, but it makes a real difference. Toasting the rice gives it a nutty flavor and helps it stay separate and fluffy instead of turning into mush. You’ll notice it starts to smell a little toasty.
- Add the liquids and seasonings: Pour in the beef broth and the undrained can of diced tomatoes. Add the smoked paprika, dried oregano, salt, and black pepper. Stir everything together, scraping up any browned bits from the bottom of the pan—that’s pure flavor. Return the browned beef to the pan and stir to combine.
- Bring to a simmer: Increase the heat to high and bring the mixture to a boil. Once it’s boiling, reduce the heat to low, cover the pan with a tight-fitting lid, and let it simmer. This is the crucial part—do not lift the lid to check on it for at least 18 minutes. The steam is what cooks the rice perfectly.
- Check the rice: After 18 minutes, carefully remove the lid. The rice should be tender and most of the liquid should be absorbed. If the rice is still a little firm and there’s still liquid, cover it again and let it cook for another 2-3 minutes. If the rice is tender but there’s still a little liquid left, that’s fine—it will absorb as it rests.
- Add the cheese: Remove the pan from the heat. Sprinkle the shredded cheddar and Monterey Jack cheese evenly over the top of the rice mixture. Don’t stir it in yet—just let it sit on top. Cover the pan again for 2-3 minutes to let the cheese melt from the residual heat. This creates a beautiful, gooey cheese layer.
- Stir and serve: After the cheese has melted, give everything a good stir to incorporate the cheese into the rice and beef. The cheese will create a creamy, cohesive sauce that coats every grain of rice and every piece of beef. Garnish with fresh parsley if you’re using it, and serve immediately.
Pro tip: If you want a little more texture, you can sprinkle some extra cheese on top after stirring and pop the pan under the broiler for 2-3 minutes until it’s bubbly and golden. Just make sure your skillet is oven-safe!
Cooking Tips & Techniques
I’ve made this recipe enough times to know exactly where things can go wrong. Here are the lessons I learned the hard way so you don’t have to.
The rice-to-liquid ratio is everything. The first time I made this, I used too much broth and ended up with soupy rice. The second time, I used too little and the rice was crunchy. The 2 cups of broth plus the liquid from the diced tomatoes is the perfect amount for 1 cup of long-grain white rice. Trust the ratio.
Don’t skip toasting the rice. I know it seems like an extra step, but it’s not. It takes two minutes and it prevents your rice from turning into a sticky, clumpy mess. The toasting process coats the rice grains in fat (the drippings), which helps them stay separate as they cook.
Resist the urge to peek. I cannot stress this enough. Every time you lift that lid, you let out steam, and steam is what cooks the rice. I had a friend who kept checking her rice every five minutes, and it took forever to cook and turned out gummy. Just set a timer and walk away.
Shred your own cheese. This is the tip that makes the biggest difference in texture. Pre-shredded cheese is coated with potato starch or cellulose to prevent clumping, which also prevents it from melting smoothly. When you shred your own cheese, it melts into a silky, cohesive sauce instead of a greasy, clumpy mess. I learned this the hard way when I was in a hurry and used pre-shredded cheese—it was still tasty, but the texture was nowhere near as good.
Let it rest before serving. After you add the cheese and stir it in, let the pan sit off the heat for about 5 minutes before serving. This allows the flavors to meld together and the rice to absorb any last bits of liquid. The result is a more cohesive, flavorful dish.
Variations & Adaptations
One of the things I love about this Cozy Cheesy Beef Rice Skillet is how adaptable it is. I’ve tried several variations, and they’ve all been delicious in their own way.
- Spicy Southwest Version: Add 1 diced jalapeño along with the onion and bell pepper. Use pepper jack cheese instead of Monterey Jack, and add 1/2 teaspoon of cumin and a pinch of cayenne pepper with the other seasonings. Top with fresh cilantro and a squeeze of lime juice. This version has a nice, warm kick that’s perfect for chilly nights.
- Vegetarian Version: Swap the ground beef for two cans of drained and rinsed black beans or a package of plant-based crumbles. Use vegetable broth instead of beef broth. The beans add a lovely creamy texture that works really well with the rice and cheese. I’ve made this for my vegetarian sister, and she said it was the best comfort food she’d had in months.
- Loaded Veggie Version: Add 1 cup of frozen corn kernels and 1 cup of frozen peas along with the broth. You can also throw in a handful of fresh spinach right before adding the cheese—it wilts down beautifully and adds a boost of nutrients. This is my go-to when I want to feel like I’m eating something a little healthier without sacrificing any of the comfort factor.
- Mexican-Inspired Version: Add 1 teaspoon of chili powder and 1/2 teaspoon of cumin with the other seasonings. Use a can of diced tomatoes with green chilies (like Rotel) instead of regular diced tomatoes. Top with sliced black olives and a dollop of sour cream. This version is a crowd-pleaser at potlucks.
You can also switch up the cheese. Gouda adds a smoky, buttery flavor. Mozzarella gives an incredible stretch. And a little bit of crumbled feta on top at the end adds a salty, tangy pop that’s really nice.
Serving & Storage Suggestions
This Cozy Cheesy Beef Rice Skillet is a complete meal on its own, but it also pairs beautifully with a few simple sides.
Serving: Serve this hot, straight from the skillet. I like to scoop it into shallow bowls so the cheesy sauce doesn’t get lost. A side of crusty bread is perfect for sopping up any extra sauce. A simple green salad with a tangy vinaigrette cuts through the richness beautifully. For a truly cozy meal, serve it with a side of roasted vegetables like broccoli or asparagus.
Storage: Leftovers keep well in an airtight container in the refrigerator for up to 4 days. The flavors actually get even better as they meld together overnight. I’ve been known to make a double batch just for the leftovers.
Reheating: The best way to reheat this is in a skillet over medium-low heat with a splash of beef broth or water. Stir occasionally until heated through. You can also microwave it in 30-second bursts, stirring in between. If it seems dry, add a little water or broth before reheating. The cheese will still be melty and delicious.
Freezing: This recipe freezes surprisingly well. Let it cool completely, then transfer it to a freezer-safe container. It will keep for up to 3 months. To thaw, place it in the refrigerator overnight. Reheat in a skillet as directed above. I’ve frozen individual portions for quick lunches, and they’re a lifesaver on busy days.
Nutritional Information & Benefits
While this is definitely comfort food, it also has some nutritional highlights worth noting. Here’s an approximate breakdown per serving (based on 6 servings):
- Calories: ~480
- Protein: 28g
- Fat: 22g
- Carbohydrates: 42g
- Fiber: 3g
- Calcium: 25% of the Daily Value
- Iron: 20% of the Daily Value
The ground beef provides high-quality protein and iron, which is essential for energy and healthy blood. The bell peppers and tomatoes are packed with vitamin C and antioxidants. And while cheese gets a bad rap sometimes, it’s a good source of calcium and protein. This isn’t a health food, but it’s a balanced meal that will keep you full and satisfied. I personally love that I can get my family to eat vegetables like bell peppers and onions without any complaints—they’re too busy enjoying the cheesy, beefy goodness.
Conclusion
This Cozy Cheesy Beef Rice Skillet is more than just a recipe—it’s a solution for those nights when you need dinner to be easy, comforting, and absolutely delicious. It’s the kind of meal that brings people to the table, that makes everyone take a second helping, that leaves you with a clean skillet and a full heart.
I love this recipe because it’s forgiving. You can add extra vegetables, swap the protein, use a different cheese, and it still works. It’s a canvas for whatever you have on hand, and it always delivers. That Tuesday night at Jenna’s house, I didn’t know I was about to discover my new favorite comfort food. But now, every time I make it, I think of her wobbly kitchen table and that first incredible bite.
I’d love to hear how this turns out for you. Did you try a variation? Did your kids go back for seconds? Drop a comment below and let me know—I read every single one. And if you share a photo on Pinterest, tag me so I can see your beautiful skillet! Happy cooking, friends.
Frequently Asked Questions
Can I use brown rice instead of white rice?
Yes, but you’ll need to adjust the cooking time and liquid. Brown rice takes about 40-45 minutes to cook and needs about 1/2 cup more liquid. I recommend cooking the brown rice separately and then stirring it into the beef mixture at the end. It’s easier and gives you more control over the texture.
Can I make this in a slow cooker?
You can, but the texture will be different. Brown the beef and sauté the vegetables on the stovetop first, then transfer everything except the rice to the slow cooker. Cook on low for 4-6 hours. About 30 minutes before serving, cook the rice separately and stir it in along with the cheese. The slow cooker version is more of a stew-like consistency, but it’s still delicious.
My rice came out mushy. What went wrong?
Mushy rice usually means too much liquid or the heat was too high. Make sure you’re using a tight-fitting lid and cooking on low heat after it comes to a simmer. Also, don’t stir the rice while it’s cooking—stirring releases starch and makes it gummy. If it’s already mushy, you can try spreading it on a baking sheet and baking it at 350°F for a few minutes to dry it out a bit.
Can I use ground turkey or chicken instead of beef?
Absolutely. Just add a tablespoon of olive oil to the pan before browning the poultry, since it’s leaner than beef. You might also want to add a little extra seasoning since poultry is milder. I’ve made this with ground turkey, and my family didn’t even notice the swap.
How can I make this dairy-free?
Use a dairy-free cheese alternative that melts well, like Violife or Daiya shreds. You can also use nutritional yeast for a cheesy flavor without the dairy. And make sure your broth is dairy-free—some broths contain milk solids. The texture will be slightly different, but it’s still a satisfying, comforting meal.
Pin This Recipe!
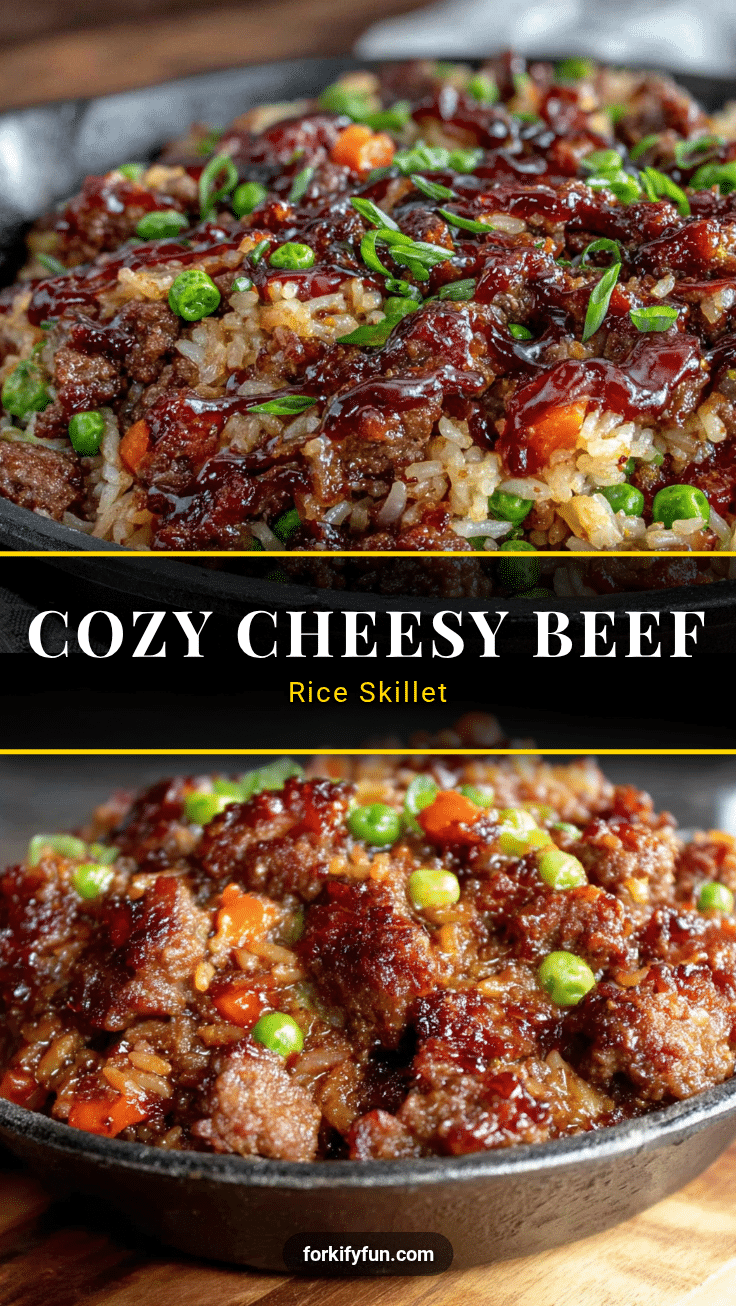
Cozy Cheesy Beef Rice Skillet
A warm, comforting one-pan dinner featuring seasoned ground beef, tender rice, and a blend of melted cheddar and Monterey Jack cheese. This easy 30-minute meal is perfect for busy weeknights and is sure to become a family favorite.
- Prep Time: 10 minutes
- Cook Time: 30 minutes
- Total Time: 40 minutes
- Yield: 6 servings 1x
- Category: Main Course
- Cuisine: American
Ingredients
- 1 pound ground beef (85/15 lean)
- 1 medium yellow onion, diced (about 1 cup)
- 2 cloves garlic, minced
- 1 green bell pepper, diced (about 1 cup)
- 1 cup long-grain white rice, uncooked
- 2 cups low-sodium beef broth
- 1 can (14.5 ounces) diced tomatoes, undrained
- 1 teaspoon smoked paprika
- 1/2 teaspoon dried oregano
- 1/2 teaspoon salt
- 1/4 teaspoon black pepper
- 1 1/2 cups shredded sharp cheddar cheese
- 1/2 cup shredded Monterey Jack cheese
- 2 tablespoons chopped fresh parsley, for garnish (optional)
Instructions
- Brown the beef: Place a large skillet over medium-high heat and add the ground beef. Break it up with a wooden spoon and cook until browned, about 5-7 minutes. Use a slotted spoon to transfer the beef to a plate, leaving about 1 tablespoon of drippings in the pan.
- Sauté the aromatics: Reduce heat to medium. Add the diced onion and bell pepper to the pan with the drippings. Cook for 4-5 minutes, stirring occasionally, until the onion is translucent. Add the minced garlic and cook for 30 seconds until fragrant.
- Toast the rice: Add the uncooked rice to the pan and stir for 1-2 minutes until it smells nutty and is lightly toasted.
- Add liquids and seasonings: Pour in the beef broth and undrained diced tomatoes. Add smoked paprika, dried oregano, salt, and black pepper. Stir to combine, scraping up any browned bits from the bottom of the pan. Return the browned beef to the pan and stir.
- Bring to a simmer: Increase heat to high and bring to a boil. Reduce heat to low, cover with a tight-fitting lid, and let simmer for 18 minutes. Do not lift the lid during this time.
- Check the rice: After 18 minutes, remove the lid. The rice should be tender and most liquid absorbed. If still firm, cover and cook for another 2-3 minutes.
- Add the cheese: Remove the pan from heat. Sprinkle the shredded cheddar and Monterey Jack cheese evenly over the top. Cover and let sit for 2-3 minutes until the cheese is melted.
- Stir and serve: Stir the melted cheese into the rice and beef until well combined. Garnish with fresh parsley if desired. Serve immediately.
Notes
For best results, shred your own cheese from a block—it melts smoother than pre-shredded. Resist the urge to lift the lid while the rice cooks to ensure proper steaming. If you want a golden top, place the skillet under the broiler for 2-3 minutes after adding the cheese (ensure skillet is oven-safe). Leftovers keep in the refrigerator for up to 4 days and freeze well for up to 3 months.
Nutrition
- Serving Size: 1 serving (about 1.5
- Calories: 480
- Sugar: 5
- Sodium: 680
- Fat: 22
- Saturated Fat: 10
- Carbohydrates: 42
- Fiber: 3
- Protein: 28
Keywords: cheesy beef rice skillet, one-pan dinner, easy weeknight meal, comfort food, ground beef recipe, cheesy rice, family dinner


