Last Tuesday, I was staring into my fridge, completely uninspired. A pack of boneless chicken breasts stared back at me—the same ones I’d walked past three days in a row. I wanted something crispy, something with a little punch, but honestly? I didn’t want to deal with a greasy stovetop or a long oven preheat. That’s when my neighbor across the hall, an older guy named Leo who always smells like rosemary and garlic, knocked on my door holding a small jar of his homemade herb rub. He’d seen me hauling groceries the week before and figured I liked to cook. He just handed it over, said “try it on chicken in that air fryer you’re always bragging about,” and walked away. No fanfare, no recipe card—just the jar and a nod.
I stood there for a second, holding this little gift from a near-stranger, and thought, well, here we go. I rubbed that garlicky, herby mixture all over the chicken, popped it in the air fryer, and waited. The smell that filled my apartment was ridiculous—like a fancy steakhouse had somehow moved in next door. And when I bit into that first piece? The crunch was real. The inside was juicy. I actually texted Leo a photo. He sent back a thumbs-up emoji. That’s how this crispy air fryer chicken breast recipe was born—not from a cookbook or a blog, but from a tiny jar of kindness and a little kitchen experiment.
Maybe you’ve been there, too. You want something satisfying that doesn’t take an hour of scrubbing pans afterward. You want flavor that actually sticks, not just a sprinkle of salt that falls off. This recipe is for those nights. It’s simple enough for a Tuesday, but good enough to serve to someone you want to impress. Let me tell you, it’s become my go-to for busy weeks when I still want to eat well. And honestly, I keep making it because every time I do, I remember that small moment of connection—and the perfect crunch that followed.
Why You’ll Love This Recipe
Let’s be real for a second. There are a million chicken breast recipes out there, and most of them end up dry or boring. This one is different. I’ve tested it more times than I’d like to admit, tweaking the rub, adjusting the air fryer time, and even messing up a batch or two (under-cooked chicken is not a vibe). But after all that trial and error, I can confidently say this version works every single time. Here’s why you’re going to love it:
- Quick & Easy : This comes together in under 25 minutes from start to finish. No marinating overnight, no complicated steps—just rub, cook, and eat.
- Simple Ingredients : You probably already have garlic powder, dried herbs, salt, and pepper in your pantry. No weird specialty items required.
- Perfect for Busy Weeknights : When you’re tired and hungry, this recipe delivers. It’s my go-to on days when I barely have energy to chop an onion.
- Crowd-Pleaser : I’ve served this to picky eaters, health-conscious friends, and even my dad who swears by fried chicken. Everyone goes back for seconds.
- Unbelievably Crispy : The air fryer works its magic here. You get that golden, crunchy exterior without deep frying. It’s almost too good to be true, but trust me.
What makes this version stand out from every other air fryer chicken recipe out there? It’s the garlic herb rub. Most recipes just use a generic seasoning blend, but this one has a carefully balanced mix that clings to the chicken and creates a beautiful crust. The garlic isn’t overpowering—it’s warm and savory. The herbs add a freshness that cuts through the richness. And the technique? I’ve learned that patting the chicken completely dry before applying the rub makes all the difference. No soggy skin here.
This isn’t just another recipe you’ll try once and forget. It’s the kind that makes you close your eyes after the first bite and actually smile. It’s comfort food that fits into a healthy lifestyle—high protein, low fuss, and absolutely no guilt. Whether you’re cooking for yourself or feeding a family, this crispy air fryer chicken breast is going to become a regular on your menu.
What Ingredients You Will Need
This recipe uses simple, wholesome ingredients to deliver big flavor without the fuss. Most of these are pantry staples, which is exactly what you want on a busy night. Let me walk you through each one and why it matters.
For the Garlic Herb Rub
- 2 teaspoons garlic powder (not garlic salt—we want pure garlic flavor without extra sodium)
- 1 teaspoon onion powder (adds a subtle sweetness that balances the herbs)
- 1 teaspoon dried oregano (I prefer Mediterranean oregano for its slightly floral notes)
- 1 teaspoon dried thyme (earthy and warm; pairs beautifully with chicken)
- 1 teaspoon dried rosemary (crush it between your fingers before adding to release the oils)
- ½ teaspoon smoked paprika (this is my secret weapon—adds color and a hint of smokiness)
- ½ teaspoon black pepper (freshly ground is best, but pre-ground works in a pinch)
- 1 teaspoon salt (I use fine sea salt; it sticks better to the chicken)
For the Chicken
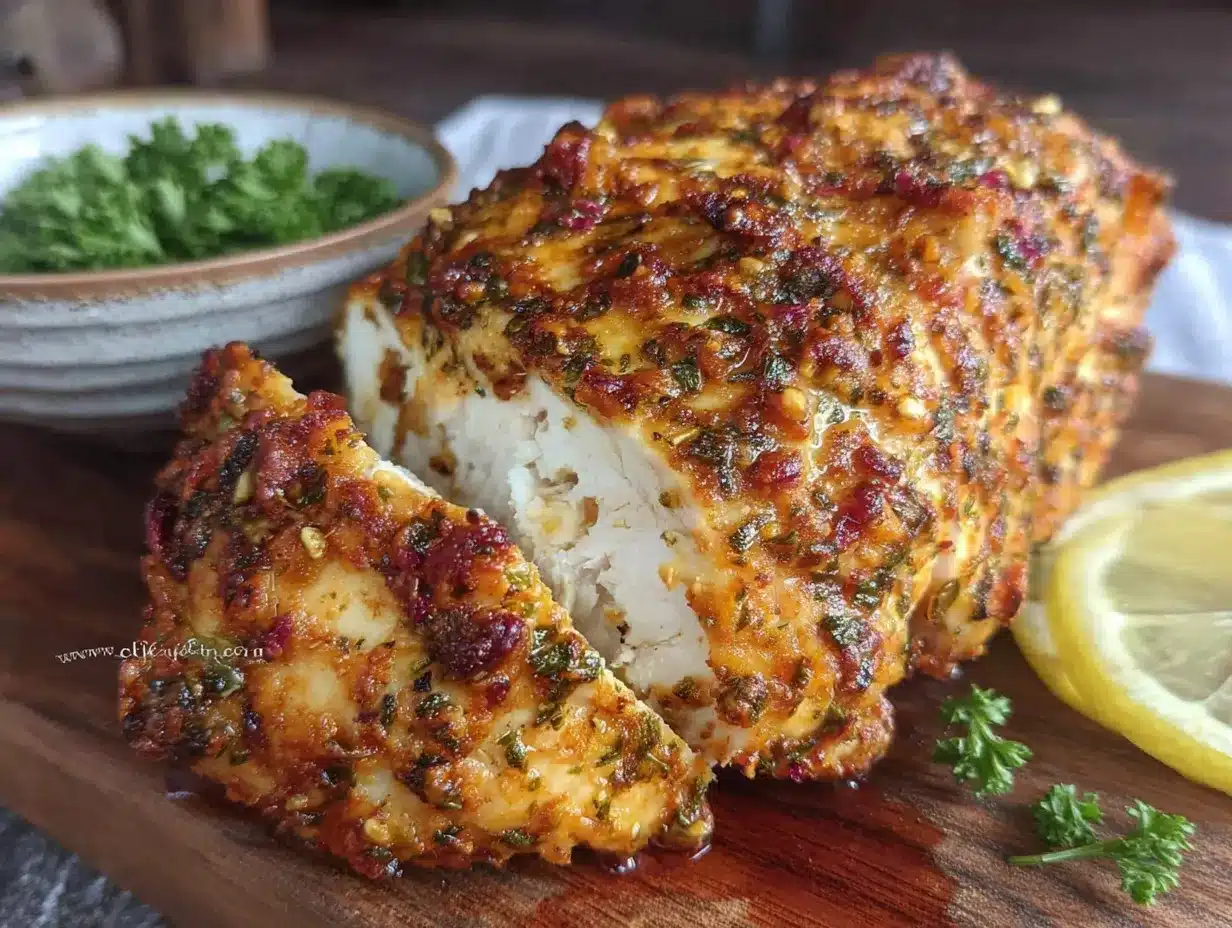
- 2 boneless, skinless chicken breasts (about 6-8 ounces each; look for even thickness so they cook uniformly)
- 1 tablespoon olive oil (helps the rub stick and promotes browning; avocado oil works too)
- Optional: cooking spray (for the air fryer basket, prevents sticking)
A few notes from my kitchen to yours. I recommend using Kirkland or Bell & Evans chicken breasts if you can find them—they tend to be juicier and more consistent in size. If your chicken breasts are thicker on one end, pound them to an even thickness with a rolling pin or meat mallet. It takes two minutes and saves you from dry edges.
For the herbs, I usually use dried because they hold up better in the air fryer’s high heat. But if you have fresh herbs on hand, you can absolutely use them. Just triple the amount (fresh herbs are less concentrated) and chop them finely. The flavor will be a little brighter, but the dried version is more reliable.
One more thing: don’t skip the olive oil. I know some air fryer recipes try to cut every calorie, but a little fat is essential here. It helps the rub stick, encourages the Maillard reaction (that’s the fancy term for browning), and keeps the chicken from drying out. Trust me on this one.
Equipment Needed
You don’t need a fancy kitchen to make this recipe work. Here’s what you’ll need:
- Air fryer (any brand works—I use a 5.8-quart Cosori, but a smaller one will work if you cook in batches)
- Small bowl (for mixing the rub)
- Tongs (for flipping the chicken without piercing it)
- Cutting board (preferably one with a groove to catch juices)
- Meat thermometer (this is non-negotiable for perfectly cooked chicken; I use a ThermoPro instant-read)
- Paper towels (for patting the chicken dry—crucial for crispiness)
- Measuring spoons (for the rub ingredients)
If you don’t have a meat thermometer, you can still check doneness by cutting into the thickest part—the juices should run clear and there should be no pink. But honestly, a thermometer takes the guesswork out and costs less than ten bucks. It’s worth it.
For a budget-friendly option, any basic air fryer will do. I started with a $40 model from a discount store, and it made perfectly crispy chicken. The key is preheating it properly and not overcrowding the basket. If your air fryer is on the smaller side, just cook the chicken in batches. It’ll still be hot and crispy.
Preparation Method
Alright, let’s get cooking. I’ve broken this down into simple steps so you can follow along without any confusion. Each step includes a little tip I learned the hard way.
- Prep the chicken (5 minutes) : Place your chicken breasts on a cutting board. If they’re uneven in thickness, place a piece of plastic wrap over them and gently pound with a rolling pin until they’re about 1 inch thick all the way across. Pat them completely dry with paper towels—this is the most important step for crispiness. I cannot stress this enough. Wet chicken = steamed chicken. Dry chicken = crispy chicken.
- Make the garlic herb rub (2 minutes) : In a small bowl, combine 2 teaspoons garlic powder, 1 teaspoon onion powder, 1 teaspoon dried oregano, 1 teaspoon dried thyme, 1 teaspoon dried rosemary (crushed), ½ teaspoon smoked paprika, ½ teaspoon black pepper, and 1 teaspoon salt. Stir with a fork until evenly mixed. The smell at this point is incredible—like a Mediterranean garden.
- Season the chicken (3 minutes) : Drizzle 1 tablespoon of olive oil over the chicken breasts. Use your hands to rub the oil evenly over both sides. Then sprinkle the garlic herb rub generously over all surfaces. Don’t be shy—use all of it. Massage it into the chicken like you mean it. Let it sit for 5 minutes at room temperature while the air fryer preheats. This rest time helps the seasoning penetrate.
- Preheat the air fryer (3 minutes) : Set your air fryer to 400°F (200°C) and let it preheat for 3 minutes. Most air fryers heat up fast, but this step ensures the chicken starts cooking immediately, which seals in juices and creates that crust.
- Arrange the chicken (2 minutes) : Lightly spray the air fryer basket with cooking spray to prevent sticking. Place the seasoned chicken breasts in a single layer in the basket. Make sure they’re not touching—if they’re crowded, they’ll steam instead of crisp. If your chicken breasts are large, cook them one at a time.
- Cook the chicken (12-15 minutes) : Air fry at 400°F (200°C) for 6 minutes. Then carefully flip the chicken using tongs (don’t pierce the meat with a fork—you’ll lose juices). Cook for another 6-8 minutes, depending on thickness. The chicken is done when the internal temperature reaches 165°F (74°C) in the thickest part. My 7-ounce breasts usually take exactly 13 minutes total.
- Rest the chicken (5 minutes) : This step is crucial. Remove the chicken from the air fryer and let it rest on a cutting board for 5 minutes. Don’t skip this! Resting allows the juices to redistribute throughout the meat. If you cut into it right away, all those delicious juices will run out onto the board, leaving you with dry chicken. I learned this the hard way after ruining a beautiful batch.
- Slice and serve (2 minutes) : After resting, slice the chicken against the grain into strips or serve it whole. The outside should be golden brown and crispy, and the inside should be juicy and tender. You’ll hear that satisfying crunch when you cut through the crust.
One more thing—if your chicken breasts are on the thicker side (over 1.5 inches), you might need to add 2-3 minutes to the cooking time. Always rely on the thermometer, not the clock. Better safe than sorry.
Cooking Tips & Techniques
Over the months of testing this recipe, I’ve made plenty of mistakes so you don’t have to. Here are my best tips for perfect crispy air fryer chicken every time.
Pat, pat, pat that chicken dry. I already mentioned this, but it’s worth repeating. Moisture is the enemy of crispiness. Use multiple paper towels and really press into the surface. If you have time, let the chicken sit uncovered in the fridge for 15 minutes after patting—it dries out even more.
Don’t skip the oil. I tried making this with no oil once, thinking it would be healthier. The result was a sad, pale piece of chicken with the rub sliding off. A little oil helps the seasoning stick and promotes browning. You only need one tablespoon for two breasts—it’s not going to break your diet.
Let the rub sit. After you apply the garlic herb rub, let the chicken rest for at least 5 minutes before cooking. This gives the salt time to draw out a tiny bit of moisture, which then reabsorbs into the meat, seasoning it from the inside out. I’ve let it sit for 30 minutes before with even better results.
Preheat your air fryer. I know it’s tempting to just throw the chicken in and hit start, but preheating ensures the surface of the chicken sears immediately. That sear is what creates the crispy crust. Without preheating, the chicken warms up slowly and the outside doesn’t get that golden crunch.
Flip halfway through. This ensures even cooking and browning on both sides. Use tongs, not a fork. Piercing the chicken releases juices that keep it moist. Trust me, I’ve made that mistake and ended up with dry patches.
Check the temperature early. Start checking the internal temperature at the 10-minute mark if your chicken is on the thinner side. The last thing you want is overcooked, rubbery chicken. Once it hits 165°F, pull it out immediately. Carryover cooking will raise the temperature another 2-3 degrees as it rests.
Batch cooking tip: If you’re cooking for a crowd, keep the cooked chicken warm in a 200°F oven while you finish the rest. Place it on a wire rack set over a baking sheet so the bottom stays crispy. Don’t wrap it in foil—that traps steam and ruins the crunch.
Variations & Adaptations
One of the best things about this recipe is how flexible it is. Here are some variations I’ve tried and loved.
Spicy Cajun Version: Swap the dried herbs for 1 teaspoon Cajun seasoning, ½ teaspoon cayenne pepper, and ½ teaspoon garlic powder. Keep the smoked paprika. This version has a nice kick that pairs well with a cooling dip like ranch or yogurt sauce. I made this for a game day gathering and it disappeared in minutes.
Lemon Herb Version: Add 1 teaspoon lemon zest to the garlic herb rub and squeeze fresh lemon juice over the chicken after it cooks. The citrus brightens up the herbs beautifully. This is my go-to for summer dinners when I want something light and fresh.
Parmesan Crust Version: After applying the oil and rub, sprinkle 2 tablespoons of grated Parmesan cheese over each chicken breast before air frying. The cheese melts and creates an extra-crispy, golden crust. Fair warning—it’s addictive. Just be careful not to burn the cheese; check a minute or two earlier than usual.
Gluten-Free Option: This recipe is naturally gluten-free as written. Just double-check that your spice blends don’t contain any hidden wheat starch. Most pure spices are safe, but pre-mixed blends sometimes add fillers.
Dairy-Free Adaptation: If you try the Parmesan version, simply skip the cheese or use a dairy-free alternative. The rub alone is already dairy-free, so this recipe works for most dietary needs without any changes.
Different Cuts of Chicken: This rub works beautifully on chicken thighs, chicken tenders, or even chicken wings. Adjust cooking times accordingly—thighs need about 15-18 minutes at 400°F, tenders need 8-10 minutes, and wings need 20-25 minutes. The technique stays the same: pat dry, oil, rub, cook, rest.
I personally love the lemon herb version for spring and the spicy Cajun for fall. It’s fun to switch things up depending on the season or my mood.
Serving & Storage Suggestions
This crispy air fryer chicken breast is incredibly versatile when it comes to serving. Here’s how I like to enjoy it, plus tips for keeping leftovers fresh.
Serving Temperature: Serve the chicken hot, right after it rests. The crust is at its crispiest within 10 minutes of coming out of the air fryer. If you let it sit too long, the crust softens slightly from residual steam. That said, it’s still delicious at room temperature—great for meal prep salads or sandwiches.
Presentation Ideas: Slice the chicken against the grain into thick strips and fan them out on a plate. Garnish with fresh parsley or a lemon wedge for a pop of color. It looks impressive with minimal effort.
What to Serve With It: This chicken pairs beautifully with roasted vegetables like asparagus, broccoli, or Brussels sprouts. A simple side salad with a lemon vinaigrette cuts through the richness. For a heartier meal, serve it over rice, quinoa, or mashed potatoes. I also love it sliced on top of a Caesar salad—the crunch replaces croutons perfectly.
Storage Instructions: Store leftover chicken in an airtight container in the refrigerator for up to 4 days. The crust will soften as it sits, but the flavor stays great. To reheat, place the chicken back in the air fryer at 350°F for 3-4 minutes. This restores some of the crispiness. Avoid microwaving—it makes the chicken rubbery and the crust soggy.
Freezing Tips: You can freeze cooked chicken breasts for up to 3 months. Wrap each piece individually in plastic wrap, then place them in a freezer bag. To reheat, thaw overnight in the fridge, then air fry at 350°F for 5-6 minutes. The texture won’t be quite as crispy as fresh, but it’s still really good for meal prep.
Flavor Development: Interestingly, the garlic herb flavor deepens after a day in the fridge. I actually enjoy leftovers more sometimes because the herbs have had time to meld. It’s great sliced cold over a lunch salad.
Nutritional Information & Benefits
Here’s the nutritional breakdown for one serving (one chicken breast with the garlic herb rub and olive oil):
- Calories: Approximately 290
- Protein: 42 grams
- Fat: 12 grams (mostly from olive oil, which is heart-healthy)
- Carbohydrates: 2 grams
- Fiber: 0.5 grams
- Sugar: 0 grams
- Sodium: 650 mg (adjust salt to reduce if needed)
This recipe is naturally low-carb and keto-friendly, with no added sugars. It’s also gluten-free and dairy-free as written. The high protein content makes it excellent for muscle recovery and keeping you full for hours.
Garlic and herbs aren’t just for flavor—they offer health benefits too. Garlic is known for its immune-boosting properties and anti-inflammatory effects. Oregano, thyme, and rosemary are packed with antioxidants that support overall health. Smoked paprika contains capsaicin, which may help with metabolism.
From a wellness perspective, this recipe fits perfectly into a balanced diet. It’s whole foods-based, uses healthy fats, and skips the processed ingredients. I feel good eating it, and I feel even better knowing it took less than 30 minutes to make. No guilt, just satisfaction.
Conclusion
This crispy air fryer chicken breast with garlic herb rub has honestly changed my weeknight cooking game. It’s proof that you don’t need complicated techniques or fancy equipment to make something that tastes incredible. A little bit of herb rub, a hot air fryer, and a few minutes of patience—that’s all it takes.
I love that this recipe is forgiving enough for beginners but impressive enough for experienced cooks. You can dress it up with Parmesan or keep it simple with just the herbs. It works for a quick dinner, meal prep, or even a casual get-together. And every time I make it, I think of Leo and that unexpected jar of rub that started it all.
Now I want to hear from you. Have you tried making crispy chicken in your air fryer? What’s your favorite herb combination? Drop a comment below and let me know how this recipe turned out for you. And if you loved it, share it with a friend who needs a little crunch in their life. Happy cooking!
Frequently Asked Questions
Can I use chicken thighs instead of chicken breasts?
Absolutely! Chicken thighs work great with this garlic herb rub. They’re a bit more forgiving because they have more fat, so they stay juicy even if you overcook them slightly. Cook boneless, skinless thighs at 400°F for about 15-18 minutes, flipping halfway. Bone-in thighs will need closer to 22-25 minutes.
How do I prevent the chicken from sticking to the air fryer basket?
Make sure you spray the basket with cooking spray before adding the chicken. I also recommend using tongs to flip the chicken rather than shaking the basket—this prevents the rub from scraping off. If you’re still having sticking issues, try lining the basket with parchment paper specifically designed for air fryers (with holes for airflow).
Can I make this recipe without an air fryer?
Yes, you can. Bake the chicken in a preheated oven at 425°F (220°C) on a wire rack set over a baking sheet. The wire rack allows air to circulate around the chicken, helping it crisp up. Bake for 20-25 minutes, or until the internal temperature reaches 165°F. The crust won’t be quite as crispy as the air fryer version, but it’s still delicious.
How do I know when the chicken is fully cooked without a thermometer?
If you don’t have a meat thermometer, you can check by cutting into the thickest part of the chicken. The juices should run clear with no pink color. The meat should be opaque all the way through. However, I really recommend getting a thermometer—it takes the guesswork out and prevents dry chicken from overcooking.
Can I double the rub recipe and store it for later?
Definitely! This garlic herb rub keeps well in an airtight container in a cool, dark place for up to 3 months. I often make a double or triple batch so I have it ready to go. Just make sure your dried herbs and spices are fresh—if they’ve been sitting in your pantry for years, the flavor won’t be as strong. Label the jar with the date so you remember when you made it.
Pin This Recipe!
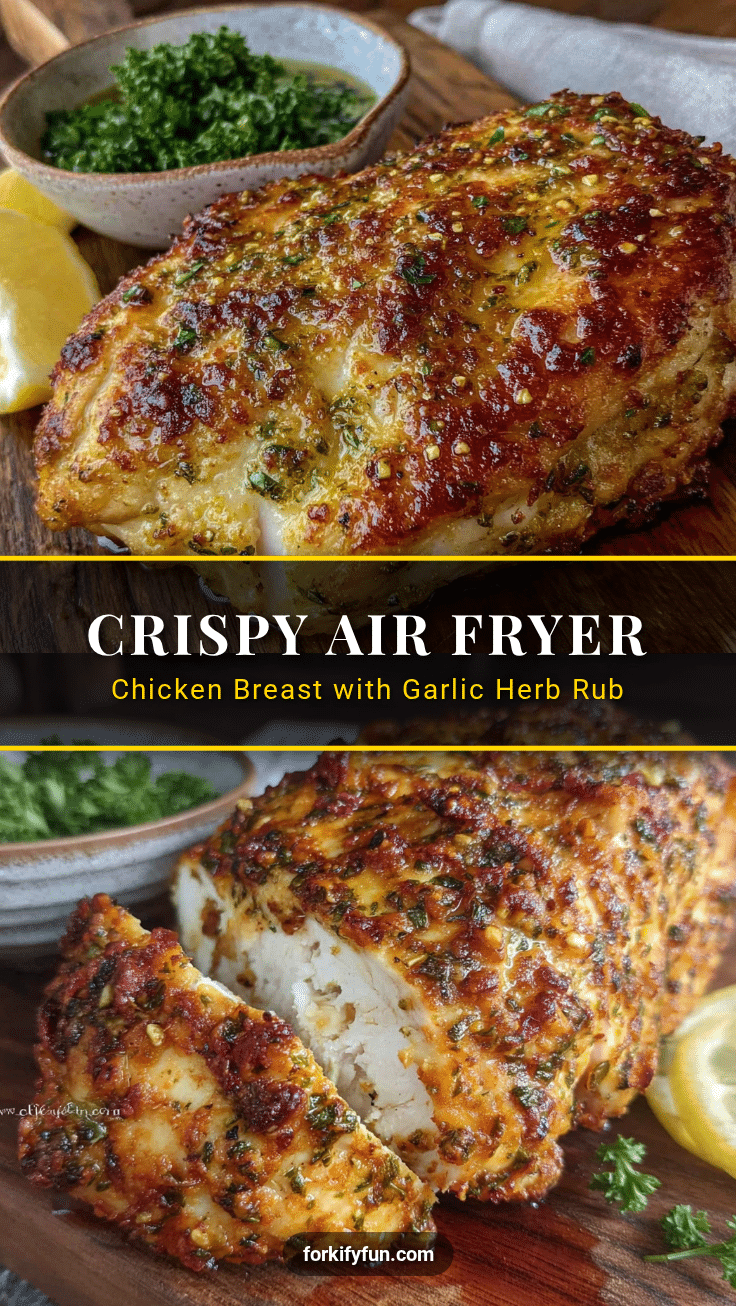
Crispy Air Fryer Chicken Breast Recipe with Garlic Herb Rub

A quick and easy air fryer chicken breast recipe with a flavorful garlic herb rub that delivers a crispy exterior and juicy interior in under 25 minutes.
- Prep Time: 10 minutes
- Cook Time: 12-15 minutes
- Total Time: 25 minutes
- Yield: 2 servings 1x
- Category: Main Course
- Cuisine: American
Ingredients
- 2 teaspoons garlic powder
- 1 teaspoon onion powder
- 1 teaspoon dried oregano
- 1 teaspoon dried thyme
- 1 teaspoon dried rosemary, crushed
- ½ teaspoon smoked paprika
- ½ teaspoon black pepper
- 1 teaspoon fine sea salt
- 2 boneless, skinless chicken breasts (6–8 ounces each)
- 1 tablespoon olive oil
- Cooking spray (optional, for the air fryer basket)
Instructions
- Prep the chicken: Place chicken breasts on a cutting board. If uneven, pound to 1-inch thickness. Pat completely dry with paper towels.
- Make the garlic herb rub: In a small bowl, combine garlic powder, onion powder, oregano, thyme, rosemary, smoked paprika, black pepper, and salt. Stir until evenly mixed.
- Season the chicken: Drizzle olive oil over chicken and rub evenly. Sprinkle the garlic herb rub generously over all surfaces, massaging it in. Let sit for 5 minutes at room temperature.
- Preheat the air fryer: Set air fryer to 400°F (200°C) and preheat for 3 minutes.
- Arrange the chicken: Lightly spray the air fryer basket with cooking spray. Place chicken in a single layer, not touching.
- Cook the chicken: Air fry at 400°F for 6 minutes. Flip with tongs and cook for another 6-8 minutes until internal temperature reaches 165°F (74°C).
- Rest the chicken: Remove from air fryer and let rest on a cutting board for 5 minutes.
- Slice and serve: Slice against the grain into strips or serve whole.
Notes
Pat the chicken completely dry for maximum crispiness. Let the seasoned chicken rest for at least 5 minutes before cooking. Use a meat thermometer to ensure doneness without overcooking. For thicker breasts, add 2-3 minutes cooking time.
Nutrition
- Serving Size: 1 chicken breast
- Calories: 290
- Sodium: 650
- Fat: 12
- Saturated Fat: 2
- Carbohydrates: 2
- Fiber: 0.5
- Protein: 42
Keywords: air fryer chicken breast, crispy chicken, garlic herb rub, quick dinner, healthy chicken recipe


