Jen wasn’t trying to impress anyone. I’d stopped by her place to borrow a cake pan—mine had mysteriously vanished after a neighbor’s potluck—and the smell hit me before I even got past her screen door. That sweet, slightly tangy scent of cocoa and buttermilk, mixed with something warm and almost vanilla-tinged. She was pulling a tray of cupcakes out of the oven, and I swear, the kitchen looked like a flour bomb had gone off. There was a smear of red batter on her cheek, and she was using a spatula to scrape the last bit of frosting from a bowl that was clearly too small for the job. “Oh, those,” she said, waving her hand like it was nothing. “Just testing a recipe for the school bake sale.”
I stood there, honestly a little stunned. These weren’t just any cupcakes. They were perfectly domed, a deep crimson color peeking through the edges, and she was piping this luscious, cream cheese frosting onto them with a focus that contradicted her casual tone. I grabbed one that had a slightly lopsided heart shape—she’d used a cookie cutter on a few, just for fun, she said—and took a bite. Let me tell you, the texture was like biting into a cloud that had been dusted with cocoa and kissed by a hint of tang. It was the kind of thing you’d expect to pay twelve dollars for at a fancy bakery, not find on a cluttered counter next to a half-empty coffee mug. Maybe you’ve been there, where you witness someone being effortlessly brilliant in the kitchen and you just feel a little bit of culinary envy mixed with pure gratitude.
I begged her for the recipe, and she scribbled it on a napkin. It was smudged, had a coffee ring on one corner, and the measurements were in her own shorthand. But I’ve made these Guest-Favorite Red Velvet Heart-Shaped Cupcakes at least a dozen times since that afternoon, and honestly, they’ve become my secret weapon for every dinner party, Valentine’s Day gathering, or just a Tuesday when I need to feel like I’ve got my life together. They’re the recipe that makes people stop mid-conversation and ask, “Who made these?” And the best part? I get to act just as nonchalant as Jen did. “Oh, these? They’re nothing.”
Why You’ll Love This Recipe
Listen, I’ve tested a lot of red velvet recipes. Some are dry. Some taste like artificial food coloring. Some are just chocolate cupcakes with a bad dye job. These are none of those things. This is the version I bring to every gathering, and here’s why it works so well for someone like you who loves to host.
- Perfect for Impressing a Crowd: The heart shape adds an instant “wow” factor. You don’t need fancy piping skills or complicated decorations. A simple swirl of cream cheese frosting and a few sprinkles, and they look like they came from a professional bakery. Your guests will think you spent hours on them.
- Unbelievably Moist: The secret here is a combination of buttermilk and a little bit of oil. It keeps the crumb tender and soft for days. I’ve made these a full day before a party, and they were still perfectly moist the next afternoon.
- That Classic Tangy Flavor: Real red velvet isn’t just about the color. It’s that subtle dance between the mild cocoa, the tang from the buttermilk, and the slight acidity from the vinegar. This recipe nails that balance perfectly. It’s not a chocolate cupcake; it’s its own beautiful thing.
- Simple Ingredients: You probably have 90% of these in your pantry right now. No weird extracts or hard-to-find specialty flours. The only “special” item is the red food coloring, and even that is easy to find at any grocery store.
- Stress-Free Prep: The batter comes together in one bowl. No creaming butter and sugar for ten minutes. No alternating dry and wet ingredients. Just whisk, pour, and bake. This leaves you more time to set the table or, you know, pour yourself a glass of wine before the doorbell rings.
This recipe isn’t just good—it’s the kind that makes you close your eyes after the first bite. It’s comfort food reimagined for a celebration. It’s the perfect thing for impressing guests without any of the stress, turning a simple dessert into the memorable finale of a great meal.
What Ingredients You Will Need
This recipe uses simple, wholesome ingredients to deliver that signature red velvet flavor and incredibly tender texture. Most of these are pantry staples, which makes this a great last-minute dessert option when you’re planning a gathering.
For the Cupcakes
- All-purpose flour (2 ½ cups / 300g) — This gives the cupcakes structure. Spoon it into your measuring cup and level it off with a knife for accuracy.
- Unsweetened cocoa powder (2 tablespoons / 15g) — Use a natural cocoa powder, not Dutch-processed. I prefer Hershey’s for its classic flavor. It gives the red velvet its subtle chocolate note without making it taste like a brownie.
- Baking soda (1 teaspoon) — This helps the cupcakes rise and react with the buttermilk and vinegar for a tender crumb.
- Salt (½ teaspoon) — Just regular table salt. It balances the sweetness.
- Granulated sugar (1 ½ cups / 300g) — Standard white sugar works beautifully here.
- Vegetable oil (1 cup / 240ml) — A neutral oil like canola or grapeseed is best. This is what keeps the cupcakes incredibly moist, even the next day.
- Large eggs (2, at room temperature) — Room temperature eggs incorporate into the batter much more smoothly, creating a better emulsion.
- Buttermilk (1 cup / 240ml, at room temperature) — This is non-negotiable for the authentic tangy flavor. If you don’t have buttermilk, you can make a quick substitute by adding 1 tablespoon of lemon juice or white vinegar to a cup of milk and letting it sit for 5 minutes.
- White vinegar (1 teaspoon) — Sounds weird, I know. But it reacts with the baking soda to give the cupcakes an extra-light texture.
- Vanilla extract (2 teaspoons) — Pure vanilla is best, but imitation works in a pinch.
- Red food coloring (2 tablespoons or 1 ounce bottle) — I use a gel-based food coloring for a more vibrant color without thinning the batter. The liquid kind works too, but you might need a little extra.
For the Cream Cheese Frosting
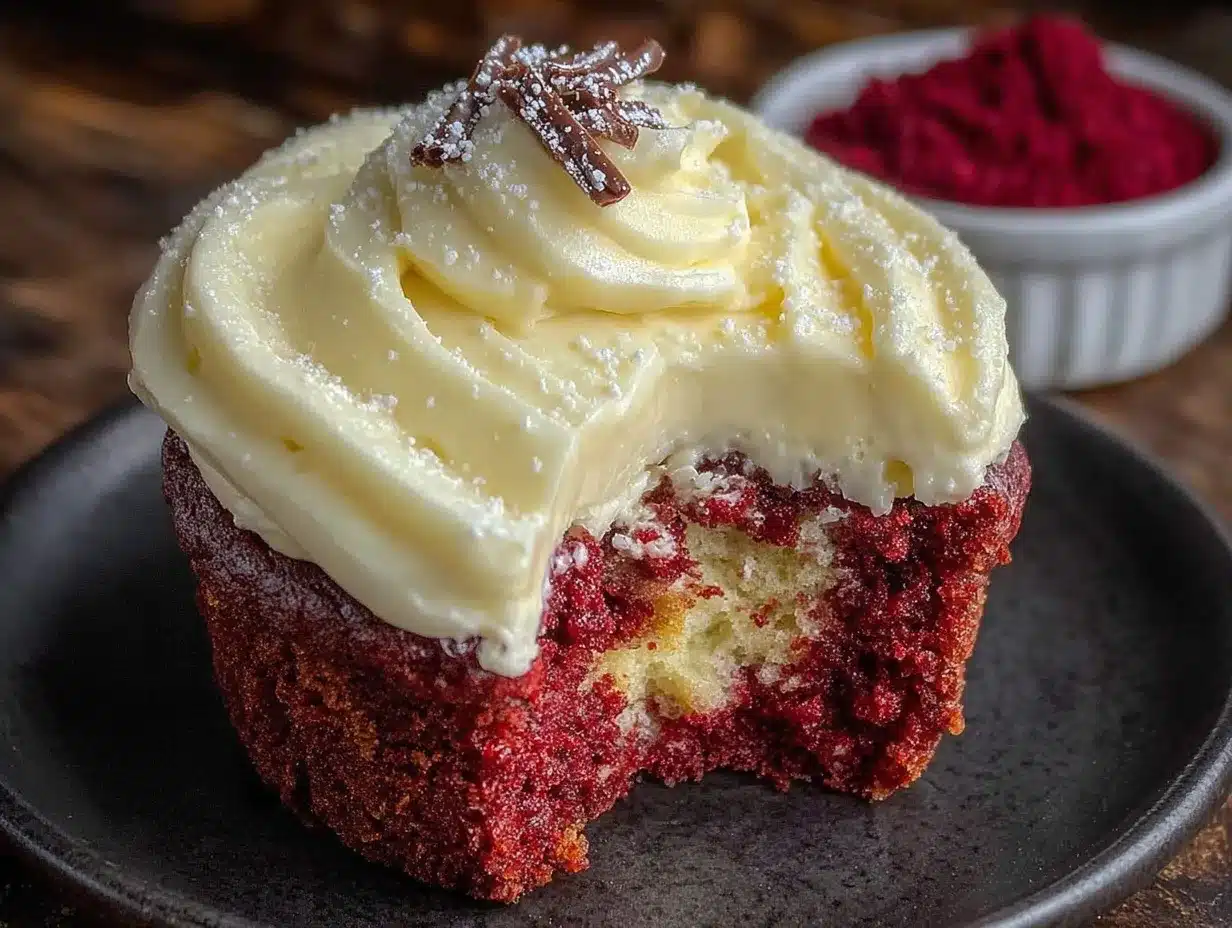
- Cream cheese (16 ounces / 450g, softened) — Use full-fat block cream cheese, not the spreadable kind in a tub. Philadelphia is my go-to brand. It needs to be really soft, almost at room temperature, to avoid lumps.
- Unsalted butter (½ cup / 113g, softened) — Adds richness and helps stabilize the frosting.
- Powdered sugar (4 cups / 480g) — Also known as confectioners’ sugar. Sift it if it’s particularly lumpy.
- Vanilla extract (2 teaspoons) — For that classic flavor pairing.
- Pinch of salt — To cut the sweetness and enhance the tanginess of the cream cheese.
Equipment Needed
You don’t need a professional bakery setup for these. Here’s what you’ll need to pull this off without a hitch.
- Muffin Tin: A standard 12-cup muffin tin. I use a non-stick one, and it works perfectly.
- Cupcake Liners: I recommend using parchment paper liners or foil liners for a cleaner look. They peel off the red velvet cake much easier than standard paper liners.
- Heart-Shaped Cookie Cutter: A 2-inch or 2.5-inch heart-shaped cookie cutter is ideal. If you don’t have one, you can just leave them as round cupcakes, but the shape is what makes them so special for a party.
- Mixing Bowls: You’ll need one large bowl for the dry ingredients and one for the wet ingredients. A medium bowl for the frosting is also helpful.
- Whisk and Spatula: A good whisk for the dry ingredients and a flexible rubber spatula for folding the batter together.
- Electric Hand Mixer or Stand Mixer: For the frosting, you really want an electric mixer to get it light and fluffy. A whisk and a lot of elbow grease will work, but it’s a workout.
- Piping Bag and Tip: A large piping bag fitted with a star tip (like a 1M or 2D) makes frosting look professional. If you don’t have one, you can use a zip-top bag with the corner snipped off, or even just use a knife to spread the frosting.
- Cooling Rack: Essential for letting the cupcakes cool completely before you frost them. If you frost them while they’re warm, the frosting will turn into a melty mess.
Preparation Method
Alright, let’s get to it. This is surprisingly straightforward, and I’ve included all the little sensory cues that tell you you’re on the right track.
- Preheat and Prep: Preheat your oven to 350°F (175°C). Line your muffin tin with 12-14 paper liners. If you’re making the heart-shaped version, place a heart-shaped cookie cutter in the center of each liner. Don’t worry if it doesn’t sit perfectly flat; the batter will hold it in place.
- Whisk the Dry Ingredients: In a large bowl, whisk together the 2 ½ cups of all-purpose flour, 2 tablespoons of cocoa powder, 1 teaspoon of baking soda, and ½ teaspoon of salt. Whisk for about 30 seconds to make sure everything is evenly distributed. You’ll see the cocoa powder swirl into the flour, creating a warm, brownish-tan color. Set this aside.
- Mix the Wet Ingredients: In a separate, medium-sized bowl, whisk together the 1 ½ cups of granulated sugar and 1 cup of vegetable oil until it’s well combined. It will look like a thick, golden syrup. Add the 2 eggs, one at a time, whisking well after each addition. The mixture will become a bit paler and thicker. Then, whisk in the 1 cup of buttermilk, 1 teaspoon of white vinegar, and 2 teaspoons of vanilla extract. Finally, stir in the 2 tablespoons of red food coloring. The mixture will turn a vibrant, almost shocking red—don’t worry, it bakes into a deeper, more elegant ruby color.
- Combine Wet and Dry: Pour the wet ingredients into the bowl with the dry ingredients. Use a rubber spatula to gently fold everything together. Don’t overmix! Just stir until you see the last streak of flour disappear. The batter will be thick, smooth, and a gorgeous shade of red. It should have a slight sheen from the oil.
- Fill the Liners: Fill each cupcake liner about ⅔ to ¾ full. If you’re using the heart-shaped cutters, carefully spoon the batter inside the cutter, making sure it fills the shape. Don’t worry if a little bit spills over the edge of the cutter—it will bake into a thin, crispy edge that you can easily trim off later. The batter should look glossy and smooth.
- Bake: Bake for 18-22 minutes, or until a toothpick inserted into the center of a cupcake comes out with just a few moist crumbs attached. You’ll know they’re done when the tops spring back lightly when you touch them. The kitchen will smell incredible at this point—like a warm, slightly tangy cocoa. Let the cupcakes cool in the pan for 5 minutes, then carefully transfer them to a wire rack to cool completely. If you used the cookie cutters, gently lift them out after the 5-minute cooling period. They should slide right off.
- Make the Frosting: While the cupcakes are cooling, make the cream cheese frosting. In a large bowl, beat the 16 ounces of softened cream cheese and ½ cup of softened unsalted butter together with an electric mixer on medium speed until smooth and creamy. This takes about 2-3 minutes. Scrape down the sides of the bowl. Add the 2 teaspoons of vanilla extract and a pinch of salt. Then, gradually add the 4 cups of powdered sugar, one cup at a time, beating on low speed until it’s incorporated. Once all the sugar is in, increase the speed to medium-high and beat for another 2 minutes, until the frosting is light, fluffy, and spreadable. It should hold a stiff peak when you lift the beater.
- Frost and Decorate: Once the cupcakes are completely cool, it’s time to frost them. Fit your piping bag with the star tip and fill it with the frosting. Pipe a generous swirl on top of each cupcake. If you want to hide the edges from the cookie cutter, start piping from the outside and work your way in. Top with a few red or pink sprinkles, or even a single fresh raspberry for a beautiful contrast.
Cooking Tips & Techniques
I’ve messed up this recipe in almost every way possible, so you don’t have to. Here are the things I’ve learned the hard way.
Don’t Overmix the Batter: This is the number one mistake. Red velvet cupcakes are delicate. Overmixing develops the gluten too much, resulting in a tough, dense cupcake. Mix just until the flour disappears. A few small lumps are perfectly fine.
Room Temperature Ingredients are Key: I cannot stress this enough. Cold eggs and cold buttermilk will seize the oil and create a lumpy batter. It will still bake, but the texture won’t be as tender. Take your eggs and buttermilk out of the fridge about 30 minutes before you start. If you forget, you can place the eggs in a bowl of warm water for 5 minutes and gently warm the buttermilk in the microwave for 10-15 seconds.
Using the Heart-Shaped Cutters: The first time I tried this, I forgot to grease the inside of the cookie cutters. The batter stuck to them and pulled away from the sides, creating a weird, hollow shape. A quick spray of non-stick cooking spray inside the cutter before you place it in the liner makes all the difference. Also, don’t fill the cutter all the way to the top; leave about ¼ inch of space so the batter can rise without overflowing completely.
The Frosting Consistency: If your cream cheese frosting is too soft, it will slide right off the cupcakes. This usually happens if the butter or cream cheese is too warm, or if you overbeat it. If it’s too soft, pop the bowl in the refrigerator for 15-20 minutes to firm it up before piping. If it’s too thick, add a splash of milk or cream and beat again.
Make Ahead Strategy for Hosting: This is a lifesaver. You can bake the cupcakes a day ahead of time. Let them cool completely, then store them in an airtight container at room temperature. Make the frosting the day of the party. Frost them just a couple of hours before your guests arrive. This way, the frosting is fresh and perfect, and you’re not scrambling at the last minute.
Variations & Adaptations
This recipe is a fantastic base, and it’s easy to tweak it for different tastes or dietary needs. Here are a few ways I’ve played with it.
Gluten-Free Version: I’ve tested this with a good quality 1-to-1 gluten-free flour blend (like Bob’s Red Mill or King Arthur Measure for Measure) and it works beautifully. Just use the exact same amount. The texture is slightly more tender, but the flavor is spot on. Be careful not to overmix the gluten-free batter, as it can get gummy.
Dairy-Free Adaptation: You can easily make this dairy-free. Use a full-fat oat milk or soy milk mixed with a tablespoon of lemon juice to replace the buttermilk. For the frosting, use a dairy-free cream cheese alternative (like Kite Hill or Violife) and a plant-based butter. The frosting will be a bit softer, so you might want to chill it for longer before piping.
Flavor Twists: For a more intense chocolate flavor, you can add a ¼ cup of mini chocolate chips to the batter. For a hint of warmth, add ½ teaspoon of cinnamon to the dry ingredients. I once made a batch with a teaspoon of orange zest in the batter, and it was a fantastic surprise—the citrus cuts through the richness beautifully.
Different Shapes: Don’t have a heart-shaped cutter? No problem! Just bake them as regular round cupcakes. You can still get a festive look by using a star-shaped cookie cutter, or even just making a slight indentation in the top of the cupcake with a spoon and filling it with a dollop of frosting.
Lighter Frosting Option: If you find cream cheese frosting too heavy, you can swap it for a classic ermine frosting (also known as boiled milk frosting). It’s lighter, less sweet, and has a silky texture that pairs wonderfully with the tangy red velvet cake. It takes a bit more effort, but the result is stunning.
Serving & Storage Suggestions
These cupcakes are designed to be the star of the show, so let’s talk about how to serve them like a pro.
Serving Temperature: These are best served at room temperature. The cake is tender and the frosting is perfectly soft and creamy. If they’ve been in the fridge, let them sit out for about 20-30 minutes before serving. The flavors really open up as they warm up a bit.
Presentation for a Party: For a dinner party, I like to arrange them on a tiered cake stand. It instantly makes the table look more festive. You can garnish the plate with a few fresh raspberries, a dusting of powdered sugar, or some dark chocolate shavings. For a more casual gathering, a simple wooden board or a decorative platter works perfectly.
What to Serve Alongside: These cupcakes are rich, so they pair beautifully with something light and bright. A glass of cold milk is a classic, but a cup of strong black coffee or a hot cup of Earl Grey tea is even better. For a more indulgent dessert spread, serve them with a scoop of vanilla bean ice cream or a dollop of fresh whipped cream.
Storage Instructions: Store any leftover cupcakes in an airtight container in the refrigerator for up to 4 days. The cream cheese frosting needs to be kept cold. However, the cake itself might dry out a little in the fridge. To prevent this, you can place a piece of bread in the container with the cupcakes—it will absorb the excess moisture and keep the cakes soft.
Freezing Instructions: You can freeze the unfrosted cupcakes for up to 3 months. Wrap each one tightly in plastic wrap, then place them in a freezer-safe bag. When you’re ready to use them, let them thaw in the refrigerator overnight, then bring them to room temperature before frosting. The frosting itself can also be frozen in an airtight container for up to a month. Thaw it in the fridge overnight and give it a good whisk before piping.
Flavor Development: Honestly, these cupcakes taste even better the day after they’re baked. The flavors meld together beautifully overnight. So, don’t be afraid to bake them a day ahead. Just wait to frost them until the day you plan to serve them for the best texture.
Nutritional Information & Benefits
Let’s be real—these are a treat. They’re not health food, and that’s okay. But here’s a breakdown of what you’re getting, along with a few surprising benefits from the ingredients.
Estimated Nutritional Values (per cupcake, with frosting):
| Nutrient | Amount |
|---|---|
| Calories | 420-450 |
| Fat | 24g |
| Saturated Fat | 10g |
| Carbohydrates | 52g |
| Sugar | 38g |
| Protein | 5g |
Ingredient Highlights: The buttermilk provides a small amount of calcium and protein, and it’s a fermented dairy product which can be easier to digest for some people. The cocoa powder is rich in antioxidants called flavanols, which are good for heart health. The cream cheese adds a bit of calcium and protein to the frosting, though it’s mostly there for flavor and texture.
Dietary Considerations: As written, this recipe contains gluten, dairy, and eggs. I’ve included variations above for gluten-free and dairy-free versions. For a vegan option, you would need to use a commercial egg replacer alongside the dairy-free substitutions. Please note that red food coloring can be a concern for some. You can find natural food colorings made from beet juice or other plant sources, but the color will be less vibrant and more of a deep pink than a true red.
Personal Perspective: I believe in balance. I love that I can make a dessert that feels incredibly indulgent and special using ingredients that are still recognizable. Knowing that I can make a version that fits my gluten-free friend’s needs or my lactose-intolerant cousin’s preferences means I can share this joy with everyone I care about. That’s the real benefit.
Conclusion
So, there you have it. The recipe that started with a borrowed cake pan and a flour-covered friend has become my go-to for every celebration. These Guest-Favorite Red Velvet Heart-Shaped Cupcakes are more than just a dessert—they’re a statement. They say, “I put in the effort,” even when the effort was surprisingly minimal. They’re the kind of thing that makes people feel special, and honestly, that’s the whole point of hosting, right?
I hope you give these a try for your next gathering. Don’t be afraid to make them your own—swap the frosting, change the shape, or just enjoy them as perfect little round cakes. The magic is in the tender crumb and that perfect tangy sweetness. And when your guests start asking for the recipe, just shrug and say, “Oh, those? They’re nothing.”
I’d love to hear how they turn out! Drop a comment below and let me know if you tried any fun variations, or share a photo of your beautiful creations. Happy baking, and here’s to making every meal a little more memorable.
Frequently Asked Questions
Can I use a different type of food coloring?
Yes, you can! Gel food coloring is best because it gives a vibrant color without adding extra liquid. If you only have liquid food coloring, you can use it, but you might need a bit more than 2 tablespoons to get the same deep red color. Natural food colorings from beets will work, but they will produce a more pinkish-red hue.
Why did my cupcakes come out dry?
Dry cupcakes usually mean they were overbaked or overmixed. Check your oven temperature with an oven thermometer to make sure it’s accurate. Start checking for doneness at the 18-minute mark. Also, make sure you’re not overmixing the batter—just mix until the flour disappears. Using room temperature ingredients also helps keep them moist.
Can I make this into a cake instead of cupcakes?
Absolutely! This recipe will make two 8-inch round cake layers. Grease and flour your pans, then bake at 350°F (175°C) for 25-30 minutes, or until a toothpick comes out clean. You’ll need to double the frosting recipe to have enough for a two-layer cake.
How do I get perfectly shaped hearts every time?
The trick is to lightly spray the inside of your cookie cutter with non-stick spray before placing it in the liner. Don’t fill the cutter more than ⅔ full. After baking, let the cupcakes cool in the pan for exactly 5 minutes, then carefully lift the cutter straight up. It should slide off easily. If it sticks, let them cool for another minute or two.
Can I leave the frosting off?
You can, but I wouldn’t recommend it! The cream cheese frosting is a classic pairing with red velvet and balances the slight tang of the cake. If you want something lighter, you could dust the cupcakes with powdered sugar or serve them with a dollop of whipped cream. But for the full experience, the cream cheese frosting is where it’s at.
Pin This Recipe!
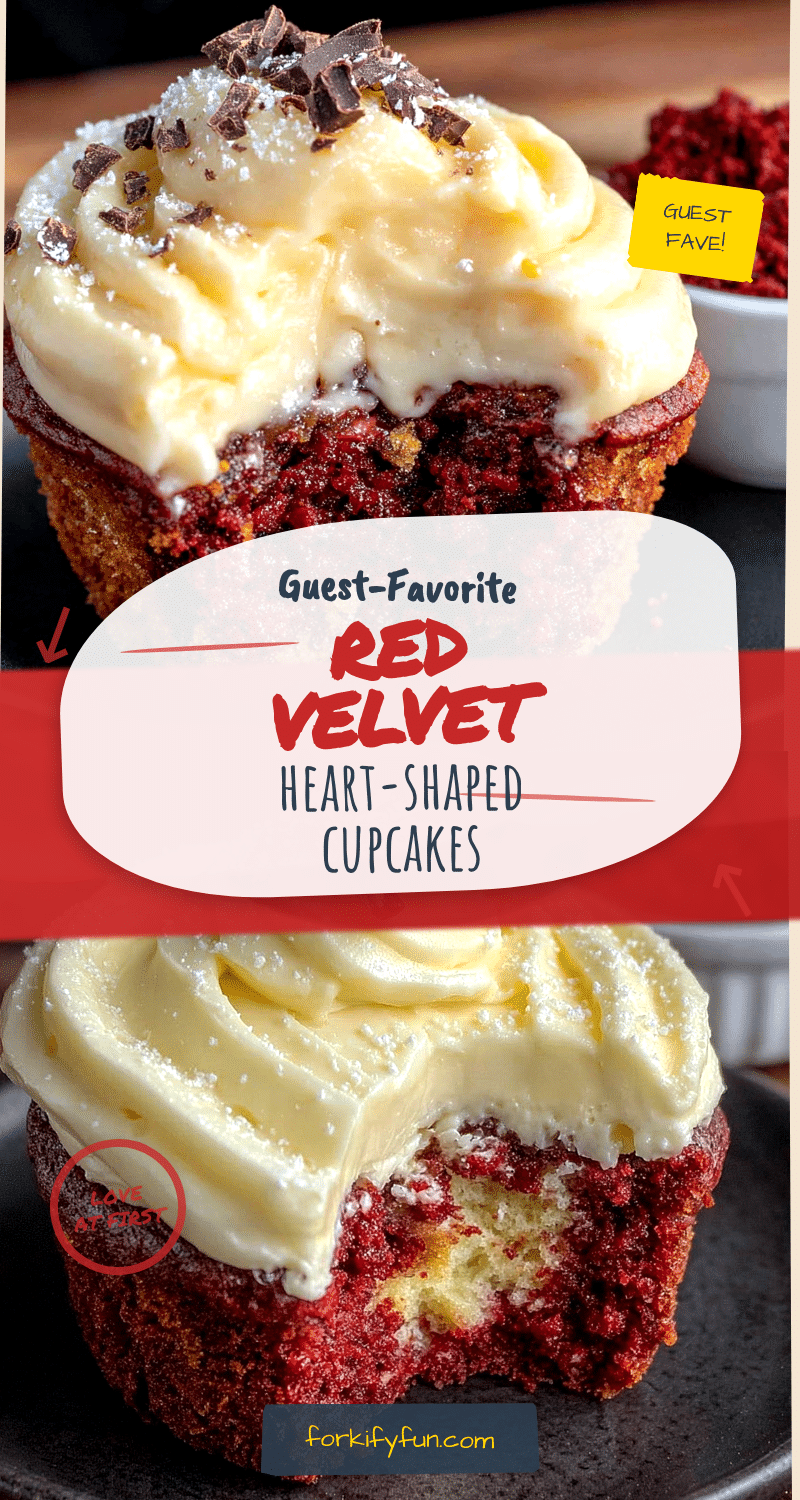
Best Red Velvet Heart Cupcakes: Easy Guest Favorite
These incredibly moist and tangy red velvet cupcakes are shaped like hearts and topped with a luscious cream cheese frosting. They’re the perfect show-stopping dessert for any gathering, and surprisingly easy to make.
- Prep Time: 20 minutes
- Cook Time: 20 minutes
- Total Time: 40 minutes
- Yield: 12-14 cupcakes 1x
- Category: Dessert
- Cuisine: American
Ingredients
- 2 ½ cups (300g) all-purpose flour
- 2 tablespoons (15g) unsweetened cocoa powder
- 1 teaspoon baking soda
- ½ teaspoon salt
- 1 ½ cups (300g) granulated sugar
- 1 cup (240ml) vegetable oil
- 2 large eggs, at room temperature
- 1 cup (240ml) buttermilk, at room temperature
- 1 teaspoon white vinegar
- 2 teaspoons vanilla extract
- 2 tablespoons red food coloring (gel preferred)
- 16 ounces (450g) cream cheese, softened
- ½ cup (113g) unsalted butter, softened
- 4 cups (480g) powdered sugar
- 2 teaspoons vanilla extract (for frosting)
- Pinch of salt (for frosting)
Instructions
- Preheat oven to 350°F (175°C). Line a muffin tin with 12-14 paper liners. If making heart-shaped cupcakes, lightly spray a 2-inch heart-shaped cookie cutter with non-stick spray and place one in the center of each liner.
- In a large bowl, whisk together flour, cocoa powder, baking soda, and salt.
- In a separate medium bowl, whisk together sugar and oil until combined. Add eggs one at a time, whisking well after each. Whisk in buttermilk, vinegar, vanilla, and red food coloring until smooth.
- Pour wet ingredients into dry ingredients and fold with a rubber spatula until just combined. Do not overmix.
- Fill each liner about ⅔ to ¾ full. If using cutters, spoon batter inside the cutter, filling about ⅔ full.
- Bake for 18-22 minutes, until a toothpick inserted in the center comes out with a few moist crumbs. Cool in pan for 5 minutes, then transfer to a wire rack to cool completely. If using cutters, remove them after the 5-minute cooling period.
- For frosting: In a large bowl, beat cream cheese and butter with an electric mixer on medium speed until smooth and creamy (2-3 minutes). Add vanilla and salt. Gradually add powdered sugar, one cup at a time, beating on low until incorporated. Increase speed to medium-high and beat for 2 minutes until light and fluffy.
- Once cupcakes are completely cool, pipe frosting onto each cupcake using a piping bag fitted with a star tip. Decorate with sprinkles or fresh raspberries if desired.
Notes
For best results, use room temperature ingredients. Do not overmix the batter. If frosting is too soft, chill for 15-20 minutes before piping. Cupcakes can be baked a day ahead; store unfrosted in an airtight container at room temperature. Frost just before serving.
Nutrition
- Serving Size: 1 cupcake
- Calories: 435
- Sugar: 38
- Sodium: 280
- Fat: 24
- Saturated Fat: 10
- Carbohydrates: 52
- Fiber: 1
- Protein: 5
Keywords: red velvet, cupcakes, heart-shaped, cream cheese frosting, Valentine's Day, party dessert


