This was supposed to be my attempt at a fancy, multi-layered birthday cake for my husband’s surprise dinner. I had the recipe bookmarked for weeks, bought all the ingredients, and even cleared my entire afternoon. Then, at 6:30 PM, the power flickered. Not out completely, but just enough to reset my oven timer and confuse my stand mixer into a sad, grinding halt. I stood there, holding a bowl of melted chocolate and butter, with exactly fifteen minutes before he walked through the door. The big, impressive cake? Not happening.
I grabbed the wrong ramekins—too small for a proper cake—and just poured the batter in, figuring I’d salvage something. I set my phone’s timer, crossed my fingers, and hoped for the best. What came out of that slightly temperamental oven was nothing like the plan. It was cracked on top, a little lopsided, and when I poked it with a toothpick, it came out wet. I almost threw the whole thing in the trash, honestly. But I didn’t. I served it with a scoop of vanilla ice cream, and my husband took one bite and just stared at me. “This is the best thing you’ve ever made,” he said. And he meant it.
That was the night I stopped panicking when things go wrong in the kitchen. This quick molten chocolate lava cake for two isn’t just a recipe—it’s a lesson in letting go of perfection. It’s what happens when you have limited time, a tiny bit of chaos, and a desperate need for something chocolatey. Maybe you’ve been there, staring at a half-melted mess and wondering if dinner is a lost cause. Trust me, this happy accident is the dessert you’ll keep coming back to, especially on those crazy weeknights when you need something sweet, fast, and ridiculously good.
Why You’ll Love This Recipe
Let me tell you why this quick molten chocolate lava cake for two has become my go-to weeknight dessert. I’ve tested this recipe more times than I care to admit—sometimes on purpose, sometimes because I forgot an ingredient and had to pivot. Each time, it delivers the same gooey, decadent result without the stress of a complicated dessert.
- Quick & Easy: From start to finish, this comes together in about 15 minutes. Seriously. You don’t need a stand mixer, a double boiler, or any fancy gadgets. Just a microwave, a couple of ramekins, and a little bit of patience while it bakes.
- Simple Ingredients: You probably have everything in your pantry right now. Butter, eggs, sugar, flour, cocoa powder, and chocolate chips. No trips to the specialty store, no weird extracts you’ll only use once.
- Perfect for Date Nights: Whether it’s a Tuesday night or a special anniversary, this dessert feels fancy without the fuss. It’s intimate, indulgent, and made for two.
- Crowd-Pleaser: I’ve served this to friends, family, and even picky eaters who claim they “don’t like chocolate.” They always ask for the recipe. Always.
- Unbelievably Delicious: The contrast between the warm, molten center and the slightly firm cake exterior is pure magic. It’s comfort food at its finest, and it takes almost no effort to achieve.
What makes this version different from all the other lava cake recipes out there? It’s the timing. I’ve perfected the bake time so you get that perfect lava flow every single time, without any guesswork. Plus, I’ve tested it with both dark and semi-sweet chocolate, so you can choose your adventure. This isn’t just another recipe—it’s the one you’ll text your friends about the next morning.
What Ingredients You Will Need
This recipe relies on a handful of pantry staples to create something truly special. Each ingredient plays a crucial role in building that perfect molten center and tender cake structure. Here’s what you’ll need, along with a few tips I’ve picked up along the way.
- Unsalted butter, melted (4 tablespoons or 57g): I always use unsalted so I can control the salt level. If you only have salted butter, just skip the pinch of salt later. Melt it in the microwave in 20-second bursts—don’t let it boil.
- Semi-sweet chocolate chips (1/2 cup or 90g): I prefer Ghirardelli or Guittard for their smooth melt and rich flavor. Dark chocolate chips (60-70% cacao) work beautifully if you want a more intense, less sweet lava cake.
- Powdered sugar (1/2 cup or 60g): This is my secret weapon. Powdered sugar dissolves faster than granulated, giving you a smoother batter with fewer lumps. Plus, it adds a touch of stability to the cake structure.
- Large eggs (2, room temperature): Room temperature eggs are crucial here. They whip up better and incorporate more air, which helps create that light, tender crumb. If you forgot to take them out of the fridge, place them in a bowl of warm water for 5 minutes.
- Egg yolk (1, room temperature): The extra yolk adds richness and helps create that gooey, custard-like center. Don’t skip it—it’s the key to the lava effect.
- All-purpose flour (2 tablespoons or 16g): Just enough to give the cake structure without making it dense. Use a gluten-free 1:1 flour blend if needed—I’ve done it with Bob’s Red Mill and it worked perfectly.
- Unsweetened cocoa powder (1 tablespoon or 5g): This deepens the chocolate flavor and adds a beautiful dark color. Dutch-process cocoa will give a milder, smoother taste, while natural cocoa is more intense.
- Pinch of salt: Don’t skip this. Salt enhances the chocolate flavor and balances the sweetness. I use fine sea salt.
- Vanilla extract (1/2 teaspoon): Pure vanilla is best, but imitation works in a pinch. It rounds out the chocolate flavor beautifully.
- Butter and cocoa powder for greasing ramekins: This step is non-negotiable. It ensures the cakes release cleanly and adds a thin, slightly crispy exterior.
Equipment Needed
You don’t need a professional kitchen to make this quick molten chocolate lava cake for two. Here’s what I use, along with some budget-friendly alternatives.
- Two 6-ounce ramekins: These are the perfect size for individual lava cakes. If you don’t have ramekins, you can use oven-safe mugs or small ceramic bowls. Just adjust the bake time slightly—mugs may take an extra minute or two.
- Microwave-safe bowl: For melting the butter and chocolate. A glass measuring cup works great because it’s easy to pour from.
- Whisk: A small wire whisk is ideal for incorporating the eggs and flour without overmixing. A fork works in a pinch.
- Baking sheet: Place the ramekins on a baking sheet before putting them in the oven. This catches any potential spills and makes it easier to transfer them in and out.
- Pastry brush (optional): For greasing the ramekins evenly. You can also use a paper towel or your fingers.
- Cooling rack: Let the cakes rest on a rack for exactly 1 minute before inverting. This helps them release cleanly.
Preparation Method
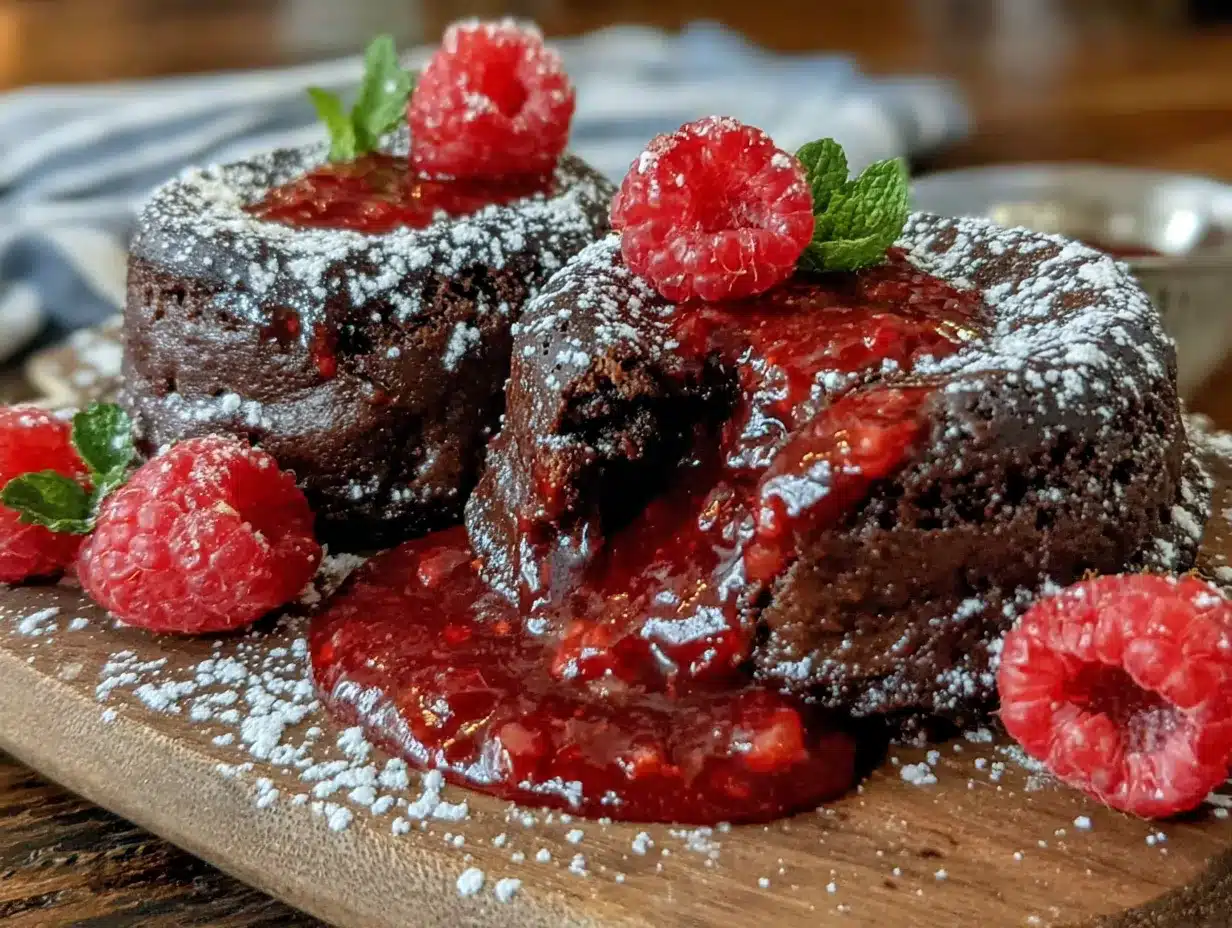
Follow these steps carefully, and you’ll have a perfect molten center every time. I’ve included all the little cues I’ve learned from making this dozens of times.
- Preheat your oven to 425°F (220°C). Place a baking sheet on the middle rack. The hot sheet helps the cakes bake evenly from the bottom.
- Grease two 6-ounce ramekins. Use a pastry brush to coat the insides with softened butter, making sure to get every nook and cranny. Then dust with cocoa powder, tapping out the excess. This creates a non-stick surface and adds a subtle chocolate flavor to the exterior.
- Melt the butter and chocolate together. In a microwave-safe bowl, combine the 4 tablespoons of butter and 1/2 cup of chocolate chips. Microwave in 30-second intervals, stirring after each, until completely smooth. It usually takes about 60-90 seconds total. Don’t overheat—the mixture should be glossy and fluid, not thick or grainy.
- Stir in the powdered sugar. Add the 1/2 cup of powdered sugar to the warm chocolate mixture and whisk until smooth. The mixture will look thick and fudgy at this point—that’s perfect.
- Add the eggs and yolk. Whisk in the 2 eggs and 1 extra yolk one at a time, mixing well after each addition. The batter will become thinner and glossier. It should look like a thick, shiny pudding.
- Mix in the flour, cocoa powder, salt, and vanilla. Sprinkle the 2 tablespoons of flour, 1 tablespoon of cocoa powder, and a pinch of salt over the batter. Add the 1/2 teaspoon of vanilla. Fold gently with a spatula or whisk until just combined. Do not overmix—a few tiny lumps are fine. Overmixing can make the cakes tough.
- Divide the batter between the ramekins. Pour the batter evenly into the prepared ramekins, filling them about 3/4 full. The batter will be thick—use a spatula to scrape every last bit. Place the ramekins on the preheated baking sheet in the oven.
- Bake for exactly 12-14 minutes. The cakes are done when the edges are set and firm, but the center still jiggles slightly when you gently shake the ramekin. The top should look slightly cracked and puffed. If you insert a toothpick into the center, it should come out with wet batter—that’s the lava.
- Let them rest for 1 minute. Remove the ramekins from the oven and place them on a cooling rack. Let them sit for exactly 60 seconds. This allows the cakes to pull away from the sides slightly, making them easier to invert.
- Invert and serve immediately. Run a small knife around the edge of each ramekin to loosen the cake. Place a small plate upside down over the ramekin, then flip it over quickly. Lift the ramekin gently—the cake should slide out, revealing a beautiful, molten center. Serve right away with ice cream or whipped cream.
Cooking Tips & Techniques
Over the years, I’ve learned a few things the hard way. Here are my best tips for nailing this quick molten chocolate lava cake for two every single time.
Don’t overbake. This is the most common mistake. I’ve pulled out lava cakes that looked perfect on top but were completely solid inside. Trust the jiggle test—when the center wobbles like jelly, it’s done. Every oven runs differently, so start checking at 11 minutes if your oven runs hot.
Room temperature eggs are non-negotiable. I learned this after a disastrous attempt where my cold eggs seized the chocolate mixture into a grainy mess. Cold eggs don’t emulsify properly, and you’ll end up with a dense, uneven cake. If you’re short on time, place the eggs in a bowl of warm water for 5 minutes before cracking them.
Grease those ramekins well. I once skimped on the butter and ended up with a lava cake that refused to release. I had to eat it with a spoon straight from the ramekin—which wasn’t the worst thing, honestly, but it wasn’t the presentation I was going for. Use a generous amount of butter and don’t forget the cocoa powder dusting.
Multitask strategically. While the cakes are baking (that 12-14 minute window), scoop your ice cream, whip some cream, or brew a pot of coffee. This dessert waits for no one—it needs to be served immediately for that perfect lava flow.
Use a kitchen scale for accuracy. If you have one, weigh your chocolate and butter. It’s more precise than measuring cups, especially with chocolate chips which can vary in size. I’ve found that 90g of chocolate chips is the sweet spot for that perfect molten center.
Variations & Adaptations
One of the best things about this recipe is how adaptable it is. Here are some variations I’ve tried and loved.
Gluten-Free Version: Swap the all-purpose flour with a 1:1 gluten-free baking blend. I’ve used Bob’s Red Mill and King Arthur Measure for Measure with great results. The texture is slightly more delicate, but the lava center works perfectly.
Dairy-Free Version: Use vegan butter (I like Miyoko’s) and dairy-free chocolate chips. Enjoy Life makes a great semi-sweet option. The texture will be slightly less rich, but still incredibly satisfying. Just make sure your vegan butter has a high fat content for the best results.
Flavor Twists: Add 1/2 teaspoon of espresso powder to the batter for a mocha lava cake. Or stir in 1 tablespoon of peanut butter or Nutella just before pouring the batter into the ramekins—it sinks to the center and creates an extra-gooey surprise. I once added a pinch of cayenne pepper for a spicy Mexican chocolate version, and it was a hit at a dinner party.
Single Serving: Halve the recipe for a solo treat. Use one egg and skip the extra yolk, or just make the full batch and save the second ramekin in the fridge for up to 24 hours. Bake it straight from the fridge, adding 1-2 minutes to the bake time.
Serving & Storage Suggestions
This quick molten chocolate lava cake for two is best enjoyed immediately, but here’s how to make the most of it.
Serving Temperature: Serve the cakes warm, straight from the oven. The contrast between the warm, gooey center and a scoop of cold vanilla ice cream is pure perfection. A dusting of powdered sugar or a few fresh raspberries adds a beautiful touch.
Complementary Sides: A dollop of freshly whipped cream, a drizzle of caramel sauce, or a sprinkle of flaky sea salt takes this dessert to the next level. For a boozy twist, add a splash of bourbon or Grand Marnier to the whipped cream.
Storage: If you have leftovers (unlikely, but possible), let the cakes cool completely in the ramekins, then cover with plastic wrap and refrigerate for up to 2 days. To reheat, microwave the ramekin for 20-30 seconds, or until the center is warm and gooey again. The texture won’t be as perfect as fresh, but it’s still delicious.
Make-Ahead Option: You can prepare the batter and divide it into the greased ramekins up to 24 hours in advance. Cover and refrigerate. When you’re ready to bake, add 2-3 minutes to the bake time since the batter is cold. This is a lifesaver for dinner parties or busy weeknights.
Nutritional Information & Benefits
Let’s be real—this is an indulgent dessert, and that’s okay. But here’s a breakdown of what you’re working with, plus a few silver linings.
- Estimated per serving (1 lava cake): Calories: 420, Fat: 28g, Carbs: 38g, Protein: 8g, Sugar: 28g.
- Dark chocolate benefits: Semi-sweet and dark chocolate are rich in antioxidants, specifically flavonoids, which can support heart health. The higher the cacao percentage, the more benefits you get.
- Eggs provide protein: Each serving has 8g of protein from the eggs, which helps keep you full and satisfied—even with dessert.
- Dietary considerations: This recipe is naturally vegetarian and can be made gluten-free or dairy-free with simple swaps. It contains eggs and dairy in its standard form.
- Portion control: This recipe is designed for two, which makes it easier to enjoy a reasonable portion. No leftover cake calling your name from the fridge!
Conclusion
This quick molten chocolate lava cake for two is proof that the best recipes often come from the most unexpected moments. It’s the dessert I turn to when I need something fast, indulgent, and guaranteed to impress. Whether you’re celebrating an anniversary, surviving a Tuesday, or just really need chocolate, this recipe delivers every single time.
I’d love to hear how it turns out for you. Did you try a variation? Did your power flicker too? Drop a comment below and let me know—I read every single one. And if you share a photo on Pinterest or Instagram, tag me so I can see your beautiful creation. Happy baking, and remember: sometimes the happy accidents are the best ones of all.
Frequently Asked Questions
Can I use milk chocolate instead of semi-sweet?
You can, but the lava cake will be significantly sweeter and may not set as firmly. Milk chocolate has a lower cocoa butter content, which can affect the texture. If you prefer milk chocolate, I recommend using a mix of half milk and half semi-sweet for the best balance.
Why did my lava cake turn out completely solid?
This usually means it was overbaked. The key is to pull the cakes out when the edges are set but the center still jiggles. Every oven is different, so start checking at 11 minutes. Also, make sure your ramekins aren’t too large—if they’re too wide, the batter spreads thin and bakes through too quickly.
Can I make this in a microwave instead of an oven?
Yes, but the texture will be different. Microwave lava cakes tend to be more sponge-like and less delicate. If you’re in a rush, microwave each ramekin on high for about 45-60 seconds. The center should still be slightly wet. Let it rest for 30 seconds before serving.
Can I double this recipe?
Absolutely. This recipe scales beautifully. Just double all the ingredients and use four ramekins. The bake time may increase by 1-2 minutes, so keep an eye on them. For larger batches, I recommend baking them in two separate batches to ensure even heat distribution.
How do I get the lava cake to release cleanly from the ramekin?
Generous greasing is key. Use softened butter and coat every surface, including the bottom corners. Then dust with cocoa powder and tap out the excess. After baking, let the cake rest for exactly 60 seconds—no longer, or it will stick. Run a small knife around the edge before inverting onto a plate.
Pin This Recipe!
Quick Molten Chocolate Lava Cake for Two: Easy 15-Minute Dessert

A quick and easy molten chocolate lava cake for two, perfect for weeknight desserts or date nights. This recipe delivers a gooey, decadent result in about 15 minutes with simple pantry ingredients.
- Prep Time: 5 minutes
- Cook Time: 12-14 minutes
- Total Time: 17-19 minutes
- Yield: 2 servings 1x
- Category: Dessert
- Cuisine: American
Ingredients
- 4 tablespoons (57g) unsalted butter, melted
- 1/2 cup (90g) semi-sweet chocolate chips
- 1/2 cup (60g) powdered sugar
- 2 large eggs, room temperature
- 1 large egg yolk, room temperature
- 2 tablespoons (16g) all-purpose flour
- 1 tablespoon (5g) unsweetened cocoa powder
- Pinch of fine sea salt
- 1/2 teaspoon vanilla extract
- Butter and cocoa powder for greasing ramekins
Instructions
- Preheat your oven to 425°F (220°C). Place a baking sheet on the middle rack.
- Grease two 6-ounce ramekins with softened butter, then dust with cocoa powder, tapping out the excess.
- In a microwave-safe bowl, combine the 4 tablespoons of butter and 1/2 cup of chocolate chips. Microwave in 30-second intervals, stirring after each, until completely smooth (about 60-90 seconds total).
- Stir in the 1/2 cup of powdered sugar and whisk until smooth.
- Whisk in the 2 eggs and 1 extra yolk one at a time, mixing well after each addition.
- Sprinkle the 2 tablespoons of flour, 1 tablespoon of cocoa powder, and a pinch of salt over the batter. Add the 1/2 teaspoon of vanilla. Fold gently until just combined; do not overmix.
- Divide the batter evenly between the prepared ramekins, filling them about 3/4 full. Place the ramekins on the preheated baking sheet in the oven.
- Bake for exactly 12-14 minutes. The cakes are done when the edges are set and firm, but the center still jiggles slightly when shaken.
- Remove the ramekins from the oven and place them on a cooling rack. Let them rest for exactly 60 seconds.
- Run a small knife around the edge of each ramekin to loosen the cake. Place a small plate upside down over the ramekin, then flip it over quickly. Lift the ramekin gently to release the cake. Serve immediately with ice cream or whipped cream.
Notes
Don’t overbake. The key is to pull the cakes out when the edges are set but the center still jiggles. Room temperature eggs are crucial for proper emulsification. Grease ramekins generously for easy release. Serve immediately for the best lava flow. For gluten-free, use a 1:1 gluten-free flour blend. For dairy-free, use vegan butter and dairy-free chocolate chips.
Nutrition
- Serving Size: 1 lava cake
- Calories: 420
- Sugar: 28
- Sodium: 150
- Fat: 28
- Saturated Fat: 16
- Carbohydrates: 38
- Fiber: 3
- Protein: 8
Keywords: molten chocolate lava cake, quick dessert, easy lava cake, chocolate cake for two, 15-minute dessert, date night dessert, weeknight dessert


