I was standing in the middle of the baking aisle at my local grocery store last October when the smell hit me — not pumpkin spice candles or some fancy latte, but that specific, almost dusty sweetness of canned pumpkin puree mixed with the earthy scent of cinnamon. And just like that, I was seven years old in my Aunt Lena’s tiny kitchen, my chin barely reaching the counter, watching her roll out pie dough with a wine bottle because she’d lost her rolling pin somewhere in the chaos of her pantry. She’d let me press my thumb into the edge of the crust to make little scalloped marks, and I’d smear pumpkin filling on my shirt before the pie ever made it to the oven. That memory came rushing back so hard I almost dropped my shopping basket.
Aunt Lena passed away five years ago, and I never got her pie recipe written down. She was one of those cooks who measured everything by feel — a handful of flour, a splash of cream, a pinch of salt that somehow always turned out perfect. I’ve spent the last four autumns trying to recreate that pie, and honestly, I’ve had some disasters. A crust that crumbled like sand. A filling that wept so much it turned the bottom crust into soggy sadness. A pie that looked beautiful but tasted like nothing special. You know that feeling when you’re chasing a flavor from your past and you just can’t quite catch it?
But this year, I finally nailed it. This easy homemade pumpkin pie with flaky butter crust is the one. It’s the pie that made my husband stop mid-bite and say, “Wait — this is different. This is really good.” It’s the pie that my neighbor Karen, who’s a pastry chef, asked for the recipe. And it’s the pie that finally tastes like Aunt Lena’s kitchen. Maybe you’ve been there — that longing for a dish from your past that feels just out of reach. Let me tell you, this recipe is worth the chase.
Why You’ll Love This Recipe
Let’s be real for a second — pumpkin pie is everywhere come November, but most versions are just okay. They’re the last slice left on the dessert table, the one people take out of politeness. This easy homemade pumpkin pie with flaky butter crust is not that pie. It’s the one people ask for seconds of, the one they text you about the next morning asking for the recipe.
- Quick & Easy: From start to oven in about 35 minutes of active time. The crust comes together in under 10 minutes, and the filling is a one-bowl situation. Perfect for a Tuesday night when you’re already exhausted but promised dessert for tomorrow’s dinner.
- Simple Ingredients: You probably already have most of these in your pantry. No specialty flours, no hard-to-find spices, no expensive equipment. Just honest, real food.
- Perfect for Weeknights & Holidays: This pie works for a random Wednesday just as well as it works for Thanksgiving. It’s forgiving, reliable, and doesn’t demand perfection.
- Crowd-Pleaser: I brought this to a potluck last month and three separate people asked if they could take the leftovers home. One of them was my boss. It’s that good.
- Unbelievably Delicious: The crust shatters when you bite into it — all those flaky layers from real butter. The filling is silky and spiced just right, not too sweet, with that deep pumpkin flavor that tastes like fall in a slice.
What makes this recipe different from every other pumpkin pie out there? Two things. First, the crust uses a technique called fraisage — you smear the dough across the counter with the heel of your hand to create those paper-thin layers of butter. It sounds fancy, but it’s actually easier than traditional pie dough. Second, the filling gets a secret ingredient: a tablespoon of maple syrup and a splash of heavy cream instead of evaporated milk. It gives the filling a richness and depth that canned milk just can’t match. This isn’t just another pumpkin pie — it’s your new signature dessert.
What Ingredients You Will Need
This recipe uses simple, honest ingredients to create something truly special. Most of these are pantry staples, and the ones that aren’t are easy to find at any grocery store. Here’s what you’ll need, broken down by component.
For the Flaky Butter Crust
- All-purpose flour: 1 ¼ cups (156 grams). I use King Arthur Flour for consistent results, but any good brand works. Don’t use bread flour — it has too much protein and will make the crust tough.
- Unsalted butter: ½ cup (113 grams), very cold, cut into small cubes. This is the most important ingredient. The butter must be ice-cold — I pop mine in the freezer for 15 minutes before I start. European-style butter like Plugrà or Kerrygold has a higher fat content and makes an even flakier crust.
- Salt: ½ teaspoon. I use fine sea salt. It balances the butter and brings out the flavor of the crust.
- Ice water: 4 to 6 tablespoons. The exact amount depends on humidity and your flour. Start with 4 and add more if needed. The water should be genuinely icy — I keep a bowl of ice water in the fridge while I work.
- Sugar: 1 teaspoon. Just a tiny bit to help the crust brown and add a whisper of sweetness.
For the Pumpkin Filling
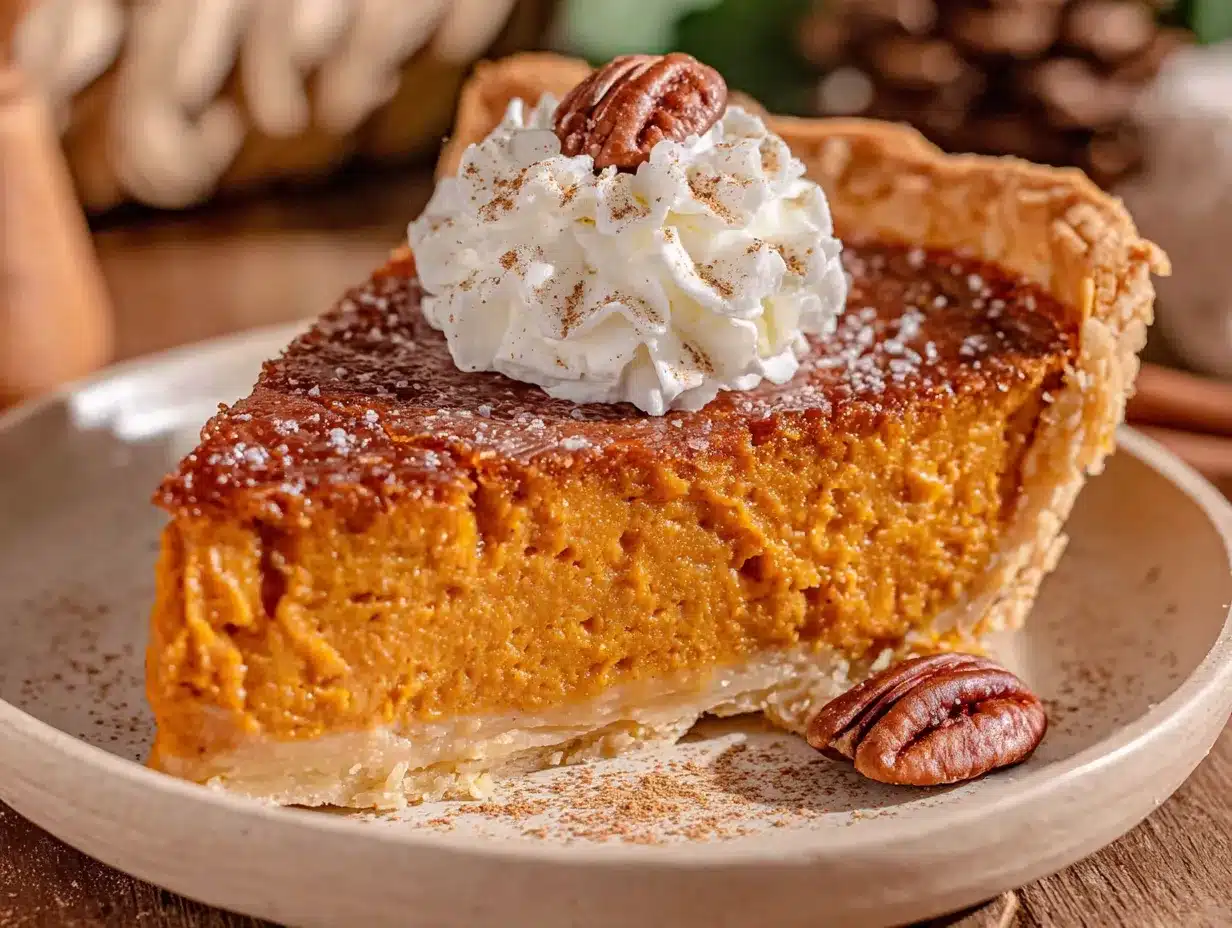
- Canned pumpkin puree: 1 can (15 ounces). Not pumpkin pie filling — that’s already sweetened and spiced. You want 100% pure pumpkin. I prefer Libby’s for its consistent texture and deep color.
- Heavy cream: ¾ cup (180 ml). This replaces the traditional evaporated milk and makes the filling incredibly silky. Don’t substitute with half-and-half — you need the fat content for that luscious texture.
- Maple syrup: 1 tablespoon (15 ml). Pure maple syrup, not pancake syrup. It adds a subtle complexity that brown sugar alone can’t achieve.
- Light brown sugar: ½ cup (100 grams), packed. Dark brown sugar works too, but it will give a deeper molasses flavor that can overpower the pumpkin.
- Granulated sugar: ¼ cup (50 grams). The combination of brown and white sugar gives the perfect balance of moisture and structure.
- Eggs: 2 large, at room temperature. Cold eggs can seize the filling and make it lumpy. Leave them on the counter for 30 minutes, or float them in warm water for 5 minutes.
- Vanilla extract: 1 teaspoon. Pure vanilla, not imitation. It rounds out the spices beautifully.
- Ground cinnamon: 1 ½ teaspoons. This is the backbone of the spice blend. Use fresh spices — they lose potency over time.
- Ground ginger: ½ teaspoon. Adds warmth and a little kick.
- Ground nutmeg: ¼ teaspoon. Freshly grated is incredible here if you have it.
- Ground cloves: ⅛ teaspoon. A little goes a long way. Be careful not to overdo it.
- Salt: ¼ teaspoon. Don’t skip this — salt makes the sweetness sing.
Equipment Needed
You don’t need a fancy kitchen to make this easy homemade pumpkin pie with flaky butter crust. Here’s what you’ll actually use:
- 9-inch pie dish: Glass or ceramic works best. I use a standard Pyrex pie plate — it heats evenly and lets you see when the bottom crust is golden. Avoid dark metal pans, which can over-brown the crust.
- Rolling pin: I have a fancy French rolling pin now, but I used a wine bottle for years and it worked just fine. A smooth cylinder of any kind will do the job.
- Large mixing bowl: For the crust. A stainless steel bowl is ideal because it stays cold.
- Pastry cutter or two forks: To cut the butter into the flour. Your hands work too, but work quickly so the butter doesn’t warm up.
- Medium mixing bowl: For the filling. Any bowl works.
- Whisk: To combine the filling ingredients smoothly.
- Bench scraper: Optional but helpful for the fraisage technique and for cleaning your work surface.
- Plastic wrap: To chill the dough.
- Parchment paper: For blind baking the crust. Aluminum foil works in a pinch.
- Pie weights or dried beans: To weigh down the crust during blind baking. I keep a bag of cheap dried beans in my pantry just for this purpose.
- Cooling rack: Essential for even cooling and a crisp bottom crust.
Budget-friendly tip: Skip the pie weights. Use a roll of aluminum foil, shape it to fit your pie crust, and fill it with dried beans or even dry rice. I’ve been using the same bag of pinto beans for three years now.
Preparation Method
Step 1: Make the Flaky Butter Crust
Start by combining the flour, salt, and sugar in a large bowl. Whisk them together to distribute everything evenly. Add the cold butter cubes and toss them in the flour to coat each piece. Now, using a pastry cutter or your fingertips, work the butter into the flour until you have pieces ranging from pea-sized to about the size of a walnut. Some larger pieces are good — they create the flaky layers. If you’re using your hands, work quickly. Warm hands melt butter.
Drizzle 4 tablespoons of ice water over the mixture and stir with a fork until the dough starts coming together. It should look shaggy and clumpy, not smooth. Squeeze a handful — if it holds together without crumbling, it’s ready. If it falls apart, add another tablespoon of water, one at a time, until it holds.
Here’s where the magic happens. Turn the dough out onto a lightly floured surface. With the heel of your hand, smear the dough away from you in small sections, pushing it across the counter. This is the fraisage technique. It creates those paper-thin layers of butter that make the crust so flaky. Gather the dough into a ball, flatten it into a disk about 1 inch thick, wrap it in plastic, and refrigerate for at least 30 minutes. You can leave it for up to 3 days.
Step 2: Roll and Blind Bake the Crust
Preheat your oven to 375°F (190°C). Take the dough out of the fridge and let it sit for 5 minutes — just enough so it’s rollable but still cold. On a lightly floured surface, roll the dough from the center outward, rotating it a quarter turn after each roll. Aim for a circle about 12 inches in diameter and about ⅛ inch thick. Don’t worry if the edges crack — just pinch them back together.
Carefully transfer the dough to your pie dish. Don’t stretch it — stretching causes shrinkage during baking. Gently press the dough into the bottom and up the sides of the dish. Trim the overhang to about ½ inch, then fold it under and crimp the edges. I do a simple flute with my fingers, but a fork press works great too. Prick the bottom of the crust all over with a fork — this prevents air bubbles.
Line the crust with parchment paper and fill with pie weights or dried beans. Bake for 15 minutes, then remove the parchment and weights. Bake for another 7 to 10 minutes, until the bottom looks dry and just barely golden. Set it aside to cool slightly while you make the filling. Leave the oven on.
Step 3: Make the Pumpkin Filling
In a medium bowl, whisk together the pumpkin puree, heavy cream, maple syrup, both sugars, eggs, vanilla, and all the spices until smooth. Make sure the eggs are fully incorporated — you don’t want streaks of white in your finished pie. The mixture should be glossy and thick, like a milkshake. Taste it. Yes, it’s safe to taste raw filling — no raw eggs if you’re using pasteurized eggs. Adjust the spices if you want. I sometimes add an extra pinch of ginger if I’m feeling bold.
Step 4: Assemble and Bake
Pour the filling into the pre-baked crust. It should fill the crust almost to the rim — the filling won’t rise much. Carefully transfer the pie to the oven. Bake at 375°F (190°C) for 45 to 55 minutes. The edges should be set and slightly puffed, but the center should still jiggle slightly when you gently shake the pie. It will continue to set as it cools.
If the edges of the crust are browning too fast, tent the pie with foil or a pie shield after about 30 minutes. I always forget to do this and end up with dark edges — learn from my mistakes.
Step 5: Cool Completely
This is the hardest part. Let the pie cool on a wire rack for at least 2 hours at room temperature. Then refrigerate for at least 4 hours, preferably overnight. I know you want to slice into it immediately, but trust me — a fully set pie slices cleanly and tastes better. The flavors meld and deepen overnight. This is the pie that rewards patience.
Cooking Tips & Techniques
After way too many failed pumpkin pies, here’s what I’ve learned the hard way:
Keep everything cold for the crust. I cannot stress this enough. If your butter melts before the crust hits the oven, you’ll get a tough, greasy crust instead of a flaky one. I chill my flour and bowl in the freezer for 10 minutes before I start. I also fill a measuring cup with ice water and let it sit while I prep. When the recipe says ice water, it means water with actual ice cubes floating in it.
Don’t overmix the filling. Whisk until just combined. Overmixing incorporates too much air, which can cause the filling to puff up and then collapse, leaving you with a cracked, uneven surface. A few tiny bubbles are fine. A foamy filling is not.
The jiggle test is your friend. You’ll know the pie is done when the edges are set but the center has a gentle wobble, like Jell-O that’s just been shaken. If the whole pie is liquid, it needs more time. If it’s completely firm and cracking, it’s overbaked. Pull it when the center still has that soft jiggle — it will continue to cook from residual heat.
Don’t skip the blind bake. I tried to skip this step once because I was in a hurry. The result was a soggy bottom crust that made me want to cry. Blind baking ensures the bottom crust is fully cooked and crisp, even under the moist filling. It adds 25 minutes to the process, but it’s non-negotiable.
Let the pie cool gradually. A sudden temperature change can cause the filling to crack. Cool it at room temperature first, then refrigerate. Don’t put a hot pie directly in the fridge — the condensation will make the crust soggy.
Variations & Adaptations
This easy homemade pumpkin pie with flaky butter crust is wonderfully adaptable. Here are some ways to make it your own:
Gluten-Free Version: Substitute the all-purpose flour with a good gluten-free flour blend that contains xanthan gum. I’ve had great results with Bob’s Red Mill 1-to-1 Baking Flour. The crust will be a bit more delicate, so handle it gently. The filling is naturally gluten-free, so just swap the crust.
Dairy-Free Version: Use a high-quality vegan butter stick (not the spreadable kind in a tub) for the crust. Miyoko’s and Country Crock Plant Butter work well. For the filling, substitute the heavy cream with full-fat coconut cream — the kind that comes in a can, not the refrigerated carton. The filling will have a subtle coconut flavor that pairs surprisingly well with pumpkin.
Spice It Up: Add ¼ teaspoon of white pepper or a pinch of cayenne to the filling for a warm, unexpected kick. It won’t make the pie spicy — it just adds depth and complexity that makes people wonder what’s different. I tried this on a whim last year and now I can’t go back.
Maple Pecan Topping: Before baking, sprinkle the top of the filling with ½ cup of chopped pecans and a light drizzle of maple syrup. The nuts toast as the pie bakes, adding crunch and flavor. This is my husband’s favorite variation.
Individual Mini Pies: Use a muffin tin instead of a pie dish. Roll the dough and cut circles to fit the muffin cups. Blind bake for 10 minutes, then fill and bake for 20 to 25 minutes. Perfect for portion control or parties. Plus, everyone loves having their own little pie.
Serving & Storage Suggestions
Serve this pie slightly chilled or at room temperature — never warm. The filling needs to be fully set for clean slices. I prefer it straight from the fridge on a cool autumn evening, but room temperature allows the flavors to open up more. Try both and see what you prefer.
For the ultimate slice, top it with a dollop of lightly sweetened whipped cream. The cream cuts through the richness of the filling and adds a lovely contrast. I make my whipped cream with 1 cup of heavy cream, 2 tablespoons of powdered sugar, and ½ teaspoon of vanilla — whip until soft peaks form. A sprinkle of cinnamon on top is never a bad idea.
This pie pairs beautifully with a hot cup of coffee, spiced chai, or even a glass of bourbon or dark rum. For a full dessert spread, serve it alongside a crumble or a simple apple tart.
Storage: Cover the pie loosely with plastic wrap or foil and refrigerate for up to 5 days. The crust will stay crisp for about 2 days, then soften slightly — it’s still delicious, just different. You can also freeze the fully baked and cooled pie for up to 3 months. Wrap it tightly in plastic wrap, then foil. Thaw overnight in the fridge before serving.
Reheating: I don’t recommend reheating the whole pie. If you want a warm slice, microwave individual pieces for 15 to 20 seconds. The crust won’t be as flaky, but the warm filling is comforting on a cold night.
Nutritional Information & Benefits
Here’s the honest truth about this easy homemade pumpkin pie with flaky butter crust: it’s a dessert, and it’s not low-calorie. But it’s made with real, whole ingredients, and that counts for something.
Per slice (based on 8 servings):
- Calories: Approximately 350
- Fat: 22g
- Carbohydrates: 35g
- Protein: 6g
- Fiber: 3g
- Sugar: 20g
Pumpkin is genuinely nutritious — it’s packed with vitamin A (over 200% of your daily needs per cup), vitamin C, potassium, and fiber. The spices — cinnamon, ginger, nutmeg, cloves — are anti-inflammatory and rich in antioxidants. The butter and cream provide fat-soluble vitamins A, D, E, and K. So while this isn’t health food, it’s a dessert you can feel reasonably good about. Everything in moderation, right?
This recipe contains gluten, dairy, and eggs. If you need to avoid any of these, check the variations section above for suitable substitutions.
Conclusion
This easy homemade pumpkin pie with flaky butter crust is more than just a recipe — it’s the pie I’ve been chasing for years, the one that finally brought Aunt Lena’s kitchen back to life in my own home. It’s the pie that proves you don’t need fancy techniques or expensive ingredients to create something genuinely special. Just good butter, real cream, a little patience, and a whole lot of love.
I hope you make this pie for your family, for your friends, or just for yourself on a quiet Tuesday night. I hope you serve it with a generous dollop of whipped cream and maybe a second slice when no one’s looking. And I hope it becomes your pie — the one you pull out year after year, the one people start asking for before the leaves even change color.
If you make this recipe, I’d love to hear about it. Drop a comment below and tell me how it turned out. Did you add your own twist? Did your family fight over the last slice? Did you finally recreate that memory you’ve been chasing? Share your story — I read every single comment, and honestly, they make my day. Happy baking, friends.
Frequently Asked Questions
Can I use fresh pumpkin instead of canned?
Absolutely, but it’s more work than you might think. Fresh pumpkin has more water than canned, so you’ll need to roast it, puree it, and then strain it through cheesecloth for several hours to remove excess moisture. Canned pumpkin is actually more consistent and reliable for baking. If you want to use fresh, go for it — just be prepared for a longer process and potentially different results.
Why is my pumpkin pie cracking on top?
Cracks happen when the pie is overbaked or when the temperature changes too quickly. Pull the pie when the center still has a slight jiggle — it will continue to set as it cools. Also, let the pie cool gradually at room temperature before refrigerating. A sudden chill can cause the filling to contract and crack.
Can I make this pie ahead of time?
Yes, and I actually recommend it. This pie tastes better the next day. You can bake it up to 2 days in advance and keep it covered in the fridge. You can also freeze the baked pie for up to 3 months. Just thaw it overnight in the fridge before serving.
How do I prevent a soggy bottom crust?
Blind bake the crust before adding the filling. That’s the single most important step. Also, make sure your filling isn’t too liquid — the heavy cream and maple syrup combination in this recipe is thicker than traditional evaporated milk fillings, which helps. And always cool the pie on a wire rack so air circulates underneath.
Can I use a store-bought crust instead?
You can, but honestly, the flaky butter crust is what makes this pie special. A store-bought crust will save you about 15 minutes of work, but you’ll lose that shatteringly flaky texture and rich buttery flavor. If you’re really short on time, use a refrigerated pie crust from the dairy aisle — not the frozen ones. And consider brushing the crust with an egg wash before blind baking for a better color and texture.
Pin This Recipe!
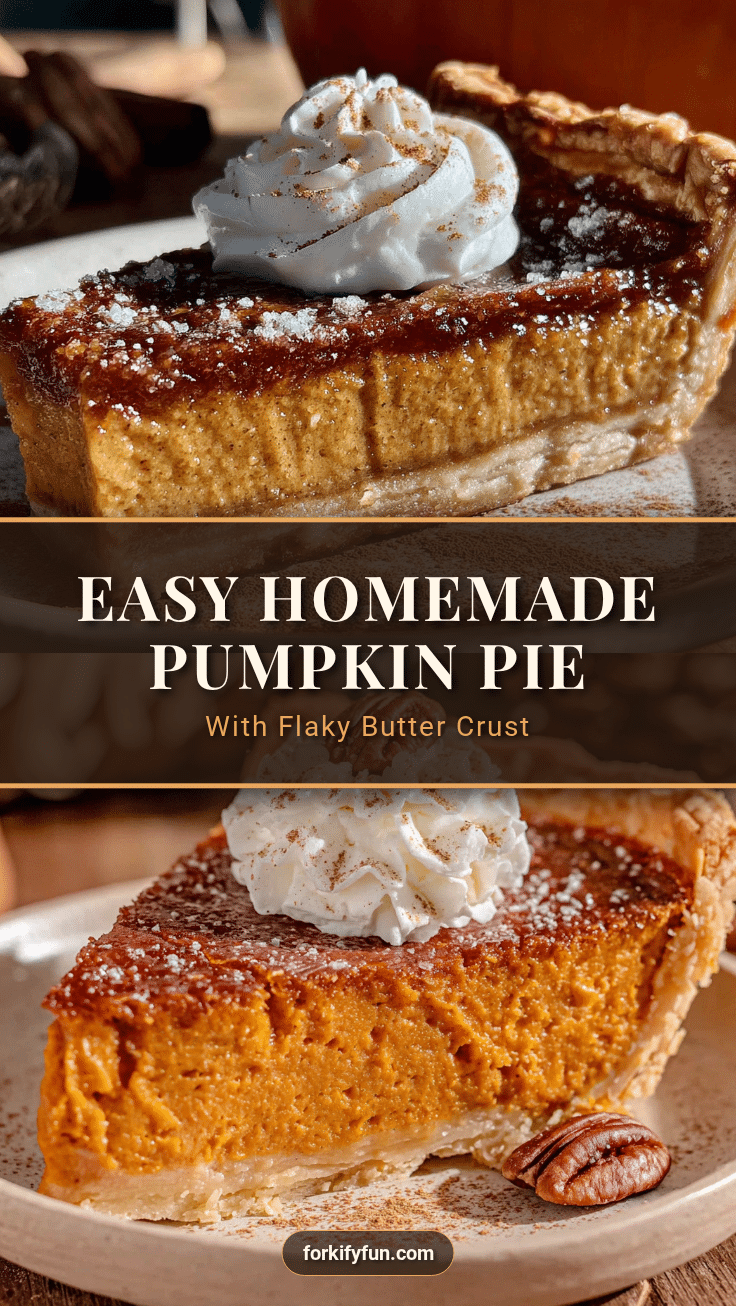
Easy Homemade Pumpkin Pie with Flaky Butter Crust
This easy homemade pumpkin pie with flaky butter crust is the one you’ve been chasing—a silky, spiced filling in a shatteringly flaky crust that tastes like fall in every bite. Perfect for weeknights or holidays, it’s made with simple ingredients and a secret touch of maple syrup and heavy cream.
- Prep Time: 35 minutes
- Cook Time: 55 minutes
- Total Time: 1 hour 30 minutes (plus chilling time)
- Yield: 8 servings 1x
- Category: Dessert
- Cuisine: American
Ingredients
- 1 ¼ cups (156 grams) all-purpose flour
- ½ cup (113 grams) unsalted butter, very cold, cut into small cubes
- ½ teaspoon fine sea salt
- 4 to 6 tablespoons ice water
- 1 teaspoon sugar
- 1 can (15 ounces) canned pumpkin puree (not pumpkin pie filling)
- ¾ cup (180 ml) heavy cream
- 1 tablespoon (15 ml) pure maple syrup
- ½ cup (100 grams) light brown sugar, packed
- ¼ cup (50 grams) granulated sugar
- 2 large eggs, at room temperature
- 1 teaspoon pure vanilla extract
- 1 ½ teaspoons ground cinnamon
- ½ teaspoon ground ginger
- ¼ teaspoon ground nutmeg
- ⅛ teaspoon ground cloves
- ¼ teaspoon salt
Instructions
- Make the crust: In a large bowl, whisk together flour, salt, and sugar. Add cold butter cubes and toss to coat. Using a pastry cutter or fingertips, work butter into flour until pieces range from pea-sized to walnut-sized. Drizzle 4 tablespoons ice water over mixture and stir with a fork until dough comes together. If needed, add more water 1 tablespoon at a time. Turn dough onto a lightly floured surface and use the heel of your hand to smear dough away from you in small sections (fraisage tech…
- Roll and blind bake the crust: Preheat oven to 375°F (190°C). Let dough sit at room temperature for 5 minutes. On a lightly floured surface, roll dough from center outward to a 12-inch circle, about ⅛ inch thick. Transfer to a 9-inch pie dish without stretching. Trim overhang to ½ inch, fold under, and crimp edges. Prick bottom with a fork. Line with parchment paper and fill with pie weights or dried beans. Bake for 15 minutes, then remove parchment and weights. Bake another 7 to 10 minutes unti…
- Make the filling: In a medium bowl, whisk together pumpkin puree, heavy cream, maple syrup, brown sugar, granulated sugar, eggs, vanilla, cinnamon, ginger, nutmeg, cloves, and salt until smooth and glossy.
- Assemble and bake: Pour filling into pre-baked crust. Bake at 375°F (190°C) for 45 to 55 minutes, until edges are set and center jiggles slightly when shaken. If edges brown too fast, tent with foil after 30 minutes.
- Cool completely: Let pie cool on a wire rack for at least 2 hours at room temperature, then refrigerate for at least 4 hours (preferably overnight) before slicing.
Notes
Keep all ingredients cold for the crust. Do not overmix the filling. Use the jiggle test to check doneness. Blind baking is essential to prevent a soggy bottom. Cool the pie gradually at room temperature before refrigerating.
Nutrition
- Serving Size: 1 slice
- Calories: 350
- Sugar: 20
- Sodium: 280
- Fat: 22
- Saturated Fat: 13
- Carbohydrates: 35
- Fiber: 3
- Protein: 6
Keywords: pumpkin pie, easy pumpkin pie, flaky butter crust, homemade pumpkin pie, Thanksgiving dessert, fall dessert, pumpkin dessert


