I was supposed to be making individual appetizer plates. Little ramekins with olives, tiny cups of dip, perfectly arranged salad forks — the whole Pinterest-worthy setup for my first-ever Friendsgiving. But then I realized I only owned six matching bowls, the store was out of the cute little skewers I had planned to use, and my oven decided to preheat to 500 degrees when I just wanted it at 350. I stood in my kitchen, honestly questioning every life choice that led me to host a party for twelve people.
So I grabbed the biggest wooden cutting board I owned — the one my roommate bought at a thrift store for five bucks — and I started piling things on it. Cheese wedges went down first, then piles of prosciutto, then handfuls of grapes and figs that I didn’t even bother arranging. I figured everyone would just grab what they wanted and nobody would notice the chaos. But something happened when that board came together. The colors just worked — deep reds, golden yellows, creamy whites. People started grabbing food with their hands, laughing, reaching across the table. Nobody missed the little forks. Nobody cared about the ramekins.
That night, my friend Sarah said, “This is so much better than fancy plates. It feels like we’re all sharing something.” And she was right. That messy, thrown-together board became the centerpiece of our Friendsgiving tradition. Now I make this Cozy Friendsgiving Charcuterie Board with Fall Fruit every year, and honestly? I never go back to the individual plate plan. Maybe you’ve been there — overthinking a gathering, stressing about the details, when what people really want is just to dig in together.
Why You’ll Love This Cozy Friendsgiving Charcuterie Board with Fall Fruit
Let me tell you why this board has become the star of my Friendsgiving table year after year. I’ve tested this combination through three different gatherings, and each time it gets better. The balance of savory and sweet, the way the fall fruit cuts through the richness of the cheese — it’s honestly kind of magical.
- No Cooking Required — Seriously, zero oven time. You just arrange and serve. This is perfect when your kitchen is already working overtime on the turkey and sides.
- Fall Flavors at Their Best — We’re talking crisp apples, juicy pears, figs, and grapes. These fruits are at their peak in autumn, and they pair beautifully with aged cheeses and cured meats.
- Perfect for Sharing — A charcuterie board brings people together in a way that individual plates just can’t. Everyone gathers around, reaches in, and starts conversations.
- Customizable for Any Crowd — Whether you have two people or twenty, you can scale this board up or down without any extra work.
- Looks Impressive with Minimal Effort — I’ve had guests ask if I spent hours on this board. The secret? It takes about 15 minutes to put together. The colors and textures do all the work for you.
What makes this board different from other charcuterie boards you’ve seen? It’s the focus on fall fruit as the star, not just an afterthought. Most boards use fruit as a tiny garnish. Here, the apples, pears, and figs are front and center, balancing out the richness of the cheese and meat. I learned this trick from a cheesemonger at my local market — he told me that the best boards tell a story of the season, not just a random collection of ingredients. This board tells a story of crisp autumn afternoons and cozy gatherings.
And honestly? This recipe is the kind that makes you close your eyes after the first bite. That moment when you bite into a slice of aged gouda with a piece of honeycrisp apple — it’s comfort food reimagined. Simple, seasonal, and completely soul-soothing.
What Ingredients You Will Need for Your Cozy Friendsgiving Charcuterie Board with Fall Fruit
Building a great charcuterie board is all about balance. You want a mix of textures, flavors, and colors. Here’s what I use for my fall version, broken down by category so you can see how everything works together.
Cheeses (3-4 varieties)
- Aged Gouda (8 oz) — This is my go-to for fall. It has that nutty, caramel-like flavor that pairs perfectly with apples and pears. I recommend Boar’s Head or a local artisan brand if you can find one.
- Brie (8 oz wheel) — Soft, creamy, and decadent. The mild flavor balances the stronger cheeses. Look for a wheel that feels slightly springy when you press it — that means it’s perfectly ripe.
- Sharp Cheddar (8 oz) — A classic for a reason. The tangy, sharp flavor cuts through the sweetness of the fruit. I prefer an aged white cheddar for its crumbly texture.
- Blue Cheese (4 oz) — Optional but highly recommended. The bold, funky flavor adds contrast. A small wedge of gorgonzola or roquefort works beautifully. If you’re not a blue cheese fan, swap in a goat cheese log instead.
Cured Meats (3 varieties)
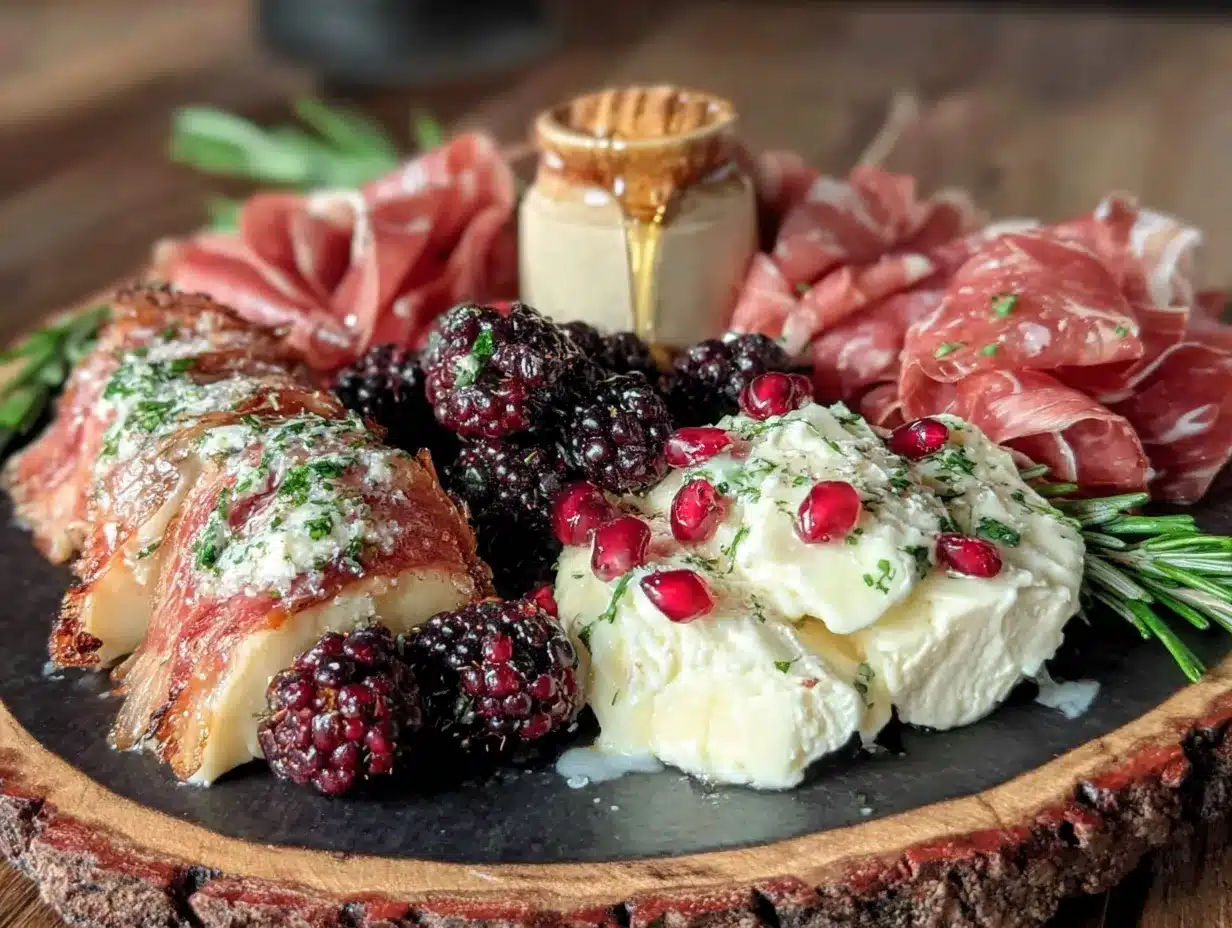
- Prosciutto (6 oz) — Thinly sliced and buttery. I like to leave some slices flat and fold others into ribbons for texture variety.
- Salami (6 oz) — Genoa salami or soppressata works great. Slice it into thin rounds or small cubes. The garlic and fennel flavors are perfect for fall.
- Chorizo (6 oz) — The smoky, spicy notes add a nice kick. Spanish chorizo is firmer and drier, while Mexican chorizo is softer — either works, but I prefer Spanish for this board.
Fall Fruits
- Honeycrisp Apples (2 large) — Sweet, crisp, and slightly tart. They hold up well and don’t brown too quickly. Slice them just before serving for best results.
- Bartlett Pears (2 large) — Soft, juicy, and fragrant. Their sweetness pairs beautifully with the aged gouda. Look for pears that yield slightly to gentle pressure near the stem.
- Fresh Figs (6-8) — If you can find them, fresh figs are a game-changer. Their honey-like sweetness and soft texture add something special. In a pinch, dried figs work too.
- Red Seedless Grapes (1 cup) — A classic charcuterie staple. They add pops of sweetness and a refreshing crunch. Plus, they’re easy to grab and eat.
Accompaniments
- Honey (1/4 cup) — For drizzling over brie or blue cheese. Local honey adds a nice floral note that changes with the season.
- Fig Jam or Apple Butter (1/2 cup) — A sweet spread that ties everything together. I love Bonne Maman fig jam, but any brand works.
- Mixed Nuts (1 cup) — Toasted almonds, candied pecans, or spiced walnuts add crunch. I usually use a mix of salted and sweet.
- Olives (1/2 cup) — Castelvetrano or kalamata olives add briny contrast. I love the bright green castelvetranos for their buttery texture.
- Crackers and Bread (1-2 varieties) — A mix of water crackers, crostini, or baguette slices. Look for neutral-flavored options that won’t compete with the cheese and fruit.
Optional Additions
- Dried Apricots or Dates (1/2 cup) — For extra sweetness and chew.
- Dark Chocolate (2 oz) — A few squares of high-quality dark chocolate add a touch of indulgence.
- Fresh Herbs (for garnish) — Rosemary sprigs, thyme, or sage leaves add a beautiful fall touch.
Equipment Needed
You don’t need fancy equipment to build a beautiful charcuterie board. Here’s what I use:
- Large Wooden Cutting Board or Serving Platter — At least 18 inches long. If you don’t have a large board, use a baking sheet lined with parchment paper. Nobody will know the difference.
- Small Bowls or Ramekins — For honey, jam, and olives. I use 4-ounce ramekins, but any small dish works.
- Cheese Knives — One for soft cheese (like brie) and one for hard cheese (like gouda). If you don’t have cheese knives, use a butter knife for soft cheese and a paring knife for hard cheese.
- Tongs or Small Spoons — For serving olives and nuts. I prefer small wooden spoons for a rustic look.
- Paring Knife — For slicing apples and pears just before serving.
- Cutting Board for Prep — A small board for slicing fruit and cheese.
I found my large wooden board at a thrift store for $8, and honestly, it works better than the fancy ones I’ve seen online. A little olive oil rub keeps it looking nice. For budget-friendly options, check home goods stores or even the wooden cutting boards at IKEA.
Preparation Method for Your Cozy Friendsgiving Charcuterie Board with Fall Fruit
Here’s how I put this board together. It takes about 15-20 minutes, and the key is layering — start with the biggest items and fill in the gaps.
Step 1: Prep Your Ingredients (5 minutes)
Take your cheeses out of the refrigerator about 30 minutes before serving. This lets them come to room temperature, which brings out their full flavor. While they’re resting, slice your apples and pears. I cut apples into thin wedges and pears into similar-sized slices. Toss them with a little lemon juice to prevent browning if you’re prepping ahead. Rinse your grapes and pat them dry. If using fresh figs, cut them in half lengthwise. Arrange your cured meats — I like to fold prosciutto into loose ribbons and slice salami into thin rounds.
Step 2: Place the Bowls (2 minutes)
Put your small bowls or ramekins on the board first. This is important — they anchor the layout. Place them in a triangle pattern if using three bowls, or a square pattern for four. I usually put honey in one, fig jam in another, and olives in a third. This creates natural stopping points on the board and keeps wet ingredients from making everything soggy.
Step 3: Add the Cheeses (3 minutes)
Place your cheese wedges around the bowls. I put them at different points on the board so people don’t have to reach too far. For the brie, I leave it whole with a small knife next to it. For the aged gouda and cheddar, I cut a few slices off the wedge to show guests what it looks like inside. This encourages people to start eating. The blue cheese goes in a corner — its strong flavor means some people will want just a little.
Step 4: Arrange the Meats (3 minutes)
Fold your prosciutto into loose ribbons and place them in piles near the cheeses. I put the salami slices in a small fan pattern — it looks pretty and makes them easy to grab. The chorizo goes in a separate pile. Don’t worry about being perfect here. A slightly messy arrangement looks more inviting and homemade.
Step 5: Add the Fruit (3 minutes)
Scatter your apple and pear slices around the board, filling in the gaps between the cheese and meat. Place the fig halves in clusters — they’re beautiful and draw the eye. Tuck bunches of grapes into empty spaces. The fruit should look abundant, not sparse. If you’re using dried apricots or dates, scatter those around too.
Step 6: Fill in the Gaps (2 minutes)
Now comes the fun part. Fill in any empty spaces with nuts, crackers, and small items. I like to put crackers in one or two clusters rather than spreading them all over — it keeps them from getting crushed. Scatter the nuts around the board, tucking them into little crevices. Add fresh herb sprigs for color — rosemary and thyme look especially fall-ish.
Step 7: Final Touches (1 minute)
Drizzle a little honey over the brie or blue cheese. Add a small spoon to the jam bowl. Place cheese knives next to each cheese. Step back and look at your board — if there are any bare spots, fill them with extra crackers or nuts. The board should look abundant, like there’s plenty for everyone.
Cooking Tips & Techniques for the Perfect Cozy Friendsgiving Charcuterie Board with Fall Fruit
After making this board more times than I can count, I’ve learned a few things the hard way. Here are my best tips:
Don’t Overcrowd the Board — I know it’s tempting to pile everything on, but a crowded board is hard to eat from. Leave a little space between items so people can grab what they want without knocking things over. If you have a lot of ingredients, use two smaller boards instead of one big one.
Layer Flavors Intentionally — Think about the order of flavors as someone eats. Start with mild cheese and fruit, then move to stronger cheese and meat, then finish with something sweet like honey or fig jam. I arrange my board in this order — mild to strong — so guests naturally experience the progression.
Prep Ahead, Assemble Later — You can slice cheese, rinse fruit, and portion nuts the day before. Store everything in separate containers in the fridge. Then on Friendsgiving day, just pull everything out and arrange it. This saves so much stress when you’re already busy with other dishes.
Watch the Apple Browning — I learned this one the hard way. If you slice apples more than 30 minutes ahead, they’ll turn brown. Toss them with a little lemon juice or apple cider vinegar to slow this down. Or just slice them right before serving — it only takes a minute.
Temperature Matters — Cheese tastes best at room temperature. Take it out of the fridge 30-45 minutes before serving. If you’re serving the board over a few hours, keep an eye on the brie — it can get too soft and messy if it sits out too long. I usually add a fresh brie wheel halfway through if the party goes long.
The One Thing I Messed Up — My first time making this board, I put the crackers directly on the board next to the jam. Within 20 minutes, they were completely soggy. Now I keep crackers in a separate basket or on the edge of the board away from any wet ingredients. Such a simple fix, but it makes a huge difference.
Variations & Adaptations for Your Cozy Friendsgiving Charcuterie Board with Fall Fruit
This board is endlessly customizable. Here are some of my favorite variations:
Vegetarian Version
Skip the cured meats and double up on the cheese and fruit. I add marinated artichoke hearts, roasted red peppers, and grilled halloumi for extra flavor and texture. The halloumi adds that salty, savory element that the meats usually provide.
Gluten-Free Option
Use gluten-free crackers or rice cakes instead of regular crackers. I love the simple rice crackers from Lundberg — they’re neutral enough to let the cheese and fruit shine. Also add sliced cucumber rounds or bell pepper strips for extra crunch.
Dairy-Free Adaptation
Use dairy-free cheese alternatives — I’ve had good luck with Miyoko’s brand. Add extra nuts, seeds, and roasted vegetables to compensate for the missing cheese. Roasted chickpeas also add a nice crunch and protein boost.
Seasonal Swaps
In the fall, I use apples, pears, and figs. In winter, swap in pomegranate seeds, persimmons, and dried cranberries. Spring calls for fresh strawberries and cherries. Summer is all about peaches, plums, and berries. The board changes with the season, but the concept stays the same.
Sweet Tooth Version
Add dark chocolate squares, caramel sauce, and candied pecans. Include dried mango or pineapple for a tropical twist. This version is perfect for dessert or a brunch gathering.
Serving & Storage Suggestions
This board is best served at room temperature, so let it sit out for about 20 minutes after assembling before guests dig in. I like to place it in the center of the table so everyone can reach it — it becomes a natural gathering point.
What to Serve Alongside — This board pairs beautifully with a crisp white wine like Sauvignon Blanc or a light red like Pinot Noir. For non-alcoholic options, sparkling apple cider or a warm spiced tea works wonderfully. I also like to have a simple green salad on the side — it adds freshness and balances the richness.
Storage Instructions — If you have leftovers (which is rare in my house), store the components separately. Cheese keeps for 3-5 days in the fridge, wrapped in wax paper. Meats last 3-4 days in an airtight container. Fruit should be eaten within a day or two — sliced apples and pears don’t keep well. Nuts and crackers can go back in their original containers.
Reheating Tips — This is a no-cook recipe, so there’s nothing to reheat. But if your brie gets too cold from the fridge, let it sit at room temperature for 30 minutes before serving. The honey and jam are best at room temperature too.
How Flavors Develop — Honestly, this board tastes best the day it’s made. The fruit stays fresh and crisp, the cheese is at its prime, and everything looks beautiful. But the cheese and meat will still be delicious the next day — just refresh the fruit and crackers.
Nutritional Information & Benefits
This board is packed with nutrients from the fruit, nuts, and cheese. Here’s a rough estimate per serving (assuming 8-10 servings):
| Nutrient | Amount Per Serving |
|---|---|
| Calories | 350-400 |
| Protein | 15-20g |
| Fat | 25-30g |
| Carbohydrates | 20-25g |
| Fiber | 4-6g |
| Sugar | 12-15g |
| Sodium | 600-800mg |
The apples and pears provide fiber and vitamin C. Nuts offer healthy fats and protein. Cheese gives you calcium and protein. The honey and jam add natural sweetness. This board is naturally gluten-free (if you choose gluten-free crackers) and can be made dairy-free or vegetarian with simple swaps. Just be aware of potential allergens — nuts, dairy, and gluten are all present in the standard version.
I love that this board feels indulgent but still has real nutritional value. It’s the kind of food that satisfies both your taste buds and your body.
Conclusion
This Cozy Friendsgiving Charcuterie Board with Fall Fruit has become my go-to for every fall gathering. It’s simple, beautiful, and brings people together in a way that feels natural and unforced. No stress, no complicated recipes — just good food and good company.
I hope you’ll try this board for your next Friendsgiving or any cozy fall gathering. Customize it with your favorite cheeses, fruits, and meats. Make it your own. And if you come up with a variation I haven’t tried, please share it in the comments. I’m always looking for new ideas.
Here’s to messy boards, happy friends, and the best season of the year. Happy Friendsgiving, friends!
Frequently Asked Questions
How far in advance can I assemble this charcuterie board?
You can prep all the ingredients up to 24 hours in advance, but I recommend assembling the board no more than 2 hours before serving. The crackers can get soggy, and the fruit will start to brown. Store prepped ingredients separately in the fridge and assemble just before guests arrive.
Can I make this board for a smaller gathering?
Absolutely. Just scale down the ingredients. For 2-4 people, use 2 cheeses, 1-2 meats, and a smaller selection of fruit and accompaniments. The same principles apply — just use a smaller board or platter.
What’s the best way to keep the fruit from browning?
Toss apple and pear slices with a little lemon juice or apple cider vinegar. About 1 tablespoon of juice per apple should do it. You can also use a commercial fruit preservative like Fruit-Fresh, but I prefer the natural lemon juice method.
Can I use dried fruit instead of fresh?
Yes, dried fruit works great, especially in fall. Dried figs, apricots, dates, and cranberries are all excellent choices. Just keep in mind that dried fruit is much sweeter and chewier than fresh, so adjust your other sweet elements accordingly.
How do I store leftover charcuterie board ingredients?
Store each component separately. Cheese keeps best wrapped in wax paper or cheese paper in the fridge. Meats go in an airtight container. Fruit should be eaten within a day or two. Nuts and crackers can go back in their original containers. Don’t try to store the assembled board — it won’t hold up well.
Pin This Recipe!
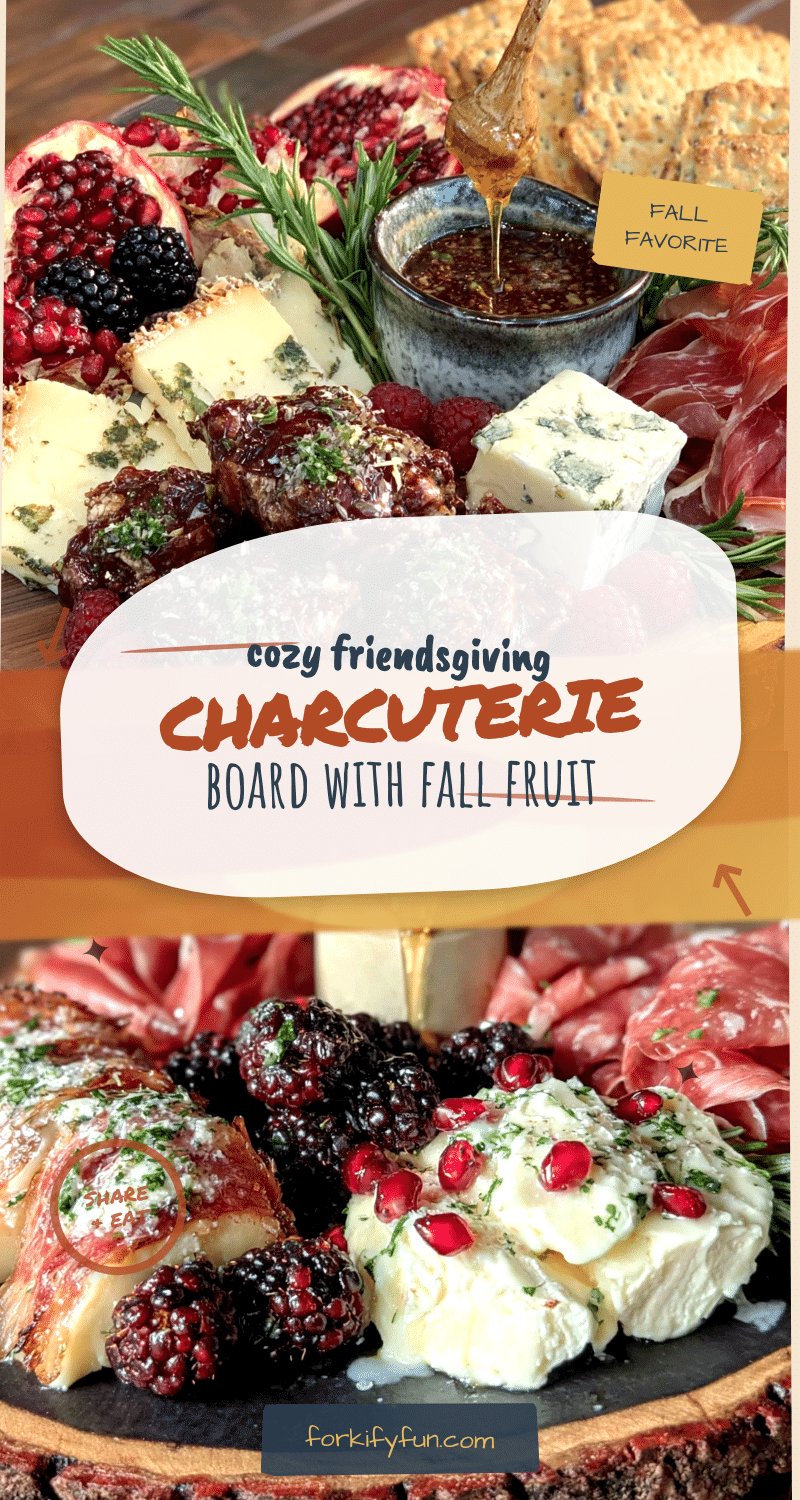
Cozy Friendsgiving Charcuterie Board with Fall Fruit
A no-cook, beautifully abundant charcuterie board featuring fall fruits like apples, pears, and figs alongside aged cheeses, cured meats, and sweet accompaniments. Perfect for sharing at a Friendsgiving or any cozy autumn gathering.
- Prep Time: 15 minutes
- Cook Time: 0 minutes
- Total Time: 15 minutes
- Yield: 8-10 servings
- Category: Appetizer
- Cuisine: American
Ingredients
- Aged Gouda (8 oz)
- Brie (8 oz wheel)
- Sharp Cheddar (8 oz)
- Blue Cheese (4 oz)
- Prosciutto (6 oz)
- Salami (6 oz)
- Chorizo (6 oz)
- Honeycrisp Apples (2 large)
- Bartlett Pears (2 large)
- Fresh Figs (6-8)
- Red Seedless Grapes (1 cup)
- Honey (1/4 cup)
- Fig Jam or Apple Butter (1/2 cup)
- Mixed Nuts (1 cup)
- Olives (1/2 cup)
- Crackers and Bread (1-2 varieties)
- Dried Apricots or Dates (1/2 cup, optional)
- Dark Chocolate (2 oz, optional)
- Fresh Herbs for garnish (optional)
Instructions
- Take cheeses out of the refrigerator about 30 minutes before serving to bring to room temperature. Slice apples into thin wedges and pears into similar-sized slices. Toss with a little lemon juice to prevent browning. Rinse grapes and pat dry. If using fresh figs, cut them in half lengthwise. Fold prosciutto into loose ribbons and slice salami into thin rounds.
- Place small bowls or ramekins on the board first in a triangle or square pattern. Fill with honey, fig jam, and olives.
- Place cheese wedges around the bowls at different points on the board. Leave brie whole with a small knife. Cut a few slices off the gouda and cheddar to show the interior. Place blue cheese in a corner.
- Fold prosciutto into loose ribbons and place in piles near the cheeses. Fan salami slices in a small pattern. Place chorizo in a separate pile.
- Scatter apple and pear slices around the board, filling gaps between cheese and meat. Place fig halves in clusters. Tuck bunches of grapes into empty spaces. If using dried apricots or dates, scatter them around.
- Fill any empty spaces with nuts, crackers, and small items. Put crackers in one or two clusters. Scatter nuts around the board. Add fresh herb sprigs for color.
- Drizzle a little honey over the brie or blue cheese. Add a small spoon to the jam bowl. Place cheese knives next to each cheese. Step back and fill any bare spots with extra crackers or nuts.
Notes
Don’t overcrowd the board; leave space between items. Layer flavors from mild to strong. Prep ingredients ahead but assemble no more than 2 hours before serving. Toss apple and pear slices with lemon juice to prevent browning. Keep crackers away from wet ingredients to avoid sogginess. Cheese tastes best at room temperature.
Nutrition
- Serving Size: 1 serving (based on
- Calories: 375
- Sugar: 13.5
- Sodium: 700
- Fat: 27.5
- Saturated Fat: 12
- Carbohydrates: 22.5
- Fiber: 5
- Protein: 17.5
Keywords: charcuterie board, Friendsgiving, fall fruit, appetizer, no-cook, cheese board, prosciutto, brie, gouda, figs, apples, pears


