There used to be a little diner off Route 9, the kind with sticky vinyl booths and a jukebox that only played songs from the 80s. They made these stuffed peppers every October, but they weren’t just any stuffed peppers. They carved little faces right into the orange bell peppers, turning a simple dinner into something magical. When the diner closed three years ago after the owner retired, I honestly felt a little pang of loss. My kids asked about “the happy face peppers” for weeks.
After 7 tries — the first batch looked like sad, deflated pumpkins, let me tell you — I finally cracked the code. It’s not about complicated carving techniques or fancy ingredients. It’s about choosing the right peppers, getting the filling just right, and knowing a few simple tricks to keep those little faces from collapsing during baking. The moment I pulled the perfect tray out of the oven and saw my youngest’s eyes go wide, I knew I had nailed it.
This recipe has become our official Halloween Eve tradition, a night when the chaos of costumes and candy gives way to something simple and satisfying. Maybe you’ve been there, standing in the grocery aisle wondering how to make October 31st feel special without spending a fortune or losing your mind. These little guys are the answer. They’re fun, they’re affordable, and they taste like the kind of comfort food that makes everyone at the table happy. I keep making them because that moment — when a kid sees their dinner smiling back at them — never gets old.
Why You’ll Love This Recipe
I’ve tested this recipe more times than I care to count, tweaking the filling-to-pepper ratio and experimenting with different carving techniques until I found what actually works. Here’s why this version stands out from every other stuffed pepper recipe you’ve seen:
- Kid-Friendly Fun: The jack-o-lantern faces turn dinner into a craft project. Kids actually get excited to eat their vegetables when they’re smiling.
- Budget-Friendly Ingredients: Ground beef, rice, cheese, and bell peppers are all affordable staples. No special trips to fancy grocery stores required.
- Quick Enough for Weeknights: From start to finish, you’re looking at about 45 minutes. That’s faster than ordering pizza some nights.
- Leftovers That Reheat Beautifully: The flavors actually get better overnight, making these perfect for meal prep or next-day lunches.
- Picky Eater Approved: My nephew, who swears he hates vegetables, ate two whole peppers last Halloween. The faces make all the difference.
What makes this recipe different from the rest is the technique. Most stuffed pepper recipes tell you to boil the peppers first, which makes them too soft to hold their shape. I use a method that keeps them firm enough to carve but tender enough to eat easily. Plus, the filling has a secret ingredient — a pinch of cinnamon — that gives it that warm, comforting flavor without being sweet. It’s the kind of dinner that makes you close your eyes after the first bite, even while the kids are giggling at their food.
What Ingredients You Will Need
This recipe uses simple, wholesome ingredients that you probably already have in your kitchen. The magic comes from how they work together, not from anything fancy or hard to find.
- Orange Bell Peppers (4 large): Look for peppers that are wide at the bottom and have a flat base — they’ll stand up better in the baking dish. The color should be bright and even. I’ve found that the ones from farmers markets tend to have thicker walls, which makes carving much easier.
- Ground Beef (1 pound, 80/20 blend): The 80/20 blend gives you enough fat for flavor without making the filling greasy. If you’re using leaner meat, add a tablespoon of olive oil when browning.
- Cooked Rice (1 cup, white or brown): Leftover rice works perfectly here. Day-old rice actually holds up better in the filling because it’s a little drier.
- Shredded Cheddar Cheese (1 cup, plus extra for topping): Sharp cheddar gives the most flavor, but mild cheddar works fine for sensitive palates. I recommend shredding your own — the pre-shredded stuff has anti-caking agents that make it less melty.
- Tomato Sauce (1 can, 8 ounces): Use plain tomato sauce, not pasta sauce. You want control over the seasoning.
- Onion (1 medium, finely diced): Yellow or white onions work best. If you’ve got picky eaters, grate the onion instead of dicing it — it melts right into the meat.
- Garlic (2 cloves, minced): Fresh garlic makes a difference here. The jarred stuff works in a pinch, but fresh gives a brighter flavor.
- Dried Oregano (1 teaspoon): This adds that classic Italian-ish flavor that pairs so well with bell peppers.
- Ground Cinnamon (¼ teaspoon): This is my secret weapon. It doesn’t make the filling taste sweet — it just rounds out the savory flavors in a way that’s hard to describe but impossible to miss.
- Salt and Black Pepper (to taste): Don’t be shy with the salt. Peppers need a fair amount of seasoning to taste their best.
- Olive Oil (1 tablespoon): For sautéing the onion and garlic.
For the faces, you’ll also want a small paring knife and a steady hand. I’ve tried using cookie cutters and pumpkin carving tools, but honestly, a simple knife works best. The imperfections make each pepper unique — kind of like real jack-o-lanterns.
Equipment Needed
You don’t need any fancy gadgets for this recipe, which is exactly how I like it. Here’s what you’ll need:
- Large Baking Dish (9×13 inches works best): Glass or ceramic dishes work well. Metal can sometimes react with the tomato sauce, so I stick with glass.
- Sharp Paring Knife: This is crucial for carving the faces. A dull knife will tear the pepper walls instead of cutting cleanly.
- Large Skillet: For browning the beef and sautéing the aromatics. Cast iron is my preference, but any large skillet works.
- Cutting Board: Use one with a groove around the edge to catch any pepper juice.
- Mixing Bowl: For combining the filling ingredients.
- Measuring Cups and Spoons: Standard set will do fine.
- Wooden Spoon or Spatula: For breaking up the ground beef as it cooks.
- Aluminum Foil: For covering the dish during the first part of baking.
If you don’t have a paring knife, a small serrated knife works surprisingly well for carving. I’ve also used a clean X-Acto knife in a pinch — just make sure to wash it thoroughly first. The key is having something sharp and precise, not expensive.
Preparation Method
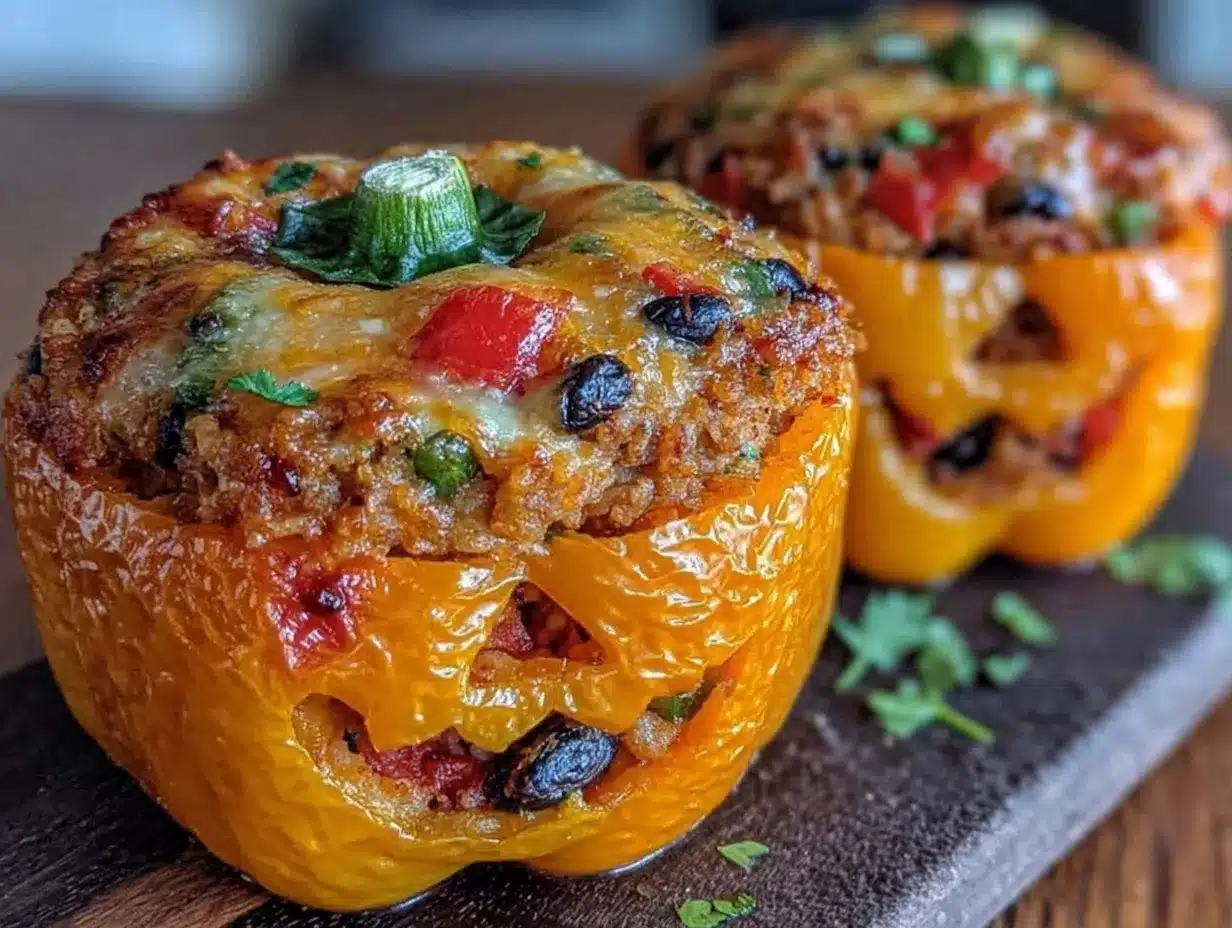
Let me walk you through this step by step. I’ve included all the little details that make the difference between okay peppers and unforgettable ones.
- Preheat your oven to 375°F (190°C). Get this going first so the oven is ready when you need it.
- Prepare the peppers: Wash the bell peppers and pat them dry. Using your sharp knife, cut the top off each pepper about ½ inch from the stem. Set the tops aside — you’ll use them later. Scoop out the seeds and membranes from inside each pepper. Don’t rinse them with water after this; the inside needs to stay dry for the filling to stick.
- Carve the faces: This is the fun part. Using your paring knife, cut small triangles for eyes and a zigzag or curved line for the mouth. Start with small cuts — you can always make them bigger, but you can’t undo a cut that’s too large. Hold the pepper gently but firmly. I like to carve the eyes first, then the mouth. For younger kids, keep the faces simple. Older kids might want more complex designs. Remember, the holes shouldn’t be too big or the filling will leak out during baking.
- Make the filling: Heat the olive oil in your large skillet over medium heat. Add the diced onion and cook for 3-4 minutes until it’s soft and translucent. Add the minced garlic and cook for another 30 seconds until fragrant. Add the ground beef, breaking it up with your wooden spoon. Cook until browned, about 5-7 minutes. Drain off any excess fat if needed.
- Season the meat: Add the dried oregano, ground cinnamon, salt, and pepper to the skillet. Stir to combine and cook for 1 minute. The cinnamon will smell amazing — don’t worry, it won’t make the filling taste like dessert.
- Combine the filling: Transfer the meat mixture to your mixing bowl. Add the cooked rice, tomato sauce, and 1 cup of shredded cheddar cheese. Stir everything together until well combined. Taste the filling and adjust the seasoning if needed. It should be well-seasoned but not overpowering.
- Stuff the peppers: Place the carved peppers in your baking dish, standing upright. If they wobble, you can trim a tiny slice off the bottom to make them flat — just be careful not to cut through. Spoon the filling into each pepper, pressing gently to pack it in. Fill them all the way to the top, mounding it slightly if needed.
- Top and cover: Sprinkle the remaining shredded cheddar cheese over the top of each stuffed pepper. Place the pepper tops back on — they’ll look like little hats. Cover the baking dish tightly with aluminum foil.
- Bake: Place the dish in the preheated oven and bake for 25 minutes. Remove the foil and bake for another 10-15 minutes, until the cheese is melted and bubbly and the peppers are tender but still holding their shape. The faces should be clearly visible, not collapsed.
- Rest and serve: Let the peppers rest for 5 minutes before serving. This helps the filling set and makes them easier to handle. Serve warm, watching for those smiles.
One thing I learned the hard way — don’t overbake these. The peppers will continue to soften as they cool, so pulling them out when they’re just tender is the sweet spot. Overcooked peppers turn into mushy messes, and those carefully carved faces will just slump into sad expressions.
Cooking Tips & Techniques
After making these peppers more times than I can count, I’ve picked up a few tricks that make a real difference. Here’s what I’ve learned through trial and error:
Choose peppers with thick walls. Thin-walled peppers collapse during baking, and your jack-o-lantern faces will disappear. When you’re at the store, gently squeeze the peppers. Thicker walls feel firmer and more substantial. The ones with four distinct lobes tend to have thicker walls than the three-lobed varieties.
Don’t overfill the peppers. I know it’s tempting to pack as much filling in as possible, but leaving a little room at the top helps the cheese melt properly and prevents the filling from spilling out through the face holes. About ¼ inch of space is perfect.
Use day-old rice. Freshly cooked rice is too soft and sticky for stuffed peppers. Day-old rice has had time to dry out slightly, which means it holds its shape better in the filling. If you’re in a rush, spread freshly cooked rice on a baking sheet and let it cool for 10 minutes before using.
Let the filling cool slightly before stuffing. Hot filling can start cooking the peppers from the inside, making them soft before they even hit the oven. Letting the filling cool for 5-10 minutes gives you a better final texture.
Don’t skip the foil. Baking covered for the first 25 minutes steams the peppers, making them tender without drying out. The uncovered time at the end lets the cheese brown and the tops get slightly crispy. It’s the best of both worlds.
I once forgot to cover the dish and ended up with dry, shriveled peppers that looked like they’d been through a desert. My kids called them “mummy peppers” and refused to eat them. Lesson learned.
Variations & Adaptations
This recipe is incredibly flexible. Here are some ways to make it your own:
Vegetarian Version: Swap the ground beef for a can of black beans (drained and rinsed) or cooked lentils. Add an extra ½ cup of rice and a little more cheese to keep the filling hearty. My vegetarian friend Sarah loves this version and says it’s even better than the original.
Spicy Kick: Add ½ teaspoon of red pepper flakes or a diced jalapeño to the filling for adults who want some heat. You can also mix some hot sauce into the tomato sauce. Just keep the kids’ peppers separate — trust me on this one.
Mexican-Inspired: Swap the oregano for cumin and chili powder. Use pepper jack cheese instead of cheddar. Top with fresh cilantro and a dollop of sour cream before serving. This version disappears fast in my house.
Gluten-Free: This recipe is naturally gluten-free as written, as long as you use certified gluten-free rice. Double-check your tomato sauce label — some brands add wheat-based thickeners.
Low-Carb Option: Replace the rice with riced cauliflower. Squeeze the excess moisture out of the cauliflower before adding it to the filling. The texture is a little different, but the flavor is still fantastic.
Different Proteins: Ground turkey, ground chicken, or even crumbled sausage all work beautifully in this recipe. Just adjust the seasoning accordingly — sausage is already well-seasoned, so you might want to go easy on the salt.
My personal favorite variation? I add a spoonful of cream cheese to the filling for extra creaminess. It’s not traditional, but it makes the filling incredibly rich and satisfying. My kids call them “fancy peppers” and ask for them year-round, not just at Halloween.
Serving & Storage Suggestions
These peppers are best served warm, right after they’ve rested for 5 minutes. The cheese should be melted and slightly bubbly, and the peppers should be tender but firm enough to hold their shape. I like to serve them on a plate with a simple green salad or some steamed broccoli on the side. The bright orange peppers against the green vegetables make a beautiful presentation.
For a complete Halloween dinner, pair these with some spooky spiderweb dip and crusty bread. The kids love dipping the bread into any extra sauce on their plates. You can also serve them with a side of roasted potatoes or a simple rice pilaf if you want something more filling.
Storage: Leftover stuffed peppers will keep in an airtight container in the refrigerator for up to 4 days. The flavors actually meld together beautifully overnight, making leftovers taste even better than the fresh version. I often make a double batch on purpose just for the leftovers.
Freezing: These peppers freeze wonderfully. Let them cool completely, then wrap each pepper individually in plastic wrap and place them in a freezer-safe bag. They’ll keep for up to 3 months. To reheat, thaw overnight in the refrigerator and then bake at 350°F for 15-20 minutes, or until heated through.
Reheating: The microwave works in a pinch, but the oven gives better results. Place the peppers in a baking dish, cover with foil, and reheat at 350°F for about 15 minutes. If you’re in a hurry, microwave on medium power for 2-3 minutes. The peppers will be softer, but they’ll still taste great.
One thing I love about this recipe is how the flavors develop over time. The second day, the filling has absorbed all the pepper’s sweetness, and the seasoning has mellowed into something really special. If you can resist eating them all the first night, you’re in for a treat.
Nutritional Information & Benefits
Here’s the approximate nutritional breakdown for one stuffed pepper (using 80/20 ground beef, white rice, and cheddar cheese):
| Nutrient | Amount Per Serving |
|---|---|
| Calories | 385 |
| Protein | 28g |
| Fat | 18g |
| Saturated Fat | 8g |
| Carbohydrates | 24g |
| Fiber | 4g |
| Sugar | 6g |
| Sodium | 520mg |
Bell peppers are packed with vitamin C — actually, one orange bell pepper has more vitamin C than an orange. They’re also a great source of vitamin A, which is why they got that beautiful orange color. The protein from the beef and cheese keeps everyone full and satisfied, while the rice provides steady energy. This is a balanced meal that actually nourishes while it delights.
If you’re watching your sodium, use low-sodium tomato sauce and go easy on the added salt. You can also swap the cheddar for a reduced-fat version, though I find the flavor isn’t quite as good. For a lighter option, ground turkey works beautifully and cuts the fat content significantly.
Conclusion
These Kid-Approved Jack-o-Lantern Stuffed Bell Peppers are more than just a Halloween dinner. They’re a way to make an ordinary weeknight feel special, to get kids excited about eating vegetables, and to create a family tradition that doesn’t cost a fortune or require hours in the kitchen. The simple act of carving faces into dinner turns a meal into a memory, and that’s something worth making time for.
I love this recipe because it’s forgiving, flexible, and genuinely fun to make. Whether you’re feeding picky eaters, hosting a Halloween party, or just looking for a way to shake up your dinner routine, these little guys deliver. Don’t be afraid to experiment with the faces or the filling — the imperfections are what make them charming. And honestly, the messier the carving, the more character they have.
I’d love to hear how your jack-o-lantern peppers turn out. Did your kids design their own faces? Did you try a variation that blew your mind? Drop a comment below and share your creations. And if you’re looking for more fun family dinners, check out our Halloween pizza monsters — they’re another favorite in our house. Happy cooking, and may your dinner table be full of smiles!
Frequently Asked Questions
Can I make these ahead of time?
Absolutely. You can assemble the peppers completely up to 24 hours in advance. Just stuff them, top with cheese, cover, and refrigerate. When you’re ready to bake, add about 10 minutes to the covered baking time since you’re starting from cold.
Can I use different colored bell peppers?
You can, but orange peppers look the most like jack-o-lanterns. Yellow peppers work well too. Red peppers are sweeter and make great faces, but they don’t have that classic pumpkin color. Green peppers are less sweet and have a slightly bitter flavor that doesn’t pair as well with the filling.
How do I keep the faces from closing up during baking?
Make your cuts slightly wider than you think you need. The pepper walls expand slightly as they cook, so a small cut can close up. Also, don’t overbake — the longer they’re in the oven, the softer they get. Pull them out when they’re just tender.
Can I make these in an air fryer?
Yes. Preheat your air fryer to 350°F. Place the stuffed peppers in the basket, leaving space between them. Cook for 12-15 minutes, checking halfway through. The tops might brown faster, so keep an eye on them. You can cover with foil if needed.
What can I do with the pepper scraps from carving?
Don’t throw them away! The small pieces you cut out for the faces can be diced and added to the filling for extra nutrition. You can also save them for salads, stir-fries, or omelets. Waste not, want not.
Pin This Recipe!
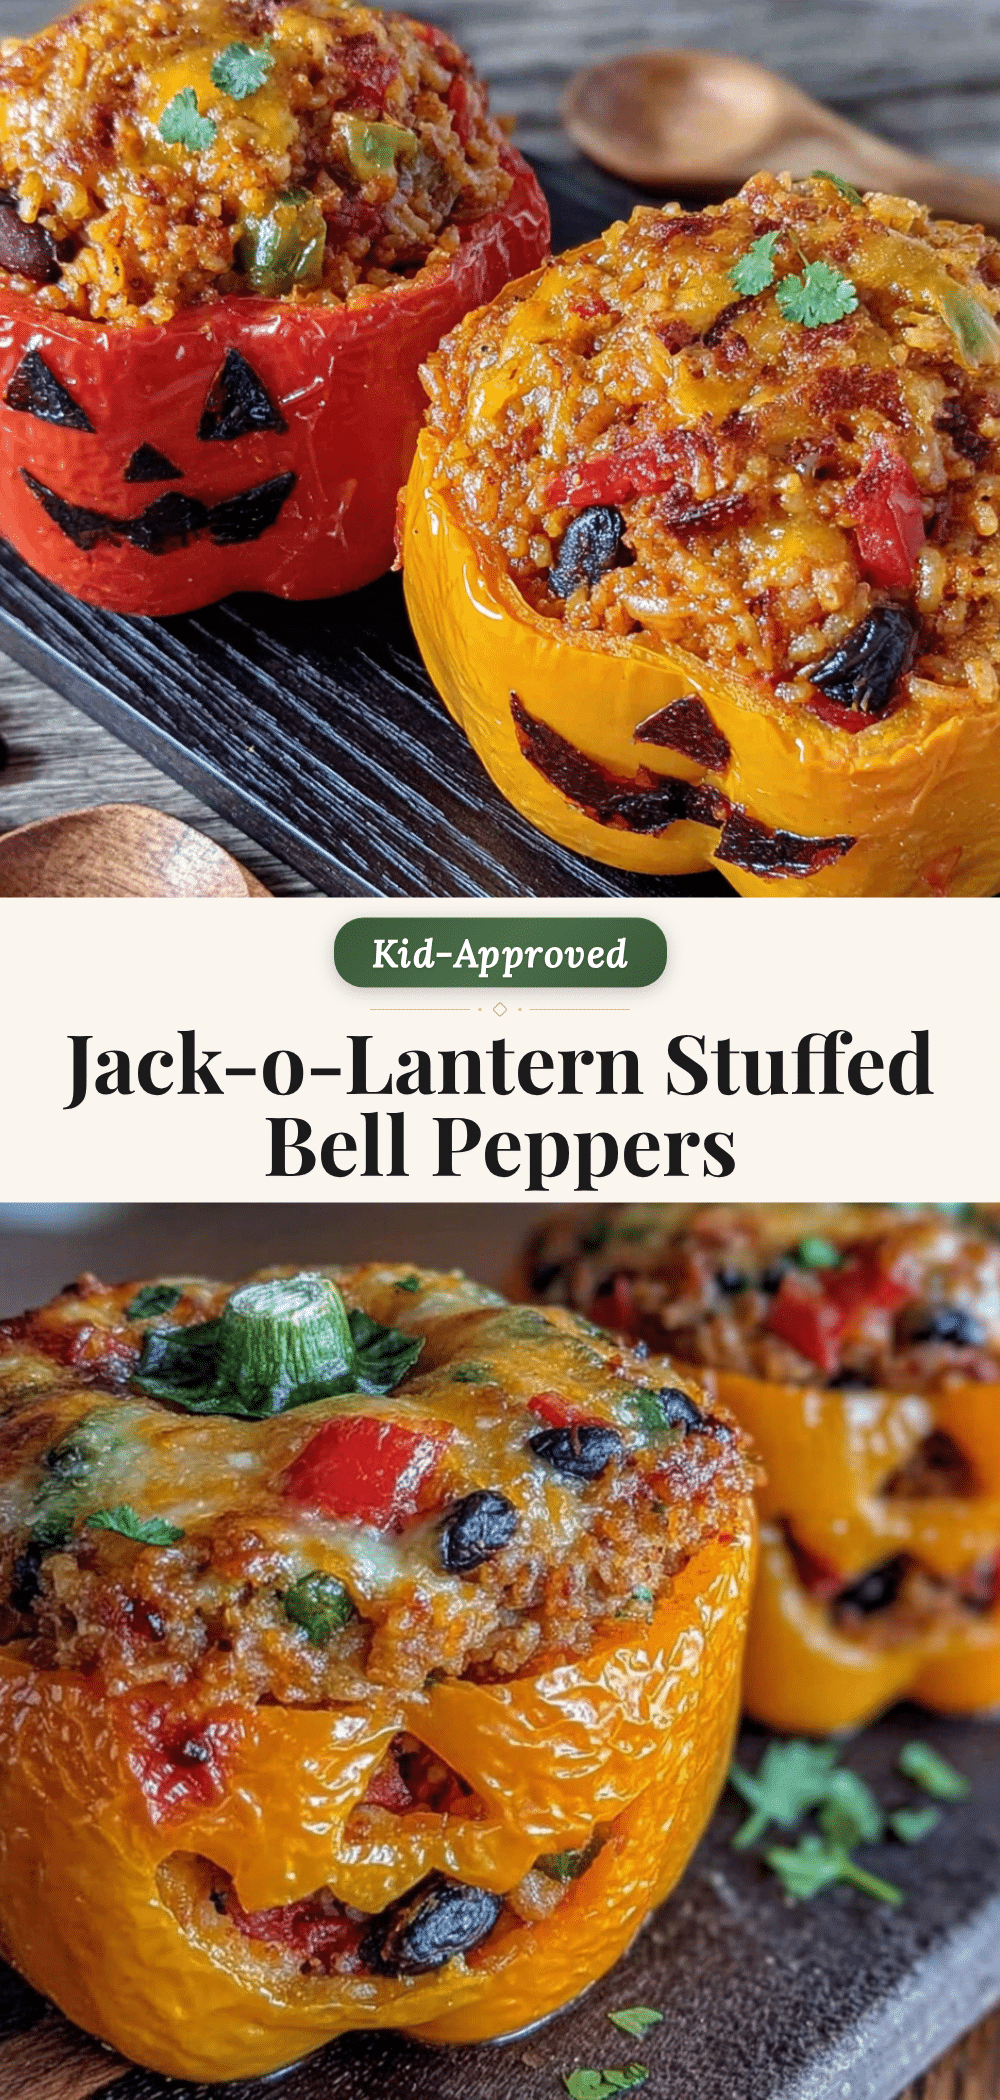
Kid-Approved Jack-o-Lantern Stuffed Bell Peppers: Easy Halloween Dinner

These fun and festive jack-o-lantern stuffed bell peppers are a kid-friendly Halloween dinner that turns a simple meal into a memorable family tradition. With a savory beef and rice filling, they’re budget-friendly, quick enough for weeknights, and guaranteed to bring smiles to the table.
- Prep Time: 15 minutes
- Cook Time: 35 minutes
- Total Time: 50 minutes
- Yield: 4 servings 1x
- Category: Main Course
- Cuisine: American
Ingredients
- 4 large orange bell peppers
- 1 pound ground beef (80/20 blend)
- 1 cup cooked rice (white or brown)
- 1 cup shredded cheddar cheese, plus extra for topping
- 1 can (8 ounces) tomato sauce
- 1 medium onion, finely diced
- 2 cloves garlic, minced
- 1 teaspoon dried oregano
- 1/4 teaspoon ground cinnamon
- Salt and black pepper to taste
- 1 tablespoon olive oil
Instructions
- Preheat your oven to 375°F (190°C).
- Wash the bell peppers and pat them dry. Cut the top off each pepper about 1/2 inch from the stem. Set the tops aside. Scoop out the seeds and membranes from inside each pepper. Do not rinse with water.
- Using a sharp paring knife, carve small triangles for eyes and a zigzag or curved line for the mouth on each pepper. Start with small cuts and make them larger if needed.
- Heat the olive oil in a large skillet over medium heat. Add the diced onion and cook for 3-4 minutes until soft and translucent. Add the minced garlic and cook for 30 seconds until fragrant.
- Add the ground beef to the skillet, breaking it up with a wooden spoon. Cook until browned, about 5-7 minutes. Drain off any excess fat if needed.
- Add the dried oregano, ground cinnamon, salt, and pepper to the skillet. Stir to combine and cook for 1 minute.
- Transfer the meat mixture to a mixing bowl. Add the cooked rice, tomato sauce, and 1 cup of shredded cheddar cheese. Stir until well combined. Taste and adjust seasoning if needed.
- Place the carved peppers in a 9×13-inch baking dish, standing upright. If they wobble, trim a tiny slice off the bottom to make them flat.
- Spoon the filling into each pepper, pressing gently to pack it in. Fill them all the way to the top, mounding slightly if needed.
- Sprinkle the remaining shredded cheddar cheese over the top of each stuffed pepper. Place the pepper tops back on like little hats. Cover the baking dish tightly with aluminum foil.
- Bake for 25 minutes. Remove the foil and bake for another 10-15 minutes, until the cheese is melted and bubbly and the peppers are tender but still holding their shape.
- Let the peppers rest for 5 minutes before serving. Serve warm.
Notes
Choose peppers with thick walls for easier carving and to prevent collapse during baking. Use day-old rice for better texture. Let the filling cool slightly before stuffing to avoid pre-cooking the peppers. Don’t overbake; peppers continue to soften as they cool. For a vegetarian version, swap ground beef with black beans or lentils. For a spicy kick, add red pepper flakes or diced jalapeño. Leftovers keep in the refrigerator for up to 4 days and freeze well for up to 3 months.
Nutrition
- Serving Size: 1 stuffed pepper
- Calories: 385
- Sugar: 6
- Sodium: 520
- Fat: 18
- Saturated Fat: 8
- Carbohydrates: 24
- Fiber: 4
- Protein: 28
Keywords: stuffed bell peppers, jack-o-lantern peppers, Halloween dinner, kid-friendly, ground beef, bell peppers, easy dinner, fall recipe