The cookie swap was in two hours and I’d completely forgotten. Everyone else would be bringing those elaborate, multi-layered, Pinterest-perfect creations that looked like they belonged in a bakery window. I had a half-stick of butter, one sad egg, and absolutely no time to run to the store. Let me tell you, standing in my kitchen staring at my pantry felt like being back in high school, watching everyone else turn in their A+ projects while I’d just remembered the assignment existed.
I mean, honestly, I almost gave up and grabbed a store-bought package. But then I remembered this little recipe I’d scribbled on a sticky note months ago—one I’d developed for those nights when you just need a cookie but don’t want to commit to a full batch. You know that feeling, right? When you want something warm and sweet without having three dozen cookies staring at you from the counter for the next week?
So I threw these together in about twenty minutes, burned my fingers trying to slide them off the baking sheet too early, and walked into that swap looking like I’d just rolled out of bed. The funny part? My six little cookies were gone before half the other trays had even been set down. People kept coming back asking for “the small ones” and I had to keep explaining, “That’s literally all there were!” It was one of those moments where you accidentally win at something you weren’t even trying to compete in.
These cozy small-batch chocolate chip cookies have become my secret weapon ever since. They’re the recipe I turn to when I need a little comfort without leftovers, when I want to bake with my niece without sugar-loading her for a week, or when I just need to feel like I’ve got my act together even when I clearly don’t. Let me show you how to make them.
Why You’ll Love This Recipe
These aren’t just any chocolate chip cookies—they’re the ones you’ll make when you need a win. I’ve tested this recipe more times than I care to admit, tweaking the butter-to-flour ratio until it hit that perfect sweet spot between crispy edges and soft centers.
- Quick & Easy: From start to finish, you’re looking at under 25 minutes. That’s less time than it takes to decide what to order for delivery.
- Simple Ingredients: You probably have everything in your kitchen right now. No specialty flours, no obscure extracts, no trips to three different stores.
- Perfect for Cozy Nights: These are made for those evenings when you’re curled up with a mug of tea and a good book, or when you just want something sweet after dinner without having cookies around for days.
- Crowd-Pleaser: Despite being small-batch, these cookies pack serious flavor. I’ve had people ask for the recipe after tasting just one bite.
- Unbelievably Delicious: The texture is what gets me every time—crispy on the outside, soft and almost gooey in the center. It’s that perfect cookie texture that usually takes years of practice to nail.
What makes these different from other small-batch recipes is the technique. I use a slightly higher ratio of brown sugar to white sugar, which gives them that deep, almost caramel-like flavor and keeps them soft for days. Plus, I’ve figured out the exact butter temperature so you don’t end up with flat, greasy discs or dry, crumbly pucks. It’s the Goldilocks of cookie recipes.
These cookies are the kind that make you close your eyes after the first bite. They’re comfort food at its simplest—faster, more manageable, but with all the soul-soothing satisfaction of a full batch. Perfect for impressing that one friend who always brings bakery cookies, or for turning a regular Tuesday night into something a little bit special.
What Ingredients You Will Need
This recipe uses simple, everyday ingredients to deliver that classic chocolate chip cookie experience without any fuss. Everything here is probably already in your pantry, which is exactly how I designed it.
- Unsalted butter, softened: 4 tablespoons (57g) – I use unsalted so I can control the salt level. Land O’Lakes is my go-to for consistent results. Make sure it’s truly softened—you should be able to press it with your finger and leave an indent, but it shouldn’t be melty.
- Light brown sugar, packed: 3 tablespoons (40g) – This is where the magic happens. The molasses in brown sugar gives these cookies their chewiness and that deep, warm flavor. I like Domino brand for their consistent moisture content.
- Granulated sugar: 2 tablespoons (25g) – Just enough to help with spread and give those edges a little crunch. You can reduce this slightly if you prefer less sweet cookies.
- Large egg yolk: 1 yolk (about 18g) – The yolk adds richness and tenderness without the extra moisture of the white. Save the white for scrambled eggs tomorrow morning.
- Vanilla extract: 1/2 teaspoon – Pure vanilla makes a difference here since there are so few ingredients. I’m partial to Nielsen-Massey, but any pure extract works. Please avoid imitation vanilla if you can help it.
- All-purpose flour: 1/3 cup (42g) – Spoon and level your flour—don’t scoop directly from the bag or you’ll end up with dry cookies. Gold Medal or King Arthur are both reliable.
- Baking soda: 1/4 teaspoon – This gives the cookies just enough lift without making them cakey. Make sure your baking soda isn’t expired—it loses potency over time.
- Salt: 1/4 teaspoon – Don’t skip this! Salt balances the sweetness and makes the chocolate flavor pop. I use fine sea salt for baking.
- Semi-sweet chocolate chips: 1/3 cup (60g) – I prefer Ghirardelli for their size and melt quality. You can also chop up a good chocolate bar if you want those melty puddles of chocolate. Dark chocolate works beautifully here too.
- Optional: Flaky sea salt: For sprinkling on top right after baking. Maldon is my favorite—it adds that little crunch and salty hit that makes these cookies absolutely irresistible.
For substitutions, you can use vegan butter and a flax egg (1 tablespoon ground flax mixed with 3 tablespoons water) for a dairy-free version. Coconut sugar works in place of brown sugar, though the cookies will be slightly less tender. And if you’re out of vanilla, a tiny pinch of cinnamon adds a nice warmth instead.
Equipment Needed
One of the best things about this recipe is how little equipment you need. I’ve made these in a tiny apartment kitchen and a fully stocked one—they turn out the same either way.
- Medium mixing bowl: Any bowl works, but a wide, shallow one makes creaming the butter and sugar easier. My favorite is a simple ceramic bowl I picked up at a thrift store.
- Small bowl: For mixing the dry ingredients. A cereal bowl works perfectly.
- Whisk: For combining the dry ingredients. A fork works in a pinch, but a whisk is faster.
- Spatula or wooden spoon: For mixing the dough. I prefer a rubber spatula because it scrapes the sides clean, but a sturdy spoon does the job.
- Baking sheet: A quarter-sheet pan is ideal for just 6 cookies. If you only have a full-size sheet, that’s fine—just bake in the center of the oven.
- Parchment paper or silicone baking mat: Parchment paper is cheaper and disposable; silicone mats are reusable and give consistent results. I use both depending on what’s in my drawer.
- Cooling rack: Not strictly necessary, but it keeps the bottoms from getting soggy. If you don’t have one, transfer the cookies to a plate after a few minutes on the sheet.
- Cookie scoop (optional): A 1.5-tablespoon scoop makes perfectly even cookies. If you don’t have one, two spoons work fine—just try to make each portion roughly the same size.
That’s it. No stand mixer, no fancy gadgets, no stress. If you have a bowl and a spoon, you’re ready to go.
Preparation Method
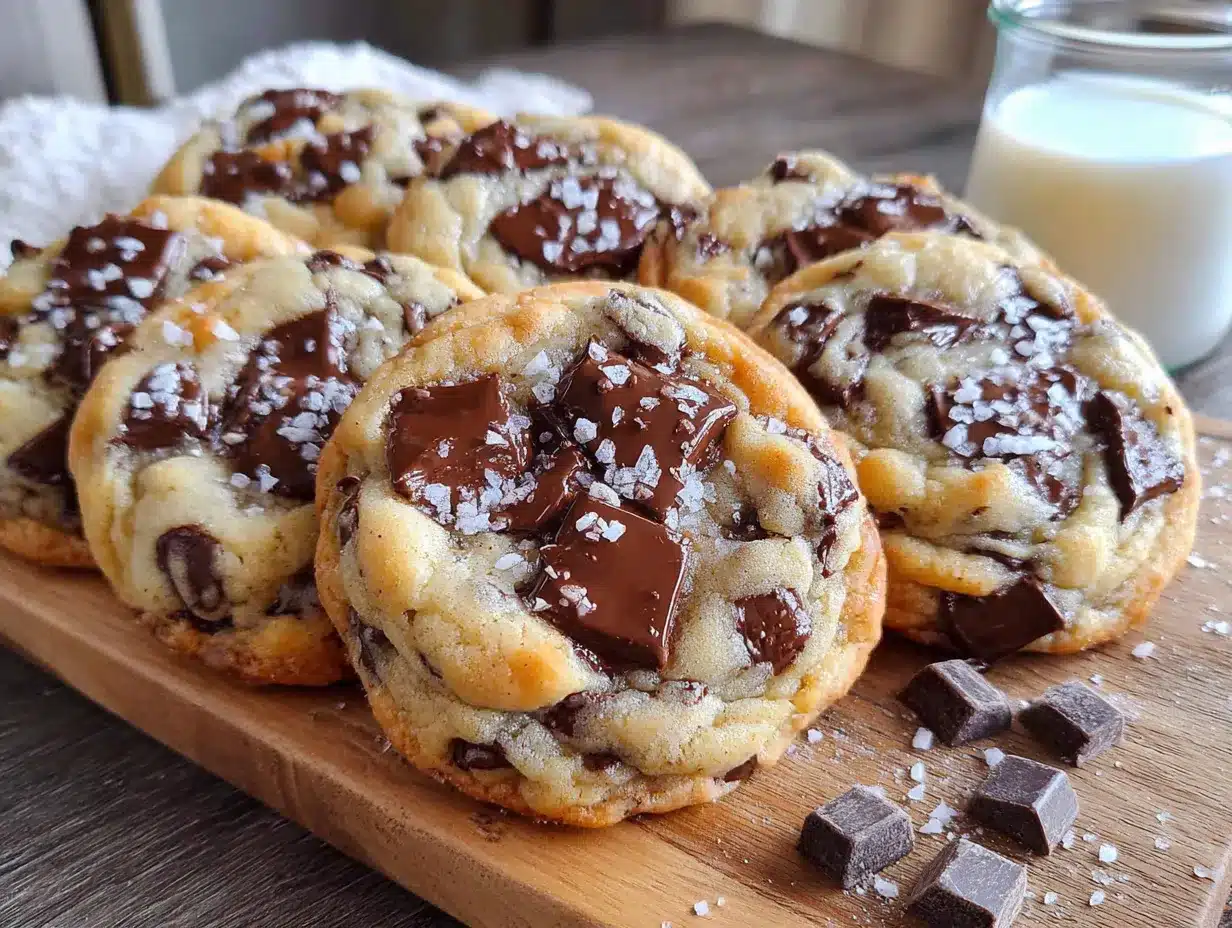
Let me walk you through this step by step. I’ve made these cookies probably fifty times now, so I know exactly where things can go wrong and how to fix them.
- Preheat your oven to 350°F (175°C). Do this first—it takes about 15 minutes for most ovens to reach temperature. Line your baking sheet with parchment paper or a silicone mat. I’ve forgotten to preheat before and ended up with cookies that spread too much while the oven was still warming up. Learn from my mistake.
- Cream the butter and sugars together. In your medium bowl, combine the softened butter, brown sugar, and granulated sugar. Using your spatula or spoon, mash and stir until the mixture is smooth and looks like wet sand. This should take about 2 minutes of vigorous stirring. You’re looking for a uniform texture with no visible streaks of butter. The mixture should smell amazing at this point—that’s the brown sugar doing its thing.
- Add the egg yolk and vanilla. Drop in the egg yolk and pour in the vanilla. Stir until everything is combined and the mixture looks glossy and smooth. It might look a little separated at first, but keep stirring—it will come together. This usually takes about 30 seconds of steady mixing. If the mixture looks curdled, your butter was probably too cold. Don’t panic; just keep stirring and it will smooth out.
- Mix the dry ingredients separately. In your small bowl, whisk together the flour, baking soda, and salt. Whisking ensures the baking soda and salt are evenly distributed so you don’t get a pocket of salt in one cookie. I learned this the hard way with a cookie that was basically a salt lick.
- Combine wet and dry ingredients. Add the flour mixture to the butter mixture. Stir gently until just combined—stop when you can’t see any more white flour streaks. Overmixing at this stage develops gluten and makes tough cookies. We want tender cookies, not bread. The dough should be soft and slightly sticky but hold together when pressed.
- Fold in the chocolate chips. Add the chocolate chips and fold them in with a few gentle strokes. Make sure they’re distributed evenly throughout the dough. If you’re using chopped chocolate, save a few larger pieces to press onto the tops of the cookies before baking—it makes them look prettier.
- Portion the dough. Using your cookie scoop or two spoons, divide the dough into 6 equal portions. Each portion should be about 1.5 tablespoons (about 30g). Roll each portion into a ball between your palms. Place them on the prepared baking sheet, spacing them about 2 inches apart. These cookies spread moderately, so they need a little room.
- Bake for 10-12 minutes. Place the sheet on the center rack of your preheated oven. Bake for 10 minutes for soft, gooey cookies, or 12 minutes for slightly firmer cookies with crisper edges. The cookies are done when the edges are golden brown and the centers look slightly puffy and underdone. They will continue to bake on the hot sheet after you take them out, so it’s better to underbake slightly than overbake. Your kitchen should smell like a bakery at this point.
- Cool on the baking sheet. Let the cookies rest on the baking sheet for 5 minutes. This is crucial—they’re too fragile to move right away. After 5 minutes, transfer them to a cooling rack using a thin spatula. If you want that flaky salt finish, sprinkle it on right after you pull them from the oven while the tops are still warm and slightly tacky.
- Wait (if you can). I know it’s hard, but let them cool for at least another 5 minutes before diving in. The texture really sets during this time, and you’ll get that perfect contrast between crispy edge and soft center. Plus, you won’t burn your mouth.
Cooking Tips & Techniques
After making these cookies more times than I can count, I’ve picked up a few tricks that make a real difference. Let me share what I’ve learned—including the mistakes I’ve made so you don’t have to.
Butter temperature is everything. I cannot stress this enough. If your butter is too cold, it won’t cream properly with the sugar, and you’ll end up with dense, uneven cookies. If it’s too warm or melted, your cookies will spread into flat, greasy puddles. The ideal texture is when you can press your finger into the butter and it leaves an indent without being squishy. If you’re in a hurry, cut the butter into small cubes and let it sit at room temperature for about 15 minutes. I’ve also microwaved it for 5-second bursts, but that’s risky—one second too long and you’ve got melted butter.
Don’t skip the chill step. While this recipe doesn’t require chilling the dough (that’s part of what makes it so quick), if you have an extra 30 minutes, pop the portioned dough balls in the fridge. Chilled dough spreads less and develops a slightly deeper flavor as the ingredients meld. I’ve done it both ways, and while the unchilled version is perfectly delicious, the chilled version is noticeably better. If you’re making these for company, chill them. If you’re making them because you need a cookie right now, skip it.
The scoop-and-level method for flour. This is the most common mistake home bakers make. Scooping flour directly from the bag compacts it, and you can end up with up to 25% more flour than the recipe calls for. Instead, use a spoon to fluff the flour in its container, then spoon it into your measuring cup and level it off with a knife. It takes an extra 10 seconds and prevents dry, cakey cookies.
Watch the clock carefully. These cookies go from perfectly golden to overdone very quickly. I always set a timer for 9 minutes, then check them. If they need more time, I add it in 1-minute increments. Ovens vary wildly—my old apartment oven ran hot and these were done in 8 minutes. Get to know your oven’s quirks.
Use a cookie scoop for even baking. I resisted buying a cookie scoop for years, thinking it was unnecessary. Then I got one as a gift, and honestly, it was a game-changer. Even-sized cookies bake evenly—no more burning the small ones while waiting for the big ones to finish. A 1.5-tablespoon scoop is perfect for this recipe.
My biggest failure: I once tried to double this recipe and bake all 12 cookies at once on a single sheet. They were crowded, spread into each other, and I ended up with one giant, misshapen cookie slab. It still tasted good, but it was not pretty. Stick with 6 per sheet if you’re doubling—use two sheets or bake in batches.
Variations & Adaptations
One of the things I love about this recipe is how adaptable it is. I’ve tried quite a few variations over the years, and here are my favorites.
Double Chocolate Chunk: Replace 1 tablespoon of flour with 1 tablespoon of unsweetened cocoa powder. Use white chocolate chips or milk chocolate chunks instead of semi-sweet. The contrast between the dark cookie and white chocolate is gorgeous, and it feels extra decadent. I made these for a friend who claimed she didn’t like chocolate chip cookies, and she ate three.
Nutty Brown Butter: Brown the 4 tablespoons of butter in a small saucepan over medium heat until it turns amber and smells nutty—about 3-4 minutes. Let it cool completely before using (pop it in the fridge for 10 minutes to speed this up). Then proceed with the recipe as written. The brown butter adds an incredible toffee-like depth that takes these cookies to another level. This is my go-to for when I want to impress someone.
Gluten-Free Version: Substitute the all-purpose flour with a good 1:1 gluten-free baking flour blend. I’ve had great results with King Arthur’s Measure for Measure flour. Add an extra tablespoon of the blend if the dough seems too sticky. The texture will be slightly more tender and a little less chewy, but honestly, most people won’t notice the difference.
Vegan Adaptation: Use vegan butter (I like Miyoko’s for baking) and replace the egg yolk with 1 tablespoon of aquafaba (the liquid from a can of chickpeas) mixed with 1 teaspoon of cornstarch. The cookies will be slightly less rich but still delicious. I tested this version for a friend’s vegan birthday and they disappeared just as fast as the original.
Seasonal Twist: In fall, add 1/4 teaspoon of cinnamon and a pinch of nutmeg to the dry ingredients. In winter, swap half the chocolate chips for white chocolate and add 1 tablespoon of crushed candy cane on top. In summer, fold in 2 tablespoons of chopped dried cherries along with the chocolate. These little tweaks keep the recipe feeling fresh year-round.
Serving & Storage Suggestions
These cookies are best enjoyed warm, about 10 minutes after they come out of the oven. That’s when the centers are still soft and the chocolate is perfectly melted. I like to serve them with a cold glass of milk, a hot cup of coffee, or a mug of chai tea. For a real treat, sandwich a scoop of vanilla ice cream between two cookies while they’re still warm—instant ice cream sandwich.
If you’re serving these to guests, arrange them on a pretty plate or a wooden board. A light dusting of powdered sugar or a drizzle of melted chocolate makes them look extra special. And don’t forget that flaky sea salt on top—it’s such a simple touch but it makes them look (and taste) like they came from a fancy bakery.
For storage, these cookies will keep in an airtight container at room temperature for up to 3 days. Place a slice of bread in the container with them—the bread absorbs excess moisture and keeps the cookies soft. Replace the bread slice if it gets stale. I’ve also stored them in the freezer for up to 3 months. Just let them thaw at room temperature for about 15 minutes, then pop them in a 300°F oven for 3-4 minutes to re-crisp the edges.
Here’s a little secret: these cookies actually taste better on day two. The flavors meld together and the texture becomes perfectly soft all the way through. If you can resist eating them all on day one, you’re in for a treat on day two. The edges lose some of their crispness, but the centers become almost fudgy. It’s a different experience, but equally wonderful.
Nutritional Information & Benefits
Let’s be real—these are cookies, not health food. But knowing what’s in them helps you enjoy them mindfully. Per cookie (based on 6 cookies), here’s the approximate breakdown:
| Nutrient | Amount |
|---|---|
| Calories | 185 |
| Total Fat | 10g |
| Saturated Fat | 6g |
| Carbohydrates | 23g |
| Sugar | 15g |
| Protein | 2g |
| Sodium | 135mg |
The dark chocolate chips provide a small amount of antioxidants and magnesium. The butter contains vitamin A and healthy fats. And honestly, there’s a mental health benefit to taking 25 minutes to bake something simple and delicious. I truly believe that the act of baking—measuring, mixing, watching something transform in the oven—is good for the soul.
If you’re watching your sugar intake, you can reduce the granulated sugar to 1 tablespoon, though the cookies will be slightly less crisp on the edges. For a lower-fat option, substitute 2 tablespoons of the butter with 2 tablespoons of unsweetened applesauce. The texture will be more cake-like, but they’re still tasty.
These cookies contain gluten, dairy, and eggs. For allergen-friendly versions, see the variations section above.
Conclusion
These cozy small-batch chocolate chip cookies have become my go-to for so many reasons. They’re quick enough for a Tuesday night craving, special enough for a weekend treat, and just the right size for when you want something sweet without the temptation of three dozen cookies sitting on your counter. They’ve saved me from last-minute potluck panic, made rainy afternoons feel cozier, and proven that you don’t need a lot of time or ingredients to create something genuinely wonderful.
What I love most about this recipe is how forgiving it is. Even on days when I’m distracted or rushing, these cookies turn out beautifully. They remind me that baking doesn’t have to be complicated to be satisfying. Sometimes the simplest things are the ones that bring the most joy.
I’d love to hear how these turn out for you! Did you try any of the variations? Did you add something unexpected that worked? Drop a comment below and share your experience. And if you’re looking for more small-batch recipes, check out my single-serve brownie recipe for another perfect-for-two dessert. Happy baking, friends!
Frequently Asked Questions
Can I double this recipe?
Absolutely! Simply double all the ingredients. Use a whole egg instead of two yolks (the white adds structure for a larger batch). Bake in two batches or use two baking sheets, rotating them halfway through baking.
Why did my cookies turn out flat?
Flat cookies usually mean the butter was too warm or melted. Next time, make sure your butter is softened but not greasy. You can also chill the dough balls for 20 minutes before baking to prevent excessive spreading.
Can I use margarine instead of butter?
You can, but the texture will be different. Margarine has more water and less fat than butter, which can make cookies spread more and become less tender. If you must substitute, use a high-fat stick margarine, not the spreadable kind in a tub.
How do I know when the cookies are done?
Look for golden brown edges with centers that still look slightly puffy and underdone. The tops should be set but still soft to the touch. Remember, they’ll continue baking on the hot sheet for a few minutes after you take them out of the oven.
Can I make the dough ahead of time?
Yes! You can make the dough, portion it into balls, and refrigerate for up to 3 days or freeze for up to 3 months. If baking from frozen, add 2-3 minutes to the baking time. No need to thaw first. This is actually my preferred method—the chilled dough produces even better cookies.
Pin This Recipe!
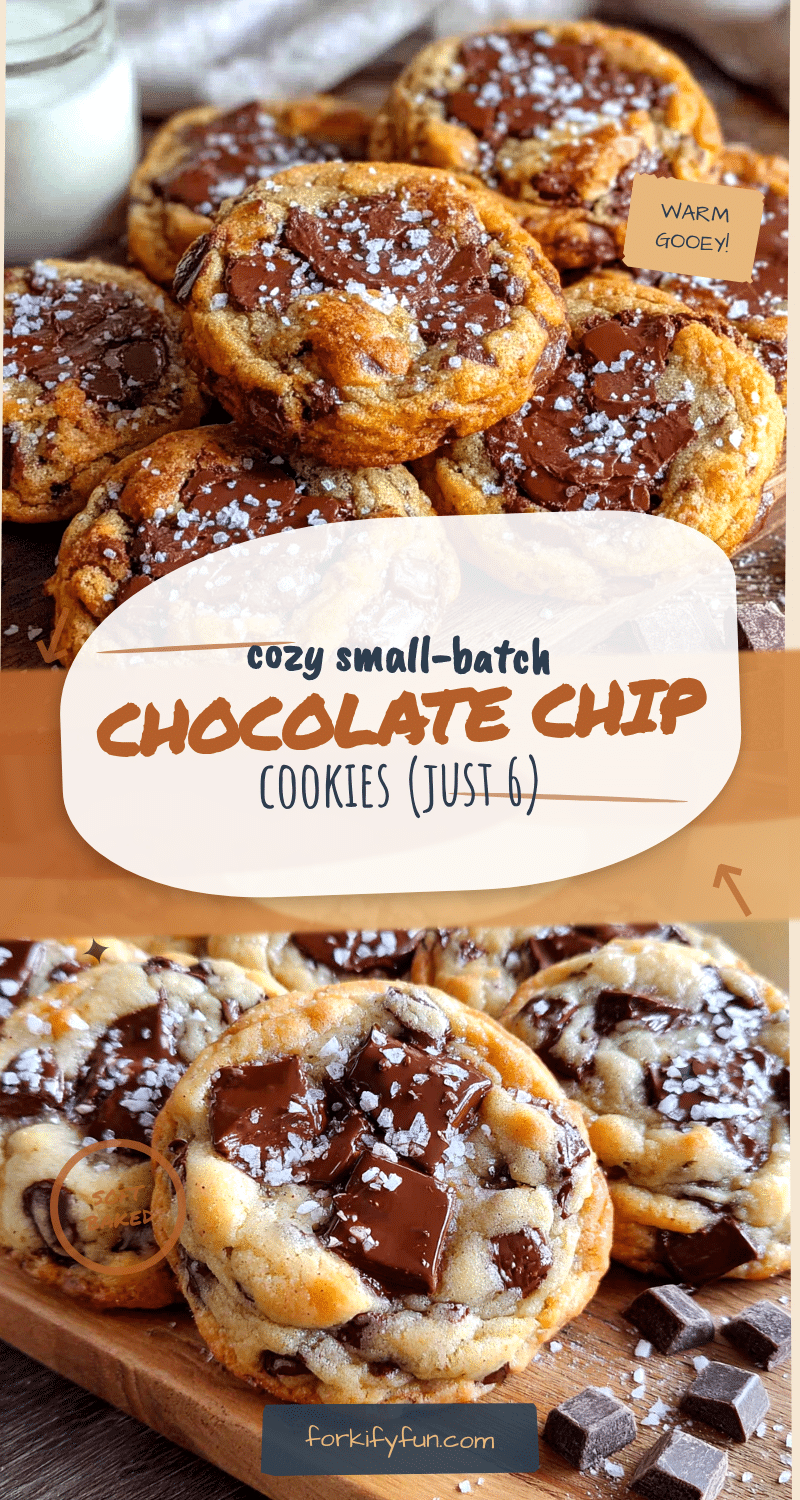
Cozy Small-Batch Chocolate Chip Cookies: Perfect for 2

These quick and easy small-batch chocolate chip cookies are perfect for when you need a warm, sweet treat without committing to a full batch. With crispy edges and soft, gooey centers, they come together in under 25 minutes using simple pantry ingredients.
- Prep Time: 10 minutes
- Cook Time: 10-12 minutes
- Total Time: 25 minutes
- Yield: 6 cookies 1x
- Category: Dessert
- Cuisine: American
Ingredients
- 4 tablespoons (57g) unsalted butter, softened
- 3 tablespoons (40g) light brown sugar, packed
- 2 tablespoons (25g) granulated sugar
- 1 large egg yolk (about 18g)
- 1/2 teaspoon vanilla extract
- 1/3 cup (42g) all-purpose flour
- 1/4 teaspoon baking soda
- 1/4 teaspoon salt
- 1/3 cup (60g) semi-sweet chocolate chips
- Optional: flaky sea salt for sprinkling
Instructions
- Preheat your oven to 350°F (175°C). Line a baking sheet with parchment paper or a silicone mat.
- In a medium bowl, cream together the softened butter, brown sugar, and granulated sugar until smooth and looks like wet sand, about 2 minutes.
- Add the egg yolk and vanilla extract. Stir until combined and glossy, about 30 seconds.
- In a small bowl, whisk together the flour, baking soda, and salt.
- Add the flour mixture to the butter mixture. Stir gently until just combined—no white flour streaks remain. Do not overmix.
- Fold in the chocolate chips until evenly distributed.
- Divide the dough into 6 equal portions (about 1.5 tablespoons or 30g each). Roll into balls and place on the prepared baking sheet, spacing about 2 inches apart.
- Bake for 10-12 minutes, until edges are golden brown and centers look slightly puffy and underdone.
- Let cookies rest on the baking sheet for 5 minutes, then transfer to a cooling rack. If using flaky sea salt, sprinkle on top right after removing from oven.
- Allow to cool for at least another 5 minutes before serving for best texture.
Notes
Butter should be softened but not melted—press with finger to leave an indent. For best results, use the spoon-and-level method for flour. If you have extra time, chill dough balls for 30 minutes before baking for deeper flavor and less spread. Cookies keep in an airtight container at room temperature for up to 3 days; place a slice of bread in the container to keep them soft. Freeze dough balls for up to 3 months.
Nutrition
- Serving Size: 1 cookie
- Calories: 185
- Sugar: 15
- Sodium: 135
- Fat: 10
- Saturated Fat: 6
- Carbohydrates: 23
- Fiber: 1
- Protein: 2
Keywords: small-batch chocolate chip cookies, cookies for two, easy cookie recipe, quick cookies, homemade cookies


