My neighbor, an older woman named Elena, watched me staring at a pile of honeynut squash at the farmers’ market last October. I didn’t say anything at first, just kept poking at them like I knew what I was doing. Then she picked one up, handed it to me, and said, “You slice these in half, scoop the seeds, and put a little butter on them. The kids will eat them like candy.” I laughed, thinking she was exaggerating. But I bought a few anyway, mostly because she had that calm, confident way of talking about food that you just trust. I roasted them that night, and honestly? She was right. My kids didn’t just eat them—they asked for more. That never happens with vegetables in our house.
The thing about honeynut squash is that it looks like a tiny butternut squash, but it’s sweeter and creamier. It doesn’t need much fussing over. You don’t have to peel it, which is a huge win in my book. The skin gets tender enough to eat, so you can just roast it and serve it. I’ve been making this recipe ever since that day at the market, and it’s become our go-to side dish for fall dinners. It’s one of those recipes that feels almost too simple to write down, but the results are so good that you’ll want to remember it. Maybe you’ve been there—standing in the produce aisle, wondering if your kids will actually eat something new. I get it. This one works.
I’ve tweaked Elena’s original method over the years, mostly by adding brown butter because, let’s face it, brown butter makes everything better. The nutty, toasty flavor pairs perfectly with the natural sweetness of the squash. It’s the kind of dish that makes you feel like you’ve done something fancy, but really you just roasted some squash and melted butter. That’s my favorite kind of cooking. This recipe stayed with me because it solved a real problem in my kitchen: getting my family to eat vegetables without complaints. Now it’s a staple, and I’m pretty sure it’ll become one in yours too.
Why You’ll Love This Recipe
I’ve tested this recipe more times than I can count, and I can tell you with confidence that it delivers every single time. Here’s why this roasted honeynut squash with brown butter deserves a spot in your regular dinner rotation:
- Quick & Easy: From start to finish, this dish comes together in about 35 minutes. You only need 5 minutes of active prep time, which means you can get it in the oven while you focus on the rest of dinner.
- Simple Ingredients: You probably already have butter, salt, and pepper in your kitchen. The only thing you might need to pick up is the honeynut squash itself, and they’re showing up everywhere these days.
- Perfect for Family Meals: This is the kind of side dish that pleases everyone at the table. Picky eaters, adults who think they don’t like squash, and even toddlers who usually push vegetables to the side of their plate.
- Crowd-Pleaser: I’ve brought this to potlucks and holiday dinners, and it always gets the most comments. People can’t believe something so simple tastes this good.
- Unbelievably Delicious: The combination of caramelized squash and nutty brown butter creates a flavor that’s honestly addictive. The edges get all crispy and golden, while the inside turns creamy and sweet.
What makes this recipe different from other squash recipes is the technique. Instead of just roasting the squash with plain butter, you take a few extra minutes to brown the butter first. That small step transforms the whole dish. The brown butter adds a deep, toasty flavor that you just can’t get any other way. Plus, because honeynut squash is naturally sweeter than butternut squash, you don’t need to add any sugar or maple syrup. It’s already perfect on its own.
This isn’t just a good vegetable side dish—it’s the kind that makes you close your eyes after the first bite. It’s comfort food that happens to be healthy, and it’s fast enough for a Tuesday night but fancy enough for Thanksgiving. I love that about it.
What Ingredients You Will Need
This recipe uses simple, wholesome ingredients to deliver bold flavor and satisfying texture without the fuss. Most of these are pantry staples, which makes this dish perfect for those nights when you need something good but don’t want to run to the store.
- Honeynut squash (4-5 medium squash): These are smaller than butternut squash, about the size of a large bell pepper. Look for ones that feel heavy for their size with firm, unblemished skin. I usually pick up a few extra because they keep well in the pantry for weeks.
- Unsalted butter (4 tablespoons, or 60 grams): I recommend using unsalted butter so you can control the salt level. If you only have salted butter on hand, just reduce the added salt slightly. Kerrygold is my personal favorite for browning because it has a lower water content, but any good-quality butter works.
- Kosher salt (1 teaspoon): I use Diamond Crystal kosher salt. If you’re using table salt or a different brand, you might need to adjust the amount. The salt helps bring out the natural sweetness of the squash and balances the richness of the butter.
- Freshly ground black pepper (1/2 teaspoon): Don’t skip the pepper! It adds a subtle warmth that complements the nutty brown butter perfectly. I always grind it fresh from a pepper mill for the best flavor.
- Optional: Fresh sage leaves (8-10 leaves): If you want to get fancy, frying a few sage leaves in the brown butter takes this dish to another level. It’s completely optional, but I do it whenever I have sage in the garden.
- Optional: Flaky sea salt for finishing: A sprinkle of Maldon salt right before serving adds a nice crunch and a pop of saltiness. It’s a small touch that makes a big difference.
For the best texture, choose squash that are similar in size so they cook evenly. If you find some that are much larger than others, you can cut them in half and roast them that way, but I prefer keeping them whole and halving them lengthwise. The skin is completely edible once roasted, so don’t bother peeling them.
If you can’t find honeynut squash, you can substitute butternut squash, but you’ll need to peel it and cut it into chunks. The cooking time will also be longer. I’ve also made this with delicata squash, which has a similar edible skin and cooks in about the same time. The flavor is slightly different but still delicious.
Equipment Needed
You don’t need much to make this recipe, which is one of the reasons I love it. Here’s what you’ll need:
- Sharp chef’s knife: A good 8-inch chef’s knife makes cutting through the squash much easier. Honeynut squash are small but dense, so a sharp knife is important for safety.
- Cutting board: Any sturdy cutting board will work. I prefer a wooden one because it’s gentler on my knives.
- Large baking sheet: A rimmed baking sheet is best to catch any butter that might drip off. I use a half-sheet pan (18×13 inches) for this recipe.
- Parchment paper or aluminum foil: Lining the baking sheet makes cleanup so much easier. I always use parchment paper because nothing sticks to it.
- Small saucepan: For browning the butter. A light-colored pan is helpful so you can see the butter change color, but any small saucepan works.
- Measuring spoons: For the salt and pepper. I also use them to scoop out the seeds from the squash.
- Pastry brush (optional): If you want to brush the brown butter evenly over the squash. You can also just drizzle it with a spoon.
If you don’t have a pastry brush, don’t worry about it. I’ve made this recipe many times just using a spoon to drizzle the butter, and it turns out great every time. The key is to make sure each piece gets some butter on it.
Preparation Method
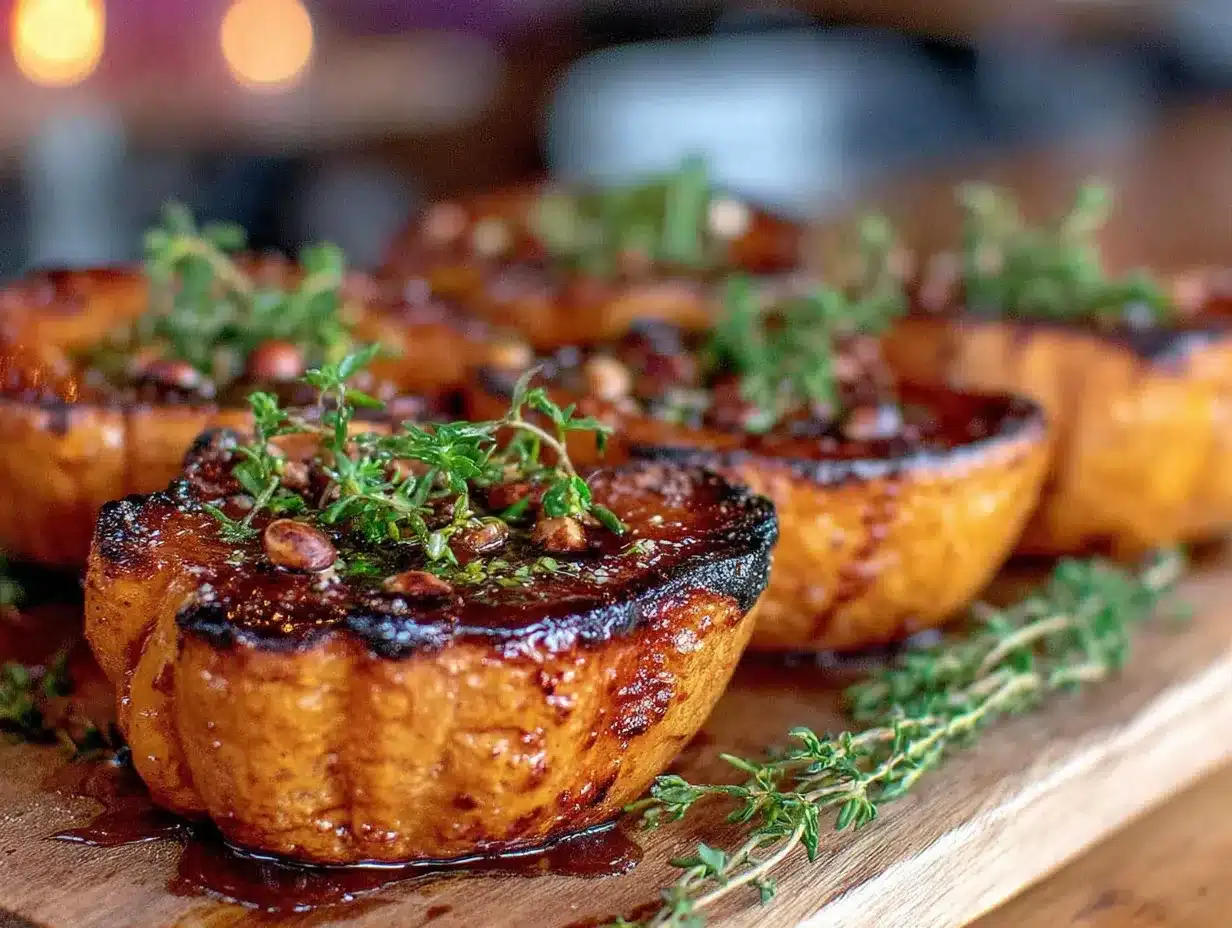
Let me walk you through how to make this roasted honeynut squash with brown butter. I’ve included all the little details I’ve learned from making this dozens of times.
- Preheat your oven to 400°F (200°C). Position the rack in the middle of the oven. While the oven is heating up, line a large baking sheet with parchment paper or aluminum foil for easy cleanup.
- Prepare the squash. Wash the honeynut squash under cold water and pat them dry. Using a sharp chef’s knife, carefully cut each squash in half lengthwise. Be careful—these little guys are dense, and the knife can slip. I always cut away from my body and keep my fingers curled under. Use a spoon or a measuring spoon to scoop out the seeds and stringy bits from the center. Don’t worry about getting every last seed; just remove the bulk of them. You can save the seeds and roast them separately if you want, but I usually just toss them.
- Season the squash. Place the squash halves cut-side up on the prepared baking sheet. Sprinkle them evenly with the kosher salt and freshly ground black pepper. Don’t be shy with the salt—it really brings out the sweetness.
- Make the brown butter. This is where the magic happens. Place the unsalted butter in a small saucepan over medium heat. Let it melt completely, then continue cooking, swirling the pan occasionally. The butter will start to foam and bubble. After a few minutes, you’ll notice the foam subsiding and the butter turning a golden color. Watch carefully—it can go from perfect to burnt very quickly. When the butter turns a deep amber color and smells nutty and toasty, remove it from the heat immediately. This usually takes about 4-5 minutes from start to finish. If you’re using fresh sage leaves, add them to the hot butter right after you remove it from the heat. They’ll crisp up in the residual heat.
- Brush the squash with brown butter. Using a pastry brush or a spoon, generously brush the brown butter over the cut sides of the squash. Make sure you get some butter into the cavities where the seeds were. If you fried sage leaves in the butter, you can tuck a crispy sage leaf into each squash half for extra flavor.
- Roast the squash. Place the baking sheet in the preheated oven and roast for 25-30 minutes. The squash is done when the edges are caramelized and golden brown, and the flesh is tender when pierced with a fork. The skin should be wrinkled and slightly charred in spots. Halfway through cooking, I like to brush the squash with any accumulated butter from the baking sheet to keep them moist.
- Finish and serve. Remove the baking sheet from the oven and let the squash cool for 2-3 minutes. If you have flaky sea salt, sprinkle a little over the top right before serving. Transfer the squash to a serving platter or individual plates. Serve warm, drizzled with any remaining brown butter from the baking sheet.
A few things to watch for: If your squash are on the smaller side, check them at 20 minutes. If they’re larger, they might need up to 35 minutes. The key is that fork-tender texture. Also, don’t overcrowd the baking sheet. Give each squash half a little space so they caramelize instead of steam.
Cooking Tips & Techniques
After making this recipe more times than I can count, I’ve picked up a few tricks that make a real difference. Here are my best tips for perfect roasted honeynut squash with brown butter every time.
Don’t rush the brown butter. I learned this the hard way. The first few times I made brown butter, I cranked up the heat to speed things up, and I ended up with burnt butter every time. Low and slow is the way to go. Medium heat, constant attention, and patience. The butter will go through stages: melt, foam, subside, then turn golden. When you see those little brown specks forming at the bottom of the pan, you’re almost there. Trust your nose—when it smells nutty and amazing, it’s done.
Cut the squash evenly. This is probably the most important tip for even cooking. Try to cut each squash half so they’re roughly the same thickness. If some pieces are much thinner than others, they’ll cook faster and might burn before the thicker pieces are done. I stack two squash together and cut them at the same time to keep things consistent.
Use a light-colored pan for browning butter. Dark nonstick pans make it really hard to see the color change. I use a stainless steel saucepan for this, and it makes a huge difference. You can actually see when the butter turns that perfect amber color. If you only have dark pans, just pay extra attention to the smell and the sound. The butter will get quieter as the water evaporates, and the nutty smell is your cue.
Don’t skip the resting time. I know it’s tempting to serve the squash right out of the oven, but letting it rest for just a couple of minutes makes a difference. The squash continues to cook slightly from residual heat, and the butter sets a little bit so it doesn’t just slide off. Plus, it gives you time to finish up whatever else you’re serving.
Save the pan drippings. After you remove the squash from the baking sheet, there will be some brown butter and caramelized bits left on the parchment paper. Scrape those up and drizzle them over the squash. That’s pure flavor right there. I’ve even used a silicone spatula to get every last drop.
Variations & Adaptations
One of the best things about this recipe is how easy it is to change it up. Here are some variations I’ve tried and loved.
Maple-Bourbon Version: This is my go-to for holiday dinners. After brushing the squash with brown butter, drizzle 1 tablespoon of maple syrup and 1 tablespoon of bourbon over the squash halves. The alcohol cooks off during roasting, leaving behind a warm, complex sweetness. My husband, who claims he doesn’t like squash, ate three halves of this version last Thanksgiving.
Spicy Honey Variation: For a sweet-heat combo, mix 1 tablespoon of honey with a pinch of cayenne pepper or red pepper flakes. Drizzle this over the roasted squash right before serving. The heat cuts through the richness of the brown butter beautifully. I first tried this when I had some leftover honey from a farmers’ market trip, and it’s been a regular ever since.
Herb-Infused Brown Butter: Before browning the butter, add a sprig of fresh rosemary or thyme to the pan. Let it infuse as the butter browns, then remove the herb before brushing the squash. The herbal notes pair wonderfully with the sweet squash. I’ve also used dried herbs in a pinch—just add them to the melted butter and let them steep for a minute before brushing.
Cheesy Topping: About 5 minutes before the squash is done, sprinkle a little grated Parmesan or crumbled feta over the top. Return to the oven to finish roasting. The cheese gets all melty and browned, adding a salty, savory element. My kids actually prefer this version, which surprised me because they’re usually not big cheese fans on vegetables.
Air Fryer Method: If you’re short on time, you can make this in the air fryer. Preheat the air fryer to 375°F (190°C). Place the seasoned and buttered squash halves in the basket, cut-side up. Cook for 12-15 minutes, or until tender and caramelized. You might need to work in batches depending on the size of your air fryer. The results are slightly crispier on the edges, which I actually prefer.
Serving & Storage Suggestions
This roasted honeynut squash with brown butter is incredibly versatile when it comes to serving. Here’s how I like to enjoy it.
Serve it warm, not hot. I’ve found that the flavor really shines when the squash has cooled just slightly. The sweetness becomes more pronounced, and the brown butter flavor is more noticeable. If you’re serving it as part of a larger meal, let it rest on the counter while you finish everything else.
Make it a meal. This squash pairs beautifully with roasted chicken, pork chops, or grilled steak. I often serve it alongside a simple roasted chicken and a green salad for an easy weeknight dinner. It also works great as a vegetarian main dish when served with a grain like quinoa or farro and a dollop of Greek yogurt.
Perfect for holiday tables. This recipe is my secret weapon for Thanksgiving and Christmas dinners. It’s much easier than making a complicated casserole, and it always gets rave reviews. The beautiful golden color looks stunning on a serving platter, and the individual portions make serving a breeze.
Storage instructions: Leftover squash can be stored in an airtight container in the refrigerator for up to 4 days. The texture will soften slightly, but the flavor remains delicious. I actually love leftovers because the flavors meld together even more overnight.
Reheating tips: The best way to reheat this squash is in a 350°F (175°C) oven for about 10 minutes. This helps restore some of the caramelization. You can also reheat it in the microwave, but the texture will be softer. If you’re in a hurry, the microwave works fine—just don’t expect the same crispy edges.
Freezer-friendly: Yes, you can freeze this dish! Place the cooled squash halves on a baking sheet and freeze until solid, then transfer to a freezer bag. They’ll keep for up to 3 months. To serve, thaw overnight in the refrigerator and reheat in the oven. The texture won’t be quite as perfect as fresh, but it’s still really good.
Nutritional Information & Benefits
This roasted honeynut squash with brown butter isn’t just delicious—it’s actually pretty good for you too. Here’s the breakdown per serving (one squash half):
| Nutrient | Amount |
|---|---|
| Calories | 145 |
| Total Fat | 8g |
| Saturated Fat | 5g |
| Carbohydrates | 18g |
| Fiber | 3g |
| Sugar | 6g |
| Protein | 2g |
| Vitamin A | 180% DV |
| Vitamin C | 25% DV |
| Potassium | 10% DV |
Honeynut squash is packed with vitamin A, which is great for eye health and immune function. It’s also a good source of fiber, which helps keep you full and supports digestive health. The brown butter adds healthy fats that help your body absorb the fat-soluble vitamins in the squash.
This recipe is naturally gluten-free and can be made dairy-free by using a plant-based butter alternative. It’s also low in sodium if you watch your salt intake. The natural sweetness of the squash means you don’t need to add any refined sugar, making it a great option for those watching their sugar intake.
From a wellness perspective, I love that this dish feels indulgent but is actually quite nutritious. It’s the kind of recipe that makes you feel good about what you’re feeding your family, without any sacrifice in flavor.
Conclusion
This roasted honeynut squash with brown butter has become one of those recipes I genuinely look forward to making. It’s simple enough for a busy Tuesday night, but special enough for a holiday dinner. The combination of sweet, caramelized squash and nutty brown butter is honestly one of the best things I’ve ever tasted, and I’ve made it so many times that I don’t even need to look at the recipe anymore.
What I love most about this recipe is how it solves a real problem in our kitchen. Getting my kids to eat vegetables used to be a daily struggle. Now they actually ask for this squash. They’ll eat it plain, with the maple-bourbon glaze, or topped with cheese. It’s become our go-to side dish for fall and winter, and I’m pretty sure it’ll become yours too.
I encourage you to make this recipe your own. Try different herbs, experiment with toppings, or keep it simple with just the brown butter. The beauty of this dish is that it’s forgiving and adaptable. And if your kids end up loving it as much as mine do, I’d love to hear about it. Drop a comment below and let me know how it turned out, or share your own variation. Happy cooking!
Frequently Asked Questions
Can I use butternut squash instead of honeynut squash?
Yes, you can substitute butternut squash, but you’ll need to peel it and cut it into chunks since the skin is tougher. The cooking time will also be longer—about 35-40 minutes at 400°F. The flavor won’t be quite as sweet, but it’s still delicious with the brown butter.
Do I really need to brown the butter, or can I just melt it?
You can just melt the butter if you’re short on time, but I really recommend taking the extra few minutes to brown it. The nutty, toasty flavor is what makes this dish special. It’s a small step that transforms the whole recipe. Trust me on this one!
How do I know when the squash is done roasting?
The squash is done when the edges are caramelized and golden brown, and the flesh is tender when pierced with a fork. The skin should be wrinkled and slightly charred in spots. If the squash is still firm when you poke it, give it another 5 minutes and check again.
Can I make this recipe ahead of time?
Absolutely! You can prepare the squash up to a day in advance. Simply cut them in half, scoop out the seeds, and store them in the refrigerator. When you’re ready to cook, just brush with brown butter and roast as directed. You can also fully cook the squash and reheat it later—just keep in mind that the texture will be softer.
How do I prevent the brown butter from burning?
The key is to watch it carefully and use medium heat. Once the butter starts foaming, keep an eye on it. When the foam subsides and you see brown specks forming at the bottom of the pan, remove it from the heat immediately. The residual heat will continue cooking it slightly. If you’re nervous, you can also brown the butter over low heat—it takes longer but gives you more control.
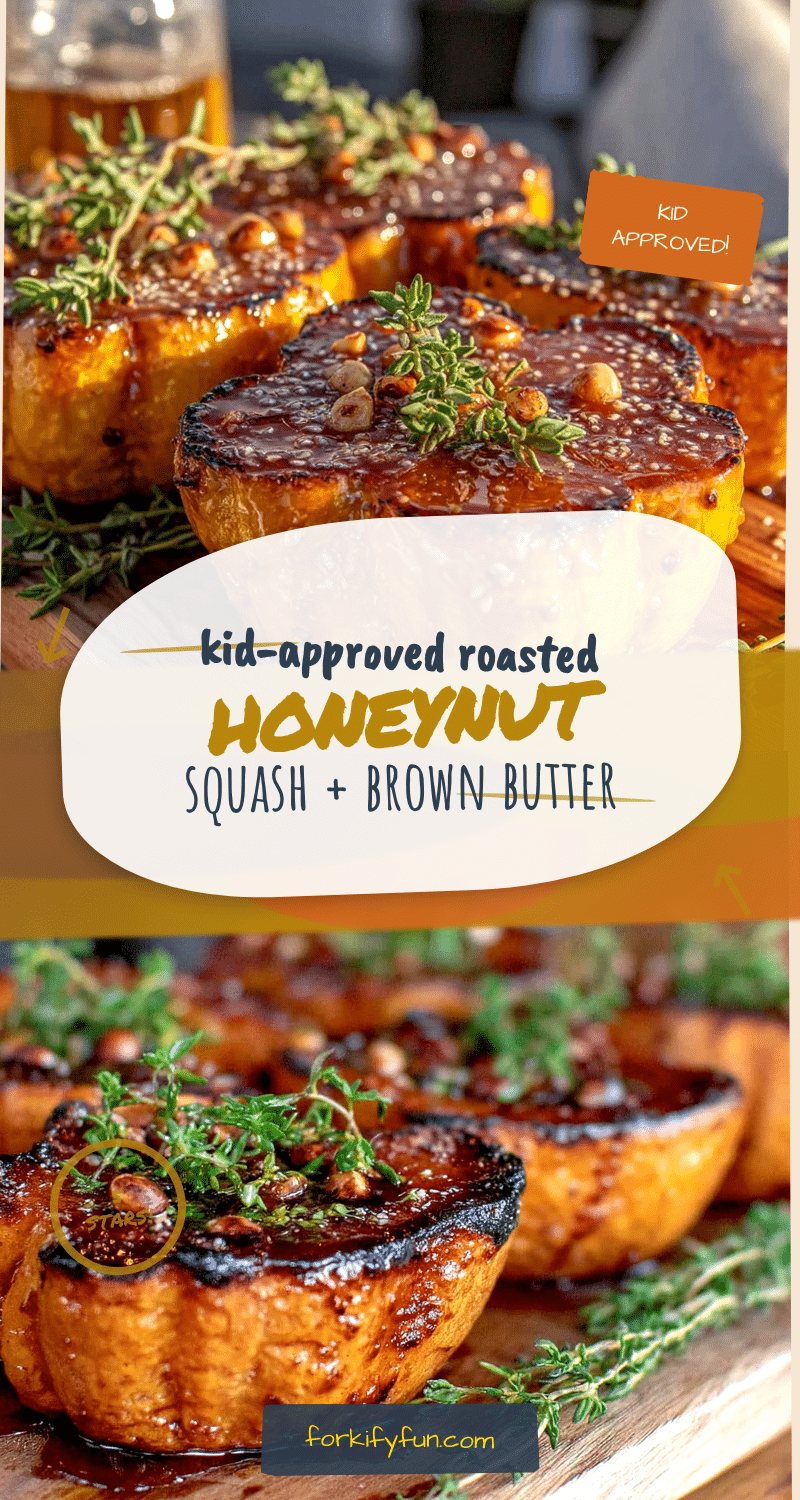
Pin This Recipe!
Easy Roasted Honeynut Squash with Brown Butter
This simple roasted honeynut squash with brown butter is a quick and easy side dish that’s sweet, creamy, and nutty. Perfect for family dinners or holiday tables, it’s made with just a few ingredients and comes together in about 35 minutes.
- Prep Time: 5 minutes
- Cook Time: 30 minutes
- Total Time: 35 minutes
- Yield: 4 servings 1x
- Category: Side Dish
- Cuisine: American
Ingredients
- 4–5 medium honeynut squash
- 4 tablespoons (60 grams) unsalted butter
- 1 teaspoon kosher salt (Diamond Crystal recommended)
- 1/2 teaspoon freshly ground black pepper
- 8–10 fresh sage leaves (optional)
- Flaky sea salt for finishing (optional)
Instructions
- Preheat your oven to 400°F (200°C). Position the rack in the middle of the oven. Line a large baking sheet with parchment paper or aluminum foil.
- Wash the honeynut squash under cold water and pat them dry. Using a sharp chef’s knife, carefully cut each squash in half lengthwise. Use a spoon or measuring spoon to scoop out the seeds and stringy bits from the center.
- Place the squash halves cut-side up on the prepared baking sheet. Sprinkle them evenly with the kosher salt and freshly ground black pepper.
- Place the unsalted butter in a small saucepan over medium heat. Let it melt completely, then continue cooking, swirling the pan occasionally. The butter will start to foam and bubble. After a few minutes, when the butter turns a deep amber color and smells nutty and toasty, remove it from the heat immediately (about 4-5 minutes total). If using fresh sage leaves, add them to the hot butter right after removing from heat.
- Using a pastry brush or a spoon, generously brush the brown butter over the cut sides of the squash, including the cavities. If you fried sage leaves, tuck a crispy leaf into each squash half.
- Place the baking sheet in the preheated oven and roast for 25-30 minutes, until the edges are caramelized and golden brown and the flesh is tender when pierced with a fork. Halfway through, brush the squash with any accumulated butter from the baking sheet.
- Remove from the oven and let cool for 2-3 minutes. If using flaky sea salt, sprinkle a little over the top right before serving. Serve warm, drizzled with any remaining brown butter from the baking sheet.
Notes
For even cooking, choose squash that are similar in size. If using butternut squash instead, peel and cut into chunks; cooking time will be longer (35-40 minutes). The skin of honeynut squash is edible once roasted. Leftovers can be stored in an airtight container in the refrigerator for up to 4 days. To reheat, place in a 350°F (175°C) oven for about 10 minutes. This dish can be frozen for up to 3 months.
Nutrition
- Serving Size: 1 squash half
- Calories: 145
- Sugar: 6
- Sodium: 240
- Fat: 8
- Saturated Fat: 5
- Carbohydrates: 18
- Fiber: 3
- Protein: 2
Keywords: roasted honeynut squash, brown butter, easy side dish, fall recipe, vegetable side, gluten-free, vegetarian