I had claimed to hate mac and cheese for about seven years. Not in a dramatic, food-snob way—more like a quiet, consistent avoidance that just became part of my identity. Boxed stuff made me cringe, and the homemade versions I’d tried always felt heavy in a way that sat in my stomach for hours. Then last October, during a freak early snowstorm that knocked out power for three days, my neighbor Margot showed up at my door with a steaming casserole dish wrapped in tea towels. “It’s butternut squash mac and cheese,” she said, shoving it into my hands before I could protest. “Just try it. I put sage on top.”
I stood there in the doorway, snow melting on my boots, holding this dish that smelled like browned butter and autumn. Honestly, I almost gave it away to the guy upstairs. But the power was still out, I was cold, and the kitchen smelled like nothing but regret and stale coffee. So I scooped some into a bowl, sat on my couch under three blankets, and took a bite. And then I sat there for a solid minute, fork suspended, genuinely confused about why I’d spent years avoiding this exact feeling. The squash made it creamy without being gluey, and the crispy sage tasted like someone fried up little leaves of fall itself.
I finished half the dish that night. Margot never let me forget it, and honestly, she shouldn’t. This cozy roasted butternut squash mac and cheese with crispy sage became my official cold-weather obsession, the thing I make when the air gets sharp and the days get short. Maybe you’ve been there too—stuck in a food rut, convinced something isn’t for you, only to have one version change everything. This is that version.
Why You’ll Love This Recipe
Let me tell you why this particular mac and cheese is different from every other recipe you’ve scrolled past. I’ve tested this about eleven times across two different ovens, and I can say with confidence that this is the version worth your time.
- No Heavy Cream Needed : The roasted butternut squash blends into the cheese sauce so smoothly that you won’t miss the heavy cream at all. It adds natural sweetness and that velvety texture without weighing you down.
- Simple Ingredients, Big Flavor : You likely have most of these ingredients already—pasta, cheese, butter, garlic. The squash and sage are the only specialty items, and they’re easy to find at any grocery store.
- Perfect for Cozy Season : This dish was made for rainy Sundays, snowy weeknights, and those days when you just need something warm and comforting. It’s the kind of meal that makes you want to light a candle and put on a sweater.
- Crowd-Pleaser Status : I brought this to a Friendsgiving last year, and three people asked for the recipe before I even sat down. Kids love it, adults love it, and even my friend who claims to dislike squash went back for seconds.
- Unbelievably Delicious : The combination of creamy, slightly sweet squash sauce with sharp cheddar and those crispy sage leaves on top is next-level comfort food. It’s the kind of dish that makes you close your eyes after the first bite.
What really sets this recipe apart is the double-roasting technique. You roast the squash first to concentrate its sweetness, then you broil the assembled mac and cheese to get that golden, bubbly top. The crispy sage adds a texture and flavor that you just can’t get from any other herb. This isn’t just another mac and cheese recipe—it’s the one that converted me, and it might just convert you too.
What Ingredients You Will Need
This recipe uses simple, wholesome ingredients that work together to create something genuinely special. The roasted butternut squash does the heavy lifting here, providing creaminess and natural sweetness that balances the sharp cheddar beautifully.
- Butternut Squash (1 medium, about 2 pounds) – Peeled, seeded, and cubed into 1-inch pieces. Look for a squash that feels heavy for its size with firm, unblemished skin. I prefer to buy pre-cut cubes from the store when I’m short on time, but whole squash is cheaper.
- Elbow Macaroni (1 pound, or 450g) – Regular elbow mac works perfectly, but you can also use cavatappi, shells, or any short pasta shape that catches sauce well.
- Sharp Cheddar Cheese (2 cups, shredded, about 8 ounces) – Please shred your own cheese from a block. Pre-shredded cheese has anti-caking agents that make the sauce grainy. Trust me on this one—I learned the hard way.
- Gruyère Cheese (1 cup, shredded, about 4 ounces) – This adds nuttiness and incredible meltability. If you can’t find Gruyère, use more sharp cheddar or add some fontina.
- Whole Milk (2 cups, or 480ml) – Whole milk gives the best creamy texture. You can use 2% in a pinch, but avoid skim milk—it won’t create the same richness.
- Unsalted Butter (3 tablespoons, divided) – We’ll use some for the roux and some for the crispy sage topping.
- All-Purpose Flour (3 tablespoons) – This thickens the cheese sauce. For a gluten-free version, use a 1:1 gluten-free flour blend.
- Fresh Sage Leaves (about 12-15 leaves) – Look for sage with vibrant green leaves and no wilting. This is non-negotiable for the crispy topping—dried sage won’t work the same way.
- Garlic (3 cloves, minced) – Fresh garlic adds depth. Don’t use jarred minced garlic here; it won’t give you the same flavor.
- Dijon Mustard (1 teaspoon) – This is my secret ingredient. It doesn’t make the sauce taste like mustard at all—it just sharpens the cheese flavor and adds complexity.
- Salt (1 teaspoon, plus more for pasta water) – Use fine sea salt for the sauce and kosher salt for the pasta water.
- Black Pepper (½ teaspoon, freshly ground) – Freshly ground pepper makes a difference here.
- Nutmeg (¼ teaspoon, freshly grated if possible) – Just a pinch, but it brings out the sweetness of the squash beautifully.
- Panko Breadcrumbs (½ cup) – For that crunchy topping. Regular breadcrumbs work too, but panko gives a better texture.
For the squash, I recommend using a vegetable peeler to remove the skin—it’s much easier than using a knife. If you’re short on time, frozen butternut squash cubes work in a pinch, just thaw and pat them dry before roasting. I’ve tried both, and fresh roasted squash gives a noticeably better texture and flavor.
Equipment Needed
You don’t need a fancy kitchen to make this recipe work. Here’s what you’ll need:
- Large Baking Sheet (half-sheet pan works best) – For roasting the squash. Line it with parchment paper for easy cleanup.
- Large Pot (5-6 quart) – For boiling the pasta. A Dutch oven works great here too.
- Medium Saucepan (2-3 quart) – For making the cheese sauce. A heavy-bottomed saucepan prevents scorching.
- 9×13-inch Baking Dish – For assembling and baking the mac and cheese. An 8×8 dish works if you prefer a thicker, more decadent version.
- Whisk – Essential for a smooth roux and cheese sauce without lumps.
- Box Grater or Microplane – For shredding cheese and grating nutmeg. I’ve used both, and the box grater is faster for cheese.
- Small Skillet – For frying the sage leaves. A non-stick skillet works best here.
- Immersion Blender or Food Processor – For pureeing the roasted squash. A potato masher works in a pinch, but you won’t get the same silky smooth texture.
If you don’t have an immersion blender, let the roasted squash cool slightly, then transfer it to a regular blender or food processor. Just be careful with the hot steam—remove the center cap from the blender lid and cover it with a kitchen towel instead.
Preparation Method
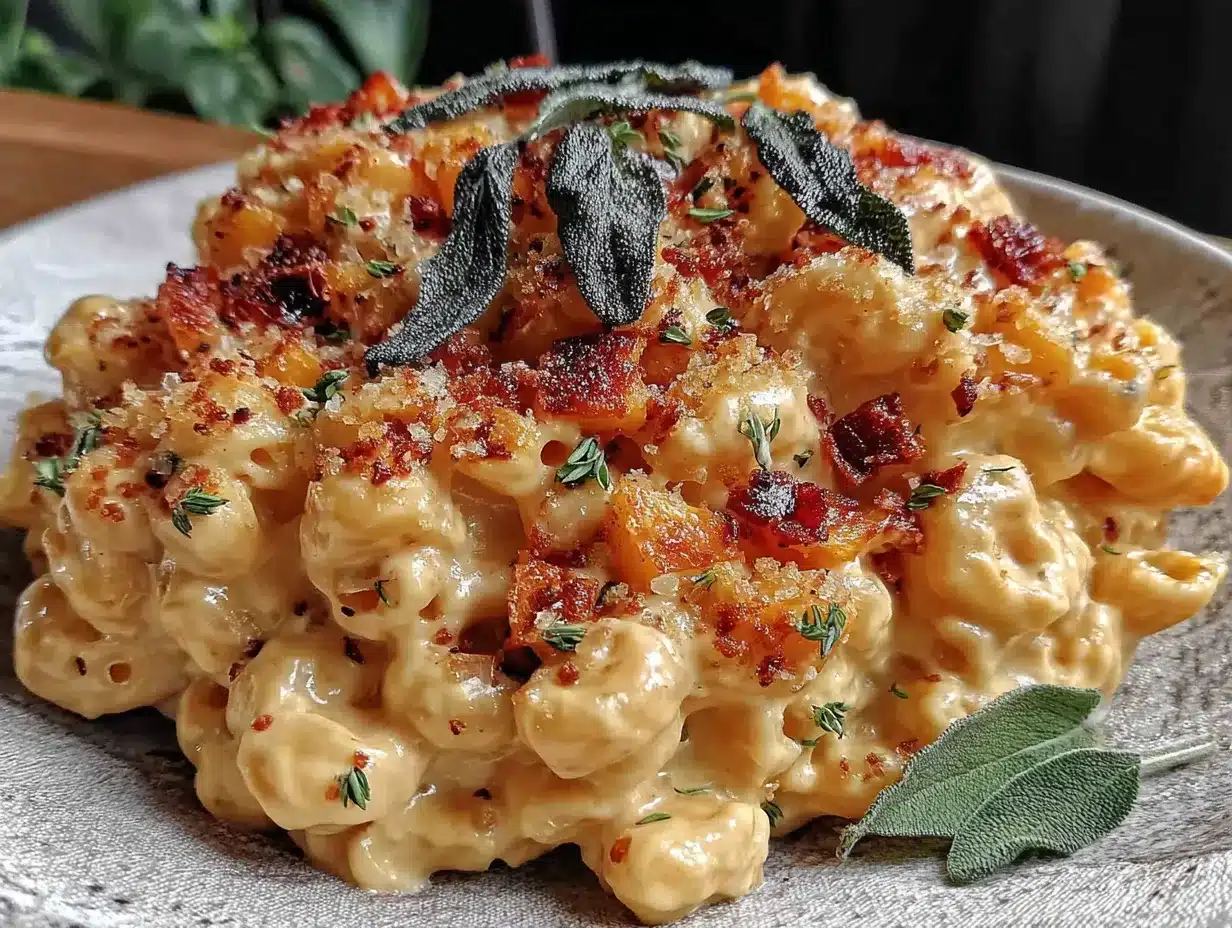
Let me walk you through this step by step. I’ve made this enough times to know where things can go wrong, so I’ll point out those moments as we go.
Step 1: Roast the Butternut Squash
Preheat your oven to 400°F (200°C). Toss the cubed butternut squash with 1 tablespoon of olive oil, ½ teaspoon of salt, and a pinch of black pepper. Spread it in a single layer on your lined baking sheet—don’t overcrowd it, or the squash will steam instead of roast. Roast for 25-30 minutes, flipping halfway through, until the squash is tender and the edges are starting to caramelize. You’ll know it’s ready when a fork slides through easily. Let it cool for about 5 minutes, then transfer to a blender or food processor and puree until completely smooth. Set aside.
Step 2: Cook the Pasta
While the squash roasts, bring a large pot of generously salted water to a boil. Add the macaroni and cook according to package directions until al dente—usually about 7-8 minutes. Here’s the trick: cook it about 1 minute less than the package says, because it will continue cooking in the oven. Drain the pasta, but reserve about ½ cup of the pasta water before you dump it. That starchy water is liquid gold for thinning out the sauce if needed.
Step 3: Make the Cheese Sauce
In your medium saucepan, melt 2 tablespoons of unsalted butter over medium heat. Add the minced garlic and cook for about 30 seconds until fragrant—don’t let it brown or it will turn bitter. Whisk in the flour and cook for 1-2 minutes, stirring constantly. This is your roux, and it should look like pale golden paste. Slowly pour in the milk while whisking continuously to prevent lumps. Keep whisking until the mixture thickens, about 3-4 minutes. It should be thick enough to coat the back of a spoon.
Reduce the heat to low and add the shredded cheddar and Gruyère cheese, one handful at a time, whisking until each addition is fully melted before adding the next. This gradual approach prevents the sauce from breaking or becoming grainy. Stir in the Dijon mustard, salt, pepper, and nutmeg. Finally, fold in the butternut squash puree until everything is smooth and uniformly orange. Taste it—I always do—and adjust seasoning if needed. If the sauce seems too thick, add a splash of the reserved pasta water.
Step 4: Combine and Assemble
Add the cooked pasta to the cheese sauce and stir until every piece is coated. Pour the mixture into your greased 9×13-inch baking dish and spread it evenly. In a small bowl, mix the panko breadcrumbs with 1 tablespoon of melted butter, then sprinkle this over the top of the mac and cheese.
Step 5: Bake and Broil
Bake at 375°F (190°C) for 20 minutes, until the sauce is bubbly around the edges. Then switch your oven to broil and cook for another 2-3 minutes, watching carefully, until the top is golden brown and crispy. This is where the magic happens—that crunchy, buttery crust is worth every second.
Step 6: Make the Crispy Sage
While the mac and cheese bakes, melt the remaining 1 tablespoon of butter in a small skillet over medium heat. Add the fresh sage leaves in a single layer and cook for about 30-60 seconds per side, until they turn dark green and crispy. They’ll shrivel slightly and become paper-thin. Transfer them to a paper towel-lined plate and sprinkle with a tiny pinch of salt. Don’t walk away from these—they go from perfect to burnt in about 10 seconds.
Step 7: Serve
Remove the mac and cheese from the oven and let it rest for 5 minutes. This resting time is crucial—it lets the sauce set up so you get clean, beautiful servings instead of a soupy mess. Top with the crispy sage leaves and serve warm.
Cooking Tips & Techniques
I’ve made every mistake you can imagine with this recipe, so let me save you some trouble. First, don’t skip roasting the squash. I tried boiling it once because I was in a hurry, and the sauce came out watery and bland. Roasting concentrates the natural sugars and gives you that deep, caramelized flavor that makes this dish special.
Low heat is your friend when making the cheese sauce. I know it’s tempting to crank up the heat to speed things along, but high heat will make your sauce grainy or cause it to separate. Keep it gentle and patient—the sauce will come together beautifully if you let it.
Here’s something I learned after my third attempt: shred your cheese while the squash roasts. It saves time and prevents that frantic moment when you realize you need more cheese but your hands are covered in flour. Also, room temperature cheese melts more smoothly than cold cheese straight from the fridge.
For the crispy sage, make sure your sage leaves are completely dry before they hit the butter. Any moisture will make them steam instead of crisp, and you’ll end up with sad, soggy leaves. I pat mine between paper towels and let them sit for a minute before frying.
If you’re making this for a crowd, you can assemble everything up to the baking step a day ahead. Just cover the dish tightly with foil and refrigerate. When you’re ready to bake, add about 10 minutes to the cooking time since you’re starting from cold. The crispy sage should always be made fresh right before serving—it loses its crunch within a few hours.
One more thing: don’t over-bake this. The difference between perfectly creamy mac and cheese and dry, rubbery mac and cheese is about 5 minutes. Bake just until it’s bubbly and hot throughout, then let it rest. Your patience will be rewarded.
Variations & Adaptations
This recipe is surprisingly flexible, and I’ve tried several variations over the past year. Here are my favorites:
Gluten-Free Version : Swap the all-purpose flour for a 1:1 gluten-free flour blend, use gluten-free pasta, and substitute the panko with crushed gluten-free crackers or almond flour. The sauce might be slightly thinner, but it still tastes amazing.
Vegan Adaptation : Use nutritional yeast (about 3 tablespoons) in place of the cheese, unsweetened cashew milk instead of whole milk, and vegan butter. The texture won’t be exactly the same, but the squash does a lot of the heavy lifting for creaminess. I’ve had vegan friends request this version specifically.
Add Protein : Toss in 2 cups of shredded rotisserie chicken or crispy bacon bits when you combine the pasta and sauce. I did this for a post-Thanksgiving casserole with leftover turkey, and it was incredible.
Spice It Up : Add ½ teaspoon of smoked paprika or a pinch of cayenne pepper to the cheese sauce. The heat pairs beautifully with the sweet squash and savory sage. My husband loves this version.
Different Herbs : If you can’t find fresh sage, try crispy fried rosemary or thyme leaves instead. The technique is the same, and the flavor profile shifts slightly but stays deliciously autumnal.
Lighter Version : Use reduced-fat cheddar, 2% milk, and skip the breadcrumb topping. The sauce will be less rich, but the squash still provides plenty of creaminess. I make this version on weeknights when I want comfort without the heaviness.
Serving & Storage Suggestions
Serve this mac and cheese hot, straight from the baking dish, with those crispy sage leaves scattered on top like little edible jewels. I like to present it in a warm ceramic dish with a wooden spoon for serving—it feels cozier that way. A simple side salad with a lemon vinaigrette cuts through the richness perfectly, and some roasted broccoli or green beans round out the meal nicely.
For beverages, a crisp white wine like Sauvignon Blanc or a light Pinot Noir pairs beautifully. If you’re in a cozy mood, a hard apple cider is absolutely wonderful with the squash and sage flavors. My personal favorite is a cup of hot spiced tea—it just feels right.
Leftovers keep well in an airtight container in the refrigerator for up to 4 days. The texture will firm up as it cools, so don’t be alarmed. To reheat, add a splash of milk and warm gently in the microwave or on the stovetop, stirring occasionally. You can also reheat it in the oven at 350°F (175°C) for about 15 minutes, covered with foil.
This mac and cheese freezes beautifully for up to 3 months. Assemble the dish completely but don’t bake it, then wrap tightly with plastic wrap and foil. When you’re ready to enjoy it, thaw overnight in the refrigerator and bake as directed, adding 10-15 minutes to the cooking time. The crispy sage should always be made fresh after thawing.
I’ve noticed that the flavors actually deepen after a day in the fridge—the squash and cheese meld together even more, creating an even richer taste. Some dishes are better the next day, and this is one of them.
Nutritional Information & Benefits
Here’s the approximate nutritional breakdown per serving (based on 8 servings):
- Calories : 485
- Protein : 22g
- Carbohydrates : 52g
- Fat : 22g
- Fiber : 5g
- Sugar : 8g
- Sodium : 620mg
Butternut squash is packed with vitamin A, vitamin C, and fiber, which makes this mac and cheese slightly more nutritious than the traditional version. The squash also provides beta-carotene, which supports eye health and immune function. Sharp cheddar cheese offers calcium and protein, while the sage leaves contain antioxidants and anti-inflammatory compounds.
This recipe is naturally vegetarian and can be made gluten-free or vegan with the substitutions mentioned above. It contains dairy and gluten in its standard form, so please adjust for dietary needs. I personally love that I can serve this to my family knowing they’re getting a serving of vegetables without anyone complaining about it.
Conclusion
This cozy roasted butternut squash mac and cheese with crispy sage is the dish that changed my mind about an entire category of food. It’s creamy without being heavy, comforting without being boring, and special enough for company but simple enough for a Tuesday night. The roasted squash adds sweetness and depth, the three-cheese blend creates that irresistible stretchy texture, and those crispy sage leaves on top are honestly worth making the whole dish for alone.
I hope you give this recipe a try, especially as the weather turns cool and you start craving something warm and satisfying. Feel free to make it your own—add extra cheese, swap in different herbs, or load it up with your favorite mix-ins. That’s the beauty of a good mac and cheese recipe; it’s a canvas for whatever you’re craving.
If you make this, I’d love to hear about it. Drop a comment below, tag me in your photos, or let me know what variations you tried. And if you’re still on the fence about butternut squash in mac and cheese—well, I was there once too. Trust me on this one. Your future self, sitting on the couch with a warm bowl of this, will thank you.
Frequently Asked Questions
Can I use frozen butternut squash instead of fresh?
Yes, you can use frozen butternut squash cubes in a pinch. Thaw them completely and pat them dry with paper towels before roasting to remove excess moisture. The texture won’t be quite as caramelized as fresh roasted squash, but it still works well in the sauce.
Why did my cheese sauce turn out grainy?
Grainy cheese sauce usually happens for two reasons: the heat was too high, or you used pre-shredded cheese. Always shred your own cheese from a block, and keep the heat on low when melting it into the sauce. If your sauce does turn grainy, try whisking in a tablespoon of cold butter or a splash of lemon juice to help smooth it out.
Can I make this recipe ahead of time?
Absolutely. Assemble the mac and cheese completely but don’t bake it, then cover tightly and refrigerate for up to 24 hours. When you’re ready to bake, add about 10 minutes to the cooking time. Make the crispy sage fresh right before serving for the best texture.
What can I use instead of Gruyère cheese?
If you can’t find Gruyère, substitute with more sharp cheddar, fontina, or even Monterey Jack. Each will give a slightly different flavor profile, but all will melt beautifully. For a more affordable option, use a good-quality mild cheddar instead.
How do I store leftovers and reheat them?
Store leftovers in an airtight container in the refrigerator for up to 4 days. To reheat, add a splash of milk and warm gently in the microwave or on the stovetop, stirring occasionally. You can also reheat in the oven at 350°F for about 15 minutes, covered with foil. The crispy sage won’t stay crunchy, so consider making fresh sage leaves for leftovers.
Pin This Recipe!
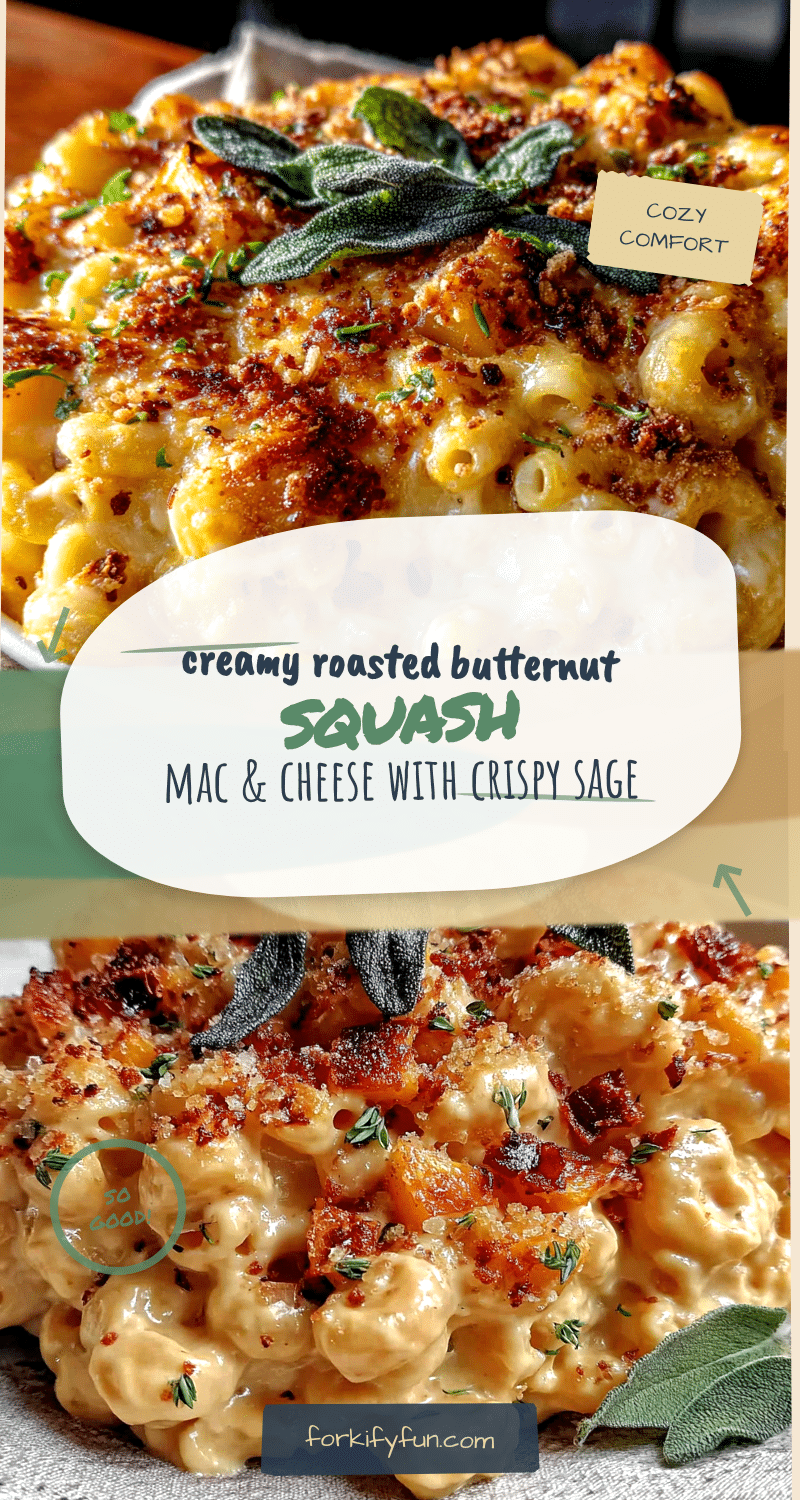
Cozy Roasted Butternut Squash Mac and Cheese with Crispy Sage

This creamy, comforting mac and cheese uses roasted butternut squash for a velvety sauce without heavy cream, topped with crispy fried sage leaves. It’s the dish that converted a self-proclaimed mac and cheese hater into a believer.
- Prep Time: 20 minutes
- Cook Time: 45 minutes
- Total Time: 1 hour 5 minutes
- Yield: 8 servings 1x
- Category: Main Course
- Cuisine: American
Ingredients
- 1 medium butternut squash (about 2 pounds), peeled, seeded, and cubed into 1-inch pieces
- 1 pound elbow macaroni (or other short pasta)
- 2 cups sharp cheddar cheese, shredded (about 8 ounces)
- 1 cup Gruyère cheese, shredded (about 4 ounces)
- 2 cups whole milk
- 3 tablespoons unsalted butter, divided
- 3 tablespoons all-purpose flour
- 12–15 fresh sage leaves
- 3 cloves garlic, minced
- 1 teaspoon Dijon mustard
- 1 teaspoon salt, plus more for pasta water
- ½ teaspoon freshly ground black pepper
- ¼ teaspoon freshly grated nutmeg
- ½ cup panko breadcrumbs
- 1 tablespoon olive oil
Instructions
- Preheat oven to 400°F (200°C). Toss cubed butternut squash with 1 tablespoon olive oil, ½ teaspoon salt, and a pinch of black pepper. Spread in a single layer on a lined baking sheet. Roast for 25-30 minutes, flipping halfway, until tender and edges caramelize. Let cool slightly, then puree until smooth in a blender or food processor. Set aside.
- Bring a large pot of generously salted water to a boil. Cook macaroni according to package directions until al dente (about 1 minute less than package suggests). Drain, reserving ½ cup pasta water.
- In a medium saucepan, melt 2 tablespoons butter over medium heat. Add minced garlic and cook for 30 seconds until fragrant. Whisk in flour and cook for 1-2 minutes, stirring constantly. Slowly pour in milk while whisking continuously. Cook until thickened, about 3-4 minutes.
- Reduce heat to low. Add shredded cheddar and Gruyère cheese one handful at a time, whisking until each addition is fully melted. Stir in Dijon mustard, salt, pepper, and nutmeg. Fold in butternut squash puree until smooth. If too thick, add a splash of reserved pasta water.
- Add cooked pasta to cheese sauce and stir until coated. Pour into a greased 9×13-inch baking dish. Mix panko breadcrumbs with 1 tablespoon melted butter and sprinkle over the top.
- Bake at 375°F (190°C) for 20 minutes until bubbly. Switch to broil and cook for 2-3 minutes until top is golden brown and crispy.
- While mac and cheese bakes, melt remaining 1 tablespoon butter in a small skillet over medium heat. Add sage leaves in a single layer and cook for 30-60 seconds per side until dark green and crispy. Transfer to a paper towel-lined plate and sprinkle with a tiny pinch of salt.
- Remove mac and cheese from oven and let rest for 5 minutes. Top with crispy sage leaves and serve warm.
Notes
Shred your own cheese from a block for a smooth sauce. Don’t skip roasting the squash—it concentrates the sweetness. Make crispy sage fresh right before serving as it loses crunch within hours. For make-ahead, assemble without baking, cover, and refrigerate up to 24 hours; add 10 minutes to baking time. Leftovers keep 4 days in the fridge; reheat with a splash of milk.
Nutrition
- Serving Size: 1 serving (about 1/8
- Calories: 485
- Sugar: 8
- Sodium: 620
- Fat: 22
- Saturated Fat: 12
- Carbohydrates: 52
- Fiber: 5
- Protein: 22
Keywords: butternut squash mac and cheese, roasted squash mac and cheese, crispy sage mac and cheese, fall mac and cheese, vegetarian mac and cheese, comfort food, baked mac and cheese