My neighbor, Carol, wasn’t trying to impress anyone. I’d stopped by to return her measuring cup—the one with the faded red handle she’d lent me three weeks prior—and the smell hit me before I even got to her screen door. It wasn’t the usual scent of her house, which is typically a mix of old books and her husband’s pipe tobacco. This was different. It was warm, fruity, and smelled like the exact moment autumn arrives. I stood there on her porch for a solid ten seconds, just breathing it in, feeling like a total creep.
When she finally opened the door, she was holding a cookie sheet, barefoot, with flour smudged on her cheek. “Oh, these?” she said when I asked about the smell. “Just messing around with some leftover apple cider.” She handed me one, still warm, and let me tell you—I almost dropped it. The cookie was soft, with this deep, caramelized apple flavor that I couldn’t quite place. And the icing? It had this nutty, toasty thing going on that made me close my eyes. Honestly, I think I let out a little moan. She just laughed and said, “It’s the brown butter.” Like it was nothing. Like she hadn’t just created the most perfect fall cookie I’d ever eaten.
I pestered her for the recipe for weeks. She finally wrote it down on a napkin, and I’ve been making them ever since. Maybe you’ve been there—you taste something at someone else’s house and you know you won’t rest until you can make it yourself. That’s these cookies for me. They’re the kind of cozy you want to wrap yourself in on a cold afternoon.
Why You’ll Love This Recipe
These aren’t just another cookie. They are the cookie you’ll want to make every single time the leaves start to change. I’ve tested this recipe at least a dozen times, tweaking the flour ratio and the cider reduction time, and I can honestly say this version is perfect. Here’s why you’re going to love it:
- Quick & Easy: From start to finish, you’re looking at about 35 minutes. No complicated techniques, no stand mixer required—just a bowl and a whisk.
- Simple Ingredients: You probably have most of this in your pantry right now. The only “special” thing is apple cider, and that’s everywhere in the fall.
- Perfect for Cozy Evenings: These cookies were made for a chilly night, a mug of tea, and a blanket. They’re pure comfort.
- Crowd-Pleaser: I’ve brought these to potlucks and cookie swaps, and they disappear faster than anything else on the table.
- Unbelievably Delicious: The brown butter icing is the secret weapon here. It’s nutty, rich, and pairs with the apple cider flavor like they were meant to be together.
What makes this recipe different from all the other apple cider cookies out there? It’s the reduction. I boil down the apple cider until it’s thick and syrupy, concentrating all that apple flavor into a little golden liquid. Most recipes skip this step, and you end up with a cookie that tastes faintly of apple. Not these. These taste like you bit into a fresh, crisp apple in cookie form. I’ve also tested this with both salted and unsalted butter, and honestly, the salted butter gives the brown butter icing a little extra something that I can’t resist.
This recipe isn’t just good—it is the kind that makes you close your eyes after the first bite. It’s comfort food reimagined: faster than a pie, easier than a cake, but with the same soul-soothing satisfaction. Perfect for impressing guests without stress, or turning a simple Tuesday night into something memorable.
What Ingredients You Will Need
This recipe uses simple, wholesome ingredients to deliver bold flavor and satisfying texture without the fuss. Most of these are pantry staples, especially if you bake during the fall months.
For the Cookies
- 1 cup (2 sticks) unsalted butter, softened (I use Land O’Lakes for consistent results)
- 1 cup (200g) granulated sugar (adds sweetness and helps with spreading)
- 1/2 cup (100g) packed light brown sugar (adds moisture and a hint of molasses)
- 2 large eggs, room temperature (cold eggs will seize the butter)
- 1 teaspoon vanilla extract (pure, not imitation, for the best flavor)
- 3 cups (360g) all-purpose flour (spooned and leveled—don’t scoop from the bag!)
- 1 teaspoon baking soda
- 1/2 teaspoon baking powder
- 1 teaspoon ground cinnamon (I prefer Saigon cinnamon for its boldness)
- 1/2 teaspoon ground nutmeg (freshly grated if you have it)
- 1/2 teaspoon salt (fine sea salt works best)
- 1/2 cup (120ml) apple cider, reduced to 1/4 cup (this is the magic step—see below)
For the Brown Butter Icing
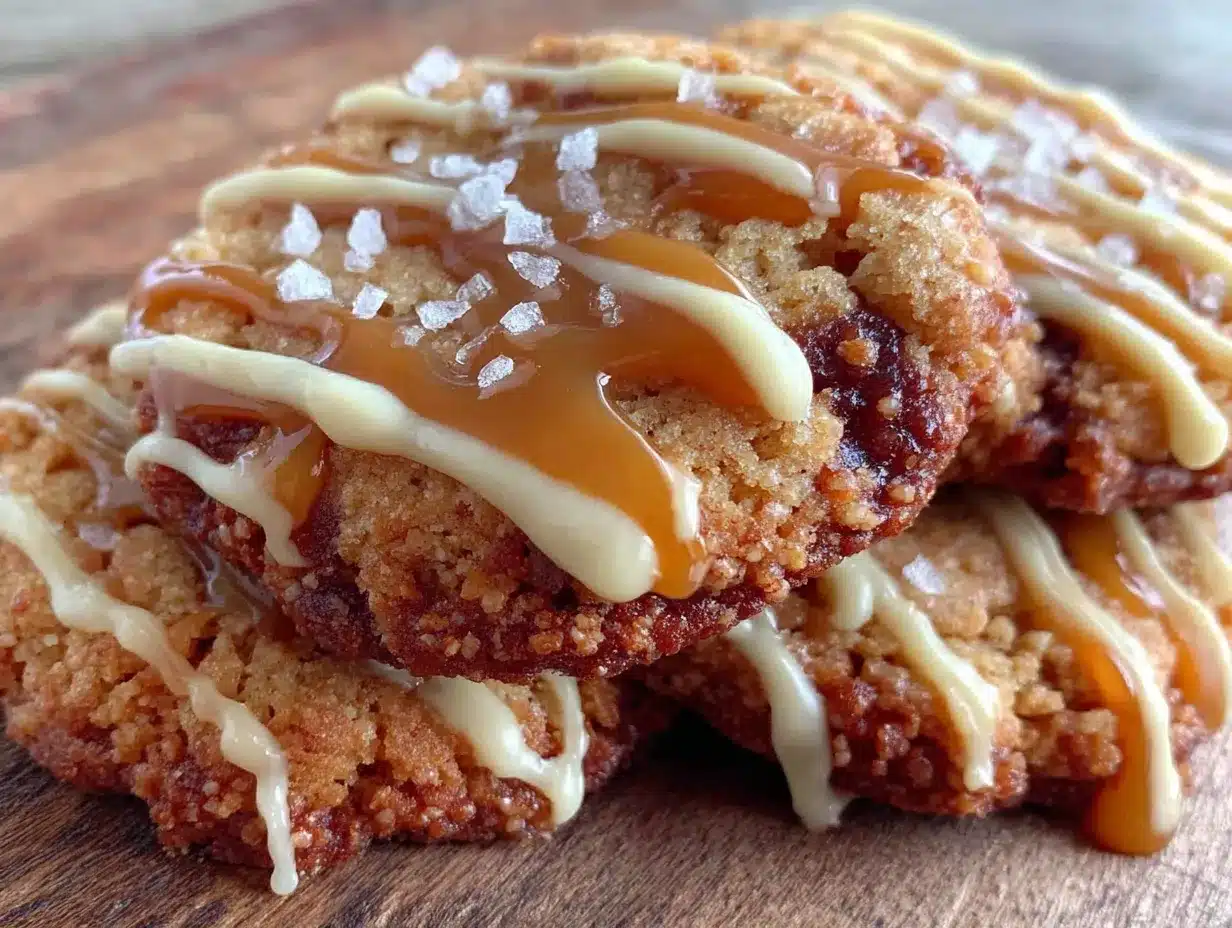
- 1/4 cup (1/2 stick) unsalted butter (you’ll brown this)
- 1 1/2 cups (180g) powdered sugar, sifted
- 2-3 tablespoons milk or heavy cream (adds richness)
- 1/2 teaspoon vanilla extract
- Pinch of salt
Ingredient Selection Tips: Look for fresh, unfiltered apple cider for the best flavor. The cloudy kind from the farmers’ market is ideal. Avoid apple juice—it’s too thin and won’t reduce properly. For the butter, I recommend a good quality brand like Kerrygold for the brown butter icing; its higher fat content browns more evenly and adds a deeper nutty flavor.
Substitution Guidance: If you’re out of apple cider, you can use apple juice, but the flavor will be milder. For a dairy-free version, use vegan butter in both the cookies and the icing (though the brown butter flavor won’t be quite the same). You can swap the all-purpose flour with a 1:1 gluten-free baking blend if needed—I’ve done it with Bob’s Red Mill and it worked great.
Equipment Needed
You don’t need a lot of fancy equipment for these cookies, which is one of the reasons I love them. Here’s what you’ll need:
- Mixing bowls: One large for the wet ingredients, one medium for the dry. I use glass bowls because they don’t hold onto smells.
- Whisk and wooden spoon: A whisk for the dry ingredients, a wooden spoon or rubber spatula for combining the dough.
- Small saucepan: For reducing the apple cider and browning the butter. A light-colored pan is best for the butter so you can see the color change.
- Baking sheets: Two large, light-colored baking sheets. Dark sheets can cause the bottoms to burn.
- Parchment paper or silicone baking mats: Silicone mats are my favorite—they prevent sticking and help the cookies bake evenly.
- Cookie scoop: A 1.5-tablespoon scoop makes perfectly uniform cookies. I’ve used a spoon in a pinch, but the scoop is worth it.
- Cooling rack: Essential for letting the cookies cool properly before icing.
Budget-Friendly Options: If you don’t have a cookie scoop, use two spoons to drop the dough. No cooling rack? Let the cookies cool on the baking sheet for 5 minutes, then transfer them to a plate. It works, just not as quickly.
Maintenance Tip: If you use a dark-colored saucepan for browning butter, watch it carefully—the dark metal makes it harder to see when the butter is done. I learned this the hard way and ended up with burnt butter that smelled like sadness.
Preparation Method
Alright, let’s get to it. This method looks long, but I promise it’s straightforward. The key is taking your time with the cider reduction and the brown butter—those two steps are where all the flavor lives.
- Reduce the apple cider. Pour the 1/2 cup of apple cider into a small saucepan. Bring it to a boil over medium-high heat, then reduce the heat to low and let it simmer. You’re looking for it to reduce down to about 1/4 cup—this takes about 10-12 minutes. It should be thick and syrupy, like maple syrup. Set it aside to cool completely. Don’t skip this step! If you add hot cider to the butter, it’ll melt it and ruin the texture.
- Preheat your oven. Set it to 350°F (175°C). Line two baking sheets with parchment paper or silicone mats.
- Mix the dry ingredients. In a medium bowl, whisk together the flour, baking soda, baking powder, cinnamon, nutmeg, and salt. Set this aside. Make sure your baking soda and powder are fresh—if they’re old, your cookies won’t spread properly.
- Cream the butter and sugars. In a large bowl, beat the softened butter with the granulated sugar and brown sugar until light and fluffy. This takes about 2-3 minutes with a hand mixer, or 4-5 minutes if you’re doing it by hand with a wooden spoon. You want it to look pale and airy. Scrape down the sides of the bowl halfway through.
- Add the eggs and vanilla. Beat in the eggs one at a time, mixing well after each addition. Then add the vanilla extract and the cooled reduced cider. Mix until just combined. The dough will look a little loose at this point—that’s okay.
- Combine wet and dry. Gradually add the flour mixture to the wet ingredients, mixing on low speed or folding with a spatula. Stop as soon as you don’t see any more streaks of flour. Overmixing will make the cookies tough. The dough should be soft and slightly sticky.
- Chill the dough. This step is optional but highly recommended. Cover the bowl and pop it in the fridge for 30 minutes. Chilling prevents the cookies from spreading too much and gives you a thicker, softer cookie. If you’re in a rush, you can skip it, but your cookies will be flatter.
- Scoop and bake. Use your cookie scoop to drop rounded tablespoons of dough onto the prepared baking sheets, spacing them about 2 inches apart. Bake for 10-12 minutes, or until the edges are set and lightly golden. The centers will look slightly underdone—that’s what you want. They’ll continue to set on the baking sheet.
- Cool the cookies. Let them rest on the baking sheet for 5 minutes, then transfer them to a cooling rack to cool completely. Don’t ice them while they’re warm or the icing will melt into a puddle.
- Make the brown butter icing. While the cookies are cooling, melt the 1/4 cup of butter in a small saucepan over medium heat. Swirl the pan occasionally. The butter will foam, then the foam will subside, and you’ll see little brown specks forming at the bottom. This takes about 5-7 minutes. The moment it smells nutty and turns a golden-brown color, remove it from the heat. Watch it like a hawk—it goes from perfect to burnt in seconds. Pour the browned butter into a heatproof bowl, making sure to scrape all those brown bits in.
- Finish the icing. Let the browned butter cool for 5 minutes. Then whisk in the sifted powdered sugar, vanilla, and a pinch of salt. Add the milk or cream one tablespoon at a time until the icing is thick but pourable. It should be like a thick glaze that slowly drips off the whisk.
- Ice the cookies. Drizzle the icing over the cooled cookies using a spoon or a piping bag with the tip snipped off. Let the icing set for about 20 minutes before serving. If you’re impatient like me, you can eat them right away—just expect sticky fingers.
Cooking Tips & Techniques
I’ve made these cookies probably twenty times now, and I’ve learned a few things the hard way. Here are my best tips to make sure yours turn out perfect.
Don’t rush the cider reduction. The first time I made these, I tried to speed up the reduction by cranking the heat. Bad idea. The cider burned and tasted bitter. Low and slow is the way to go. Keep an eye on it, and when it starts looking thick and syrupy, take it off the heat. It will thicken a little more as it cools.
Brown butter is a game-changer, but it’s tricky. I’ve burnt brown butter more times than I care to admit. The trick is to use a light-colored pan so you can actually see the color change. Once the butter stops foaming and you see those little brown specks, it’s done. Immediately pour it into a different bowl to stop the cooking process. If you leave it in the hot pan, it’ll keep browning and could burn.
Chill the dough if you have time. I know I said it’s optional, but honestly, it makes a huge difference. Chilled dough spreads less, which means thicker, softer cookies. Plus, the flavors have time to meld together. I’ve even left the dough in the fridge overnight, and the cookies were incredible the next day.
Watch your baking time. Every oven is different. My old oven would burn these at 11 minutes, but my current one takes a full 12. Start checking at 10 minutes. The edges should be set and lightly golden, but the centers should still look soft and a little underdone. They’ll continue to bake on the hot baking sheet after you pull them out.
Use a cookie scoop for even sizes. This isn’t just about aesthetics—evenly sized cookies bake evenly. If you use a spoon, your cookies will vary in size, and some will be overdone while others are underdone. A 1.5-tablespoon scoop is my go-to.
Variations & Adaptations
One of the best things about this recipe is how versatile it is. I’ve played around with it quite a bit, and here are some of my favorite variations.
Maple Apple Cider Cookies: Replace the brown sugar with maple sugar, and add 1 tablespoon of maple syrup to the icing. The maple flavor pairs beautifully with the apple cider and brown butter. I made these for a friend’s fall brunch, and they were gone in ten minutes.
Gluten-Free Version: I swapped the all-purpose flour with a 1:1 gluten-free baking blend (I like Bob’s Red Mill). The texture was slightly more crumbly, but the flavor was just as good. Make sure your blend contains xanthan gum for structure. Chill the dough for at least 30 minutes to prevent spreading.
Vegan Adaptation: Use vegan butter in both the cookies and the icing. For the eggs, I used two flax eggs (2 tablespoons ground flaxseed mixed with 6 tablespoons water, left to sit for 5 minutes). The cookies were a little less tender, but still delicious. The brown butter flavor won’t be as pronounced with vegan butter, so consider adding a teaspoon of maple syrup to mimic that depth.
Spiced Chai Variation: Add 1 teaspoon of chai spice blend (cardamom, ginger, cloves, and black pepper) to the dry ingredients. The warm spices complement the apple cider beautifully. I made these for a Christmas cookie exchange, and they were a hit.
Add-Ins: Fold in 1/2 cup of chopped toasted pecans or walnuts after mixing the dough. The crunch adds a nice contrast to the soft cookie. You can also add 1/2 cup of dried cranberries for a tart pop of flavor.
Serving & Storage Suggestions
These cookies are best served at room temperature, with the icing fully set. I like to arrange them on a pretty plate with a few cinnamon sticks and apple slices for a cozy fall presentation. They’re perfect with a hot cup of spiced tea, a mug of apple cider, or a strong cup of coffee. For a dessert spread, pair them with a scoop of vanilla ice cream or a dollop of whipped cream.
Storage Instructions: Store the cookies in an airtight container at room temperature for up to 5 days. Layer them between sheets of parchment paper to prevent the icing from sticking. If your kitchen is warm, you can store them in the fridge, but let them come to room temperature before serving for the best texture.
Freezing Instructions: You can freeze the baked cookies (without the icing) for up to 3 months. Wrap them tightly in plastic wrap and place them in a freezer-safe bag. When you’re ready to serve, thaw them at room temperature, then make the icing fresh. I’ve also frozen the unbaked dough—scoop it into balls, freeze them on a baking sheet, then transfer to a freezer bag. Bake from frozen, adding 2-3 minutes to the baking time.
Reheating Tips: If you want that just-baked warmth, pop a cookie in the microwave for 10 seconds. For a larger batch, warm them in a 300°F oven for 5 minutes. The flavors actually develop and deepen after a day or two, so don’t be afraid to make them ahead.
Nutritional Information & Benefits
These cookies are a treat, no question, but they’re made with real ingredients that offer some surprising benefits. Here’s a rough estimate per cookie (based on 24 cookies):
- Calories: ~180
- Fat: 9g
- Carbohydrates: 24g
- Sugar: 15g
- Protein: 2g
Health Benefits of Key Ingredients: Apple cider contains antioxidants called polyphenols, which may help reduce inflammation. Cinnamon is known for its blood sugar-regulating properties, and nutmeg has been used in traditional medicine for its calming effects. The brown butter, while indulgent, provides a small amount of vitamin A and healthy fats.
Dietary Considerations: These cookies are not gluten-free or vegan in their standard form, but I’ve included adaptations above. They do contain dairy and eggs, so they’re not suitable for those with allergies to those ingredients. If you’re watching your sugar intake, you can reduce the granulated sugar by 1/4 cup, though the texture will be slightly less tender.
Personal Wellness Perspective: I believe in balance. These cookies are a celebration of fall flavors, and I don’t think there’s anything wrong with enjoying a couple with your afternoon tea. Life is too short to skip the brown butter icing.
Conclusion
These cozy apple cider cookies with brown butter icing are more than just a recipe—they’re a feeling. They’re the warmth of a kitchen on a crisp autumn day, the smell that makes you stop and smile, and the taste of a season you wish would last forever. I’ve made them for friends, family, and even my mailman (he loved them), and they never fail to bring a little joy to whoever tries them.
I hope you’ll give them a try. Don’t be afraid to make them your own—add some nuts, swap the spices, or double the icing (I won’t judge). The beauty of this recipe is that it’s forgiving and adaptable, just like the best comfort food should be. If you make them, I’d love to hear how they turned out. Drop a comment below or tag me in your photos—I’m always excited to see your creations.
Until next time, happy baking, and may your kitchen always smell like autumn.
Frequently Asked Questions
Can I use apple juice instead of apple cider?
You can, but the flavor will be much milder. Apple juice is thinner and less concentrated, so your cookies won’t have that deep, authentic apple taste. If you’re in a pinch, reduce the juice to 1/4 cup just like you would with cider, and add an extra 1/4 teaspoon of cinnamon to boost the flavor.
Why did my cookies spread too much?
This usually happens for one of three reasons: your butter was too soft, you didn’t chill the dough, or your baking soda is old. Make sure your butter is softened but not melted, and chill the dough for at least 30 minutes. If your baking soda is more than six months old, it may have lost its potency.
Can I make the dough ahead of time?
Absolutely. You can refrigerate the dough for up to 3 days, or freeze it for up to 3 months. If freezing, scoop the dough into balls first, freeze them on a baking sheet, then transfer to a freezer bag. Bake from frozen, adding 2-3 minutes to the baking time.
How do I know when the brown butter is done?
Watch for the butter to stop foaming and for little brown specks to appear at the bottom of the pan. It will smell nutty and fragrant. The whole process takes about 5-7 minutes. Immediately pour it into a separate bowl to stop it from burning.
Can I skip the icing?
You can, but the cookies will be much less special. The brown butter icing is what takes these from a good cookie to a great one. If you really want to skip it, try dusting the cookies with powdered sugar or a cinnamon-sugar mixture while they’re still warm.
Pin This Recipe!
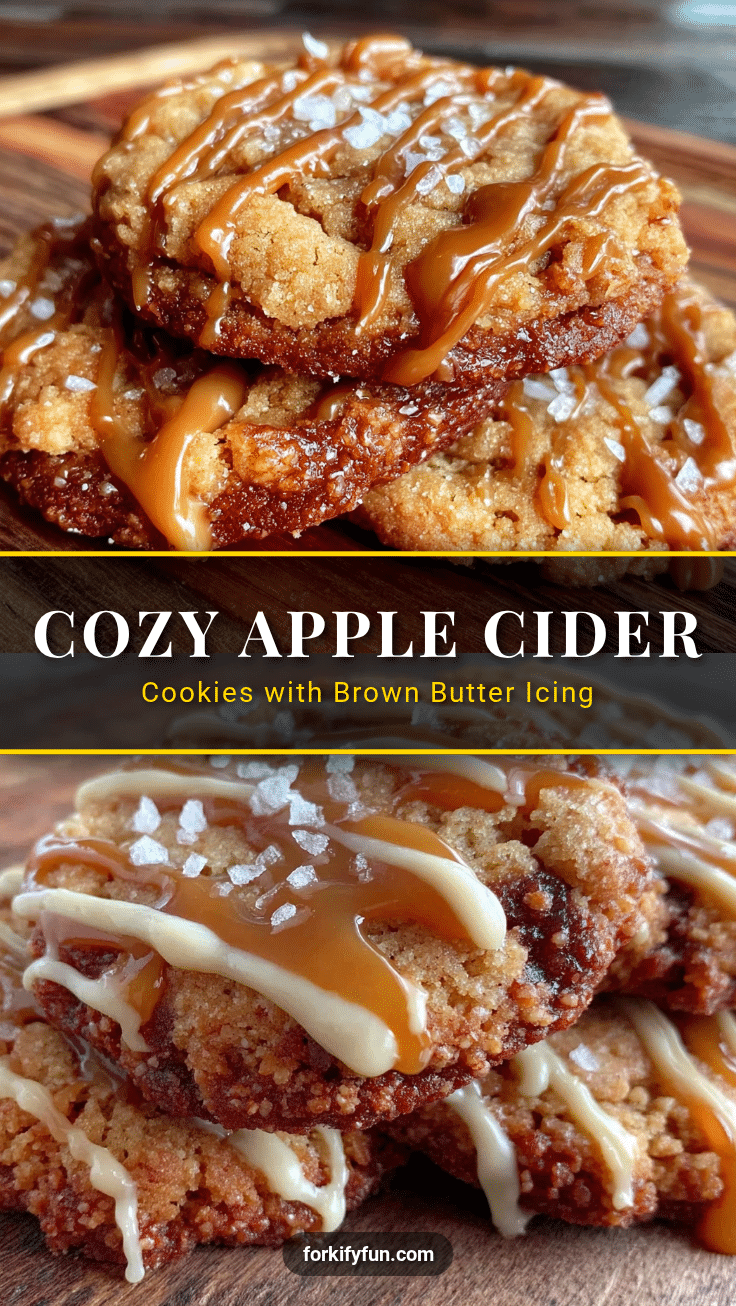
Cozy Apple Cider Cookies with Brown Butter Icing
Soft, chewy cookies infused with concentrated apple cider flavor and topped with a nutty brown butter icing. Perfect for cozy fall evenings, these cookies are quick to make and always a crowd-pleaser.
- Prep Time: 15 minutes
- Cook Time: 12 minutes
- Total Time: 35 minutes
- Yield: 24 cookies 1x
- Category: Dessert
- Cuisine: American
Ingredients
- 1 cup (2 sticks) unsalted butter, softened
- 1 cup (200g) granulated sugar
- 1/2 cup (100g) packed light brown sugar
- 2 large eggs, room temperature
- 1 teaspoon vanilla extract
- 3 cups (360g) all-purpose flour
- 1 teaspoon baking soda
- 1/2 teaspoon baking powder
- 1 teaspoon ground cinnamon
- 1/2 teaspoon ground nutmeg
- 1/2 teaspoon salt
- 1/2 cup (120ml) apple cider, reduced to 1/4 cup
- 1/4 cup (1/2 stick) unsalted butter (for icing)
- 1 1/2 cups (180g) powdered sugar, sifted
- 2–3 tablespoons milk or heavy cream
- 1/2 teaspoon vanilla extract
- Pinch of salt
Instructions
- Reduce the apple cider: Pour 1/2 cup apple cider into a small saucepan. Bring to a boil over medium-high heat, then reduce heat to low and simmer until reduced to about 1/4 cup (10-12 minutes). It should be thick and syrupy. Set aside to cool completely.
- Preheat oven to 350°F (175°C). Line two baking sheets with parchment paper or silicone mats.
- Mix dry ingredients: In a medium bowl, whisk together flour, baking soda, baking powder, cinnamon, nutmeg, and salt. Set aside.
- Cream butter and sugars: In a large bowl, beat softened butter with granulated sugar and brown sugar until light and fluffy (2-3 minutes with hand mixer, 4-5 minutes by hand). Scrape down sides halfway through.
- Add eggs and vanilla: Beat in eggs one at a time, mixing well after each. Add vanilla extract and cooled reduced cider. Mix until just combined.
- Combine wet and dry: Gradually add flour mixture to wet ingredients, mixing on low or folding with a spatula until no streaks of flour remain. Do not overmix. Dough should be soft and slightly sticky.
- Chill dough (optional but recommended): Cover bowl and refrigerate for 30 minutes for thicker, softer cookies.
- Scoop and bake: Use a 1.5-tablespoon cookie scoop to drop rounded tablespoons of dough onto prepared baking sheets, spacing 2 inches apart. Bake for 10-12 minutes, until edges are set and lightly golden but centers still look slightly underdone.
- Cool cookies: Let rest on baking sheet for 5 minutes, then transfer to a cooling rack to cool completely. Do not ice while warm.
- Make brown butter icing: In a small saucepan, melt 1/4 cup butter over medium heat. Swirl occasionally. Butter will foam, then foam subsides and brown specks appear (5-7 minutes). When it smells nutty and turns golden-brown, remove from heat immediately. Pour into a heatproof bowl, scraping all brown bits.
- Finish icing: Let browned butter cool for 5 minutes. Whisk in sifted powdered sugar, vanilla, and pinch of salt. Add milk or cream one tablespoon at a time until thick but pourable (like a thick glaze).
- Ice cookies: Drizzle icing over cooled cookies using a spoon or piping bag. Let set for about 20 minutes before serving.
Notes
Don’t skip reducing the apple cider—it concentrates the flavor. Watch the brown butter carefully; it burns quickly. Chilling the dough is optional but yields thicker cookies. For best results, use fresh, unfiltered apple cider and high-quality butter like Kerrygold for the icing.
Nutrition
- Serving Size: 1 cookie
- Calories: 180
- Sugar: 15
- Sodium: 120
- Fat: 9
- Saturated Fat: 5
- Carbohydrates: 24
- Fiber: 0.5
- Protein: 2
Keywords: apple cider cookies, brown butter icing, fall cookies, easy cookie recipe, apple cookies