I wasn’t expecting cooking advice from the quietest person in the neighborhood, but there I was, standing in the middle of a community garden plot on a crisp Saturday morning, listening to Mrs. Gable—a woman I’d only ever seen watering her petunias from behind a fence—describe exactly how to make cinnamon sugar pumpkin seeds. She had this way of talking about food like she was sharing a secret, her voice low and a little bit raspy, like she’d spent too many years tasting things straight from the pan. “You can’t just boil ’em and bake ’em,” she said, wiping a smudge of dirt off her cheek. “You have to coax the flavor out.” I had a bag of pumpkin seeds from a carving party the night before, and honestly, I was just planning to roast them with salt and call it a day. But there was something about the way she said “coax” that made me stop and listen.
She told me about her grandmother, who apparently never wasted a single part of a pumpkin. Not the flesh, not the stringy insides, and definitely not the seeds. Mrs. Gable’s grandmother would spread the seeds out on an old cookie sheet, sprinkle them with cinnamon and sugar, and roast them low and slow until the whole house smelled like a fall festival. I mean, I’d had roasted pumpkin seeds before—the kind that are so hard you’re not sure if you’re eating a seed or a pebble. But she promised me these were different. Crunchy, but not jaw-breaking. Sweet, but not cloying. The kind of snack you keep reaching for until the bowl is empty and you’re licking the cinnamon off your fingers.
I went home, carved up another pumpkin (okay, I bought one from the store because I’d already thrown the first one out), and gave her method a try. The first batch was a little too burnt—I got distracted by a phone call—but the second batch? Let me tell you, it was like biting into autumn itself. Maybe you’ve been there, standing over a baking sheet, watching the sugar caramelize, and thinking, “Why didn’t I try this sooner?” That’s exactly how I felt. And now, every time I make these, I think of Mrs. Gable and her grandmother, and that funny morning in the garden. This recipe stayed with me because it turned a throwaway ingredient into something worth savoring—and honestly, isn’t that the best kind of cooking?
Why You’ll Love This Recipe
Let’s be real for a second: not all pumpkin seeds are created equal. Some are bland, some are tough, and some just taste like cardboard with salt. But these cinnamon sugar pumpkin seeds? They’re a whole different story. I’ve tested this recipe about six times now (my family is tired of pumpkin seeds, but they keep eating them anyway), and I can say with confidence that this is the version you’ll come back to year after year.
- Quick & Easy: From start to finish, you’re looking at about 35 minutes. Most of that is hands-off oven time, so you can tidy up the kitchen or pour yourself a cup of tea while they roast.
- Simple Ingredients: You probably have everything in your pantry right now. Cinnamon, sugar, butter, salt—that’s it. No trips to a specialty store required.
- Perfect for Fall Gatherings: Whether it’s a Halloween party, a Thanksgiving snack table, or just a quiet Tuesday night with a good book, these seeds fit right in.
- Crowd-Pleaser: I’ve served these to kids, adults, and even a picky uncle who swears he doesn’t like pumpkin seeds. They disappeared in minutes.
- Unbelievably Delicious: The combination of crunchy texture, warm cinnamon, and just the right amount of sweetness is pure comfort food. It’s the kind of snack that makes you close your eyes after the first bite.
What makes this recipe different from the rest? It’s the technique. Most recipes tell you to boil the seeds first, then toss them in oil and bake. But here’s the thing—boiling helps clean them, but it also adds moisture that can make them chewy instead of crunchy. Mrs. Gable’s method skips the boiling and goes straight for a butter bath, which gives them a richer flavor and a more consistent crunch. Plus, the cinnamon sugar mixture sticks better to the butter-coated seeds, so every single one is packed with flavor. This isn’t just another version of roasted pumpkin seeds—it’s the best version.
What Ingredients You Will Need
This recipe uses simple, wholesome ingredients to deliver bold flavor and satisfying texture without the fuss. Most of these are pantry staples, especially if you’ve already carved a pumpkin or two this season. Here’s what you’ll need:
- Fresh pumpkin seeds – 1 cup (about 120 grams) – These should be raw, straight from the pumpkin. Rinse them well to remove the stringy pulp, but don’t worry about getting every last bit—a little pulp adds flavor. If you’re using store-bought raw seeds, that works too, but fresh ones have a better texture.
- Unsalted butter – 2 tablespoons (28 grams), melted – I recommend using a good-quality butter like Kerrygold for the richest flavor. Salted butter will work, but you’ll want to reduce the added salt later. The butter is what helps the cinnamon sugar stick and gives the seeds that irresistible golden-brown color.
- Granulated sugar – 2 tablespoons (25 grams) – Regular white sugar works perfectly here. It caramelizes slightly in the oven, creating a delicate crunch. You can use coconut sugar for a less refined option, but the color will be darker and the flavor a bit more molasses-like.
- Ground cinnamon – 1 teaspoon (about 2.5 grams) – This is the star of the show. I prefer Saigon cinnamon for its warm, slightly spicy kick, but any cinnamon will do. Fresh cinnamon is best—if yours has been sitting in the cabinet for more than a year, consider replacing it.
- Salt – ½ teaspoon (about 3 grams) – A flaky sea salt like Maldon is ideal for finishing, but regular table salt works fine for mixing into the coating. The salt balances the sweetness and makes the cinnamon flavor pop.
- Optional: Vanilla extract – ½ teaspoon – This isn’t in the original recipe, but I’ve added it a few times and love the subtle warmth it brings. It’s completely optional, so don’t stress if you skip it.
- Optional: Pinch of nutmeg or cardamom – For a more complex spice blend, add a tiny pinch along with the cinnamon. Just be careful—these spices are strong and can overpower the seeds if you use too much.
Substitution guidance: If you’re dairy-free, you can swap the butter for coconut oil or a plant-based butter. The flavor will be slightly different, but still delicious. For a lower-sugar version, use a sugar substitute like monk fruit sweetener—just note that it won’t caramelize the same way, so the texture will be a bit less crunchy.
Equipment Needed
You don’t need fancy tools for this recipe, which is one of the reasons I love it. Here’s what you’ll need:
- Baking sheet – A standard half-sheet pan works great. If you have a dark non-stick pan, keep an eye on the seeds—they can brown faster. I’ve used both, and honestly, my favorite is a simple aluminum sheet pan because it heats evenly.
- Parchment paper or silicone baking mat – This makes cleanup a breeze. The sugar can stick to the pan if you don’t line it, and nobody wants to scrub caramelized sugar off a baking sheet. Trust me on this one.
- Mixing bowl – Any medium-sized bowl will do. I use a glass mixing bowl because I can see if the butter is evenly coating the seeds.
- Spatula or wooden spoon – For tossing the seeds with the butter and sugar mixture. A rubber spatula is nice because it scrapes the bowl clean.
- Measuring spoons – For accuracy. I’ve eyeballed the cinnamon before and ended up with seeds that were more “dusty” than “cozy.”
- Colander – For rinsing the seeds. A fine-mesh strainer works even better because the seeds won’t fall through.
If you don’t have a silicone baking mat, don’t worry—parchment paper is cheap and works just as well. And if you’re using a dark pan, just reduce the oven temperature by 25 degrees to prevent burning. I learned that the hard way with my first batch.
Preparation Method
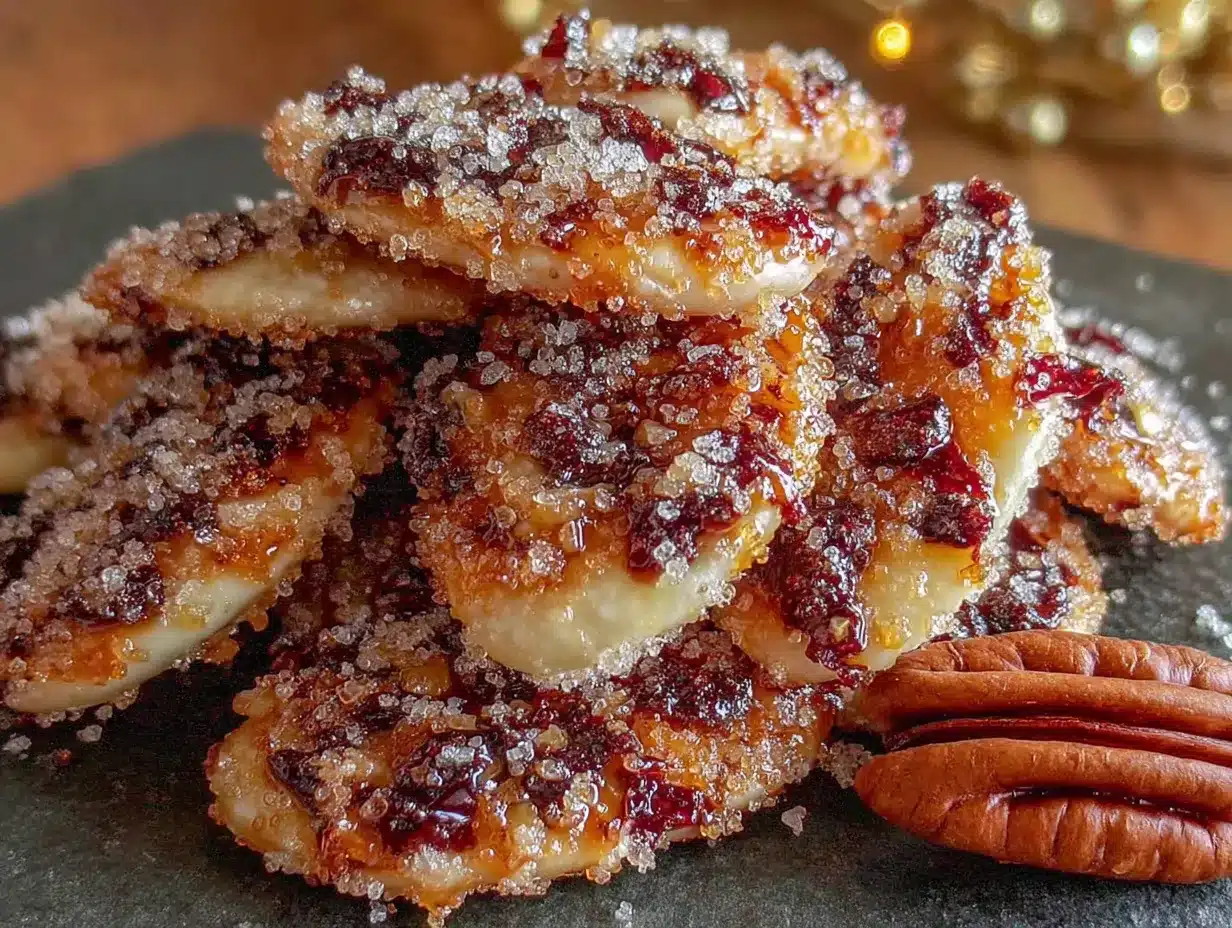
Alright, let’s get to the fun part. Here’s how to make these cozy cinnamon sugar pumpkin seeds step by step. I’ve included all the little details that make a difference—because honestly, the devil is in the details with a recipe this simple.
- Preheat your oven to 300°F (150°C). Yes, 300°F. Not 350°F, not 400°F. Low and slow is the secret to getting that even crunch without burning the sugar. While the oven heats, line your baking sheet with parchment paper or a silicone mat.
- Clean the pumpkin seeds. Place the seeds in a colander and rinse them under cool running water. Use your fingers to rub off any stringy pumpkin pulp. Don’t stress about getting every last bit—a little pulp adds flavor. Pat the seeds dry with a clean kitchen towel or paper towels. They don’t need to be bone-dry, but you want to remove excess moisture. I usually let them sit on the towel for about 5 minutes while I prep the other ingredients.
- Melt the butter. In a small microwave-safe bowl, melt the 2 tablespoons of butter. I do this in 15-second bursts to avoid splattering. Alternatively, melt it in a small saucepan over low heat. Let it cool for a minute—you don’t want it so hot that it cooks the seeds on contact.
- Mix the coating. In a medium mixing bowl, combine the granulated sugar, ground cinnamon, and salt. Stir them together with a fork to break up any clumps. If you’re using vanilla extract, add it to the melted butter now.
- Coat the seeds. Add the cleaned pumpkin seeds to the bowl with the dry ingredients. Pour the melted butter over the top. Use a spatula or wooden spoon to toss everything together until every seed is coated. The mixture will look a little clumpy—that’s perfect. The clumps will break apart as they roast.
- Spread on the baking sheet. Pour the coated seeds onto the prepared baking sheet. Spread them into a single, even layer. Try not to pile them on top of each other, or they’ll steam instead of roast. If you see any big clumps, break them apart with your fingers.
- Roast for 25-30 minutes. Place the baking sheet on the middle rack of the oven. Set a timer for 15 minutes, then take the sheet out and give the seeds a good stir with a spatula. This ensures even browning. Return to the oven and roast for another 10-15 minutes. The seeds are done when they’re golden brown and fragrant. They’ll continue to crisp up as they cool, so don’t overbake them. My first batch came out a little dark because I thought they needed more time—they didn’t.
- Cool completely. Remove the baking sheet from the oven and let the seeds cool right on the pan. This takes about 15-20 minutes. Don’t try to rush this step by putting them in the fridge—the condensation will make them soggy. As they cool, you’ll hear a faint crackling sound. That’s the sound of success.
Sensory cue: When the seeds are done, your kitchen should smell like a cinnamon bun bakery. The seeds will look glossy from the butter, with little crystallized patches of sugar. If you taste one while it’s still warm, it will be slightly soft in the center—that’s normal. The crunch comes after cooling.
Cooking Tips & Techniques
I’ve made this recipe more times than I care to count, and I’ve learned a few things along the way. Here are my best tips for getting perfect results every time:
Don’t skip the stirring. Halfway through roasting, the sugar can pool in certain spots and burn. A quick stir redistributes everything and ensures even browning. I once forgot to stir, and the seeds on the edges were almost black while the ones in the middle were still pale. Lesson learned.
Watch the oven like a hawk. Every oven runs a little differently. My friend’s oven runs hot, so her seeds are done at 22 minutes. Mine takes the full 30. Start checking at the 20-minute mark—look for a deep golden color and listen for that faint crackling sound. If you smell burnt sugar, pull them out immediately.
Let them cool completely before storing. I know it’s tempting to dig in while they’re warm, but the texture won’t be right. Warm seeds are soft and chewy. Give them 20 minutes on the pan, and they’ll transform into crispy, crunchy perfection. I’ve made the mistake of packing them up while still warm, and they turned into a sticky mess the next day.
Double the batch if you can. These seeds disappear fast. I usually make two cups at a time—one for snacking and one for sharing. Just make sure to use a larger baking sheet or split them between two pans. Overcrowding leads to steaming, and steaming leads to sad, chewy seeds.
Use room-temperature butter if you have time. Melted butter is fine, but if you soften the butter instead and cream it with the sugar, the coating gets even more even. It’s an extra step, but the texture is slightly more luxurious. I do this when I’m feeling fancy.
Variations & Adaptations
One of the best things about this recipe is how easy it is to tweak. Here are some variations I’ve tried and loved:
- Spicy-Sweet Version: Add ¼ teaspoon of cayenne pepper or chili powder to the cinnamon sugar mixture. The heat sneaks up on you and pairs beautifully with the sweetness. I made this for a football party, and it was the first thing to disappear.
- Maple Cinnamon Seeds: Replace the granulated sugar with 2 tablespoons of maple syrup. Reduce the butter to 1 tablespoon since the syrup adds moisture. The flavor is deeper and more autumnal—perfect for Thanksgiving.
- Pumpkin Spice Seeds: Swap the cinnamon for 1 teaspoon of pumpkin pie spice. This gives you all the warm notes of a pumpkin latte in seed form. I’ve even added a pinch of ginger for extra zing.
- Vegan Option: Use coconut oil instead of butter and a plant-based sugar. The coconut oil adds a subtle tropical note that actually works really well with the cinnamon. I was skeptical at first, but now I make this version half the time.
- Gluten-Free Note: This recipe is naturally gluten-free, so no adaptations needed. Just double-check that your cinnamon and vanilla extract are certified gluten-free if that’s a concern.
I once tried a chocolate-cinnamon version by adding a tablespoon of cocoa powder to the sugar mixture. It was… interesting. Not bad, but not my favorite. If you’re a chocolate lover, give it a shot—you might love it more than I did.
Serving & Storage Suggestions
These cinnamon sugar pumpkin seeds are incredibly versatile when it comes to serving. Here’s how I like to enjoy them:
Serving temperature: Room temperature is best. The crunch is at its peak, and the flavors are fully developed. I’ve served them warm right out of the oven, and they’re good, but they’re better after that 20-minute cool-down.
Presentation ideas: I love piling them into a small wooden bowl or a rustic ceramic dish. They look beautiful on a fall-themed snack board alongside apple slices, sharp cheddar cheese, and maybe some dried cranberries. For a party, I put them in little paper cones for a grab-and-go snack.
Complementary dishes: These seeds pair wonderfully with a warm cup of apple cider or a chai latte. They’re also fantastic sprinkled over a bowl of vanilla ice cream or stirred into yogurt for extra crunch. I’ve even crushed them up and used them as a topping for pumpkin pie—highly recommended.
Storage instructions: Store the cooled seeds in an airtight container at room temperature. They’ll stay fresh for up to 2 weeks, though they rarely last that long in my house. Do not refrigerate them—the moisture will make them soft. If you live in a humid climate, add a silica gel packet to the container to absorb excess moisture.
Reheating tips: If your seeds lose their crunch after a few days, spread them on a baking sheet and pop them in a 300°F (150°C) oven for 5 minutes. Let them cool completely before storing again. This restores their crispiness beautifully.
Flavor development: Interestingly, the cinnamon flavor deepens after a day or two. I actually prefer the seeds on day two—the spices have settled, and the sweetness is more balanced. Just make sure they’re stored properly.
Nutritional Information & Benefits
Let’s talk about what’s actually in these little crunchy wonders. Here’s the estimated nutritional breakdown for a ¼-cup serving (about 30 grams):
Calories: Approximately 180
Fat: 12 grams (mostly from the seeds and butter)
Carbohydrates: 14 grams
Fiber: 2 grams
Protein: 5 grams
Sugar: 8 grams
Pumpkin seeds are a nutritional powerhouse. They’re packed with magnesium, zinc, and healthy fats that support heart health and immune function. The cinnamon adds antioxidants and may help regulate blood sugar levels. And honestly, the butter and sugar are minimal enough that you’re still getting a snack that feels indulgent without being over the top.
Dietary considerations: This recipe is naturally gluten-free and vegetarian. For a vegan version, use coconut oil. For a lower-sugar option, reduce the sugar to 1 tablespoon or use a sugar substitute. The seeds are also a good source of plant-based protein, making them a satisfying snack that won’t leave you reaching for more in 20 minutes.
Potential allergens: Pumpkin seeds are tree nut-free, but if you have a seed allergy, obviously skip this one. The butter contains dairy, so use a plant-based alternative if needed.
From a wellness perspective, I love that this recipe turns a seasonal byproduct into a nutrient-dense snack. It’s proof that you don’t need complicated ingredients to eat well—sometimes the best things come from what you’d otherwise throw away.
Conclusion
So there you have it—cozy cinnamon sugar pumpkin seeds that are crunchy, sweet, and everything you want in a fall snack. This recipe is worth trying because it takes something ordinary (pumpkin seeds, which most people either throw out or roast into sad little pebbles) and turns it into something truly special. It’s the kind of recipe that makes you feel like a kitchen wizard, even though it only takes about 35 minutes and a handful of ingredients.
I love this recipe because it reminds me of that morning in the garden with Mrs. Gable, and how the best cooking advice often comes from the most unexpected places. It’s also incredibly forgiving—you can tweak the spices, swap the butter, or double the batch without any drama. I hope you’ll make it your own. Maybe add a pinch of nutmeg, or try it with maple syrup, or serve it alongside a steaming mug of cider and call it a perfect fall evening.
If you give these a try, I’d love to hear about it. Drop a comment below and let me know how they turned out, or share your own twist on the recipe. Did you add something unexpected? Did your family devour them in record time? I want to know. And hey, if you have a story about where you got a recipe from—something unexpected, like a neighbor or a stranger at a farmer’s market—share that too. Those are the best kind of recipes, after all.
Happy roasting, and here’s to finding magic in the most unlikely places.
Frequently Asked Questions
Can I use store-bought raw pumpkin seeds instead of fresh ones?
Absolutely. Store-bought raw pumpkin seeds (often called pepitas) work perfectly. They’re already cleaned and dried, so you can skip the rinsing step. Just toss them directly with the butter and cinnamon sugar mixture. The roasting time may be slightly shorter since they have less moisture, so start checking at 20 minutes.
Why did my seeds turn out chewy instead of crunchy?
Chewy seeds usually mean one of two things: they weren’t roasted long enough, or they were stored before cooling completely. Make sure you roast until they’re golden brown and fragrant, and let them cool completely on the baking sheet before transferring to a container. If they’re still chewy after cooling, pop them back in a 300°F oven for 5 more minutes.
Can I make these in an air fryer?
Yes! Air fryers work great for this recipe. Set the temperature to 300°F (150°C) and cook for 12-15 minutes, shaking the basket halfway through. Keep an eye on them because air fryers can brown things faster than ovens. The texture will be even crunchier thanks to the circulating hot air.
How do I prevent the sugar from burning?
The key is low heat and stirring. Roast at 300°F instead of higher temperatures, and stir the seeds at the 15-minute mark. If your oven runs hot, reduce the temperature by 25 degrees. Also, make sure the seeds are in a single layer—piling them up can cause uneven cooking and burnt spots.
Can I use brown sugar instead of white sugar?
Definitely. Brown sugar will give the seeds a deeper, almost caramel-like flavor and a slightly softer texture because of the molasses content. Use the same amount (2 tablespoons), and expect the seeds to be a bit darker in color. I’ve made this swap many times and love the result—it’s like a grown-up version of the original.
Pin This Recipe!
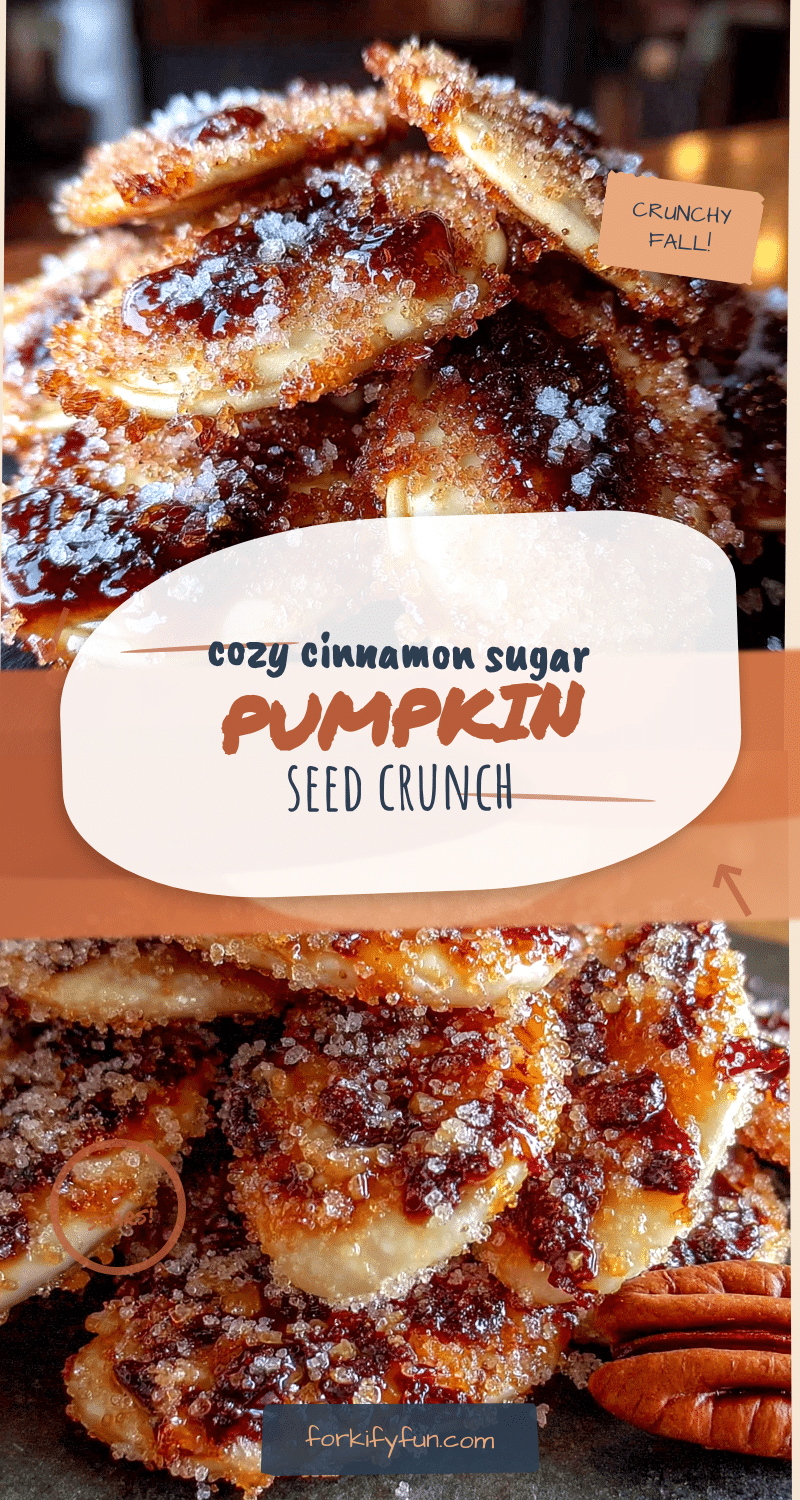
Best Easy Cinnamon Sugar Pumpkin Seeds Recipe for Fall

Crunchy, sweet, and perfectly spiced, these cinnamon sugar pumpkin seeds are the ultimate fall snack. Made with simple pantry ingredients and a low-and-slow roasting method, they turn a seasonal byproduct into something truly special.
- Prep Time: 10 minutes
- Cook Time: 25-30 minutes
- Total Time: 35-40 minutes
- Yield: 4 servings 1x
- Category: Snack
- Cuisine: American
Ingredients
- 1 cup (120 g) fresh pumpkin seeds, raw
- 2 tablespoons (28 g) unsalted butter, melted
- 2 tablespoons (25 g) granulated sugar
- 1 teaspoon (2.5 g) ground cinnamon
- ½ teaspoon (3 g) salt
- ½ teaspoon vanilla extract (optional)
- Pinch of nutmeg or cardamom (optional)
Instructions
- Preheat your oven to 300°F (150°C). Line a baking sheet with parchment paper or a silicone baking mat.
- Clean the pumpkin seeds: Place seeds in a colander and rinse under cool water, rubbing off any stringy pulp. Pat dry with a towel and let sit for about 5 minutes.
- Melt the butter in a small microwave-safe bowl or saucepan. Let cool for a minute.
- In a medium mixing bowl, combine the granulated sugar, ground cinnamon, and salt. Stir with a fork to break up clumps. If using vanilla extract, add it to the melted butter now.
- Add the cleaned pumpkin seeds to the bowl with the dry ingredients. Pour the melted butter over the top and toss with a spatula or wooden spoon until every seed is coated. The mixture will look clumpy.
- Spread the coated seeds in a single, even layer on the prepared baking sheet. Break apart any large clumps with your fingers.
- Roast for 25-30 minutes, stirring at the 15-minute mark. Seeds are done when golden brown and fragrant. They will continue to crisp as they cool.
- Remove from the oven and let cool completely on the baking sheet, about 15-20 minutes. Do not refrigerate to speed cooling.
Notes
For best crunch, let seeds cool completely before storing. Store in an airtight container at room temperature for up to 2 weeks. To restore crispiness, reheat in a 300°F oven for 5 minutes and cool again. For a vegan version, substitute coconut oil for butter.
Nutrition
- Serving Size: ¼ cup (about 30 g)
- Calories: 180
- Sugar: 8
- Sodium: 150
- Fat: 12
- Saturated Fat: 4
- Carbohydrates: 14
- Fiber: 2
- Protein: 5
Keywords: cinnamon sugar pumpkin seeds, roasted pumpkin seeds, fall snack, easy pumpkin seeds recipe, sweet pumpkin seeds


