It was 11:47 PM on a random Wednesday in late September, and I was supposed to be making a batch of my standard shortbread for a bake sale the next morning. I had the butter softened, the flour measured, and the sugar ready to go. But then I opened my pantry and saw the jar of whole almonds staring back at me. That’s when the idea hit me — a weird, slightly unhinged thought that only arrives when you’re too tired to talk yourself out of it. I didn’t have the energy for intricate cookie cutters or royal icing, but I had almond slivers that looked exactly like fingernails and a vague memory of a scary movie I’d watched the night before. So I ditched the plan entirely. I mean, who needs polite little shortbread rounds when you can make something that makes people shriek before they even take a bite? Honestly, I grabbed a butter knife and started shaping dough into long, knobby fingers right there on my counter at midnight.
The dough was a little too warm, and my first few fingers looked more like sad little potatoes than witch digits. But around midnight, something clicked. I pressed the almond sliver into the tip, used the knife to score knuckle lines, and suddenly I was holding a perfectly creepy witch finger. I laughed out loud in my quiet kitchen — the kind of laugh that feels a little unhinged but also deeply satisfying. You know that feeling when a crazy idea actually works? That was it. By the time I pulled the first tray out of the oven, the house smelled like butter and vanilla, but the cookies looked like they belonged in a haunted house. I almost felt bad bringing them to the bake sale. (Almost.)
These witch finger cookies became my Halloween tradition overnight. They’re the kind of thing that makes people do a double-take, then grab three because they taste way better than they look. And isn’t that the best kind of recipe? The one that’s a little bit creepy, a whole lot buttery, and completely unforgettable. Whether you’re throwing a Halloween party, surprising your kids, or just want to feel like a mad scientist in the kitchen for an hour, these cookies deliver. Let me show you how to make them — no midnight insanity required, though it helps.
Why You’ll Love This Recipe
I’ve tested this recipe more times than I care to admit — through dough that was too sticky, almonds that slid off, and one memorable batch where my “fingers” looked disturbingly like actual severed digits (mission accomplished?). After all that trial and error, I can confidently say this version is the one. It’s the perfect balance of creepy and delicious, and it’s way easier than you’d think.
- Quick & Easy: From start to finish, these come together in about 45 minutes. The dough chills for just 30 minutes, so you’re not waiting around all day.
- Simple Ingredients: You probably have everything in your kitchen right now. Butter, sugar, flour, eggs, vanilla, and almonds. That’s it.
- Perfect for Halloween Parties: These are the star of any spooky spread. Kids love them, adults get a kick out of them, and they’re guaranteed to get photos taken before anyone takes a bite.
- Crowd-Pleaser: Despite their creepy appearance, these are classic buttery shortbread cookies. Picky eaters, cookie snobs, and even your aunt who “doesn’t do Halloween” will go back for seconds.
- Unbelievably Delicious: The texture is that perfect shortbread crumble — not too sweet, with a subtle vanilla warmth and a satisfying crunch from the almond “nail.”
What really sets this recipe apart is the technique. Instead of using a complicated almond paste or trying to mold dough that’s too soft, I’ve nailed down the exact dough consistency that holds its shape during baking. The almond slivers stay put because I press them in at just the right angle, and the knuckle marks don’t puff away into nothing. This isn’t just another version of witch finger cookies — it’s the one that actually works without making you want to pull your hair out. And honestly? That first bite, where you forget for a split second that you’re eating a cookie shaped like a finger, is pure magic. It’s comfort food with a side of spooky fun, and it never gets old.
What Ingredients You Will Need
This recipe uses simple, everyday ingredients to create something that looks complicated but isn’t. The magic is in how you shape them, not in fancy specialty items. Here’s everything you’ll need:
For the Cookie Dough
- 1 cup (226g) unsalted butter, softened to room temperature (I prefer Land O’Lakes for consistent results, but any good quality butter works)
- 1 cup (200g) granulated sugar (you can reduce to 3/4 cup if you prefer less sweet cookies)
- 1 large egg, room temperature
- 1 teaspoon vanilla extract (use pure vanilla extract, not imitation — it makes a real difference in flavor)
- 1/2 teaspoon almond extract (this is optional but adds a lovely subtle nuttiness that complements the almond nails)
- 2 1/2 cups (312g) all-purpose flour, spooned and leveled (don’t scoop directly from the bag or you’ll pack in too much flour)
- 1/2 teaspoon salt (fine sea salt works best)
- 1/4 teaspoon baking powder (this helps the cookies spread just slightly for a more realistic finger shape)
For the Decorating
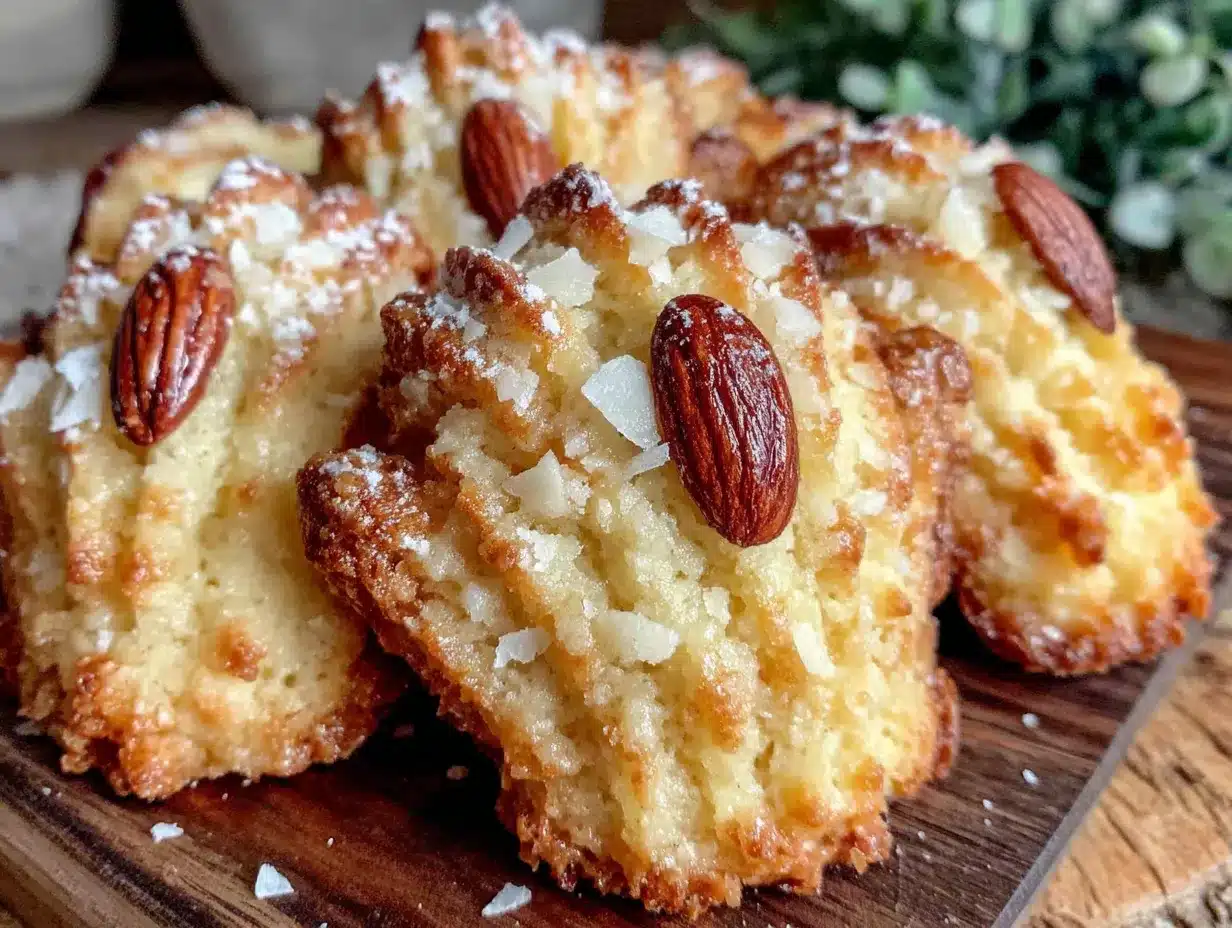
- About 30 whole almond slivers or sliced almonds (one per cookie — look for ones that are naturally pointed on one end)
- Red food coloring gel (I use Wilton brand — the gel is thicker and gives better control than liquid)
- A small paintbrush or clean toothpick (for adding “blood” details around the nail bed)
Ingredient Selection Tips: For the most realistic look, choose almond slivers that have a natural pointed end. If your almonds are too round, you can gently trim one end with a sharp knife. I’ve tried this with sliced almonds too, and they work fine — they just look a bit more like fake nails than real ones. For the red food coloring, gel is absolutely essential. Liquid food coloring is too runny and will bleed into the dough, making your cookies look more like a horror movie crime scene than a fun Halloween treat. Trust me on this one — I learned the hard way.
Substitution Guidance: If you need a dairy-free version, you can use a high-quality vegan butter stick (not the spreadable kind in a tub). I’ve had good results with Miyoko’s European Style Cultured Vegan Butter. For a gluten-free option, swap the all-purpose flour with a 1:1 gluten-free baking flour blend that contains xanthan gum. The texture will be slightly more delicate, but they’ll still hold their shape. And if you don’t have almond extract, just use an extra 1/2 teaspoon of vanilla extract instead.
Equipment Needed
You don’t need any special tools for these cookies, which is part of why I love them. Here’s what you’ll need:
- Electric mixer (handheld or stand mixer both work — I use my KitchenAid stand mixer because it frees up my hands, but a hand mixer is perfectly fine)
- Large mixing bowl
- Measuring cups and spoons
- Baking sheets (I recommend using light-colored metal baking sheets — dark ones can cause the bottoms to brown too quickly)
- Parchment paper or silicone baking mats
- Butter knife or small offset spatula (for shaping the fingers and scoring knuckle lines)
- Small paintbrush or clean toothpick (for applying food coloring)
- Wire cooling rack
- Plastic wrap (for chilling the dough)
Budget-Friendly Options: If you don’t have a paintbrush, a clean toothpick works just fine for applying the red food coloring. You can also use the back of a butter knife to create the knuckle lines — no special scoring tool needed. And honestly, I’ve made these without a stand mixer by just using a wooden spoon and some elbow grease. The dough comes together easily, so don’t let lack of fancy equipment stop you.
Preparation Method
- Cream the butter and sugar (5 minutes): In a large mixing bowl, beat the softened butter and granulated sugar together on medium speed until light and fluffy, about 3-4 minutes. You want it to look pale and airy — this is what gives shortbread its tender texture. Scrape down the sides of the bowl halfway through.
- Add the wet ingredients (2 minutes): Add the egg, vanilla extract, and almond extract (if using). Beat on low speed until just combined. Don’t overmix here — you just want everything incorporated. The mixture might look slightly curdled at this point, and that’s totally normal.
- Mix in the dry ingredients (3 minutes): In a separate bowl, whisk together the flour, salt, and baking powder. Gradually add the dry mixture to the wet ingredients, mixing on low speed until a soft dough forms. The dough should be pliable but not sticky. If it feels too sticky, add an extra tablespoon of flour. If it’s too crumbly, add a teaspoon of milk.
- Chill the dough (30 minutes): Divide the dough in half, flatten each half into a disc, wrap tightly in plastic wrap, and refrigerate for at least 30 minutes. This step is crucial — warm dough is impossible to shape into fingers without it sticking to your hands. I once skipped this step because I was in a hurry, and my “fingers” looked like blobs with almonds stuck to them. Don’t be like me.
- Preheat and prepare (10 minutes): Preheat your oven to 350°F (175°C). Line two baking sheets with parchment paper or silicone mats. While the oven is heating, take the dough out of the fridge and let it sit at room temperature for 5 minutes — it’ll be easier to shape without cracking.
- Shape the fingers (15-20 minutes): Take a small piece of dough (about 1 tablespoon) and roll it into a log shape about 3-4 inches long. Gently taper one end to be slightly thinner (this will be the fingertip) and keep the other end slightly thicker (the base where the finger was “cut”). Place it on the prepared baking sheet. Use the back of a butter knife to create 2-3 knuckle indentations across the finger. Don’t press too deep — you want the lines to be visible but not cut through the dough. Repeat with the remaining dough, spacing the fingers about 2 inches apart on the baking sheets.
- Add the almond nails (5 minutes): Press one almond sliver into the tapered end of each finger, pointy side facing out. Press firmly enough that the almond is embedded about 1/4 inch into the dough — it should look like it’s growing out of the fingertip. If the almond falls out during baking, it wasn’t pressed in deep enough.
- Bake (10-12 minutes): Bake the cookies for 10-12 minutes, or until the edges are just barely starting to turn golden brown. The centers will still look slightly pale — that’s perfect. Overbaking will make them too hard and less realistic. Let them cool on the baking sheet for 5 minutes, then transfer to a wire cooling rack to cool completely.
- Add the spooky details (5 minutes): Once the cookies are completely cool, use a small paintbrush or toothpick to dab a tiny amount of red food coloring gel around the base of each almond “nail.” You can also add a few drops near the “cut” end of the finger for extra gore factor. Less is more here — you want it to look creepy, not like a massacre.
Cooking Tips & Techniques
I’ve made these cookies more times than I can count, and I’ve learned a few things the hard way. Here’s what I wish someone had told me before my first batch:
The dough temperature is everything. If your dough is too warm, it’ll stick to your hands and lose its shape. If it’s too cold, it’ll crack when you try to shape it. The sweet spot is about 5 minutes out of the fridge. You want the dough to feel cool to the touch but pliable enough to roll without resistance. If you’re working in a warm kitchen, chill your baking sheets too — it helps the fingers hold their shape while you’re working.
Don’t overwork the dough. Shortbread is forgiving, but the more you handle it, the tougher it gets. When you’re shaping the fingers, try to work quickly and gently. If the dough starts getting sticky from the heat of your hands, pop it back in the fridge for 10 minutes. I keep a bowl of ice water nearby to cool my hands down between batches — sounds weird, but it works.
The knuckle lines need to be deep enough. I learned this after my first batch came out looking like smooth little sausages. You want to press firmly enough that the lines are visible after baking, but not so deep that the cookie breaks. A good rule of thumb: press until you can feel the baking sheet through the dough, but stop before you actually cut through. The lines will puff up slightly during baking, so what looks deep enough raw will be perfect after they come out of the oven.
Almond placement matters. I once had a batch where half the almonds fell off during baking because I didn’t press them in firmly enough. Make sure the almond is embedded at least 1/4 inch into the dough. Also, angle the almond slightly downward toward the fingertip — it looks more natural than sticking straight out. And if you’re using sliced almonds instead of slivers, press them in flat side down for a more realistic nail shape.
Multitasking tip: While the first batch is baking, shape the second batch. This keeps your workflow smooth and prevents the dough from getting too warm. If you’re making a double batch, rotate your baking sheets between the fridge and the oven so the dough stays cold.
Variations & Adaptations
One of the best things about this recipe is how easy it is to customize. Here are some variations I’ve tried over the years:
Chocolate Witch Fingers: Replace 1/4 cup of the all-purpose flour with 1/4 cup of unsweetened cocoa powder. The chocolate version looks even creepier — like dirt-covered fingers from a grave. I made these for a Halloween party last year, and they were gone before the regular ones. The chocolate flavor pairs beautifully with the almond nails too.
Gluten-Free Version: Use a 1:1 gluten-free baking flour blend that contains xanthan gum. I’ve tested this with Bob’s Red Mill 1-to-1 Baking Flour, and the results were excellent. The dough is slightly more delicate, so be extra gentle when shaping the fingers. You may need to chill the dough for an extra 10 minutes to make it easier to handle.
Vegan Witch Fingers: Substitute the butter with a high-quality vegan butter stick and use a flax egg (1 tablespoon ground flaxseed mixed with 3 tablespoons water, let sit for 5 minutes). The texture will be slightly less tender, but the cookies still hold their shape beautifully. I’ve found that Miyoko’s vegan butter gives the closest result to traditional shortbread.
Spooky Color Variations: For a truly terrifying look, add a few drops of green or purple food coloring to the dough before chilling. Green fingers look like something out of a swamp monster movie, while purple adds a magical, witchy vibe. Just be careful not to overmix the color in — you want it evenly distributed, but overmixing will make the dough tough.
Flavor Twists: Add 1 teaspoon of cinnamon and 1/4 teaspoon of nutmeg for a warm, autumnal flavor. Or try 1 tablespoon of orange zest for a citrusy twist that brightens up the shortbread. My personal favorite is adding 1/2 teaspoon of rose water — it sounds weird, but the floral notes make the cookies taste unexpectedly elegant, which is hilariously at odds with their creepy appearance.
Serving & Storage Suggestions
These cookies are best served at room temperature, and they’re at their creepiest when presented in a way that maximizes the shock value. I like to arrange them on a black platter or a wooden board lined with black tissue paper, scattered with a few loose almond slivers (to look like broken nails) and maybe a fake spider or two. If you’re serving them at a party, consider placing them in a bowl with the “cut” ends facing up — it looks disturbingly realistic.
What to serve with them: These pair wonderfully with a glass of cold milk (the classic choice), a warm cup of apple cider, or a mug of hot chocolate. For an adult Halloween gathering, they’re fantastic with a glass of bourbon or a dark stout beer. The buttery sweetness of the shortbread balances the bitterness of the alcohol beautifully.
Storage Instructions: Store the cookies in an airtight container at room temperature for up to 5 days. Place a sheet of parchment paper between layers to prevent the almonds from scratching the cookies below. Do not refrigerate them — the fridge will make the cookies dry and hard. If you live in a humid climate, add a piece of bread to the container to absorb excess moisture (replace the bread every other day).
Freezer Instructions: You can freeze the unbaked shaped fingers for up to 3 months. Place them on a baking sheet lined with parchment paper and freeze until solid (about 2 hours), then transfer to a freezer-safe bag or container. When you’re ready to bake, add 2-3 minutes to the baking time — no need to thaw. You can also freeze the baked cookies for up to 2 months. Thaw at room temperature for about 30 minutes before serving.
Flavor Development: Interestingly, these cookies actually taste better the day after baking. The flavors meld together and the shortbread becomes even more tender. So if you’re planning a Halloween party, make them a day ahead — they’ll taste better, and you’ll have one less thing to worry about on the day of.
Nutritional Information & Benefits
Let’s be honest — these are indulgent treats, not health food. But here’s the estimated nutritional breakdown per cookie (based on 30 cookies):
| Nutrient | Amount per Cookie |
|---|---|
| Calories | 145 |
| Total Fat | 8g |
| Saturated Fat | 5g |
| Cholesterol | 25mg |
| Sodium | 55mg |
| Total Carbohydrates | 17g |
| Sugars | 8g |
| Protein | 2g |
While these aren’t exactly health food, the almonds do provide a small amount of vitamin E, healthy fats, and magnesium. The butter contains vitamin A and butyrate, which is beneficial for gut health in moderation. And let’s face it — sometimes the best thing you can do for your mental health is make something ridiculous and fun with your hands. These cookies are about joy, creativity, and a little bit of Halloween mischief. Enjoy them without guilt, and maybe share them with someone who needs a laugh.
Dietary Considerations: This recipe contains dairy (butter), eggs, gluten (flour), and tree nuts (almonds). For allergen-friendly versions, see the Variations section above.
Conclusion
These witch finger cookies are everything I love about Halloween baking — they’re fun, they’re a little bit gross, and they taste absolutely amazing. Every time I make them, I remember that night in my kitchen at 11:47 PM, laughing at my own weird idea, and realizing that sometimes the best recipes come from throwing out the plan and following a crazy impulse. That’s what cooking should be, right? A little bit of play, a little bit of risk, and a whole lot of joy.
I’d love to hear how yours turn out. Did you try a fun variation? Did your kids scream with delight (or actual horror)? Did you add extra “blood” for maximum creep factor? Drop a comment below and let me know — I read every single one, and your stories make my day. And if you share these on social media, tag me so I can see your spooky creations. Happy Halloween, and happy baking!
Frequently Asked Questions
Can I make these cookies without almond extract?
Absolutely. The almond extract is optional — it just adds a subtle nutty flavor that complements the almond nails. If you don’t have it or don’t like it, simply use an extra 1/2 teaspoon of vanilla extract instead. The cookies will still taste delicious.
Why did my almonds fall off during baking?
This usually happens when the almonds aren’t pressed in deeply enough. Make sure you embed the almond at least 1/4 inch into the dough. Also, if your dough was too warm, the almond might have slipped out as the cookie spread. Chilling the shaped fingers for 10 minutes before baking can help prevent this.
Can I use a different nut for the nails?
Yes! Pecan halves, walnut pieces, or even whole cashews can work. Just keep in mind that different nuts have different shapes and textures. Pecans are longer and flatter, which can look quite realistic. Avoid using peanuts — they’re too small and round to look like fingernails.
How do I make the cookies look more realistic?
Focus on the details. Use a butter knife to create deep knuckle lines, and gently pinch the sides of the finger to create a slight ridge. Add a few tiny wrinkles near the knuckles with the tip of your knife. And don’t forget the “dirt” — a light dusting of cocoa powder or crushed chocolate cookie crumbs around the base of the fingers adds a lot of realism.
Can I make the dough ahead of time?
Definitely. You can prepare the dough up to 3 days in advance and keep it wrapped tightly in the refrigerator. When you’re ready to bake, let it sit at room temperature for about 10 minutes to soften slightly before shaping. You can also freeze the dough for up to 3 months — just thaw it overnight in the refrigerator before using.
Pin This Recipe!
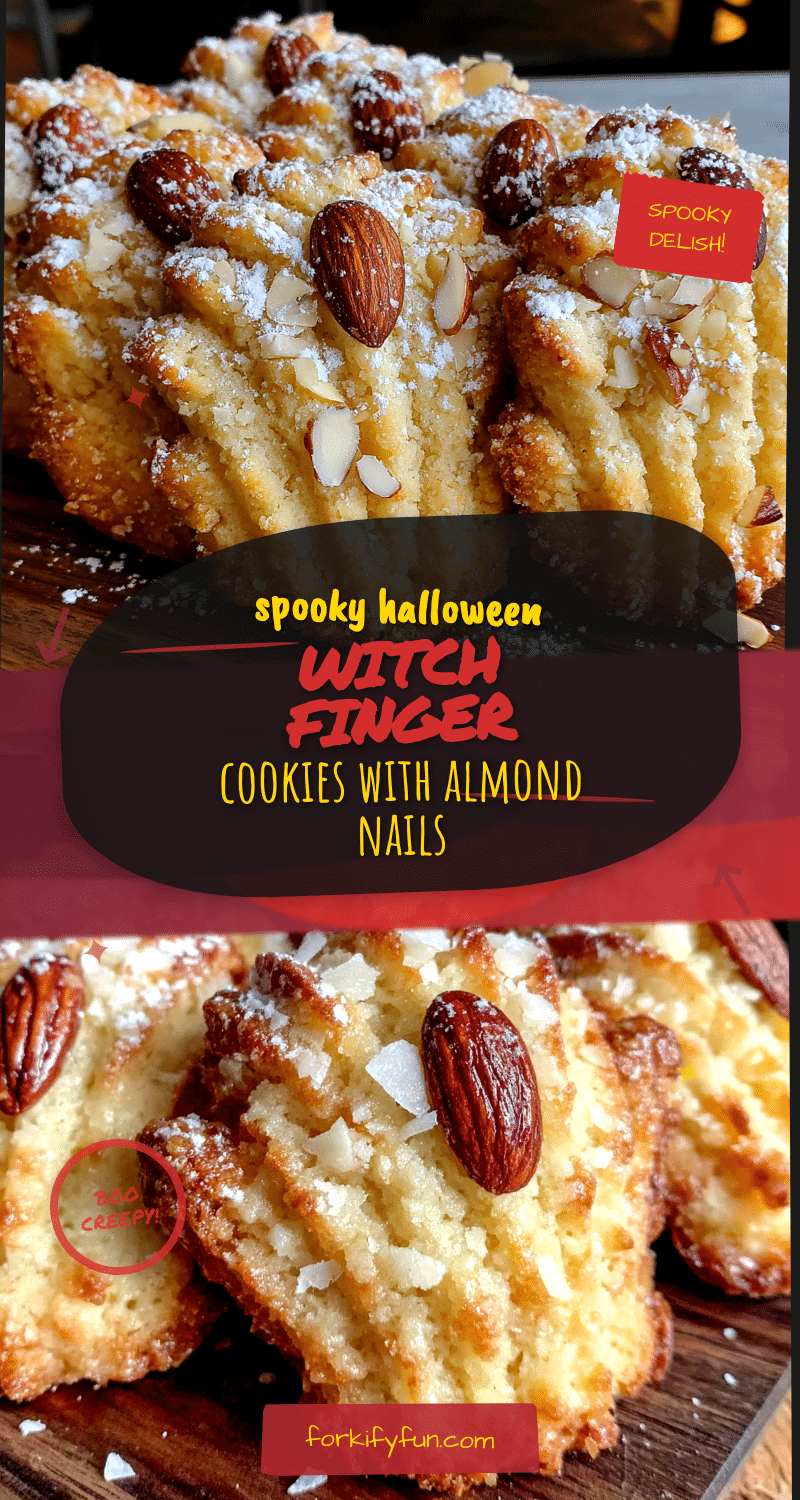
Best Witch Finger Cookies Recipe – Easy Spooky Halloween Treat
These buttery shortbread cookies are shaped like creepy witch fingers with almond sliver nails, perfect for Halloween parties. They’re easy to make, delicious, and guaranteed to get a reaction.
- Prep Time: 15 minutes
- Cook Time: 12 minutes
- Total Time: 45 minutes
- Yield: 30 cookies 1x
- Category: Dessert
- Cuisine: American
Ingredients
- 1 cup (226g) unsalted butter, softened to room temperature
- 1 cup (200g) granulated sugar
- 1 large egg, room temperature
- 1 teaspoon vanilla extract
- 1/2 teaspoon almond extract (optional)
- 2 1/2 cups (312g) all-purpose flour, spooned and leveled
- 1/2 teaspoon salt
- 1/4 teaspoon baking powder
- About 30 whole almond slivers or sliced almonds
- Red food coloring gel
- Small paintbrush or clean toothpick
Instructions
- Cream the butter and sugar: In a large mixing bowl, beat the softened butter and granulated sugar together on medium speed until light and fluffy, about 3-4 minutes. Scrape down the sides of the bowl halfway through.
- Add the wet ingredients: Add the egg, vanilla extract, and almond extract (if using). Beat on low speed until just combined.
- Mix in the dry ingredients: In a separate bowl, whisk together the flour, salt, and baking powder. Gradually add the dry mixture to the wet ingredients, mixing on low speed until a soft dough forms.
- Chill the dough: Divide the dough in half, flatten each half into a disc, wrap tightly in plastic wrap, and refrigerate for at least 30 minutes.
- Preheat and prepare: Preheat your oven to 350°F (175°C). Line two baking sheets with parchment paper or silicone mats. Let the dough sit at room temperature for 5 minutes.
- Shape the fingers: Take a small piece of dough (about 1 tablespoon) and roll it into a log shape about 3-4 inches long. Gently taper one end to be slightly thinner. Place on the prepared baking sheet. Use the back of a butter knife to create 2-3 knuckle indentations across the finger. Repeat with remaining dough, spacing fingers about 2 inches apart.
- Add the almond nails: Press one almond sliver into the tapered end of each finger, pointy side facing out, embedding it about 1/4 inch into the dough.
- Bake: Bake for 10-12 minutes, or until the edges are just barely starting to turn golden brown. Let cool on the baking sheet for 5 minutes, then transfer to a wire cooling rack to cool completely.
- Add the spooky details: Once the cookies are completely cool, use a small paintbrush or toothpick to dab a tiny amount of red food coloring gel around the base of each almond ‘nail.’
Notes
Dough temperature is crucial: too warm and it sticks, too cold and it cracks. Chill the dough for at least 30 minutes. Press almond nails firmly into the dough to prevent them from falling off during baking. For best results, make the cookies a day ahead as the flavors meld and the shortbread becomes more tender.
Nutrition
- Serving Size: 1 cookie
- Calories: 145
- Sugar: 8
- Sodium: 55
- Fat: 8
- Saturated Fat: 5
- Carbohydrates: 17
- Protein: 2
Keywords: witch finger cookies, Halloween cookies, shortbread cookies, spooky treats, easy Halloween recipe