There used to be a little diner called “The Rusty Spoon” tucked away on a side street near my old apartment. It was the kind of place with sticky vinyl booths and a jukebox that only played songs from the 80s. Every October, they’d put up this sad string of fake cobwebs in the window and serve a “Halloween Platter” that was basically just their regular menu with creepy names. But the deviled eggs? Those were something else. They had these little black olive spiders perched right on top of the filling, and my kids lost their minds every single time we went. When the diner closed two years ago — the owner retired, just like that — I thought those spooky eggs were gone for good. After six tries — the first batch was a runny mess, honestly — I finally got it. These Halloween deviled eggs with spider olive toppers are exactly what I remember, and maybe even better. Let me tell you, recreating a childhood memory in your own kitchen feels pretty good.
You know that feeling when you find a recipe that makes your kids actually cheer? That’s these eggs. They’re not just for Halloween parties or school potlucks — they’re for any night you want to turn a simple snack into something magical. I mean, who knew a couple of olives and a little patience could make a plate of deviled eggs look like a scene from a spooky cartoon? Let’s get into it.
Why You’ll Love This Recipe
I’ve tested this recipe a dozen times — through cracked eggs, over-mixed filling, and one particularly tragic incident where my youngest “helped” by adding extra mustard. But these Halloween deviled eggs? They’re the final boss of easy party snacks. Here’s why they work so well for families on a budget:
- Quick & Easy: You can have these ready in under 30 minutes. The hardest part is waiting for the eggs to boil.
- Simple Ingredients: Eggs, mayonnaise, mustard, and olives. That’s it. No fancy grocery trips needed, and you likely have everything already.
- Perfect for Halloween: Whether it’s a classroom party, a family gathering, or just a fun dinner before trick-or-treating, these eggs fit right in.
- Crowd-Pleaser: My kids — ages 5 and 8 — fight over the last one every time. And the adults? They grab them too, pretending it’s just for the kids.
- Unbelievably Delicious: The creamy filling paired with the briny olive topper is a combo that works. It’s comfort food with a creepy twist.
What makes this recipe different from the rest? It’s the technique. I blend the yolks with a touch of pickle juice — trust me on this — for an extra tang that cuts through the richness. And the olive spiders? They’re not just decoration; the saltiness of the olive balances the creamy filling perfectly. This isn’t just another deviled egg recipe. It’s the one that makes you close your eyes after the first bite, even with a tiny spider staring back at you.
These eggs are perfect for impressing guests without stress. You can make them ahead, they travel well, and they always get that “whoa, cool!” reaction from kids. Honestly, what more could you want from a snack?
What Ingredients You Will Need
This recipe uses simple, wholesome ingredients to deliver bold flavor and a fun presentation without the fuss. Most of these are pantry staples, so you probably don’t need to make a special trip. Here’s what you’ll need:
- 6 large eggs — hard-boiled and peeled. Use older eggs for easier peeling; fresh eggs are a nightmare to peel, I learned that the hard way.
- 3 tablespoons mayonnaise — I prefer Hellmann’s or Duke’s for the creamiest texture. Don’t use Miracle Whip; it’s too sweet and throws off the balance.
- 1 teaspoon yellow mustard — adds that classic tang. You can use Dijon for a sharper flavor, but kids usually prefer the milder yellow kind.
- 1 teaspoon pickle juice — from your jar of dill pickles. This is my secret ingredient. It adds brightness and a little acidity that makes the filling sing.
- Salt and black pepper — to taste. Go easy on the salt since the olives will add plenty.
- 1 can (6 ounces) large black olives — you need whole, pitted olives. Look for the biggest ones you can find; they’re easier to slice into spider bodies.
- Optional: paprika — for dusting on top. It adds color and a subtle smokiness. Smoked paprika is even better if you have it.
- Optional: fresh chives or dill — for garnish. Adds a pop of green and a fresh flavor.
For the spider toppers, you’ll need a sharp paring knife. I recommend using a brand like Lindsay or Early California for the olives — they’re consistently large and hold their shape well when sliced. If you can only find small olives, you can still make the spiders, but they’ll look more like baby spiders. Still cute, just tinier.
If you’re feeding a crowd, double the recipe. These eggs disappear fast. And if someone in your family has an egg allergy, I’m sorry — this one’s hard to substitute. But you could make a batch of guacamole-stuffed mini peppers shaped like bats instead. Just a thought.
Equipment Needed
You don’t need any fancy gadgets for these Halloween deviled eggs, which is part of the charm. Here’s what you’ll need:
- A medium saucepan — for boiling the eggs. Any pot works, but a wide one helps the eggs cook evenly.
- A sharp paring knife — for slicing olives into spiders. A dull knife will crush them. Trust me, I’ve ruined a whole can this way.
- A cutting board — preferably small, for the olive work.
- A mixing bowl — medium size, for mashing the yolks.
- A fork or potato masher — for breaking up the yolks. A fork works fine; a potato masher is faster.
- A piping bag or zip-top bag — for filling the eggs neatly. A zip-top bag with the corner snipped off works perfectly and costs nothing.
- A serving platter — something flat to arrange the eggs on. A white platter makes the spiders pop.
If you don’t have a piping bag, don’t stress. You can spoon the filling into the egg whites and smooth it with a knife. It won’t look as fancy, but it’ll taste the same. I’ve done it both ways, and honestly, my kids don’t care how it looks as long as the spiders are on top.
One tip: use a slotted spoon to lower the eggs into boiling water. It prevents them from cracking. And for the olives, a pair of tweezers can help place the spider legs precisely, but your fingers work fine too.
Preparation Method
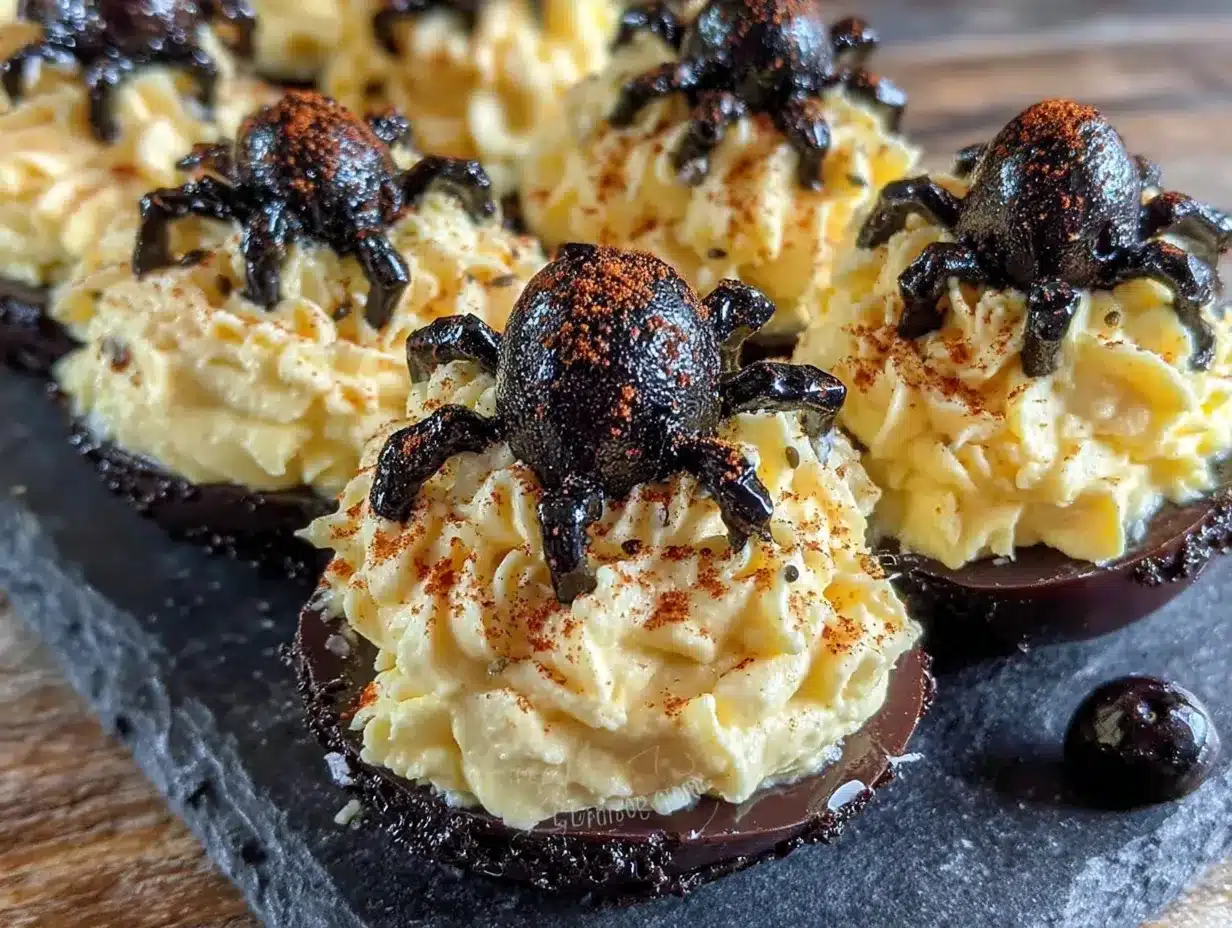
Let’s get these spooky eggs made. I’ll walk you through every step, including the little tricks I’ve learned from my own mistakes.
Step 1: Hard-Boil the Eggs
Place your 6 eggs in a single layer in a medium saucepan. Cover them with cold water by about an inch. Bring the water to a rolling boil over high heat — you’ll see big bubbles breaking the surface. Once it’s boiling, turn off the heat, cover the pot, and let it sit for exactly 12 minutes. This gives you perfectly cooked yolks without that green ring around the outside. While the eggs sit, prepare an ice bath: fill a bowl with cold water and a handful of ice cubes. After 12 minutes, use a slotted spoon to transfer the eggs to the ice bath. Let them cool for at least 10 minutes. This stops the cooking and makes peeling easier. I learned the hard way that skipping the ice bath leads to rubbery whites and peeling that takes forever.
Step 2: Peel and Halve the Eggs
Gently tap each egg on the counter to crack the shell all over. Start peeling from the wider end — there’s usually an air pocket there that makes it easier. Rinse the peeled eggs under cool water to remove any tiny shell fragments. Pat them dry with a paper towel. Using a sharp knife, cut each egg in half lengthwise. Carefully scoop out the yolks into a medium mixing bowl. Arrange the egg white halves on your serving platter, cut side up. If some tear, don’t worry — just hide them on the bottom of the platter. Nobody will know.
Step 3: Make the Filling
Add the mayonnaise, yellow mustard, and pickle juice to the bowl with the yolks. Use a fork to mash everything together until smooth. You want a creamy, spreadable consistency — no lumps. Add a pinch of salt and a few grinds of black pepper. Taste it. Does it need more mustard? More pickle juice? Adjust to your liking. I usually end up adding an extra splash of pickle juice because I love the tang. If the filling seems too thick, add another teaspoon of mayonnaise. Too thin? Add another yolk if you have extra, or just chill it for 10 minutes to firm up.
Step 4: Fill the Egg Whites
Spoon the filling into a piping bag or a zip-top bag. If using a zip-top bag, snip off a small corner — about ¼ inch wide. Pipe the filling into each egg white half, mounding it slightly. You want it to look generous, not flat. If you’re using a spoon, dollop a heaping teaspoon into each half and smooth the top with the back of the spoon. Don’t overfill; you want room for the spider topper without everything squishing.
Step 5: Make the Spider Olive Toppers
This is the fun part. Drain the can of black olives and pat them dry with a paper towel. Take each olive and slice it in half crosswise — you’ll get two round pieces. One half becomes the spider body; the other half gets sliced into thin strips for the legs. For each spider, you need one olive body half and four thin strips (each strip becomes two legs). To assemble, place the olive body half on top of the deviled egg filling, cut side down. Take one olive strip and cut it in half lengthwise — now you have two thin legs. Repeat with the other three strips. Arrange four legs on each side of the spider body, pressing them gently into the filling so they stay put. It sounds fiddly, but once you make one, the rest go fast. I usually make a few extra spiders in case one falls apart — and because my kids steal them to eat plain.
Step 6: Garnish and Serve
If using, dust the eggs lightly with paprika — a fine mesh strainer works best for an even sprinkle. You can also add a tiny piece of fresh chive or dill next to each spider for a “grass” effect. Serve immediately, or cover and refrigerate for up to 4 hours. These are best at room temperature, so take them out of the fridge 15 minutes before serving.
Cooking Tips & Techniques
I’ve made more deviled eggs than I care to count, and I’ve messed up plenty along the way. Here are the tips I wish someone had told me from the start.
Perfect hard-boiled eggs every time: The 12-minute rest method I described above works like a charm. But if you’re short on time, you can also steam the eggs: bring an inch of water to a boil, place the eggs in a steamer basket, cover, and steam for 12 minutes. Then plunge them into ice water. The shells practically fall off. I’ve tried both methods, and steaming is slightly easier for peeling.
Don’t overmix the filling: If you beat the yolks too much, they can become gluey. Mash them gently with a fork until just combined. A little texture is fine — it feels more homemade.
Make the spiders ahead: You can slice the olives and assemble the spiders on a plate up to a day in advance. Cover them with plastic wrap and refrigerate. Then just place them on the filled eggs right before serving. This saves time on party day.
Common mistake: watery filling. This happens if you don’t dry the yolks properly after boiling. Pat them with a paper towel before mashing. Also, don’t add too much pickle juice at once — start with a teaspoon and add more if needed.
Timing strategy: Boil the eggs the night before and keep them in the fridge. Peel and fill them the next day. The eggs will be easier to peel after an overnight rest, and the filling will taste just as good.
My biggest failure: The first time I made these, I used small olives and tried to slice them into legs. They crumbled into a mess. Now I always buy the largest black olives I can find — they’re sturdier and easier to work with. Learn from my mistake, please.
Variations & Adaptations
This recipe is flexible, which is great for picky eaters or different dietary needs. Here are some variations I’ve tried and loved.
Spicy version: Add a dash of hot sauce or a pinch of cayenne pepper to the filling. The heat pairs nicely with the briny olives. My husband loves this version, but my kids stick to the original.
Avocado twist: Replace half the mayonnaise with mashed avocado. The filling turns a pale green, which looks extra spooky. Just add a squeeze of lemon juice to keep the avocado from browning. This version is also dairy-free and a bit healthier.
Gluten-free and low-carb: These eggs are naturally gluten-free and low in carbs, so no changes needed. Just double-check your mayonnaise label — some brands add gluten as a thickener. Hellmann’s and Duke’s are both safe.
Different spider designs: Use green olives stuffed with pimento for a “zombie spider” look. Or try sliced bell peppers for the legs if someone doesn’t like olives. I’ve even used pretzel sticks for legs — they add a nice salty crunch.
Seasonal swap: For a non-Halloween version, skip the spiders and top with a sprinkle of paprika and a fresh herb sprig. They’re still delicious, just less creepy.
One personal variation I made last year: I added a tiny dollop of sriracha to each egg before placing the spider on top. The kids didn’t notice, and the adults appreciated the kick. Just a little sneaky upgrade.
Serving & Storage Suggestions
These Halloween deviled eggs are best served at room temperature, so take them out of the fridge about 15 minutes before you’re ready to eat. Arrange them on a flat platter — a white or black platter makes the spiders stand out. You can add a few fake spiderwebs or plastic spiders around the platter for extra Halloween flair. My kids love helping with this part.
What to serve with them: These eggs pair well with other finger foods — think mini hot dogs wrapped in crescent rolls (they look like mummies), veggie sticks with ranch dip, or a bowl of popcorn. For a full meal, serve alongside a hearty soup or chili. The creamy eggs balance the richness of chili perfectly.
Storage: Store leftover deviled eggs in an airtight container in the refrigerator for up to 2 days. The olive spiders may soften slightly, but they’ll still look cute. Do not freeze — the texture of the filling will turn grainy and watery when thawed. I tried it once, and it was a disaster.
Reheating: You don’t need to reheat these. They’re meant to be served cold or at room temperature. If you’ve refrigerated them, just let them sit out for 10 minutes before serving to take the chill off.
Flavor development: The filling actually tastes better after a few hours in the fridge — the flavors meld together and mellow out. So if you’re making these for a party, prepare them the morning of and refrigerate until serving. Just add the spiders right before serving so the olives stay crisp.
Nutritional Information & Benefits
Here’s the breakdown for one deviled egg (with one spider topper, without extra garnishes):
| Nutrient | Amount per serving |
|---|---|
| Calories | 75 |
| Total Fat | 6g |
| Saturated Fat | 1.5g |
| Cholesterol | 95mg |
| Sodium | 180mg |
| Total Carbohydrates | 1g |
| Protein | 6g |
Eggs are a great source of high-quality protein and contain essential nutrients like vitamin B12, vitamin D, and choline, which supports brain health. Black olives provide healthy monounsaturated fats and a bit of iron. This recipe is naturally low in carbs and can fit into a keto or low-carb lifestyle. If you’re watching sodium, use low-sodium olives or reduce the added salt in the filling.
One note: these eggs contain eggs (obviously) and mayonnaise, which is made with eggs. They’re not suitable for anyone with an egg allergy. The olives are generally safe, but check labels for cross-contamination warnings if you have severe allergies.
From a wellness perspective, I love that this recipe turns a nutrient-dense food into something fun. My kids eat eggs without complaining when they look like spiders. That’s a win in my book.
Conclusion
These Halloween deviled eggs with spider olive toppers are more than just a cute snack — they’re a way to make a simple ingredient feel special. Whether you’re hosting a Halloween party, packing a school lunch, or just looking for a fun activity to do with your kids, this recipe delivers. The creamy, tangy filling paired with the briny olive spiders is a combination that works for all ages. And honestly, watching my kids’ faces light up when they see the spiders? That’s the best part.
I encourage you to make this recipe your own. Swap the olives for something else if your family prefers. Add a little spice. Double the batch. Whatever you do, don’t stress about perfection — the spiders don’t have to look exactly like mine. They just have to be fun. And if you make them, I’d love to hear about it. Drop a comment below or tag me in your photos. Happy Halloween, and happy cooking!
Frequently Asked Questions
Can I make these deviled eggs the night before?
Yes! You can prepare the filling and the egg whites separately up to 24 hours in advance. Store the whites in an airtight container and the filling in a piping bag or zip-top bag in the fridge. Assemble them a few hours before serving, and add the spider toppers just before you put them out so the olives stay crisp.
How do I keep the olive spiders from falling apart?
Use large, firm black olives — they hold their shape better when sliced. When cutting the legs, make sure your knife is sharp. Press the legs gently into the filling so they stay in place. If you’re transporting the eggs, place them in a single layer in a container with a tight-fitting lid and put a paper towel on top to absorb any moisture.
Can I use a different type of olive?
Absolutely. Green olives work, but they’re firmer and have a sharper flavor. Kalamata olives are softer and may crumble when sliced. For the best results, stick with large, pitted black olives. If you’re not a fan of olives, you can skip the spiders entirely and just top the eggs with paprika and a small piece of fresh herb.
How long do these eggs last in the fridge?
Deviled eggs are best eaten within 2 days. After that, the filling can become watery and the whites may release liquid. Store them in an airtight container in the refrigerator. Do not leave them out at room temperature for more than 2 hours, especially if you’re serving them at a party.
Can I bake the eggs instead of boiling them?
You can bake eggs in a muffin tin at 325°F for about 25 minutes, then plunge them into ice water. The yolks will be slightly drier than boiled eggs, but they work fine for deviled eggs. I’ve tried this method when I needed to make a large batch, and it’s a good alternative if you don’t want to watch a pot of water.
Pin This Recipe!
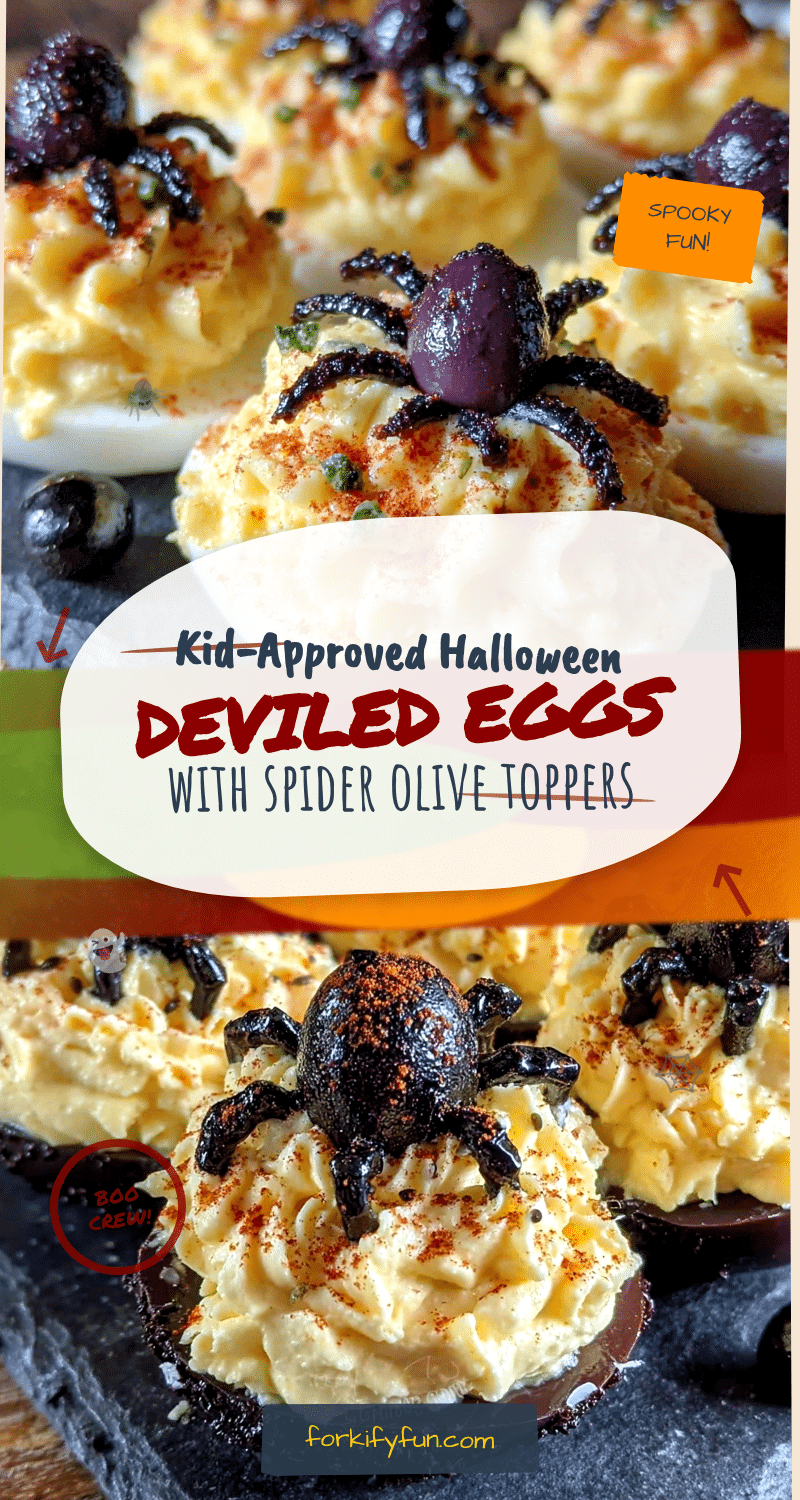
Halloween Deviled Eggs: Easy Spider Olive Toppers for Kids
These Halloween deviled eggs with spider olive toppers are a fun and easy snack that kids love. Creamy, tangy filling topped with briny olive spiders makes for a spooky yet delicious treat perfect for Halloween parties or family gatherings.
- Prep Time: 15 minutes
- Cook Time: 12 minutes
- Total Time: 27 minutes
- Yield: 12 deviled eggs (6 servings of 2 eggs each) 1x
- Category: Appetizer
- Cuisine: American
Ingredients
- 6 large eggs
- 3 tablespoons mayonnaise
- 1 teaspoon yellow mustard
- 1 teaspoon pickle juice
- Salt and black pepper to taste
- 1 can (6 ounces) large black olives, pitted
- Optional: paprika for dusting
- Optional: fresh chives or dill for garnish
Instructions
- Place eggs in a single layer in a medium saucepan. Cover with cold water by about an inch. Bring to a rolling boil over high heat. Once boiling, turn off heat, cover, and let sit for exactly 12 minutes.
- Prepare an ice bath: fill a bowl with cold water and ice cubes. Transfer eggs to ice bath using a slotted spoon. Let cool for at least 10 minutes.
- Peel eggs under cool running water, starting from the wider end. Pat dry. Cut each egg in half lengthwise. Scoop yolks into a medium bowl. Arrange egg white halves on a serving platter, cut side up.
- Add mayonnaise, yellow mustard, and pickle juice to the yolks. Mash with a fork until smooth and creamy. Season with salt and pepper to taste.
- Spoon filling into a piping bag or zip-top bag. Snip off a small corner if using a zip-top bag. Pipe filling into each egg white half, mounding slightly.
- Drain olives and pat dry. Slice each olive in half crosswise. One half becomes the spider body; the other half is sliced into thin strips for legs. For each spider, place one olive body half on the filling, cut side down. Cut each strip in half lengthwise to make two legs. Arrange four legs on each side of the spider body, pressing gently into the filling.
- If desired, dust eggs lightly with paprika. Garnish with fresh chives or dill. Serve immediately or refrigerate for up to 4 hours. Bring to room temperature 15 minutes before serving.
Notes
Use older eggs for easier peeling. For perfect hard-boiled eggs, let them sit in hot water for 12 minutes after boiling, then plunge into ice water. The pickle juice adds a tangy brightness; adjust to taste. Large black olives work best for the spiders. Make the olive toppers a day ahead and refrigerate. The filling tastes better after a few hours in the fridge.
Nutrition
- Serving Size: 2 deviled eggs
- Calories: 150
- Sodium: 360
- Fat: 12
- Saturated Fat: 3
- Carbohydrates: 2
- Protein: 12
Keywords: Halloween deviled eggs, spider deviled eggs, olive spiders, easy Halloween snack, kid-friendly Halloween recipe


