It was 10:47 PM on a random Tuesday in September, and I had a very specific, ridiculous craving for something that looked like a goth bakery exploded in my kitchen. I didn’t have any black cocoa powder—the stuff the fancy bakeries use for those dramatic, dark-as-night cakes—but I had a brand-new box of dark chocolate cake mix I’d bought on sale and a bottle of black gel food coloring that had been hiding in the back of my baking drawer since last Halloween. The idea that arrived was simple: what if I could make a velvet cake that was actually black, but still tasted like something a kid would actually eat, not just a prop from a haunted house?
Honestly, I was half-asleep and probably shouldn’t have been operating an electric mixer, but something about the quiet house and the weird hour made me feel like I could experiment without an audience. I dumped the mix into a bowl, added the coloring, and held my breath. It looked like a science experiment gone wrong—a swirling, inky mess that I was sure would taste like regret. My husband walked in, saw the bowl, and just said, “Are you making… sludge?” and walked back out. But I kept going. I added a little extra buttermilk to keep it moist, and when those cupcakes came out of the oven, they were the most beautiful, deep, velvety black I had ever seen. They didn’t taste like chemicals or artificial anything. They tasted like the best chocolate cupcake you’ve ever had, just dressed up for a costume party.
Maybe you’ve been there—staring at a Pinterest-perfect Halloween treat that requires fifteen specialty ingredients and a degree in pastry arts. These Black Velvet Halloween Cupcakes are the opposite of that. They are the treat that makes you look like a kitchen witch without the stress. I keep making them because they solve the eternal October problem: how to make something that looks spooky and impressive but still tastes like pure, kid-approved comfort. Let me tell you, there is nothing quite like watching a little vampire or ghost take a bite of a black cupcake and then immediately ask for a second one.
Why You’ll Love This Recipe
I’ve tested this recipe about six times now (my neighbors have become very willing taste-testers), and I can confidently say this is the version that works every single time. These Black Velvet Halloween Cupcakes aren’t just another spooky-season recipe—they are the result of a lot of trial and error to make sure they are truly kid-approved and parent-friendly.
- Quick & Easy: From start to finish, these come together in under 45 minutes. You don’t need to be a professional baker or own a fancy stand mixer. A bowl and a whisk will get the job done, which is perfect for those busy weeknights when your child announces at 7 PM that they need treats for the school party tomorrow.
- Simple Ingredients: I have made these with a standard box of dark chocolate cake mix (the store brand works perfectly fine), some pantry staples like oil and eggs, and a single bottle of black food coloring. No expensive specialty flours or hard-to-find extracts. You probably already have 90% of what you need in your kitchen right now.
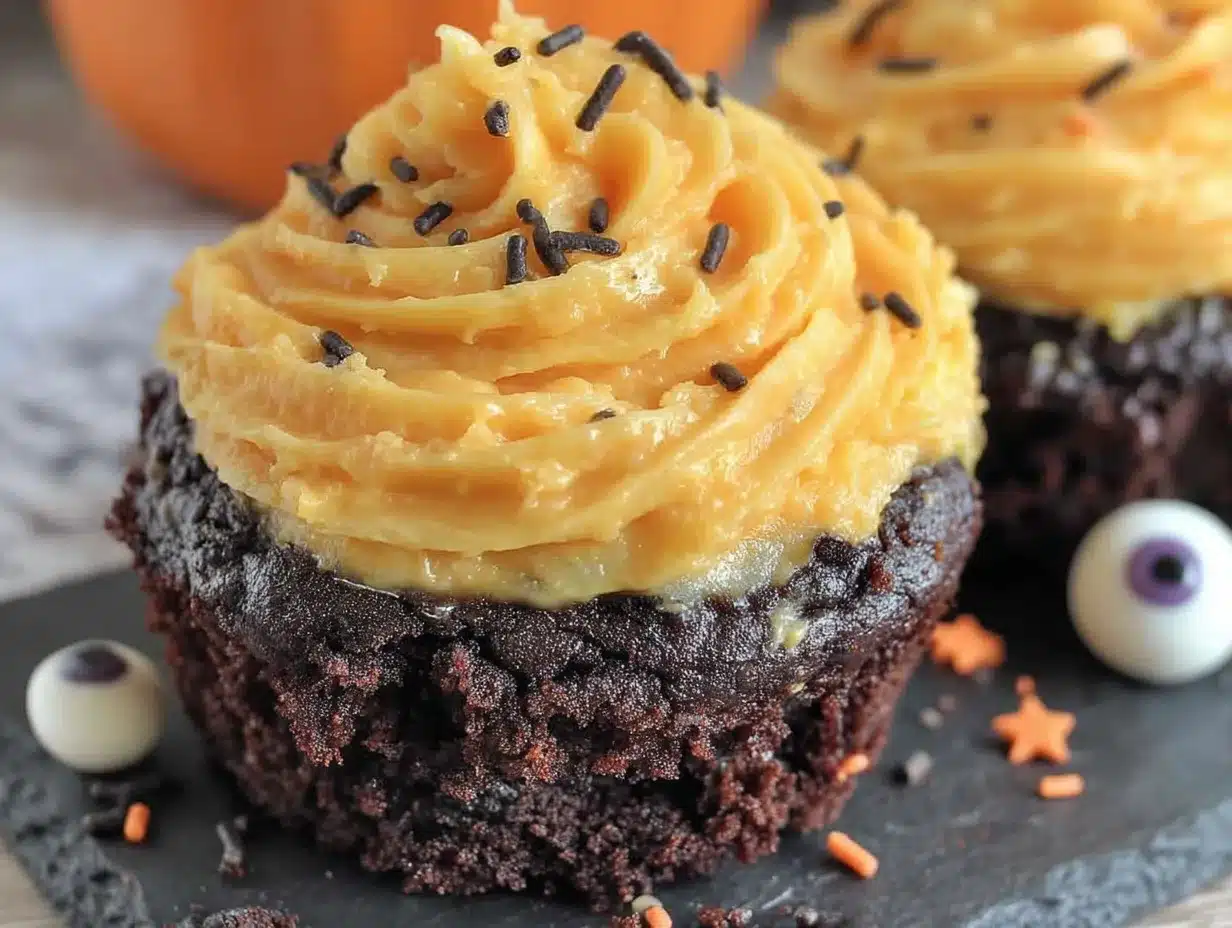
- Perfect for Halloween Parties, School Events, and Spooky Movie Nights: These cupcakes are the star of any October gathering. They look incredibly dramatic with their dark crumb and bright white cream cheese frosting, but they are approachable enough for a casual family night. They travel well, too, which is a huge bonus for potlucks or classroom celebrations.
- Crowd-Pleaser: Here is the real test: my own kids, who are suspicious of anything that looks “weird,” devoured these. I’ve brought them to two different Halloween playdates, and they were the first tray to empty every single time. The chocolate flavor is deep and familiar, so even picky eaters don’t hesitate.
- Unbelievably Delicious: The texture is what really sells these. The crumb is incredibly soft and tender—that classic velvet feel—but the color is a stunning, uniform black. The tangy cream cheese frosting cuts through the sweetness of the cake perfectly. It’s comfort food that happens to look like it belongs in a haunted mansion.
What makes this recipe different from the rest is the method. I learned the hard way that just dumping black food coloring into any old cake batter results in a muddy, grey-ish mess that tastes faintly of dye. The trick is pairing the coloring with a dark chocolate base and a touch of extra moisture, so the color deepens naturally and the flavor stays rich and chocolatey, not bitter or artificial. This isn’t just another Halloween cupcake—it is your best version.
What Ingredients You Will Need
This recipe uses simple, everyday ingredients to deliver a big, spooky impact without forcing you to hunt down obscure items. Most of these are pantry staples you likely have on hand, which is exactly what you want when you are baking with kids on a school night.
- For the Cupcakes:
- 1 box (15.25 oz / 432 g) dark chocolate cake mix (I prefer Duncan Hines or Betty Crocker for the most reliable texture, but store brands work well too)
- 1 cup (240 ml) buttermilk, room temperature (adds incredible moisture and tenderness; you can make a quick substitute by adding 1 tablespoon of lemon juice or white vinegar to a cup of regular milk and letting it sit for 5 minutes)
- 1/2 cup (120 ml) vegetable oil (or any neutral oil like canola or avocado; this keeps the crumb soft)
- 3 large eggs, room temperature (room temperature eggs emulsify better into the batter, creating a smoother texture)
- 2 teaspoons (10 ml) vanilla extract (pure vanilla is best, but imitation works fine for a more budget-friendly option)
- 2 to 3 tablespoons (30 to 45 ml) black gel food coloring (this is non-negotiable—liquid coloring won’t give you a true black; I like the Americolor Super Black brand, but any gel-based coloring works)
- For the Cream Cheese Frosting:
- 8 oz (226 g) block-style cream cheese, softened (use full-fat for the best flavor and stability; the spreadable tub kind will make your frosting too runny)
- 1/2 cup (113 g / 1 stick) unsalted butter, softened (let it sit out for at least 30 minutes; it should be soft but not melty)
- 3 to 4 cups (360 to 480 g) powdered sugar, sifted (sifting is important to avoid lumps in your frosting)
- 1 teaspoon (5 ml) vanilla extract
- Pinch of salt (this balances the sweetness)
- For Decoration (Optional but Fun):
- Halloween sprinkles, candy eyeballs, or small plastic spider rings (my kids love the eyeballs; they make every cupcake look alive)
A quick note on the food coloring: I know it feels weird to put so much dye into something you are feeding your family. I have tried natural alternatives like black cocoa powder and activated charcoal, and honestly, they either don’t get dark enough or they leave a weird, chalky taste that kids notice immediately. A good-quality gel coloring is the only way to get that dramatic, true black color while keeping the flavor kid-approved. One bottle will last you through the entire Halloween season.
Equipment Needed
You do not need a fancy bakery setup for these Black Velvet Halloween Cupcakes. I’ve made them in a tiny apartment kitchen and a full-sized one, and the results were the same: perfect.
- Muffin Tin: A standard 12-cup muffin tin is what you need. I have a non-stick one from Wilton that has served me well for years, but any basic tin works. If you only have a mini muffin tin, just adjust the baking time down to 10 to 12 minutes.
- Cupcake Liners: Use paper liners. I prefer the ones with a fun Halloween pattern, but plain white ones also look great against the black cake. Avoid foil liners for this recipe; the cake tends to stick to them.
- Mixing Bowls: You will need one large bowl for the cake batter and one medium bowl for the frosting. Glass or stainless steel is best because they don’t absorb odors.
- Electric Hand Mixer or Stand Mixer: A hand mixer is perfect for both the batter and the frosting. A stand mixer with the paddle attachment makes the frosting even easier, but it is not required.
- Rubber Spatula: A good silicone spatula is your best friend for scraping down the sides of the bowl and folding in the last bits of batter.
- Cooling Rack: Letting the cupcakes cool completely before frosting is crucial. A wire rack allows air to circulate so the bottoms don’t get soggy.
- Piping Bag and Tip (Optional): For a professional look, use a piping bag fitted with a large star tip (like a 1M). If you don’t have one, a sturdy zip-top bag with the corner snipped off works perfectly well.
A quick tip: if you are baking with kids, let them handle the mixing and the decorating. The actual measuring and oven work is for the adults. It makes the process much more fun and less stressful.
Preparation Method
Alright, let’s get to the fun part. This method is broken down into simple steps, and I’ve included all the little tricks I learned from my own late-night experiments. Trust me on the order of things—it makes a difference.
- Preheat and Prep (5 minutes): Preheat your oven to 350°F (175°C). Line your muffin tin with 18 to 20 cupcake liners (this recipe usually yields about 18 cupcakes, but it can vary slightly). I like to spray the inside of the liners very lightly with non-stick spray—it’s an extra step, but it guarantees the cupcakes release perfectly.
- Make the Black Velvet Batter (10 minutes): In a large mixing bowl, combine the dark chocolate cake mix, buttermilk, vegetable oil, eggs, and vanilla extract. Beat with an electric mixer on medium speed for about 2 minutes, until the batter is smooth and well-combined. Scrape down the sides of the bowl with your spatula once during mixing.
- Add the Color (5 minutes): This is the moment of truth. Add 2 tablespoons of the black gel food coloring to the batter. Beat on low speed until the color is evenly distributed. The batter will look like a dark, muddy grey at first—do not panic. If you want a true, deep black (like I do for Halloween), add the third tablespoon of coloring and mix again. The batter should be a uniform, very dark black. It will look almost like thick, liquid charcoal. This is exactly what you want.
- Fill the Liners (5 minutes): Use a cookie scoop or a large spoon to divide the batter evenly among the prepared liners. Fill each liner about two-thirds full. Do not overfill, or the cupcakes will mushroom over the top and lose their nice domed shape. I usually get exactly 18 cupcakes from this batter.
- Bake to Perfection (18 to 22 minutes): Place the muffin tin in the preheated oven and bake for 18 to 22 minutes. The exact time depends on your oven. The cupcakes are done when a toothpick inserted into the center of one comes out clean or with just a few moist crumbs attached. Do not overbake, or they will be dry. The tops should spring back when you gently press them.
- Cool Completely (30 minutes): Let the cupcakes cool in the tin for about 5 minutes. This allows them to set. Then, carefully transfer them to a wire cooling rack to cool completely. This is a critical step—if you try to frost them while they are even slightly warm, the frosting will melt into a sad, soupy mess. I have made this mistake before, and it is not pretty.
- Make the Cream Cheese Frosting (10 minutes): While the cupcakes are cooling, make the frosting. In a medium bowl, beat the softened cream cheese and butter together with an electric mixer on medium speed until smooth, light, and fluffy—about 2 to 3 minutes. Scrape down the sides of the bowl. Add the vanilla extract and the pinch of salt, and beat again. Gradually add the powdered sugar, one cup at a time, beating on low speed after each addition until it is fully incorporated. Once all the sugar is in, increase the speed to medium-high and beat for another 2 minutes until the frosting is very light and airy.
- Frost and Decorate (15 minutes): Once the cupcakes are completely cool, it is time to decorate. Fit a piping bag with a large star tip and fill it with the cream cheese frosting. Pipe a generous swirl onto each cupcake. If you don’t have a piping bag, you can simply spread the frosting with a knife or an offset spatula—it will still taste amazing. Immediately top with your chosen Halloween sprinkles, candy eyeballs, or whatever fun decorations you have. The frosting is sticky, so the decorations will adhere easily.
Cooking Tips & Techniques
I have made a lot of mistakes in the kitchen, and I am happy to share them so you don’t have to repeat them. Here are the most important things I have learned about making these Black Velvet Halloween Cupcakes.
Don’t Skimp on the Buttermilk. I tried making these once with regular milk because I thought I could get away with it. The cupcakes were still black, but they were noticeably drier and less tender. Buttermilk is the secret to that soft, velvety crumb. If you don’t have buttermilk, the homemade substitute (milk plus lemon juice or vinegar) works perfectly—just let it sit for a full 5 minutes to thicken properly before using it.
The Color Will Deepen as It Bakes. This is something that surprised me the first time. The batter looks very dark, but when the cupcakes first come out of the oven, they might look slightly less black than you expected. Do not worry. As they cool, the color deepens and becomes that gorgeous, true black. Trust the process and do not be tempted to add more coloring after baking.
Room Temperature Ingredients Are Non-Negotiable. I know it is tempting to use cold eggs and cold butter straight from the fridge, but it really does make a difference. Cold ingredients don’t emulsify as well, which can lead to a denser cake and a lumpy frosting. Set your eggs and cream cheese out on the counter about 30 minutes before you start baking. It is a small step that pays off in a big way.
Watch Your Oven Like a Hawk. Every oven runs a little differently. My old oven used to run hot, and I would burn the bottoms of my cupcakes before the tops were even set. The last 5 minutes of baking are crucial. Start checking your cupcakes at the 18-minute mark. If the tops are browning too quickly (which can happen with dark cake mixes), tent the tin loosely with a piece of aluminum foil.
Chill the Frosting if It Gets Too Soft. Cream cheese frosting is notorious for being soft, especially if your kitchen is warm. If your frosting looks like it is starting to lose its shape or get runny, pop the bowl in the refrigerator for 15 to 20 minutes. This firms it up just enough to pipe beautiful, stable swirls that won’t collapse.
Variations & Adaptations
One of the best things about this recipe is how easy it is to adapt. I have tried several variations over the years, and they have all been hits in their own way. Here are a few of my favorites.
Gluten-Free Black Velvet Cupcakes: I made these for a friend’s child who has celiac disease, and they turned out wonderfully. Simply swap the regular dark chocolate cake mix for a gluten-free chocolate cake mix (King Arthur Flour makes an excellent one). Follow the rest of the recipe exactly as written. The texture is slightly more delicate, so be gentle when you are frosting them, but the flavor is identical.
Vegan-Friendly Version: This one takes a bit more work, but it is totally doable. Use a vegan chocolate cake mix (many are accidentally vegan). Replace the eggs with flax eggs (1 tablespoon ground flaxseed mixed with 3 tablespoons water per egg, let sit for 5 minutes). Use a plant-based buttermilk (soy milk with a splash of lemon juice works best). For the frosting, use a vegan cream cheese and vegan butter. The cupcakes will be a tad denser, but they are still incredibly good.
Spiderweb Decoration Twist: This is my favorite visual variation. After you pipe the white cream cheese frosting onto the black cupcakes, use a toothpick to drag a few lines of black gel icing from the center of the frosting outward, creating a spiderweb pattern. It looks incredibly professional and takes less than 30 seconds per cupcake. My kids love helping with this step.
Chocolate Ganache Filling: For an extra-indulgent surprise, hollow out the center of each cooled cupcake with a small spoon or an apple corer and fill it with a spoonful of chocolate ganache or even a chocolate truffle before frosting. It turns a great cupcake into a truly decadent one. Perfect for an adult Halloween party.
Lower-Sugar Option: If you are watching the sugar intake, you can use a sugar-free chocolate cake mix and a sugar-free powdered sugar substitute (like Swerve) in the frosting. The texture will be slightly different, and the cupcakes won’t be quite as moist, but they still satisfy that Halloween craving without the sugar crash.
Serving & Storage Suggestions
These cupcakes are at their absolute best on the day they are made, but they are still fantastic for a day or two afterward. Here is how I handle serving and storing them.
Serving Temperature: I prefer to serve these cupcakes at room temperature. The cake is soft and tender, and the cream cheese frosting is perfectly creamy. If you have stored them in the fridge, let them sit out on the counter for about 20 minutes before serving to take the chill off. Cold cream cheese frosting can be a bit firm and less enjoyable.
Presentation Ideas: For a Halloween party, I arrange the cupcakes on a large black platter or a wooden board. I scatter a few fake spiderwebs and plastic spiders around them for a spooky effect. The contrast between the white frosting, the black cake, and the colorful sprinkles is really striking. For a school event, I just stack them on a simple plate—they are dramatic enough on their own.
Storage Instructions: Because these have cream cheese frosting, they need to be stored in the refrigerator if you are not serving them within a couple of hours. Place the frosted cupcakes in an airtight container. They will keep well in the fridge for up to 3 days. The cake will stay moist, and the frosting will hold its shape.
Freezing Instructions: You can absolutely freeze these cupcakes, but I recommend freezing them unfrosted. Wrap each cooled, unfrosted cupcake tightly in plastic wrap, then place them in a freezer-safe bag. They will keep for up to 3 months. When you are ready to serve them, thaw them at room temperature (still wrapped) for about an hour, then frost and decorate. The texture is almost exactly like fresh-baked.
Reheating Tips: If you want a warm cupcake (which is delicious with a scoop of vanilla ice cream), remove the frosting first, microwave the cake for 10 to 15 seconds, then put the frosting back on. The frosting will melt if you microwave it directly, so this little trick saves the day.
Nutritional Information & Benefits
Let’s be honest—these are a treat, not a health food. But I do think it is helpful to know what is in them, especially if you are making them for a school party or a family gathering where dietary concerns might come up. Here is an approximate breakdown per cupcake (based on 18 servings with frosting and without decorations).
- Calories: Approximately 310 to 350 calories per cupcake
- Fat: About 18 to 20 grams (mostly from the oil, butter, and cream cheese)
- Carbohydrates: Around 38 to 42 grams
- Sugar: Approximately 28 to 32 grams
- Protein: About 4 to 5 grams
- Calcium: A small amount from the buttermilk and cream cheese
From a wellness perspective, I like to think of these as a “sometimes food”—the kind of thing you make for a special occasion, not an everyday snack. The cream cheese does add a bit of protein and calcium, which is more than you get from a standard buttercream frosting. The buttermilk also adds a touch of probiotics (though most are killed during baking). If you are looking for a slightly lighter option, you can reduce the frosting amount or use a lighter cream cheese, but honestly, part of the joy of Halloween is indulging a little. I say go for it and enjoy every bite.
Allergen Note: This recipe contains wheat (gluten), dairy (buttermilk, butter, cream cheese), and eggs. It does not contain nuts, but always check your specific cake mix label to be sure, as some brands are processed in facilities that also handle nuts.
Conclusion
These Black Velvet Halloween Cupcakes have become a non-negotiable tradition in my house every October. They are the perfect intersection of spooky and delicious—the kind of treat that makes kids’ eyes go wide and adults secretly reach for a second one when they think no one is looking. They are proof that you do not need to be a professional baker or spend a fortune on specialty ingredients to create something truly memorable for your family.
I love this recipe because it is forgiving. It works with a box mix. It works with store-brand food coloring. It works when you are tired and distracted and just need a win. And the look on a child’s face when they bite into a black cupcake and realize it tastes like pure chocolate joy? That is the whole point of Halloween baking, if you ask me.
Now I want to hear from you. Did you try these with your kids? Did you come up with a fun new decoration idea? Did you use a different frosting flavor? Drop a comment below and tell me all about it. And if you loved this recipe, please share it with a friend who needs a little spooky-season magic in their life. Happy Halloween, and happy baking!
Frequently Asked Questions
Can I use liquid food coloring instead of gel?
I do not recommend it. Liquid food coloring has a much higher water content, which can throw off the liquid balance of your batter and make the cupcakes gummy. You would also need a huge amount to achieve a true black color, which can leave a bitter aftertaste. Gel coloring is concentrated and works perfectly with just a few tablespoons.
Why did my black cupcakes turn green?
This is a common issue! It happens when the black food coloring reacts with the baking soda or baking powder in the cake mix, especially if the batter is overmixed. To prevent this, mix the batter just until the ingredients are combined, and do not overbeat it after adding the coloring. Also, make sure you are using a dark chocolate mix, as the cocoa helps stabilize the color.
Can I make these cupcakes a day ahead of time?
Absolutely. You can bake the cupcakes, let them cool completely, and store them in an airtight container at room temperature overnight. Frost them the next day. The cake will still be moist and delicious. Just do not frost them the night before if you are worried about the frosting getting messy in the fridge.
How do I get the frosting to be really white?
The natural yellow tint of butter can make cream cheese frosting look slightly off-white. For a bright white frosting that contrasts beautifully with the black cake, use a clear vanilla extract instead of the dark brown stuff, and beat the butter and cream cheese together for a full 3 minutes until it is very pale and fluffy. You can also add a tiny drop of white gel food coloring to brighten it further.
Can I turn this into a black velvet cake instead of cupcakes?
Yes! Grease and flour two 9-inch round cake pans. Divide the batter evenly between them. Bake at 350°F (175°C) for about 28 to 32 minutes, or until a toothpick inserted in the center comes out clean. Let the layers cool completely before frosting. You will need to double the frosting recipe to have enough for a full layer cake. It makes for an incredibly dramatic Halloween birthday cake.
Pin This Recipe!
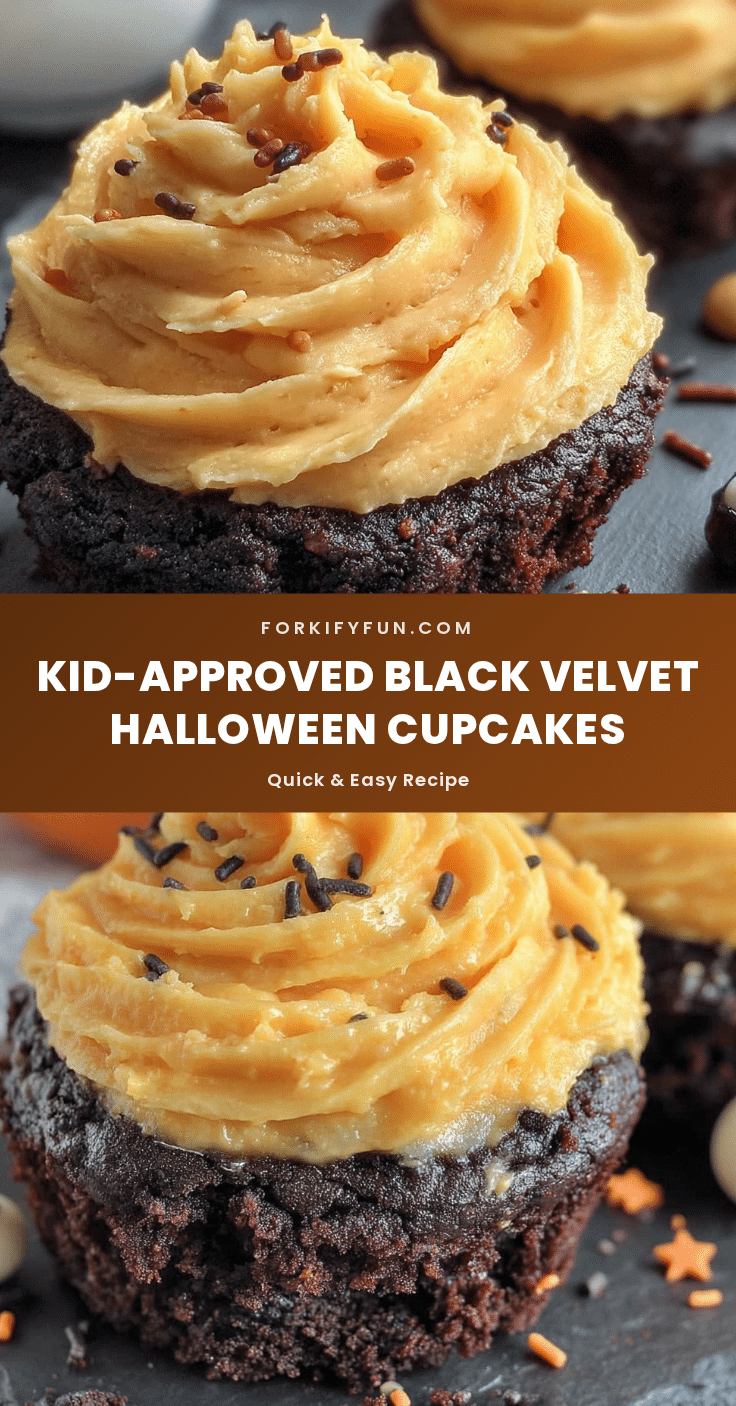
Black Velvet Halloween Cupcakes: Easy Kid-Approved Treats
These Black Velvet Halloween Cupcakes are a spooky yet kid-approved treat that combines a deep black, velvety chocolate cake with a tangy cream cheese frosting. Made with simple ingredients like a box of dark chocolate cake mix and black gel food coloring, they come together in under 45 minutes and are perfect for Halloween parties, school events, or spooky movie nights.
- Prep Time: 15 minutes
- Cook Time: 20 minutes
- Total Time: 45 minutes
- Yield: 18 servings 1x
- Category: Dessert
- Cuisine: American
Ingredients
- 1 box (15.25 oz / 432 g) dark chocolate cake mix
- 1 cup (240 ml) buttermilk, room temperature
- 1/2 cup (120 ml) vegetable oil
- 3 large eggs, room temperature
- 2 teaspoons (10 ml) vanilla extract
- 2 to 3 tablespoons (30 to 45 ml) black gel food coloring
- 8 oz (226 g) block-style cream cheese, softened
- 1/2 cup (113 g / 1 stick) unsalted butter, softened
- 3 to 4 cups (360 to 480 g) powdered sugar, sifted
- 1 teaspoon (5 ml) vanilla extract
- Pinch of salt
- Halloween sprinkles, candy eyeballs, or small plastic spider rings (optional)
Instructions
- Preheat your oven to 350°F (175°C). Line your muffin tin with 18 to 20 cupcake liners. Lightly spray the inside of the liners with non-stick spray.
- In a large mixing bowl, combine the dark chocolate cake mix, buttermilk, vegetable oil, eggs, and vanilla extract. Beat with an electric mixer on medium speed for about 2 minutes until smooth. Scrape down the sides of the bowl once during mixing.
- Add 2 tablespoons of black gel food coloring to the batter. Beat on low speed until evenly distributed. For a deeper black, add a third tablespoon and mix again. The batter should be a uniform, very dark black.
- Use a cookie scoop or large spoon to divide the batter evenly among the prepared liners, filling each about two-thirds full.
- Bake for 18 to 22 minutes, until a toothpick inserted into the center comes out clean or with a few moist crumbs. Do not overbake.
- Let the cupcakes cool in the tin for 5 minutes, then transfer to a wire cooling rack to cool completely.
- While the cupcakes cool, make the frosting: In a medium bowl, beat the softened cream cheese and butter together with an electric mixer on medium speed until smooth, light, and fluffy (about 2 to 3 minutes). Add the vanilla extract and salt, and beat again. Gradually add the powdered sugar, one cup at a time, beating on low speed after each addition. Once all sugar is in, increase speed to medium-high and beat for another 2 minutes until light and airy.
- Once cupcakes are completely cool, pipe or spread the cream cheese frosting onto each cupcake. Decorate with Halloween sprinkles, candy eyeballs, or other decorations immediately.
Notes
For best results, use room temperature ingredients. The color deepens as the cupcakes cool. If frosting gets too soft, chill it for 15-20 minutes before piping. For a gluten-free version, use a gluten-free chocolate cake mix. For a vegan version, use a vegan cake mix, flax eggs, plant-based buttermilk, and vegan cream cheese/butter.
Nutrition
- Serving Size: 1 cupcake
- Calories: 330
- Sugar: 30
- Sodium: 320
- Fat: 19
- Saturated Fat: 8
- Carbohydrates: 40
- Fiber: 1
- Protein: 4.5
Keywords: Halloween cupcakes, black velvet cupcakes, kid-friendly Halloween treats, easy Halloween dessert, black cupcakes, cream cheese frosting cupcakes