I was folding laundry last Tuesday—a stack of mismatched socks, the usual chaos—when a whiff of something warm and buttery drifted up from nowhere. It hit me so hard I actually stopped mid-fold, a sock dangling from my hand, and I was seven again, sitting cross-legged on the cold linoleum floor of Mrs. Patterson’s kitchen two houses down from where I grew up. She wasn’t my grandmother, not even a relative, just this kind older lady who let me “help” her bake after school while my mom worked late. That smell—brown sugar and vanilla and something almost like toffee—hung in her kitchen like a secret. I haven’t thought about her in years, honestly. But there I was, in my own living room, desperately trying to chase down a ghost of a scent that probably wasn’t even real.
So I did what any reasonable person would do. I abandoned the laundry, walked into the kitchen, and decided to make a batch of these cozy small-batch chocolate chip cookies. Not a full dozen, mind you—just enough. Enough to fill the house with that smell. Enough to see if I could get close to what I remembered. And you know what? I got pretty darn close. Maybe you’ve been there too, standing in your kitchen chasing a memory you can’t quite name. That’s what this recipe is for. It’s not about feeding a crowd or impressing anyone. It’s about making a little bit of warmth, just for you, on an ordinary Tuesday.
Why You’ll Love This Recipe
Let me tell you why these cookies have become my go-to for those quiet, needing-a-hug kind of evenings.
- Quick & Easy: From bowl to plate in under 30 minutes. No chilling required, no stand mixer needed, no fuss. Just you, a bowl, and a spoon.
- Simple Ingredients: You probably have everything already. Butter, sugar, an egg, flour, chocolate chips. That’s it. No trips to a specialty store for fancy flours or obscure extracts.
- Perfect for Cozy Evenings: This is the cookie you make when it’s raining outside, or when you’ve had a rough day, or when you just want the house to smell like something good.
- Crowd-Pleaser: Even though it’s a small batch, don’t be surprised if you have to hide a few. They disappear fast.
- Unbelievably Delicious: The edges get that perfect golden crisp, the centers stay soft and chewy, and the chocolate—well, it melts into these little pools of happiness.
What makes this recipe different from the hundred other cookie recipes out there? It’s the technique. I tested this about seven times (I know, rough life) to get the ratio of brown to white sugar just right, and I use a little trick of letting the butter brown just slightly. Not fully browned butter, but just kissed with it. That tiny step adds this nutty, toasty depth that makes the cookies taste like they came from a fancy bakery, not your tiny kitchen. This isn’t just another cookie recipe—it’s the one that makes you close your eyes after the first bite.
What Ingredients You Will Need
This recipe uses simple, honest ingredients to deliver that classic, soul-warming chocolate chip cookie experience. Nothing fancy, just the good stuff you already know and love.
- Unsalted butter – 4 tablespoons (56g), cut into small cubes. I prefer using unsalted so I can control the salt level myself. Let it soften to room temperature for easier mixing, but if you forget, a quick 10 seconds in the microwave (not melted, just softened) works in a pinch.
- Brown sugar – ¼ cup (50g), packed. This is where the chewiness comes from. I use dark brown sugar when I want a deeper, almost molasses-like flavor, but light brown works beautifully too. Domino is my go-to brand for consistency.
- Granulated sugar – 2 tablespoons (25g). Just enough for those crispy edges and a little bit of crunch on the outside.
- Large egg yolk – 1 yolk. Just the yolk, not the whole egg. This is a little trick I picked up from a pastry chef friend—it gives you all the richness and tenderness of the yolk without the extra moisture from the white, which can make cookies cakey instead of chewy. Save the white for scrambled eggs tomorrow!
- Vanilla extract – ½ teaspoon. Pure vanilla, not imitation, if you can swing it. It makes a subtle but real difference in the depth of flavor. I like Nielsen-Massey, but any good brand works.
- All-purpose flour – ½ cup plus 1 tablespoon (75g). Spoon and level it into your measuring cup—don’t scoop directly from the bag or you’ll pack in too much flour and get dry cookies.
- Baking soda – ¼ teaspoon. This helps the cookies spread just the right amount.
- Salt – ¼ teaspoon. I use fine sea salt. Don’t skip it—salt makes the chocolate taste more chocolatey.
- Chocolate chips or chunks – ⅓ cup (60g). Use whatever you love. I’m partial to semi-sweet chunks because they melt into bigger puddles, but dark chocolate chips are fantastic too. Ghirardelli chips are my usual pick. If you’re feeling fancy, chop up a good quality chocolate bar instead.
Equipment Needed
You don’t need a lot of fancy gear for these cookies, which is honestly my favorite part. Here’s what you’ll want to have on hand:
- Mixing bowl – One medium-sized bowl. I use a glass Pyrex bowl because I can see if everything is mixed evenly, but any bowl works.
- Wooden spoon or silicone spatula – For creaming the butter and sugar. A whisk works too, but you’ll have to tap it against the bowl to get the dough off.
- Measuring cups and spoons – For accuracy. I’ve learned the hard way that eyeballing flour leads to sad, flat cookies.
- Baking sheet – A small half-sheet pan or even a toaster oven tray works. I use a Nordic Ware aluminum sheet because it heats evenly and doesn’t warp.
- Parchment paper or silicone baking mat – Non-stick is key. I’ve forgotten this before and spent 20 minutes scraping cookie bits off the pan. Not fun.
- Cooling rack – Optional but helpful. Letting the cookies cool on the pan for a few minutes before moving them to a rack helps them set properly.
- Small cookie scoop (1 tablespoon size) – Not necessary, but it gives you evenly sized cookies. I bought mine for three dollars at a kitchen supply store and it was worth every penny.
Preparation Method
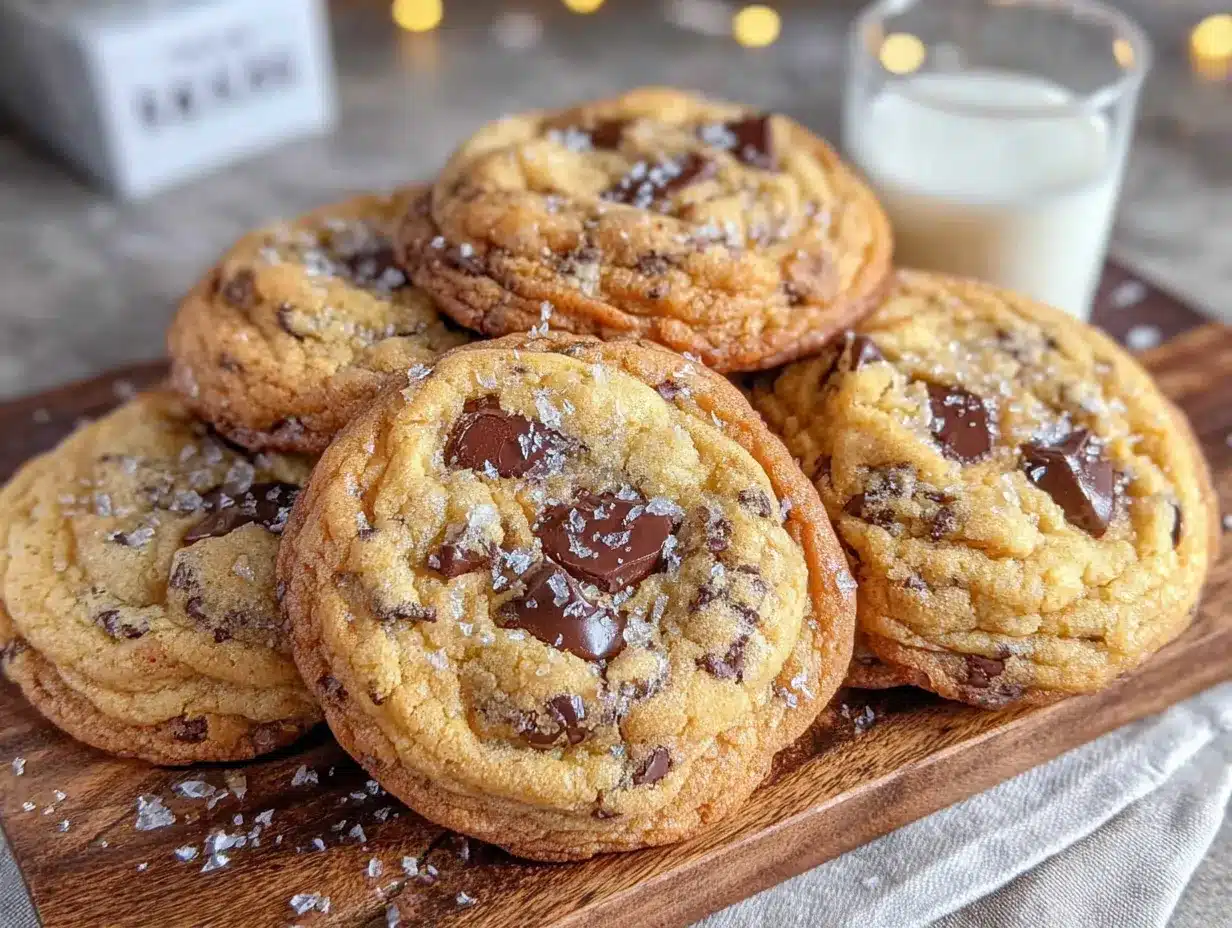
Alright, let’s make some cookies. This is the part where the magic happens. Follow these steps, and you’ll have warm, gooey cookies in about 20 minutes.
- Preheat your oven to 350°F (175°C). Line your baking sheet with parchment paper or a silicone mat. Do this first so the oven is ready when your dough is.
- Brown the butter (just a little). In a small saucepan over medium heat, melt the 4 tablespoons of butter. Swirl the pan occasionally. After a minute or two, you’ll see little brown specks start to appear at the bottom, and the butter will smell nutty and amazing. As soon as you see those specks and smell that toasty aroma—about 2 to 3 minutes—pour the butter into your mixing bowl immediately. Don’t walk away during this part. I’ve burned butter more times than I’d like to admit, and it goes from perfect to acrid in seconds.
- Cool the butter. Let the browned butter sit in the bowl for about 2 minutes. You want it warm but not hot—if it’s too hot, it’ll cook the egg yolk when you add it. Test it with your finger; it should feel like warm bath water.
- Add the sugars. Add the ¼ cup brown sugar and 2 tablespoons granulated sugar to the warm butter. Stir with your wooden spoon or spatula until they’re fully combined. The mixture will look like wet sand. This takes about 30 seconds of stirring.
- Add the egg yolk and vanilla. Drop in the egg yolk and ½ teaspoon vanilla extract. Stir vigorously for about 1 minute. The mixture should become lighter in color and look a little glossy. This step is where you’re building the structure for a chewy cookie, so don’t rush it.
- Add the dry ingredients. Sprinkle the ½ cup plus 1 tablespoon flour, ¼ teaspoon baking soda, and ¼ teaspoon salt over the wet mixture. Stir gently, just until you can’t see any more white flour streaks. A few lumps are totally fine—overmixing will make the cookies tough. The dough will be soft and a little sticky, which is exactly right.
- Fold in the chocolate chips. Add the ⅓ cup chocolate chips and fold them in with a few strokes. Reserve about a tablespoon of chips to press onto the tops of the dough balls later—this makes them look bakery-pretty.
- Scoop the dough. Use your cookie scoop or a spoon to portion the dough into 4 equal balls, each about 1.5 tablespoons in size. Place them on the prepared baking sheet, spaced at least 2 inches apart. These cookies spread, so give them room to breathe. Press a few of the reserved chocolate chips onto the tops of each dough ball.
- Bake. Place the baking sheet on the center rack of your preheated oven. Bake for 9 to 11 minutes. At 9 minutes, the edges should be golden and set, but the centers will still look soft and slightly underdone. That’s what you want. They’ll continue to bake on the hot pan as they cool. If you like crispier cookies, go for 11 minutes, but I’d start checking at 9.
- Cool on the pan. Let the cookies rest on the baking sheet for 5 minutes. This is the hardest part, I know. The smell is incredible and they look so tempting. But trust me—if you try to move them too soon, they’ll fall apart. After 5 minutes, transfer them to a cooling rack, or just grab one and eat it while it’s still warm. No judgment here.
Cooking Tips & Techniques
I’ve made a lot of mistakes in the kitchen, and these cookies have seen their fair share of them. Here’s what I’ve learned so you don’t have to repeat my errors.
Don’t skip the butter browning step. I know it seems like an extra thing to do, but it’s what gives these cookies that deep, almost caramel-like flavor. The first time I made these, I was in a rush and just melted the butter. The cookies were fine—good, even. But the second time, when I let the butter get those brown specks? They were phenomenal. It’s a two-minute step that makes all the difference.
Watch your flour measurement. This is the number one mistake I see in cookie recipes. If you scoop your measuring cup directly into the flour bag, you can pack in up to 20% more flour than the recipe calls for. That leads to dry, cakey cookies. Instead, spoon the flour into your measuring cup and level it off with the back of a knife. It takes an extra five seconds and saves you from disappointment.
Room temperature ingredients matter. I know, I know, nobody has time to let butter sit out for an hour. But if your butter is too cold, it won’t cream properly with the sugar. If it’s too warm (melted), your cookies will spread into flat puddles. The sweet spot is when you can press your finger into the butter and it leaves an indent without sliding around. If you’re in a hurry, cut the butter into small cubes and let it sit for 10 minutes—it’ll soften much faster.
Multitasking tip: While the butter is browning, measure out your other ingredients. That way, when the butter is ready, you can move through the steps without scrambling to find the flour or vanilla. I keep all my pre-measured ingredients in little bowls, like a cooking show. It makes the whole process feel smoother and more intentional.
Check your oven temperature. Ovens lie. I’m serious. My old oven ran 25 degrees hot, and my first few batches of cookies were always overdone on the bottom. An inexpensive oven thermometer ($10 at any kitchen store) will tell you the real temperature. Trust the thermometer, not the dial.
Variations & Adaptations
One of the best things about this recipe is how easy it is to twist into something new. Here are a few variations I’ve tried and loved.
Gluten-Free Version: Swap the all-purpose flour with a good 1-to-1 gluten-free baking flour blend. I’ve had great luck with Bob’s Red Mill 1-to-1 Baking Flour. The texture is slightly more tender, but the flavor is spot on. Add an extra tablespoon of flour if the dough seems too sticky.
Vegan Adaptation: Use 4 tablespoons of vegan butter (I like Miyoko’s) and replace the egg yolk with 1 tablespoon of aquafaba (the liquid from a can of chickpeas) mixed with 1 teaspoon of cornstarch. The cookies won’t be quite as rich, but they’ll still be delicious and chewy. I tested this for a friend who’s vegan, and she said they were the best cookies she’d had in years.
Flavor Twists: Add ¼ teaspoon of cinnamon to the flour for a warm, spiced note that pairs beautifully with the brown butter. Or try adding ¼ cup of toasted chopped pecans or walnuts along with the chocolate chips. For a holiday version, swap half the chocolate chips for white chocolate chips and add a pinch of nutmeg. I made a batch with orange zest and dark chocolate once, and it was like a fancy European cookie—so good.
Lower Sugar Option: Reduce the brown sugar to 3 tablespoons and the granulated sugar to 1 tablespoon. The cookies will be less sweet and a little less chewy, but still satisfying. You can also use a sugar substitute like monk fruit sweetener, though I haven’t tested that myself.
Serving & Storage Suggestions
These cookies are best served warm, obviously. That moment when the chocolate is still slightly melted and the edges are crisp? That’s the peak experience. I like to serve them with a cold glass of milk or a hot cup of coffee. For a really cozy treat, crumble a warm cookie over a scoop of vanilla ice cream—it’s like a deconstructed cookie sundae.
If you have any left (which, let’s be honest, is rare), store them in an airtight container at room temperature. They’ll stay fresh for up to 3 days. To bring back that just-baked softness, pop a cookie in the microwave for about 10 seconds. It won’t be exactly like fresh from the oven, but it’s pretty close.
You can also freeze the unbaked dough balls. Scoop them onto a parchment-lined baking sheet and freeze until solid, about 1 hour. Then transfer the frozen dough balls to a zip-top bag. When a cookie craving hits, just bake them straight from frozen, adding 2 to 3 minutes to the baking time. This is my secret weapon for last-minute dessert emergencies.
Nutritional Information & Benefits
Let’s be real—these are cookies. They’re a treat, not a health food. But that doesn’t mean they can’t fit into a balanced life. Here’s the approximate nutritional breakdown per cookie (based on 4 cookies):
| Nutrient | Amount per Cookie |
|---|---|
| Calories | 280 |
| Total Fat | 16g |
| Saturated Fat | 10g |
| Carbohydrates | 33g |
| Sugar | 22g |
| Protein | 3g |
Dark chocolate does contain antioxidants, and butter provides vitamin A, so there are tiny silver linings. But honestly, the biggest benefit here is the joy of making and eating something that makes you feel good. That matters too. These cookies are a small, intentional act of self-care. Sometimes that’s exactly what you need.
Conclusion
These cozy small-batch chocolate chip cookies have become my little ritual. They’re the recipe I turn to when I need to slow down, when I want to fill my kitchen with warmth, when I’m chasing a memory or just trying to make a new one. They’re not fancy or complicated—they’re just good, honest cookies made with a little bit of care. And that’s enough.
I’d love for you to try them. Make them on a rainy afternoon, or on a Tuesday when the laundry is piling up. Make them for yourself, or share them with someone who needs a little sweetness. And when you do, come back and tell me how they turned out. Did you add cinnamon? Did you use dark chocolate chunks? Did you eat all four in one sitting? (No judgment, I promise.) Leave a comment below or tag me in your photos—I genuinely love seeing your creations. Happy baking, friend.
Frequently Asked Questions
Can I make these cookies with whole wheat flour?
Yes, you can substitute half the all-purpose flour with whole wheat flour for a nuttier flavor and slightly denser texture. Using 100% whole wheat will make them too dry and dense, so stick to a 50/50 blend for best results.
Why did my cookies spread too much?
This usually happens if the butter was too warm when you mixed it, or if you used too little flour. Make sure your browned butter has cooled to warm (not hot) before adding the sugar and egg yolk. Also, double-check your flour measurement using the spoon-and-level method.
Can I double this recipe?
Absolutely. Simply double all the ingredients, and use a whole egg instead of just a yolk (since you’ll have two yolks from two eggs). The baking time stays the same, but you may need to bake in batches if your oven can’t fit two sheets at once.
How do I get crispy cookies instead of chewy?
Bake them for 11 to 12 minutes instead of 9 to 10, and let them cool completely on the baking sheet. You can also substitute the brown sugar with all granulated sugar, which will give you a crisper, crunchier cookie.
Can I use margarine instead of butter?
I don’t recommend it. Margarine has a higher water content than butter, which will make the cookies spread more and become greasy. Butter gives you the best flavor and texture. If you need a dairy-free option, use a high-quality vegan butter stick (not the spreadable kind in a tub).
Pin This Recipe!
Cozy Small-Batch Chocolate Chip Cookies: Easy One-Bowl Recipe

These cozy small-batch chocolate chip cookies are quick, easy, and made with simple ingredients. Perfect for a quiet evening, they deliver golden edges, soft centers, and a nutty depth from lightly browned butter.
- Prep Time: 10 minutes
- Cook Time: 10 minutes
- Total Time: 20 minutes
- Yield: 4 cookies 1x
- Category: Dessert
- Cuisine: American
Ingredients
- 4 tablespoons (56g) unsalted butter, cut into small cubes
- 1/4 cup (50g) brown sugar, packed
- 2 tablespoons (25g) granulated sugar
- 1 large egg yolk
- 1/2 teaspoon vanilla extract
- 1/2 cup plus 1 tablespoon (75g) all-purpose flour
- 1/4 teaspoon baking soda
- 1/4 teaspoon fine sea salt
- 1/3 cup (60g) chocolate chips or chunks
Instructions
- Preheat your oven to 350°F (175°C). Line your baking sheet with parchment paper or a silicone mat.
- In a small saucepan over medium heat, melt the 4 tablespoons of butter. Swirl occasionally until brown specks appear and it smells nutty, about 2 to 3 minutes. Immediately pour into a mixing bowl.
- Let the browned butter cool for about 2 minutes until warm but not hot.
- Add the 1/4 cup brown sugar and 2 tablespoons granulated sugar to the warm butter. Stir until fully combined, about 30 seconds.
- Add the egg yolk and 1/2 teaspoon vanilla extract. Stir vigorously for about 1 minute until lighter and glossy.
- Sprinkle the 1/2 cup plus 1 tablespoon flour, 1/4 teaspoon baking soda, and 1/4 teaspoon salt over the wet mixture. Stir gently until just combined; a few lumps are fine.
- Fold in the 1/3 cup chocolate chips. Reserve about 1 tablespoon of chips to press onto the tops of the dough balls.
- Scoop the dough into 4 equal balls, each about 1.5 tablespoons. Place on the prepared baking sheet, spaced at least 2 inches apart. Press reserved chocolate chips onto the tops.
- Bake on the center rack for 9 to 11 minutes. At 9 minutes, edges should be golden and set, centers soft.
- Let the cookies rest on the baking sheet for 5 minutes, then transfer to a cooling rack or enjoy warm.
Notes
Don’t skip the butter browning step for deep flavor. Spoon and level flour to avoid dry cookies. Room temperature butter is key. Check oven temperature with a thermometer for accuracy.
Nutrition
- Serving Size: 1 cookie
- Calories: 280
- Sugar: 22
- Sodium: 180
- Fat: 16
- Saturated Fat: 10
- Carbohydrates: 33
- Fiber: 1
- Protein: 3
Keywords: small-batch chocolate chip cookies, easy cookie recipe, one-bowl cookies, brown butter cookies, chewy cookies