My neighbor Maria wasn’t trying to impress anyone. I’d stopped by to borrow a lime—honestly, I was making margaritas and had run out—and the smell hit me before I even got through her screen door. That warm, nutty, buttery scent that can only mean one thing: caramel. Not just any caramel, either. There was salt in the air, too, like sea breeze and summer rolled into one.
I found her in the kitchen, barefoot, stirring a pot with one hand and holding her phone to her ear with the other. “Oh, this?” she said when I asked, barely glancing up. “It’s just ice cream. No machine or anything.” Just ice cream. She said it like it was nothing—like she hadn’t just created something that smelled better than any fancy bakery I’d ever walked into. She poured this gorgeous, golden caramel into a bowl of whipped cream, folded it in with a spatula like she was born doing it, and scraped it into a loaf pan. “Freeze it,” she said. “That’s it.”
I stood there, lime completely forgotten, watching her lick the spatula clean. “You want some?” she asked, finally noticing I hadn’t moved. I nodded. She handed me a spoonful of the raw mixture right there over the sink—no bowl, no fuss—and let me tell you, I nearly fell over. It was salty, sweet, creamy, and so ridiculously simple that it almost made me mad. I mean, I’d been buying expensive pints of artisanal ice cream for years, and here she was, making the best thing I’d ever tasted with stuff she already had in her pantry. You know that feeling when you realize you’ve been overcomplicating your whole life?
That afternoon, I sat on her back porch with a bowl of what would become my go-to summer dessert. The sun was setting, the ice cream was melting faster than we could eat it, and Maria was telling me about how her grandmother used to make this same recipe in Venezuela. No fancy equipment, no degrees in pastry arts—just cream, sugar, salt, and a little patience. I’ve been making it ever since. And honestly? I think about that afternoon every single time.
Why You’ll Love This Recipe
Let’s be real for a second. Homemade ice cream sounds like a project. You think about churning, rock salt, ice baths, maybe even one of those expensive machines that takes up half your cabinet space. But this No-Churn Salted Caramel Ice Cream? It flips all of that on its head. You don’t need a single piece of special equipment. Not one.
Here’s why this recipe works so well for summer—and honestly, for life in general:
- No ice cream maker required. Just a bowl, a whisk (or mixer), and a freezer. That’s it. You can literally make this in your pajamas.
- Simple ingredients you probably already have. Heavy cream, sweetened condensed milk, sugar, butter, salt, vanilla. No weird stabilizers, no corn syrup, nothing you have to hunt down at a specialty store.
- Perfect for hot summer days. This ice cream was made for those afternoons when the temperature hits 90 and you need something cold, sweet, and satisfying. It’s also great for barbecues, pool parties, or just Tuesday nights.
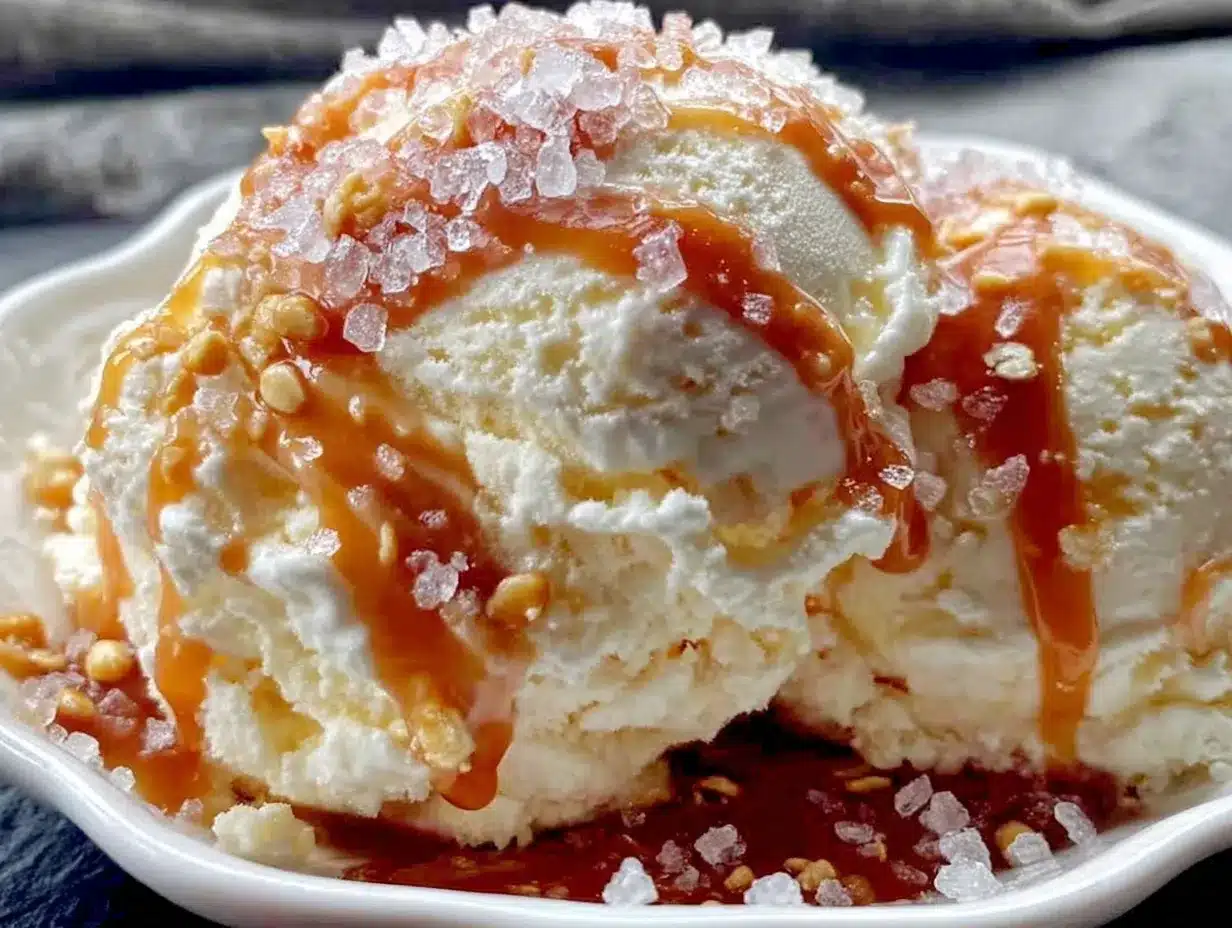
- That salty-sweet magic. The caramel is rich and buttery, but the flaky sea salt on top cuts through the sweetness in the best way. It’s the kind of balance that makes you keep going back for “just one more bite.”
- Crowd-pleaser guaranteed. I’ve brought this to potlucks, family dinners, and casual hangouts. Every single time, someone asks for the recipe. Every. Single. Time.
What makes this version different from other no-churn recipes you might have tried? It’s the caramel. Most recipes use store-bought caramel sauce, which is fine, I guess, but it’s also full of preservatives and doesn’t have that deep, almost-burnt flavor that makes homemade caramel so special. We’re making it from scratch here—and I promise, it’s easier than you think. I’ve tested this method about a dozen times to get the texture just right. The goal was a caramel that stays soft even after freezing, so you don’t end up with a rock-hard block of ice cream. And we nailed it.
This is the kind of dessert that makes you close your eyes after the first bite. It’s comfort food reimagined—cool, creamy, and just a little bit fancy without trying too hard. Perfect for impressing guests without any stress, or turning a simple summer evening into something memorable.
What Ingredients You Will Need
This recipe uses simple, honest ingredients to create something that tastes way more complicated than it actually is. Most of these are pantry staples, and the ones that aren’t are easy to find at any grocery store. Here’s what you’ll need:
For the Salted Caramel Sauce
- 1 cup (200g) granulated sugar — Regular white sugar works best here. Don’t use brown sugar; it has molasses content that can throw off the caramelization process.
- 6 tablespoons (85g) unsalted butter, cut into cubes — I use unsalted so I can control the salt level. Let it come to room temperature before you start—cold butter can cause the caramel to seize up.
- 1/2 cup (120ml) heavy cream, room temperature — This is crucial. If your cream is cold when you add it to the hot caramel, it can splatter and seize. Trust me, I’ve learned this the hard way. (More on that in the tips section.)
- 1 teaspoon flaky sea salt, plus more for topping — I love Maldon sea salt for this. It has those beautiful, delicate flakes that dissolve slowly on your tongue. Regular table salt is too fine and can make the caramel taste harsh.
- 1 teaspoon vanilla extract — Pure vanilla extract, not imitation. It adds warmth and depth to the caramel.
For the Ice Cream Base
- 2 cups (480ml) heavy whipping cream, cold — This needs to be straight from the fridge. Cold cream whips up much better than room temperature cream. I recommend a brand like Horizon Organic or Organic Valley—they tend to have a higher butterfat content, which means a creamier ice cream.
- 1 can (14 ounces / 397g) sweetened condensed milk — This is the magic ingredient in no-churn ice cream. It adds sweetness and body without needing to make a custard base. I use Eagle Brand or Borden, but any brand works fine.
- Pinch of salt — Just a tiny pinch to balance the sweetness of the condensed milk.
Ingredient Selection Tips
When you’re picking out your heavy cream at the store, look for one with a higher fat content—at least 36% milk fat. This is what gives the ice cream that luxurious, velvety texture. Some brands label it as “heavy whipping cream” and others just “heavy cream.” They’re essentially the same thing, but check the fat percentage if you can.
For the sweetened condensed milk, don’t accidentally grab evaporated milk. They look similar on the shelf, but they’re completely different. Evaporated milk is unsweetened and thinner, and it won’t give you the same creamy, scoopable texture. Double-check that label before you leave the store.
If you’re in a pinch and don’t have flaky sea salt for the topping, you can use kosher salt instead. Just crush it slightly between your fingers before sprinkling it on so the pieces are smaller. But honestly, flaky salt is worth the splurge here—it really does make a difference in how the salt hits your tongue.
One more thing: if you’re making this in the middle of summer and your kitchen is hot, consider popping your mixing bowl and beaters in the fridge for 15 minutes before you start whipping the cream. It helps the cream hold its shape better. Little tricks like this make a big difference.
Equipment Needed
The beauty of this recipe is that you don’t need much. Here’s what you’ll actually use:
- Medium saucepan — For making the caramel. A light-colored saucepan is ideal because you can see the color of the sugar as it caramelizes. If you use a dark nonstick pan, it’s harder to tell when it’s done.
- Large mixing bowl — For whipping the cream. Make sure it’s big enough to accommodate the cream doubling in volume.
- Hand mixer or stand mixer — You can whip the cream by hand with a whisk, but your arm will get tired. A hand mixer makes it quick and easy. If you’re using a stand mixer, use the whisk attachment.
- Rubber spatula — For folding everything together. A flexible spatula helps you scrape every bit of caramel into the cream.
- Loaf pan (9×5-inch) or freezer-safe container — This is what you’ll freeze the ice cream in. A metal loaf pan works great because it conducts cold well, but any container will do.
- Parchment paper or plastic wrap — To cover the surface of the ice cream and prevent freezer burn.
- Small bowl — For the flaky salt topping, if you want to keep it separate until serving.
If you don’t have a loaf pan, you can use a 8×8-inch baking dish or even a quart-sized deli container. The shape doesn’t matter much—you’re just freezing it. I’ve also used a deep pie plate in a pinch, and it worked fine. Just make sure whatever you use is freezer-safe and has a lid or can be covered tightly with foil.
One tip: if you use a metal loaf pan, the ice cream will freeze faster and more evenly than in a glass or ceramic dish. Metal conducts cold much better. I learned this from my grandmother, who always froze her ice cream in old metal bread pans.
Preparation Method
Okay, let’s get into the actual process. I’m going to walk you through this step by step, with all the little details I wish someone had told me the first time I made it. Trust me, it’s easier than you think.
Step 1: Make the Salted Caramel Sauce
Time estimate: 10-12 minutes
Start by placing your saucepan over medium heat. Add the granulated sugar in an even layer—don’t pile it up. Let it sit undisturbed for about 2 minutes. You’ll start to see the edges turning liquid and golden. This is where patience pays off. Resist the urge to stir right away.
Once you see the edges melting, gently swirl the pan (don’t stir) to help the sugar melt evenly. If you stir too early, the sugar can crystallize and turn grainy. I know it’s tempting, but just swirl. After about 4-5 minutes, the sugar should be completely melted and a deep amber color—like the color of a new penny. If it’s lighter than that, give it another 30 seconds. You want it to be just on the edge of too dark, because it’ll keep cooking for a moment after you take it off the heat.
Now, here’s the part that can feel a little scary. Remove the pan from the heat and add the cubed butter. It will bubble up and steam—that’s normal. Whisk vigorously until the butter is completely melted and incorporated. The mixture will look glossy and smooth.
Slowly drizzle in the room-temperature heavy cream while whisking constantly. If your cream is cold, it might seize up and form clumps. I’ve done this before, and it’s fixable—just keep whisking over low heat until it smooths out—but it’s easier to avoid. So take the cream out of the fridge 20 minutes before you start.
Once the cream is fully incorporated, whisk in the vanilla extract and the flaky sea salt. Set the caramel aside to cool for about 15-20 minutes. It should be warm but not hot when you add it to the cream later. If it’s too hot, it’ll melt the whipped cream.
Step 2: Whip the Cream
Time estimate: 3-5 minutes
Pour the cold heavy cream into your large mixing bowl. Using a hand mixer or stand mixer with the whisk attachment, start on low speed and gradually increase to medium-high. You’re looking for stiff peaks—when you lift the beaters, the cream should stand up straight without flopping over.
Be careful not to overwhip. If you go too far, the cream will start to look grainy and eventually turn into butter. I’ve definitely done this before, and it’s a bummer. Stop when the cream is thick and holds its shape but still looks smooth and silky. This usually takes about 3-4 minutes with a hand mixer.
Step 3: Fold in the Sweetened Condensed Milk
Time estimate: 1-2 minutes
Pour the entire can of sweetened condensed milk into the whipped cream. Add a tiny pinch of salt. Using a rubber spatula, gently fold everything together. Start from the bottom and bring the mixture up and over, rotating the bowl as you go. You want to incorporate the condensed milk without deflating all the air you just whipped into the cream.
It should look like a thick, creamy base at this point. Taste it. I mean, you have to, right? It’s already delicious, but it’s about to get so much better.
Step 4: Add the Caramel
Time estimate: 2-3 minutes
Drizzle about two-thirds of the cooled caramel sauce over the cream mixture. Reserve the rest for swirling on top later. Using your spatula, fold the caramel in gently. You don’t want to overmix—you want ribbons of caramel running through the ice cream. Just 4-5 folds should do it. If you mix it too much, the caramel will fully incorporate and you’ll lose those beautiful swirls.
Step 5: Layer and Freeze
Time estimate: 5 minutes prep + 6 hours freezing
Pour about half of the ice cream mixture into your loaf pan. Drizzle some of the reserved caramel on top. Add the remaining ice cream mixture, then drizzle the rest of the caramel on top. Use a knife or skewer to gently swirl the caramel into the top layer—just a few figure-eight motions. Don’t go too deep or you’ll disturb the caramel ribbons inside.
Sprinkle a generous pinch of flaky sea salt over the top. This is where that beautiful salt crunch happens.
Cover the pan tightly with plastic wrap or parchment paper, pressing it directly onto the surface of the ice cream. This prevents ice crystals from forming. Then cover the whole pan with foil or a lid. Place it in the coldest part of your freezer (usually the back, not the door).
Freeze for at least 6 hours, but overnight is better. The longer it freezes, the firmer it gets. If you’re impatient like me, you can check it after 4 hours—it’ll be soft-serve consistency, which is also pretty amazing.
Cooking Tips & Techniques
I’ve made this recipe about a dozen times, and let me tell you, I’ve messed up plenty along the way. Here are the lessons I learned so you don’t have to learn them the hard way.
Don’t rush the caramel. The first time I made this, I cranked the heat up to high because I was impatient. The sugar burned in spots and was still grainy in others. Low and slow is the way to go. Medium heat, patience, and constant watching. Caramel can go from perfect to burnt in about 30 seconds, so don’t walk away from the stove.
Room temperature ingredients matter. I know it’s annoying to wait for butter and cream to come to room temperature, but it really does make a difference. Cold butter can cause the caramel to seize into a grainy mess. Cold cream can cause it to splatter and seize. Set everything out on the counter 20 minutes before you start. Set a timer if you have to.
If your caramel seizes, don’t panic. It happened to me once—I added cold cream and the whole thing turned into a clumpy, separated disaster. I put it back on low heat and whisked constantly for about 2 minutes, and it smoothed right out. So if this happens to you, just keep going. It’s fixable.
Whip the cream to stiff peaks, but not beyond. This is the most important step for texture. Underwhipped cream will give you a dense, icy ice cream. Overwhipped cream will give you a grainy, buttery texture. You want that sweet spot where the cream holds its shape but still looks silky. If you see it starting to look curdled, stop immediately.
Use a metal loaf pan for faster freezing. Metal conducts cold much better than glass or ceramic. If you use a glass dish, your ice cream will take longer to freeze and might develop larger ice crystals. I learned this after my first batch came out a little icy around the edges.
Press plastic wrap directly onto the surface. This is the best way to prevent freezer burn. Air is the enemy of ice cream. If there’s any air gap between the surface and the lid, you’ll get ice crystals. Press the wrap down so it’s touching the ice cream, then cover with foil or a lid.
Let it sit for 5 minutes before scooping. When you’re ready to serve, take the ice cream out of the freezer and let it sit at room temperature for about 5 minutes. This softens it just enough to scoop easily without breaking your wrist. If you’re serving a crowd, 10 minutes is even better.
Variations & Adaptations
One of the best things about this recipe is how easy it is to customize. Here are some variations I’ve tried and loved:
Chocolate-Dipped Salted Caramel
Melt 1/2 cup of dark chocolate chips with 1 tablespoon of coconut oil. Drizzle it over the top of the ice cream before freezing, or dip scoops in the chocolate sauce before serving. It adds that extra layer of richness that chocolate lovers will appreciate.
Vegan Coconut Caramel Ice Cream
Swap the heavy cream for full-fat coconut cream (the solid part from a can of coconut milk) and use sweetened condensed coconut milk instead of dairy. For the caramel, use coconut oil instead of butter. The coconut flavor pairs beautifully with the caramel and salt. It’s a little different, but honestly, it’s still amazing.
Spiced Chai Caramel Swirl
Add 1 teaspoon of chai masala spice blend (or a mix of cinnamon, cardamom, ginger, and cloves) to the caramel while it’s cooking. The warm spices add a cozy, aromatic note that makes this feel like a fall dessert. I made this for a friend’s Diwali party, and it was a huge hit.
Peanut Butter Pretzel Crunch
Fold in 1/2 cup of crushed pretzels and 1/4 cup of peanut butter chips along with the caramel. The salty, crunchy pretzels contrast perfectly with the smooth, creamy ice cream. This is my go-to version when I want something extra indulgent.
Berry Swirl
Cook 1 cup of fresh or frozen berries with 2 tablespoons of sugar until they break down and thicken. Let it cool, then swirl it into the ice cream along with the caramel. The tartness of the berries cuts through the sweetness of the caramel beautifully. In summer, I use fresh strawberries or raspberries.
If you’re avoiding dairy, you can also use a dairy-free heavy cream alternative like oat cream or cashew cream. Just make sure it has a high fat content so it whips properly. Coconut cream is the most reliable option, but oat cream works well too.
Serving & Storage Suggestions
This ice cream is best served slightly softened—about 5 minutes out of the freezer. Scoop it into bowls or cones, and if you’re feeling fancy, drizzle a little extra caramel on top and sprinkle with more flaky sea salt. A dollop of whipped cream never hurts either.
For a complete summer dessert, serve this alongside a warm fruit crisp or a slice of pound cake. The contrast between warm and cold is just perfect. I also love pairing it with a strong cup of coffee or an affogato—pour a shot of espresso over a scoop of this ice cream, and you’ve got magic.
If you’re serving this at a party, scoop it into individual serving dishes ahead of time and keep them in the freezer until you’re ready. That way, you’re not scrambling with a scoop while everyone watches.
Storage: Keep the ice cream in an airtight container in the freezer. Press plastic wrap directly onto the surface to prevent ice crystals. It will keep for up to 2 weeks, but honestly, it never lasts that long in my house. The texture is best within the first week.
Reheating the caramel: If your caramel sauce thickens up in the fridge (which it will), just microwave it in 10-second bursts, stirring between each, until it’s pourable again. Or place the jar in a bowl of warm water for a few minutes.
Flavor development: The caramel flavor actually deepens after a day or two in the freezer. So if you can wait, it’s even better on day two. The salt also mellows out a bit, so you might want to add a little extra flaky salt when serving.
Nutritional Information & Benefits
Let’s be honest: this is a treat. It’s not health food, and it’s not pretending to be. But here’s what I can tell you about what’s in it.
Estimated per serving (1/2 cup serving, makes about 8 servings):
- Calories: 380
- Fat: 24g
- Carbohydrates: 38g
- Protein: 4g
- Sugar: 34g
- Sodium: 220mg
These are rough estimates and will vary based on the exact brands you use and how much caramel you add. If you’re watching your sugar intake, you can reduce the caramel sauce by half, but honestly, the caramel is the star here.
Potential allergens: This recipe contains dairy (heavy cream, butter, sweetened condensed milk). It is not gluten-free, nut-free, or vegan in its standard form, but see the variations section for adaptations.
On the bright side, this ice cream does contain some calcium from the dairy, and the heavy cream provides a good amount of vitamin A. The salt adds electrolytes, if you want to get technical. But really, this is about enjoyment, not nutrition. Sometimes you just need a little something sweet and cold, and that’s okay. Life is about balance, right?
I personally think of this as a “sometimes food”—something you make for special occasions, hot summer days, or when you just need a little pick-me-up. And honestly, the joy it brings is worth every calorie.
Conclusion
So there you have it. Summer’s Best No-Churn Salted Caramel Ice Cream, made right in your own kitchen with no fancy equipment and minimal fuss. It’s the kind of recipe that looks impressive but is secretly simple—my favorite kind of recipe, honestly.
I love this recipe because it reminds me of that afternoon at Maria’s house. The way she made it seem like no big deal, the way the smell filled her kitchen, the way we sat on her porch eating it straight from the bowl. It’s more than just ice cream. It’s a memory. And now it can be one for you, too.
I’d love to hear how yours turns out. Did you try a variation? Did it remind you of someone? Did you eat the whole batch in one sitting (no judgment)? Leave a comment below and let me know. And if you make it, tag me on Pinterest—I’d love to see your photos.
Go on, give it a try. Your summer just got a whole lot sweeter.
Frequently Asked Questions
Can I use store-bought caramel sauce instead of making my own?
You can, but I really recommend making your own. Store-bought caramel sauce often has preservatives and corn syrup that can affect the texture. Homemade caramel is richer, deeper, and stays softer in the freezer. It only takes about 10 minutes, and the difference is huge.
Why did my caramel turn grainy?
This usually happens if the sugar crystallizes. To avoid this, don’t stir the sugar while it’s melting—just swirl the pan. Also, make sure your butter and cream are at room temperature. If it does get grainy, you can try reheating it gently with a splash of cream and whisking until smooth.
How long does this ice cream need to freeze?
At least 6 hours, but overnight is better. If you’re in a hurry, you can eat it after 4 hours—it’ll be soft-serve consistency, which is actually pretty delicious. For a firmer scoop, give it the full 6-8 hours.
Can I make this without a hand mixer?
Absolutely. You can whip the cream by hand with a whisk, but it will take about 8-10 minutes of vigorous whisking. Your arm will get a workout, but it’s totally doable. If you have a stand mixer, even better—use the whisk attachment on medium-high speed.
How do I prevent ice crystals from forming?
Press plastic wrap directly onto the surface of the ice cream before sealing the container. This prevents air from reaching the surface, which is what causes ice crystals. Also, make sure your freezer is set to 0°F (-18°C) or colder. If you’re storing it for more than a week, it might develop some ice, but it’s still perfectly fine to eat.
Pin This Recipe!
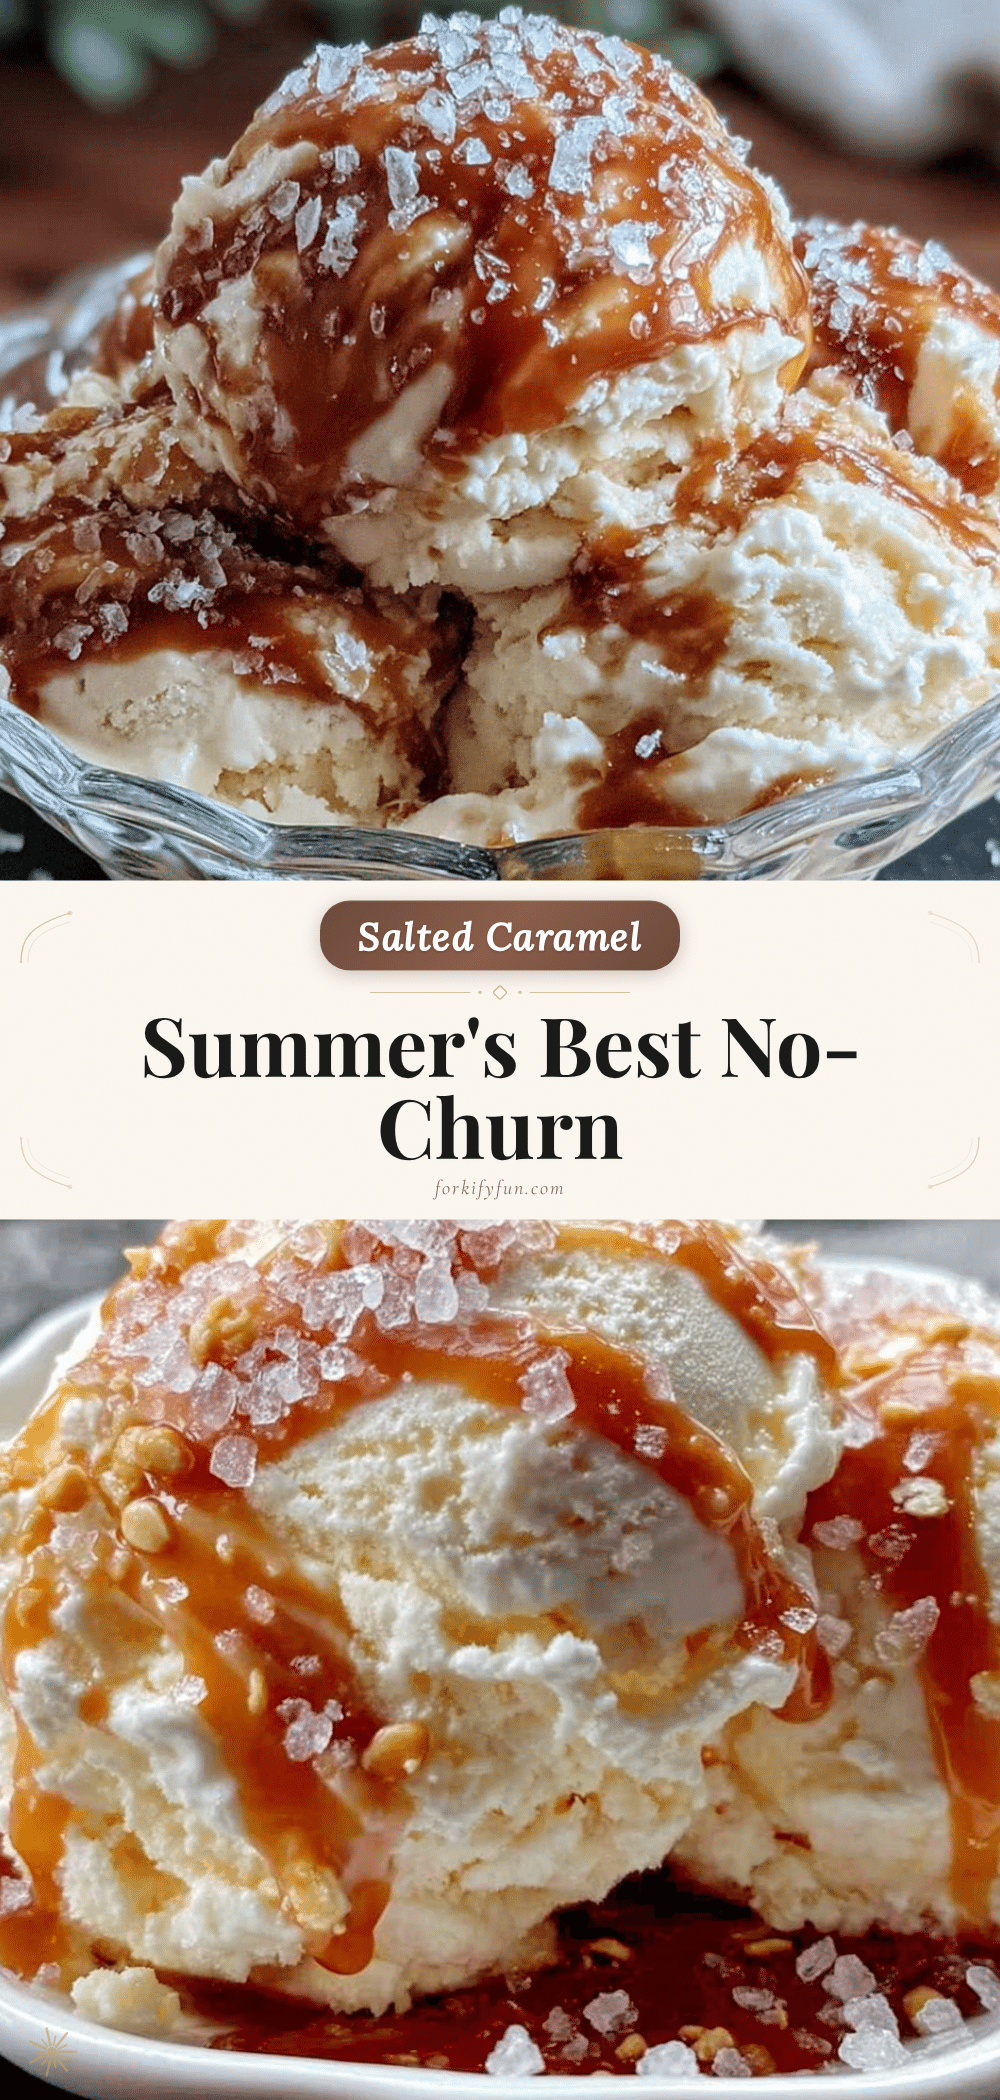
Summer’s Best No-Churn Salted Caramel Ice Cream
This no-churn salted caramel ice cream is incredibly easy to make without any special equipment. It features a rich, homemade caramel swirled into a creamy base, topped with flaky sea salt for the perfect salty-sweet treat.
- Prep Time: 20 minutes
- Cook Time: 12 minutes
- Total Time: 6 hours 32 minutes (includes freezing)
- Yield: 8 servings 1x
- Category: Dessert
- Cuisine: American
Ingredients
- 1 cup (200g) granulated sugar
- 6 tablespoons (85g) unsalted butter, cut into cubes, room temperature
- 1/2 cup (120ml) heavy cream, room temperature
- 1 teaspoon flaky sea salt, plus more for topping
- 1 teaspoon vanilla extract
- 2 cups (480ml) heavy whipping cream, cold
- 1 can (14 ounces / 397g) sweetened condensed milk
- Pinch of salt
Instructions
- Make the salted caramel sauce: Place a medium saucepan over medium heat. Add the granulated sugar in an even layer and let it sit undisturbed for about 2 minutes until the edges start to melt. Gently swirl the pan (do not stir) until the sugar is completely melted and a deep amber color, about 4-5 minutes.
- Remove the pan from heat and add the cubed butter. Whisk vigorously until the butter is melted and incorporated. The mixture will bubble up.
- Slowly drizzle in the room-temperature heavy cream while whisking constantly. Whisk until smooth.
- Whisk in the vanilla extract and flaky sea salt. Set aside to cool for 15-20 minutes until warm but not hot.
- Whip the cream: In a large mixing bowl, beat the cold heavy cream with a hand mixer or stand mixer on medium-high speed until stiff peaks form, about 3-5 minutes. Do not overwhip.
- Fold in the sweetened condensed milk and a pinch of salt using a rubber spatula. Gently fold until combined, being careful not to deflate the cream.
- Drizzle about two-thirds of the cooled caramel sauce over the cream mixture. Fold gently 4-5 times to create ribbons of caramel. Reserve the remaining caramel.
- Pour half of the ice cream mixture into a 9×5-inch loaf pan. Drizzle some of the reserved caramel on top. Add the remaining ice cream mixture and drizzle the rest of the caramel on top. Use a knife or skewer to gently swirl the caramel into the top layer.
- Sprinkle a generous pinch of flaky sea salt over the top.
- Cover the pan tightly with plastic wrap, pressing it directly onto the surface of the ice cream. Then cover with foil or a lid. Freeze for at least 6 hours, preferably overnight.
- Before serving, let the ice cream sit at room temperature for about 5 minutes to soften slightly for easier scooping.
Notes
For best results, ensure butter and cream are at room temperature before making caramel to prevent seizing. If caramel seizes, reheat gently over low heat while whisking. Use a metal loaf pan for faster, more even freezing. Press plastic wrap directly onto the ice cream surface to prevent ice crystals. The caramel flavor deepens after a day or two in the freezer.
Nutrition
- Serving Size: 1/2 cup
- Calories: 380
- Sugar: 34
- Sodium: 220
- Fat: 24
- Saturated Fat: 15
- Carbohydrates: 38
- Protein: 4
Keywords: no-churn ice cream, salted caramel, summer dessert, easy ice cream, homemade ice cream