It was 11:47 PM on a random Tuesday in December, and I had this weird, specific urge to make something that felt like a hug in a mug. I didn’t have any fancy candy melts or those fancy silicone molds everyone on social media uses, but I had a bag of semi-sweet chocolate chips I’d bought on a whim, a silicone ice cube tray from the dollar store, and a ridiculous amount of marshmallows leftover from a camping trip that never happened. Honestly, the idea just arrived, fully formed, like a little Christmas miracle in my sleep-deprived brain. I figured, what’s the worst that could happen? A melted chocolate mess? That’s still edible.
So, there I was, in my pajamas, melting chocolate in the microwave in 15-second bursts, praying I wouldn’t burn it. The kitchen was a disaster zone—chocolate smeared on the counter, a bag of marshmallows ripped open, and I may have dropped a spoon in the sink and just left it there. But when I popped those first two chocolate halves out of the ice cube tray, perfectly smooth and shiny, I felt like a mad scientist who’d just discovered fire. I filled one half with a mini marshmallow, sealed it with a hot spoon, and stood there, holding this little chocolate orb in my palm. It was ridiculous. It was perfect.
Maybe you’ve been there—that late-night craving that turns into a full-blown kitchen project. This is the recipe that came out of that chaotic, wonderful night. It’s been tested, tweaked, and gifted to every single person I know, and it always, always gets the same reaction: a wide-eyed smile. This is the kind of treat that makes you feel like you’ve pulled off something incredibly fancy, when really, you just melted some chocolate and threw in a marshmallow. And that, my friends, is the best kind of magic.
Why You’ll Love This Recipe
Let me tell you, after making about fifty batches of these things (it’s a problem, I know), I’ve got it down to a science. This isn’t just another hot cocoa bomb recipe—it’s the one that actually works without making you want to pull your hair out. I’ve tested every brand of chocolate, every type of mold, and every sealing technique so you don’t have to.
- Incredibly Easy: We’re talking 20 minutes of active work, most of which is just waiting for chocolate to set. No candy thermometer, no complicated techniques.
- Simple Ingredients: You probably already have chocolate chips and marshmallows in your pantry. No weird specialty items that you’ll use once and forget about.
- Perfect for Gifting: These are the ultimate DIY gift for teachers, neighbors, coworkers, or anyone who needs a little warmth. Pop them in a cute box with a ribbon, and you’re done.
- Crowd-Pleaser: Kids go absolutely bonkers for them, and adults can’t resist the novelty. They’re a guaranteed hit at holiday parties or cozy winter gatherings.
- Unbelievably Delicious: Rich, melted chocolate with a gooey marshmallow center, all swimming in a cup of hot milk. It’s next-level comfort food that feels like a warm hug.
What makes my version different? It’s the little tricks I learned the hard way. Like using a specific chocolate-to-coconut-oil ratio so the shells are shiny and snappy, not dull and crumbly. Or the “hot spoon” sealing technique that gives you a perfect, seamless sphere every time. This isn’t just another version—it’s the version I’d make for my own family, the one that gets requested every single December. It’s comfort food reimagined: faster, easier, but with the same soul-soothing satisfaction of a classic cup of cocoa. Perfect for impressing guests without stress, or turning a simple Tuesday night into something magical.
What Ingredients You Will Need
This recipe uses simple, pantry-friendly ingredients to deliver that rich, indulgent hot cocoa experience without the fuss. Most of these are probably already in your kitchen, which is the beauty of it.
- Chocolate Chips (12 oz / 340 g): Use good-quality semi-sweet or milk chocolate chips. I personally prefer Ghirardelli or Guittard for the smoothest melt and best flavor. Avoid chocolate chips with stabilizers, as they don’t melt as smoothly. (Adds richness and that perfect snap)
- Coconut Oil (1 tbsp / 15 ml): This is the secret ingredient for shiny, thin shells that crack beautifully when you pour hot milk over them. Refined coconut oil is best (no coconut flavor), but unrefined works in a pinch. (Use refined for a neutral taste)
- Mini Marshmallows (1 cup / 40 g): The classic filling. Look for the tiny ones that fit perfectly inside the chocolate sphere. You can also use dehydrated mini marshmallows for a different texture. (Adds that gooey, nostalgic center)
- Hot Cocoa Mix (optional, 1/2 cup / 60 g): If you want an extra boost of chocolate flavor inside the bomb, add a teaspoon of your favorite hot cocoa mix before sealing. I like using a dark chocolate mix for a richer taste. (Enhances the chocolate flavor)
- Optional Toppings: Crushed candy canes, sprinkles, sea salt flakes, or a drizzle of white chocolate for decoration. Get creative! (For visual appeal and extra flavor)
Ingredient Selection Tips: For the best results, avoid chocolate chips that are “chocolate-flavored” or contain vegetable oils. Real chocolate with cocoa butter melts more smoothly and tastes infinitely better. If you’re using a silicone mold, make sure it’s clean and completely dry—any moisture will cause the chocolate to seize up.
Substitution Guidance: For a dairy-free version, use dairy-free chocolate chips (like Enjoy Life brand) and a dairy-free hot cocoa mix. For a sugar-free option, look for chocolate chips sweetened with stevia or monk fruit. You can also swap the mini marshmallows for a dollop of marshmallow fluff, though it’s a bit messier to work with.
Equipment Needed
You don’t need a ton of fancy gear for these, which is part of the appeal. Here’s what I use every single time:
- Silicone Half-Sphere Mold: This is non-negotiable. I use a 2-inch diameter mold, which makes the perfect single-serving size. You can find these at craft stores or online for under $10. (Pro tip: wash it with hot water and dry it thoroughly before use to avoid any residue)
- Microwave-Safe Bowl: A glass or ceramic bowl works best for melting chocolate. Avoid metal bowls, as they can get too hot and scorch the chocolate.
- Spatula: A small silicone spatula is perfect for spreading the chocolate evenly in the molds. A rubber one works too, just be gentle.
- Baking Sheet: To hold the mold steady while you work, and to transfer it to the fridge.
- Small Spoon or Offset Spatula: For smoothing out the chocolate and cleaning up the edges of the mold.
- Piping Bag or Small Ziploc Bag: For drizzling chocolate to fill the molds. This makes the process so much cleaner and less messy. (Snip a tiny corner off the bag for a small opening)
- Hot Spoon: This is my secret weapon for sealing the bombs. Heat a metal spoon under hot water, dry it off, and use it to melt the edges of the two halves together.
Budget-Friendly Options: If you don’t have a piping bag, a small Ziploc bag works perfectly. No silicone mold? You can use a clean, dry metal measuring spoon (like a 1/4 cup size) as a makeshift mold, though the shape won’t be as uniform. I’ve done it in a pinch, and it still works!
Preparation Method
Alright, let’s get to the fun part. I’m going to walk you through this step-by-step, with all the little tricks I’ve learned from making about a hundred of these things. Trust me, the details matter.
-
Melt the Chocolate (5 minutes): In a microwave-safe bowl, combine 12 oz (340 g) of chocolate chips and 1 tbsp (15 ml) of coconut oil. Microwave in 30-second bursts, stirring well after each interval, until the chocolate is completely smooth and glossy. Be careful not to overheat it—chocolate burns easily. It should be warm to the touch, not hot. (Sensory cue: It should look like thick, shiny syrup)
-
Fill the Molds (10 minutes): Transfer the melted chocolate to a piping bag or a small Ziploc bag with a tiny corner snipped off. Pipe the chocolate into each cavity of your silicone half-sphere mold, filling them about 3/4 of the way full. Use the back of a small spoon or an offset spatula to spread the chocolate evenly up the sides of the mold. You want a nice, even coating—not too thick, not too thin. (Personal tip: If you see any air bubbles, tap the mold gently on the counter to release them)
-
Create the Shells (15 minutes): Once all cavities are filled, pick up the mold and gently tilt it in a circular motion, allowing the chocolate to coat the sides completely. Pour any excess chocolate back into your piping bag. Place the mold on a baking sheet and refrigerate for 10-15 minutes, or until the chocolate is firm to the touch. (Warning: Don’t leave it in the fridge too long, or the chocolate can become too brittle and crack)
-
Remove the Shells (2 minutes): Gently press on the bottom of each silicone cavity to pop out the chocolate half-spheres. They should release easily. If they’re sticking, pop them back in the fridge for another 5 minutes. Handle them by the edges—the warmth of your fingers can melt the chocolate.
-
Fill the Bombs (5 minutes): Take one half-sphere and place it on a clean, dry surface. Add a small pinch of hot cocoa mix (if using) and 3-4 mini marshmallows. Don’t overfill—you need room to seal the bomb. (Sensory cue: The marshmallows should sit comfortably inside without bulging out)
-
Seal the Bombs (5 minutes): This is the crucial step. Heat a metal spoon under hot running water for about 30 seconds. Dry it thoroughly with a clean towel. Gently run the hot spoon along the rim of a second empty half-sphere to melt the chocolate edge just a little. Immediately press it onto the filled half-sphere, aligning the edges. Hold it for about 10 seconds to let the seal set. You can use a finger to smooth out any excess chocolate around the seam. (Troubleshooting tip: If the seal isn’t perfect, dip your finger in a little melted chocolate and “glue” the crack)
-
Decorate (Optional, 10 minutes): If you want to get fancy, drizzle the sealed bombs with contrasting melted white or dark chocolate, and sprinkle with crushed candy canes, sprinkles, or sea salt flakes before the drizzle sets. Let them set in the fridge for another 10 minutes.
-
Store or Gift: Place the finished bombs in an airtight container, separating layers with parchment paper. They’ll keep in a cool, dry place for up to 2 weeks, or in the fridge for a month.
Cooking Tips & Techniques
I’ve made every mistake in the book so you don’t have to. Here are the things I wish I’d known from the start:
The Chocolate-to-Oil Ratio is Everything: I learned this the hard way. The first few batches I made without coconut oil were dull, thick, and cracked when I tried to pop them out of the mold. The coconut oil thins the chocolate just enough to create a delicate, shiny shell that snaps beautifully. Don’t skip it, and don’t add more than a tablespoon—too much oil will make the shells greasy and soft.
Don’t Overfill the Molds: I know it’s tempting to fill them to the brim, but you need a little room to work. If the chocolate is too thick at the edges, the two halves won’t seal properly. Aim for a coating that’s about 1/8-inch thick. You can always add a second coat if the first one looks too thin.
The Hot Spoon Trick is Non-Negotiable: I tried using a hot plate, a hair dryer, and even my breath to seal these things. Nothing works as consistently as a hot, dry spoon. The key is to make sure the spoon is hot enough to melt the chocolate, but not so hot that it creates a puddle. Test it on a spare piece of chocolate first.
Work in a Cool Room: If your kitchen is warm, the chocolate will stay soft and won’t set properly. If it’s a hot day, work in an air-conditioned room or pop the molds in the fridge between steps. Warm hands are also the enemy—handle the shells as little as possible.
Multitasking Strategy: While your first batch of shells is setting in the fridge, melt the chocolate for your second batch. This cuts the total time in half. Also, prep your marshmallows and toppings before you start melting chocolate—once you start, you won’t want to stop to hunt for sprinkles.
Variations & Adaptations
Once you’ve mastered the basic technique, the possibilities are endless. Here are a few of my favorite twists:
Peppermint Hot Cocoa Bombs: Add 1/4 teaspoon of peppermint extract to the melted chocolate, and fill the bombs with crushed candy canes along with the marshmallows. Top with a drizzle of white chocolate and more crushed candy canes. It’s like a candy cane in hot cocoa form.
White Chocolate Raspberry Bombs: Use white chocolate chips instead of semi-sweet, and add a few freeze-dried raspberries inside with the marshmallows. The tartness of the raspberries cuts through the sweetness of the white chocolate perfectly. I made these for Valentine’s Day last year, and they were a massive hit.
Spiced Mexican Hot Cocoa Bombs: Add 1/2 teaspoon of cinnamon and a pinch of cayenne pepper to the melted chocolate. Fill with mini marshmallows and a pinch of chili powder. The warmth of the spice is incredible with the rich chocolate. It’s my go-to for cold winter nights when I need something a little extra.
Vegan & Dairy-Free Version: Use dairy-free chocolate chips (I like Enjoy Life brand) and a vegan hot cocoa mix. The coconut oil is already dairy-free, so you’re good there. Fill with vegan marshmallows (Dandies brand works great). The result is just as decadent and creamy.
Sugar-Free Version: Use sugar-free chocolate chips sweetened with stevia or monk fruit. You can find these at most health food stores. The texture is a bit different, but the taste is still fantastic. Fill with sugar-free marshmallows if you can find them, or just use a dollop of sugar-free marshmallow fluff.
Serving & Storage Suggestions
These bombs are meant to be an experience, so let’s talk about how to serve them right.
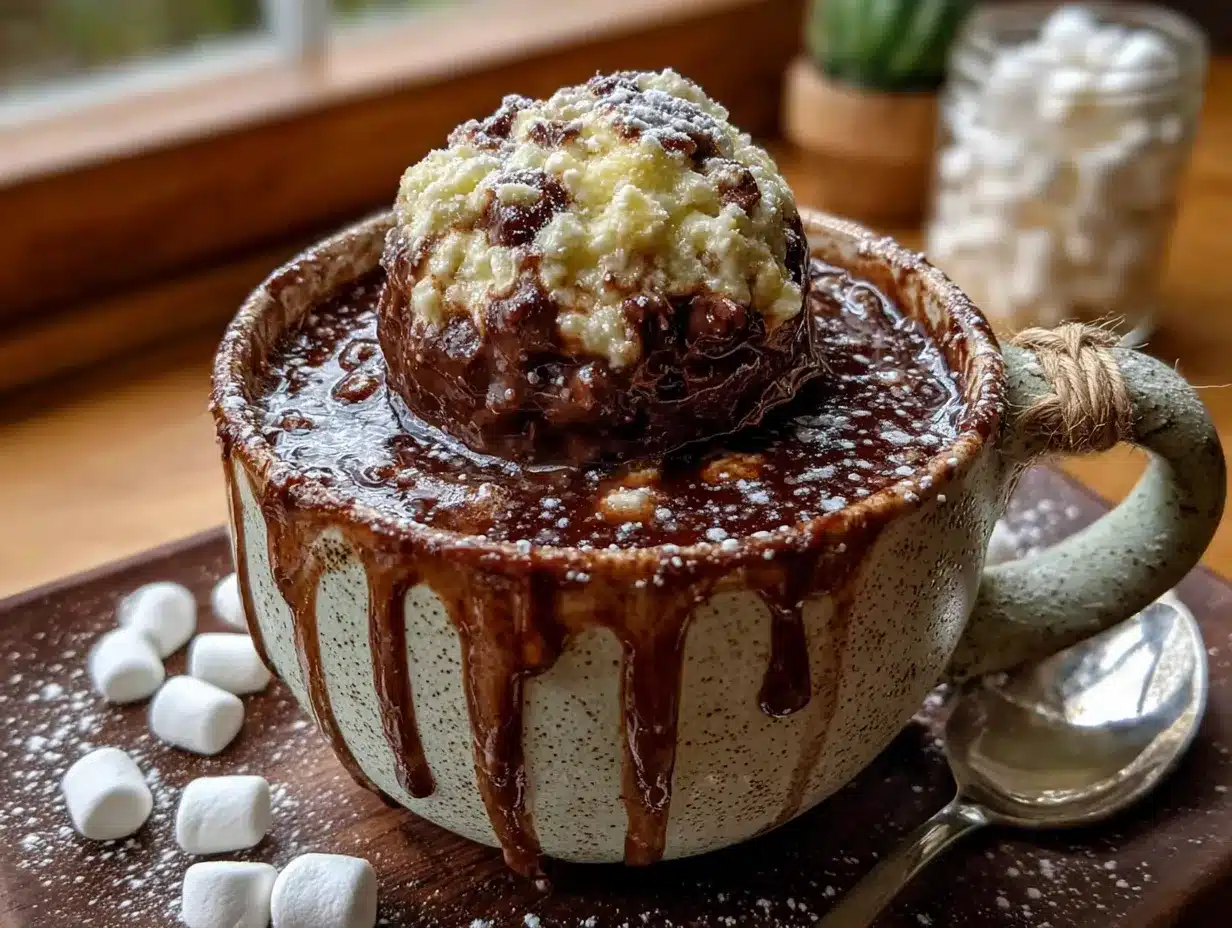
Serving Temperature: Always serve them with hot milk, not boiling. Heat your milk (dairy or plant-based) in a saucepan until it’s steaming and small bubbles form around the edges—about 150-160°F. Pouring boiling milk over the bomb can cause it to melt too quickly and not “explode” properly. For the full effect, place the bomb in a clear mug, pour the hot milk over it, and watch it crack open. Stir until the chocolate is fully melted.
Presentation Ideas: For a party, set up a hot cocoa bomb bar with different toppings—whipped cream, sprinkles, crushed cookies, caramel sauce. Let guests choose their own adventure. For gifting, place each bomb in a cellophane bag tied with a ribbon, or nestle them in a small box with tissue paper. Add a tag with instructions: “Place in a mug, pour hot milk over, stir, and enjoy.”
Storage Instructions: Store your bombs in an airtight container at room temperature for up to 2 weeks. If your kitchen is warm, keep them in the fridge for up to a month. Separate layers with parchment paper to prevent them from sticking together. Do not freeze them—the condensation when they thaw will ruin the chocolate.
Reheating Tip: If your bombs have been in the fridge, let them sit at room temperature for about 10 minutes before serving. This prevents the hot milk from shocking the cold chocolate and causing it to seize. The flavors actually get better after a day or two—the marshmallows soften slightly and meld with the chocolate.
Nutritional Information & Benefits
Let’s be real—these are a treat, not a health food. But that doesn’t mean they can’t fit into a balanced lifestyle. Here’s the breakdown for one bomb (made with semi-sweet chocolate and mini marshmallows, without any additional toppings):
| Nutrient | Amount per Bomb |
|---|---|
| Calories | 220-250 |
| Total Fat | 14-16 g |
| Saturated Fat | 9-10 g |
| Carbohydrates | 24-28 g |
| Sugar | 20-22 g |
| Protein | 2-3 g |
Health Benefits of Key Ingredients: Dark chocolate (if you use it) is rich in antioxidants called flavonoids, which can support heart health and improve blood flow. Coconut oil contains medium-chain triglycerides (MCTs), which are a quick source of energy. Marshmallows… well, they make you happy, and that counts for something!
Dietary Considerations: This recipe can easily be made dairy-free, vegan, and gluten-free (most chocolate chips and marshmallows are naturally gluten-free, but check the labels). For a lower-sugar option, use sugar-free chocolate and marshmallows. As always, enjoy these as an occasional indulgence, not an everyday staple.
Conclusion
These Easy Hot Cocoa Bombs with Marshmallows are more than just a recipe—they’re a little moment of joy in a mug. They’re the kind of treat that makes you feel like a kid again, watching that chocolate shell crack open and melt into a pool of creamy, dreamy cocoa. I’ve made them for holiday parties, for cozy nights in, and for gifts that feel personal and special without breaking the bank.
I honestly love how forgiving this recipe is. Even your “ugly” bombs—the ones with a slightly crooked seam or a crack in the shell—will taste incredible. That’s the beauty of it. You can’t really mess it up, and even if you do, you’re still left with melted chocolate and marshmallows, which is never a bad thing.
So go ahead, give it a try. Customize them with your favorite flavors, wrap them up for a friend, or just make a batch for yourself on a quiet Sunday afternoon. I’d love to hear how they turn out! Drop a comment below and tell me your favorite variation, or share a photo of your creations. And if you’re looking for more cozy winter treats, don’t miss my easy peppermint bark recipe or these classic sugar cookies—they’re perfect for a holiday baking spree. Happy melting!
Frequently Asked Questions
Can I use white chocolate or dark chocolate instead of semi-sweet?
Absolutely! White chocolate works beautifully, though it’s a bit softer, so handle it gently. Dark chocolate (60-70% cocoa) is fantastic and gives a richer, less sweet result. Just keep in mind that darker chocolate may need a tiny bit more coconut oil to thin it out for the molds.
My chocolate shells are cracking when I try to pop them out. What went wrong?
This usually happens when the chocolate is too cold or the shells are too thick. Make sure you’re not over-refrigerating them—10-15 minutes is plenty. Also, try to keep the chocolate coating thin and even. If they’re still cracking, let them sit at room temperature for a minute before trying to remove them.
Can I make these without a silicone mold?
Yes, but it’s trickier. You can use clean, dry metal measuring spoons (like a 1/4 cup size) as a makeshift mold. Grease them lightly with coconut oil, fill with chocolate, and let set. The shape won’t be as perfect, but they’ll still taste great. For the best results, though, a silicone mold is worth the small investment.
How far in advance can I make these for gifting?
You can make them up to 2 weeks ahead if stored in an airtight container at room temperature, or up to a month in the fridge. Just make sure they’re completely set and dry before wrapping them. I like to make a big batch in early December and gift them throughout the month.
My bombs won’t seal properly. What am I doing wrong?
The most common issue is that the spoon isn’t hot enough, or the chocolate edges are too cold. Make sure your spoon is really hot (run it under very hot water for at least 30 seconds) and dry it completely. Also, work quickly—once you melt the edge, you have about 10 seconds to press the halves together. If all else fails, use a little melted chocolate as “glue” to seal the seam.
Pin This Recipe!
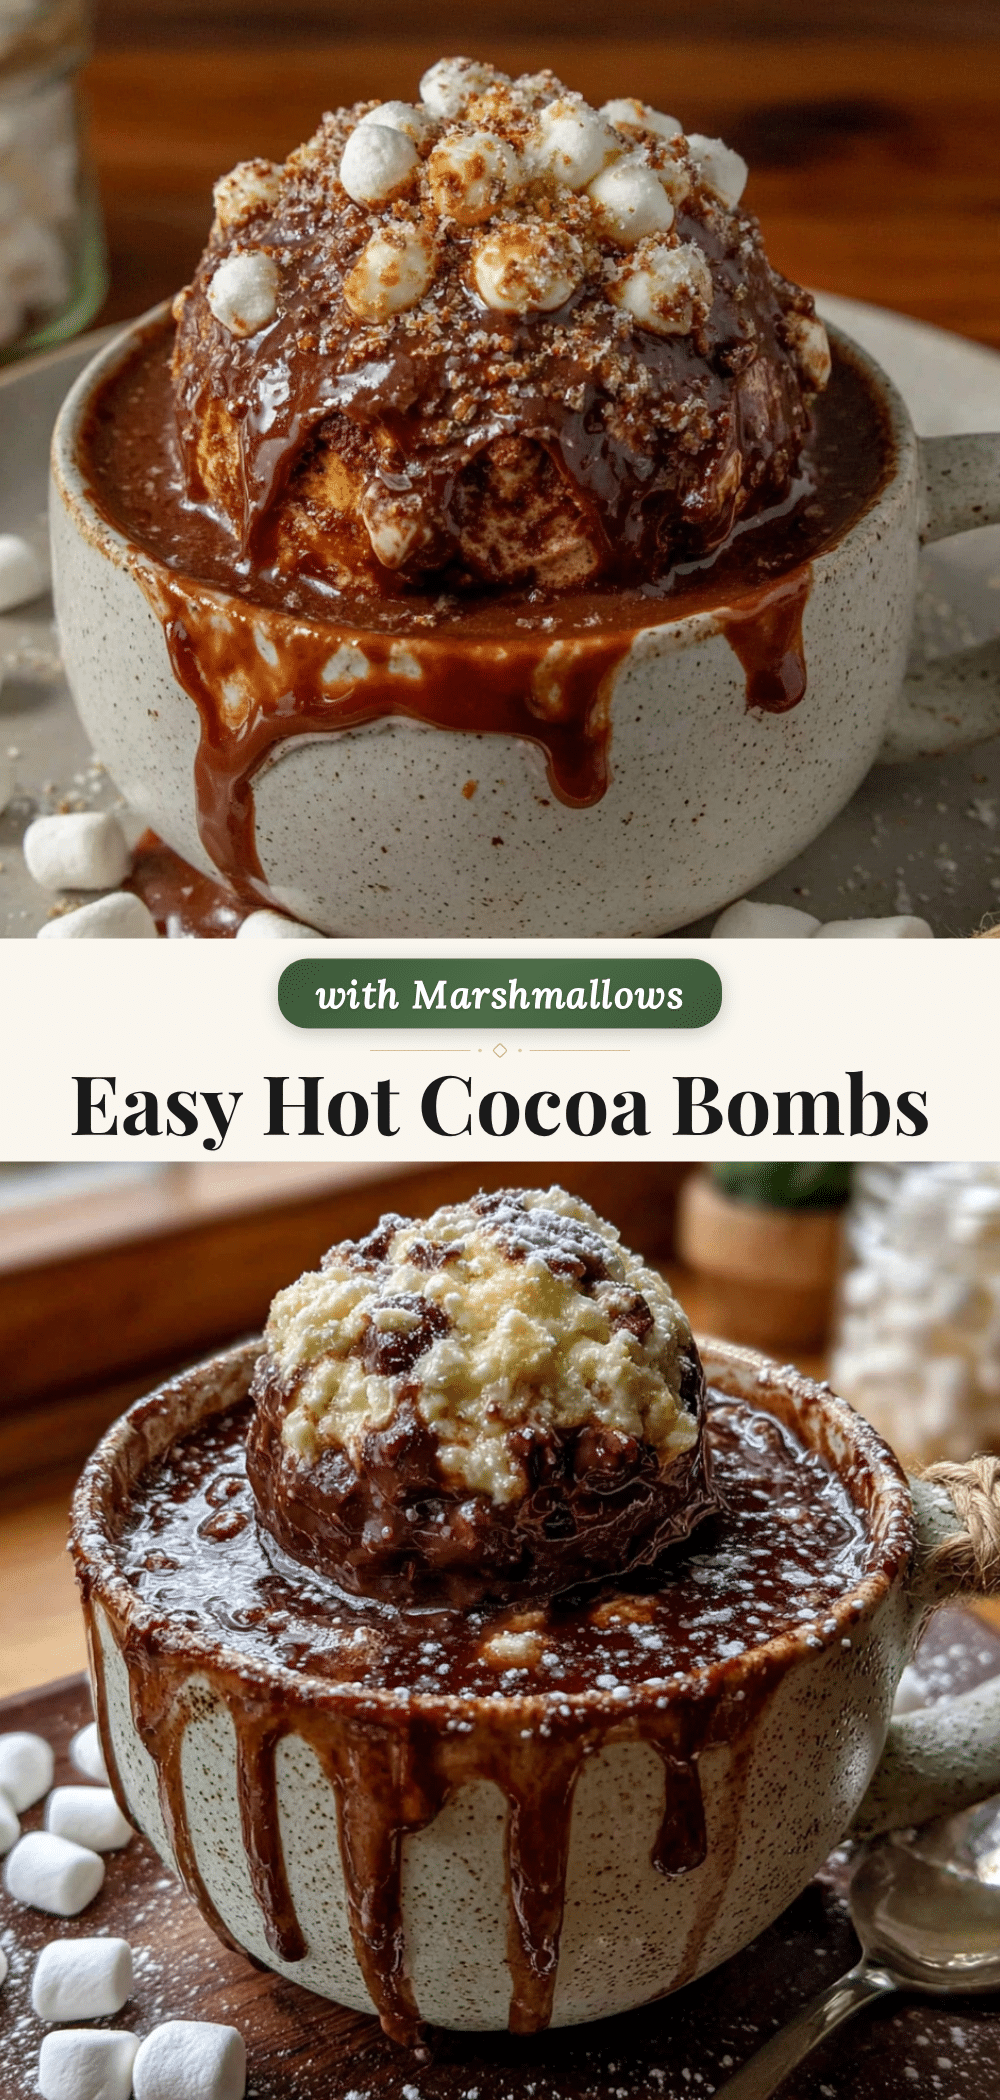
Easy Hot Cocoa Bombs with Marshmallows: Best DIY Gift

These easy hot cocoa bombs with marshmallows are the ultimate DIY gift for teachers, neighbors, coworkers, or anyone who needs a little warmth. Rich, melted chocolate with a gooey marshmallow center, all swimming in a cup of hot milk.
- Prep Time: 20 minutes
- Cook Time: 5 minutes
- Total Time: 40 minutes
- Yield: 8 servings 1x
- Category: Dessert
- Cuisine: American
Ingredients
- 12 oz (340 g) semi-sweet or milk chocolate chips
- 1 tbsp (15 ml) coconut oil (refined for neutral taste)
- 1 cup (40 g) mini marshmallows
- 1/2 cup (60 g) hot cocoa mix (optional)
- Optional toppings: crushed candy canes, sprinkles, sea salt flakes, or white chocolate for drizzling
Instructions
- Melt the Chocolate: In a microwave-safe bowl, combine 12 oz (340 g) of chocolate chips and 1 tbsp (15 ml) of coconut oil. Microwave in 30-second bursts, stirring well after each interval, until the chocolate is completely smooth and glossy.
- Fill the Molds: Transfer the melted chocolate to a piping bag or a small Ziploc bag with a tiny corner snipped off. Pipe the chocolate into each cavity of your silicone half-sphere mold, filling them about 3/4 of the way full. Use the back of a small spoon or an offset spatula to spread the chocolate evenly up the sides of the mold.
- Create the Shells: Once all cavities are filled, pick up the mold and gently tilt it in a circular motion, allowing the chocolate to coat the sides completely. Pour any excess chocolate back into your piping bag. Place the mold on a baking sheet and refrigerate for 10-15 minutes, or until the chocolate is firm to the touch.
- Remove the Shells: Gently press on the bottom of each silicone cavity to pop out the chocolate half-spheres. Handle them by the edges to avoid melting.
- Fill the Bombs: Take one half-sphere and place it on a clean, dry surface. Add a small pinch of hot cocoa mix (if using) and 3-4 mini marshmallows.
- Seal the Bombs: Heat a metal spoon under hot running water for about 30 seconds. Dry it thoroughly. Gently run the hot spoon along the rim of a second empty half-sphere to melt the chocolate edge. Immediately press it onto the filled half-sphere, aligning the edges. Hold for about 10 seconds to let the seal set.
- Decorate (Optional): Drizzle the sealed bombs with contrasting melted white or dark chocolate, and sprinkle with crushed candy canes, sprinkles, or sea salt flakes before the drizzle sets. Let them set in the fridge for another 10 minutes.
- Store or Gift: Place the finished bombs in an airtight container, separating layers with parchment paper. They’ll keep in a cool, dry place for up to 2 weeks, or in the fridge for a month.
Notes
Use good-quality chocolate chips for best results. The coconut oil is essential for shiny, thin shells. Work in a cool room to prevent chocolate from staying soft. The hot spoon trick is key for perfect sealing. For dairy-free, use dairy-free chocolate chips and vegan marshmallows.
Nutrition
- Serving Size: 1 bomb
- Calories: 235
- Sugar: 21
- Sodium: 30
- Fat: 15
- Saturated Fat: 9.5
- Carbohydrates: 26
- Fiber: 1
- Protein: 2.5
Keywords: hot cocoa bombs, chocolate bombs, DIY gift, holiday treats, hot chocolate, marshmallows, easy recipe