The woman at the community garden plot next to mine—her name is Ruth—watched me struggling to untangle a stubborn hose for a good two minutes before she said anything. Then she just laughed, walked over, and handed me a cookie wrapped in a napkin. “Stop fighting with that thing,” she said. “Eat this first. Everything works better after one of these.”
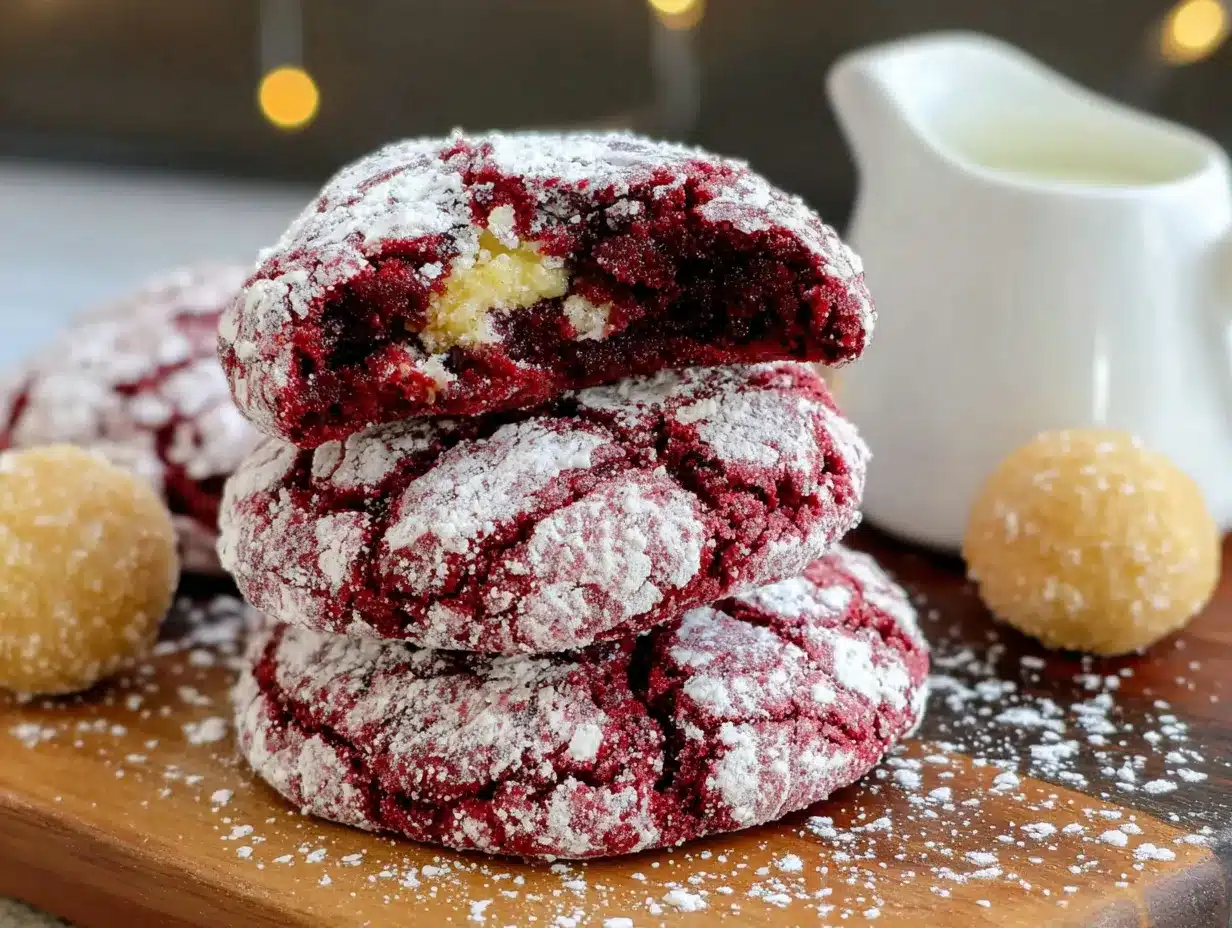
That cookie was a red velvet crinkle cookie, and honestly, I’d never had one before. I’d seen them on Pinterest, sure, but they always looked a little too perfect, you know? Like something you’d admire but not necessarily want to eat. But Ruth’s cookie was different. It was soft, almost pillowy, with that crackled powdered sugar top that dusted my fingers as I bit into it. And the flavor—mildly chocolatey, faintly tangy from the buttermilk, and just sweet enough to feel like a treat without knocking you out.
I asked her for the recipe right there, standing in the dirt, hose still tangled at my feet. She shrugged and said, “It’s just something I throw together. My grandmother’s recipe, but I changed it a little.” She told me the rough measurements, and I scribbled them on the back of a seed packet. Let me tell you, that first batch I made from those scribbled notes was a disaster—too dry, not enough cocoa, and the crinkle? Forget it. They looked like sad little rocks.
But I kept at it. I called Ruth twice, showed up at her plot with a notepad, and finally, after maybe four attempts, I got it right. This version—the one I’m sharing here—is my adaptation of Ruth’s grandmother’s recipe. It’s the kind of cookie that makes you close your eyes after the first bite. The kind that belongs on a plate next to a mug of hot cocoa on a cold December evening, or wrapped up in a little bag to give to someone who’s having a rough week. Maybe you’ve been there—the day that just won’t quit, and then a cookie fixes everything, at least for a minute.
These cozy red velvet crinkle cookies have become my go-to for exactly those moments. And I think they’ll become yours too.
Why You’ll Love This Recipe
I’ve tested this recipe more times than I care to admit—probably seven or eight batches before I stopped tweaking things. And through all that trial and error, I figured out exactly why these cookies work so well.
- Perfectly Soft Texture: These cookies stay soft for days. The secret is the combination of oil and butter, plus a little cornstarch that keeps them tender. No dry, crumbly mess here.
- Simple Pantry Ingredients: No fancy extracts or hard-to-find items. You probably have most of this stuff already—flour, sugar, cocoa powder, butter, eggs. The only “special” thing is red food coloring, and you can find that at any grocery store.
- Holiday-Ready Without the Stress: These are perfect for cookie swaps, Christmas platters, or Valentine’s Day treats. They look impressive with that crackled top, but they’re actually one of the easiest cookies you’ll ever make.
- Crowd-Pleaser Guaranteed: I’ve brought these to three different holiday parties now, and every single time, someone asks for the recipe. Kids love the color, adults love the flavor.
- That Soul-Soothing Comfort Factor: There’s something about the combination of soft chocolate and that snowy powdered sugar top that just feels like a hug. It’s comfort food, plain and simple.
What makes this version different from the dozens of red velvet crinkle recipes out there? For one, I use a touch of buttermilk powder in the dry ingredients—it adds that subtle tang without making the dough too wet. And I chill the dough for exactly one hour, not longer, not shorter. That timing gives you the perfect crinkle every time. I’ve tested it. Trust me on this one.
What Ingredients You Will Need
This recipe uses straightforward ingredients, but a few of them do the heavy lifting when it comes to flavor and texture. Let me walk you through what you’ll need and why each one matters.
For the Cookie Dough
- All-purpose flour, 2 ¼ cups (280g) – Standard flour works best here. Don’t use bread flour; it’ll make the cookies too tough.
- Unsweetened cocoa powder, ¼ cup (20g) – I prefer Hershey’s Special Dark for a richer color, but regular unsweetened works fine too. Just don’t use Dutch-process; the cookies won’t spread as nicely.
- Cornstarch, 1 tablespoon – This is my little secret. It keeps the cookies soft and tender, almost like bakery-style cookies.
- Baking powder, 1 teaspoon – Make sure it’s not expired. Fresh baking powder makes a big difference in how these cookies puff up.
- Salt, ½ teaspoon – Just regular table salt. It balances the sweetness.
- Buttermilk powder, 2 tablespoons (optional but recommended) – This adds that classic red velvet tang without adding extra liquid. If you don’t have it, substitute 2 tablespoons of regular buttermilk in the wet ingredients and reduce the milk slightly.
- Unsalted butter, ½ cup (113g), softened – Let it sit out for about 30 minutes. You want it soft but not melted.
- Granulated sugar, 1 cup (200g) – Regular white sugar. I’ve tried this with coconut sugar and it changes the texture too much, so stick with the real stuff.
- Large egg, 1, at room temperature – Cold eggs will make the butter seize up. Leave it on the counter for 15 minutes.
- Vanilla extract, 1 teaspoon – Pure vanilla, not imitation. It makes a difference in the depth of flavor.
- Milk, 2 tablespoons – Whole milk works best, but 2% is fine. Don’t use skim; the cookies need a little fat.
- Red food coloring, 1 to 1 ½ tablespoons – I use gel food coloring because it gives a deeper color without thinning the dough. Liquid works too, but you might need a little more.
For Coating
- Powdered sugar, about ½ cup (60g), for rolling – You’ll need more than you think. The cookies absorb some of it as they bake, so be generous when coating.
Ingredient Selection Tip: For the red food coloring, I’ve had the best luck with Americolor Super Red gel. It’s concentrated, so a little goes a long way, and it gives that gorgeous crimson color without any bitter aftertaste. If you’re using liquid coloring, look for the neon red variety—it’s brighter than the standard one.
Substitution Notes: Need to make these dairy-free? Use plant-based butter (I like Miyoko’s) and substitute the milk with oat milk. Skip the buttermilk powder or use a dairy-free buttermilk alternative. The texture will be slightly different, but they’ll still be delicious. For a gluten-free version, swap the all-purpose flour with a 1:1 gluten-free baking blend that contains xanthan gum. I’ve tested this with King Arthur’s Measure for Measure and it worked beautifully.
Equipment Needed
You don’t need a fancy kitchen to make these cookies. Here’s what you’ll actually use:
- Mixing bowls – Two medium bowls. One for dry ingredients, one for wet. Nothing fancy.
- Electric mixer – A hand mixer works perfectly. You can do this by hand with a wooden spoon, but your arm will get tired. I’ve done both, and the mixer is worth the cleanup.
- Baking sheets – Two standard half-sheet pans. If you only have one, just bake in batches and let the pan cool completely between rounds.
- Parchment paper – Non-negotiable. Silicone mats work too, but parchment gives the best crinkle effect.
- Cooling rack – A wire rack helps the cookies cool evenly. If you don’t have one, a clean cutting board works in a pinch.
- Cookie scoop – A 1.5-tablespoon scoop makes uniform cookies. I use a #40 scoop. Eyeballing it works too, but your cookies might vary in size.
- Small bowl – For the powdered sugar coating.
Budget-Friendly Tip: Don’t own a cookie scoop? Use two spoons—one to scoop, one to scrape the dough off. It’s not as tidy, but it gets the job done. And honestly, slightly imperfect cookies have more charm anyway.
Preparation Method
Let me walk you through this step by step. I’ve included all the little details I wish someone had told me the first time I made these.
- Whisk the dry ingredients together. In a medium bowl, combine the flour, cocoa powder, cornstarch, baking powder, salt, and buttermilk powder (if using). Whisk them until they’re evenly combined—no streaks of cocoa or flour. Set this aside.
- Cream the butter and sugar. In a separate large bowl, beat the softened butter and granulated sugar together with an electric mixer on medium speed. You want it light and fluffy, about 2 to 3 minutes. It should look pale and a little airy. Scrape down the sides of the bowl once or twice.
- Add the egg and vanilla. Crack the egg into the butter mixture and add the vanilla. Beat on medium until fully incorporated, about 30 seconds. The mixture might look slightly curdled at this point—that’s okay. Don’t panic.
- Add the milk and food coloring. Pour in the milk and the red food coloring. Beat on low until the color is evenly distributed. If you’re using gel coloring, you’ll see it swirl through the batter at first. Keep mixing until it’s all one uniform shade of red. If it looks more pink than red, add a little more coloring.
- Combine wet and dry ingredients. With the mixer on low, gradually add the dry ingredients to the wet mixture. Mix just until the flour disappears. Overmixing at this stage will make the cookies tough. You want to stop as soon as you can’t see any more white flour. The dough will be soft and slightly sticky—that’s normal.
- Chill the dough. Cover the bowl with plastic wrap and refrigerate for exactly 1 hour. Don’t skip this step. Chilling firms up the butter, which prevents the cookies from spreading too much and helps create that beautiful crinkle top. If you chill longer than 2 hours, let the dough sit at room temperature for 10 minutes before scooping—it’ll be too hard to handle otherwise.
- Preheat the oven. About 15 minutes before the dough is done chilling, preheat your oven to 350°F (175°C). Line two baking sheets with parchment paper.
- Scoop and roll. Place the powdered sugar in a small bowl. Using a cookie scoop or tablespoon, scoop out rounded balls of dough (about 1.5 tablespoons each). Roll each ball between your palms until smooth, then drop it into the powdered sugar. Roll it around until completely coated. Don’t be shy—the sugar should be thick enough that you can barely see the red dough underneath. Place the coated balls on the prepared baking sheets, spacing them about 2 inches apart.
- Bake. Bake one sheet at a time in the center of the oven for 10 to 12 minutes. The cookies will look puffy and cracked, and the edges should be set but not browned. The centers will look slightly underdone—that’s what you want. They’ll continue to set as they cool.
- Cool completely. Let the cookies rest on the baking sheet for 5 minutes. This is important—they’re too fragile to move right away. After 5 minutes, transfer them to a wire rack to cool completely. The crinkle effect will become more pronounced as they cool.
Sensory Cue: When the cookies are done, your kitchen should smell like a mix of chocolate and vanilla with a faint tanginess. The tops will have that signature crackled look, with the red dough peeking through the white powdered sugar. It’s a beautiful sight, honestly.
Cooking Tips & Techniques
I’ve made every mistake in the book with these cookies, so you don’t have to. Here’s what I learned the hard way:
Don’t overmix the dough. I know I said this already, but it’s worth repeating. The first batch I made from Ruth’s scribbled recipe? I mixed it like I was making bread dough. The cookies came out tough and flat. Mix just until the flour disappears, then stop. Your arm might twitch wanting to keep going. Ignore it.
The chilling time is non-negotiable. One hour. Not 30 minutes, not 2 hours. I tried 30 minutes once because I was in a hurry, and the cookies spread into flat, ugly discs. The crinkle effect? Gone. The hour gives the butter time to firm up just enough so the cookies bake up thick and soft with those beautiful cracks.
Be generous with the powdered sugar. This was another lesson I learned the hard way. My first few batches had barely any crinkle because I didn’t use enough sugar. Roll each dough ball until it’s completely coated—like a snowball. The sugar that falls off during baking creates the crinkle effect. If you skimp, you’ll get pale, sad cookies.
Bake one sheet at a time. I know it’s tempting to throw both sheets in at once, but the heat distribution gets uneven. The bottom sheet will brown too quickly while the top sheet stays pale. Bake them one at a time in the center of the oven. Your patience will be rewarded.
Let them cool on the pan. I once tried to move a cookie too early and it literally fell apart in my hands. The bottoms are fragile right out of the oven. Give them that 5-minute rest on the baking sheet—it makes all the difference.
Timing Strategy: Here’s how I manage this recipe on a busy day. I make the dough in the morning and chill it while I do other things. Then in the afternoon, I bake them in two quick batches while I’m making lunch or answering emails. It breaks the work up and makes the whole process feel effortless.
Variations & Adaptations
These cookies are pretty perfect as-is, but I’ve played around with a few variations that turned out surprisingly well.
Peppermint Red Velvet Crinkles: Add ½ teaspoon of peppermint extract to the wet ingredients along with the vanilla. Then crush up some candy canes and sprinkle a few pieces on top of each cookie right after they come out of the oven. The peppermint adds a cool, festive kick that’s perfect for Christmas.
White Chocolate Chunk Version: Fold in ½ cup of white chocolate chips or chopped white chocolate into the dough before chilling. The white chocolate adds little pockets of sweetness that pair beautifully with the mild cocoa flavor. I tried this for a Valentine’s Day party and they disappeared in minutes.
Gluten-Free Adaptation: As I mentioned earlier, use a 1:1 gluten-free baking blend with xanthan gum. I’ve tested this with King Arthur’s Measure for Measure and the texture was almost identical to the original. Just make sure to chill the dough for the full hour—gluten-free doughs tend to be stickier.
Vegan Version: Substitute the butter with plant-based butter, use a flax egg (1 tablespoon ground flaxseed mixed with 3 tablespoons water, let sit for 5 minutes), and use oat milk instead of regular milk. The texture will be slightly more cake-like, but they’re still delicious. I brought these to a friend’s holiday party and no one could tell they were vegan.
Extra Chocolatey: If you’re a chocolate lover like me, increase the cocoa powder to ⅓ cup. The cookies will be darker and richer, with a more pronounced chocolate flavor. Just note that the crinkle effect might be slightly less pronounced because the extra cocoa absorbs more moisture.
Serving & Storage Suggestions
These cookies are at their best when served slightly warm, about 10 minutes after they’ve come off the cooling rack. The centers are still soft and the powdered sugar top is perfectly crackled. Pair them with a cold glass of milk, a mug of hot cocoa, or a warm cup of coffee. Honestly, they’re also amazing with a cup of chai tea—the spices complement the chocolate beautifully.
For a pretty presentation, arrange them on a white platter or a festive holiday plate. The red and white color scheme is already holiday-ready. I like to dust a little extra powdered sugar over the top right before serving—it makes them look even more snowy and inviting.
Storage Instructions: Store the cookies in an airtight container at room temperature for up to 5 days. Place a piece of bread in the container—it absorbs excess moisture and keeps the cookies soft. Replace the bread every other day if you’re storing them longer. I’ve tested this trick and it works like magic.
Freezer Instructions: These cookies freeze beautifully. Place them in a single layer in a freezer-safe container, with parchment paper between layers. They’ll keep for up to 3 months. To thaw, just let them sit at room temperature for about 20 minutes. You can also freeze the unbaked dough balls—just place them on a baking sheet, freeze until solid, then transfer to a freezer bag. Bake from frozen, adding 2 to 3 minutes to the baking time.
Flavor Development: Here’s something interesting—these cookies actually taste better the next day. The flavors meld together overnight, and the texture becomes even softer. So if you can resist eating them all on day one, you’re in for a treat on day two.
Nutritional Information & Benefits
Let’s be real—these are cookies, not health food. But I do think it’s worth knowing what’s in them, especially if you’re watching your sugar intake or have dietary restrictions.
Per cookie (based on 24 cookies):
- Calories: 145
- Fat: 6g
- Saturated Fat: 3.5g
- Carbohydrates: 22g
- Sugar: 14g
- Protein: 2g
- Sodium: 85mg
Health Highlights: The cocoa powder in these cookies contains antioxidants called flavonoids, which can help reduce inflammation. The butter and eggs provide a small amount of vitamin A and B vitamins. And honestly, there’s something to be said for the mental health benefits of a homemade cookie—that sense of comfort and care is real.
Dietary Considerations: These cookies contain gluten, dairy, and eggs. For gluten-free or vegan options, check the variations section above. If you’re watching your sugar intake, you can reduce the granulated sugar to ¾ cup, but the texture will be slightly less tender.
Allergen Note: This recipe contains wheat, dairy, and eggs. If you’re baking for someone with allergies, please use the substitutions I’ve suggested and double-check all ingredient labels.
Conclusion
These cozy red velvet crinkle cookies have become a staple in my kitchen, and I think they’ll become one in yours too. They’re the kind of cookie that makes a cold day feel warmer, a tough day feel lighter, and a holiday gathering feel a little more special. Every time I bake them, I think of Ruth standing in that community garden, laughing at my tangled hose, and handing me a cookie wrapped in a napkin. That moment of unexpected kindness—that’s what these cookies taste like to me.
I’d love to hear how yours turn out. Did you try any of the variations? Did you add your own twist? Drop a comment below and let me know. And if you’re feeling generous, share this recipe with someone who could use a little comfort today. Trust me, they’ll thank you for it.
Happy baking, friend. May your cookies be soft, your crinkles be beautiful, and your kitchen smell like warmth and love.
Frequently Asked Questions
Why didn’t my cookies crinkle?
The most common reason is not enough powdered sugar coating. Roll each dough ball until it’s completely covered—you should barely see the red dough underneath. Also, make sure you chilled the dough for the full hour. If the dough is too warm, the cookies spread instead of crinkling.
Can I use liquid food coloring instead of gel?
Yes, you can. Liquid food coloring works fine, but you’ll need about 2 tablespoons to get a deep red color. Just note that the extra liquid might make the dough slightly stickier, so you may need to chill it an extra 15 minutes.
How do I know when the cookies are done baking?
The edges should be set but not browned, and the centers will look slightly underdone—puffy and soft. They’ll continue to set as they cool on the baking sheet. If you’re unsure, err on the side of underbaking slightly. Overbaked cookies will be dry and crumbly.
Can I make the dough ahead of time?
Absolutely. You can refrigerate the dough for up to 48 hours before baking. Just let it sit at room temperature for 10 minutes before scooping, as it will be very firm. You can also freeze the dough balls for up to 3 months—bake from frozen, adding 2 to 3 minutes to the baking time.
What if I don’t have buttermilk powder?
No problem. You can skip it entirely, or substitute 2 tablespoons of regular buttermilk in the wet ingredients. Just reduce the milk by 2 tablespoons to keep the dough consistency right. The cookies won’t have quite as much tang, but they’ll still be delicious.
Pin This Recipe!
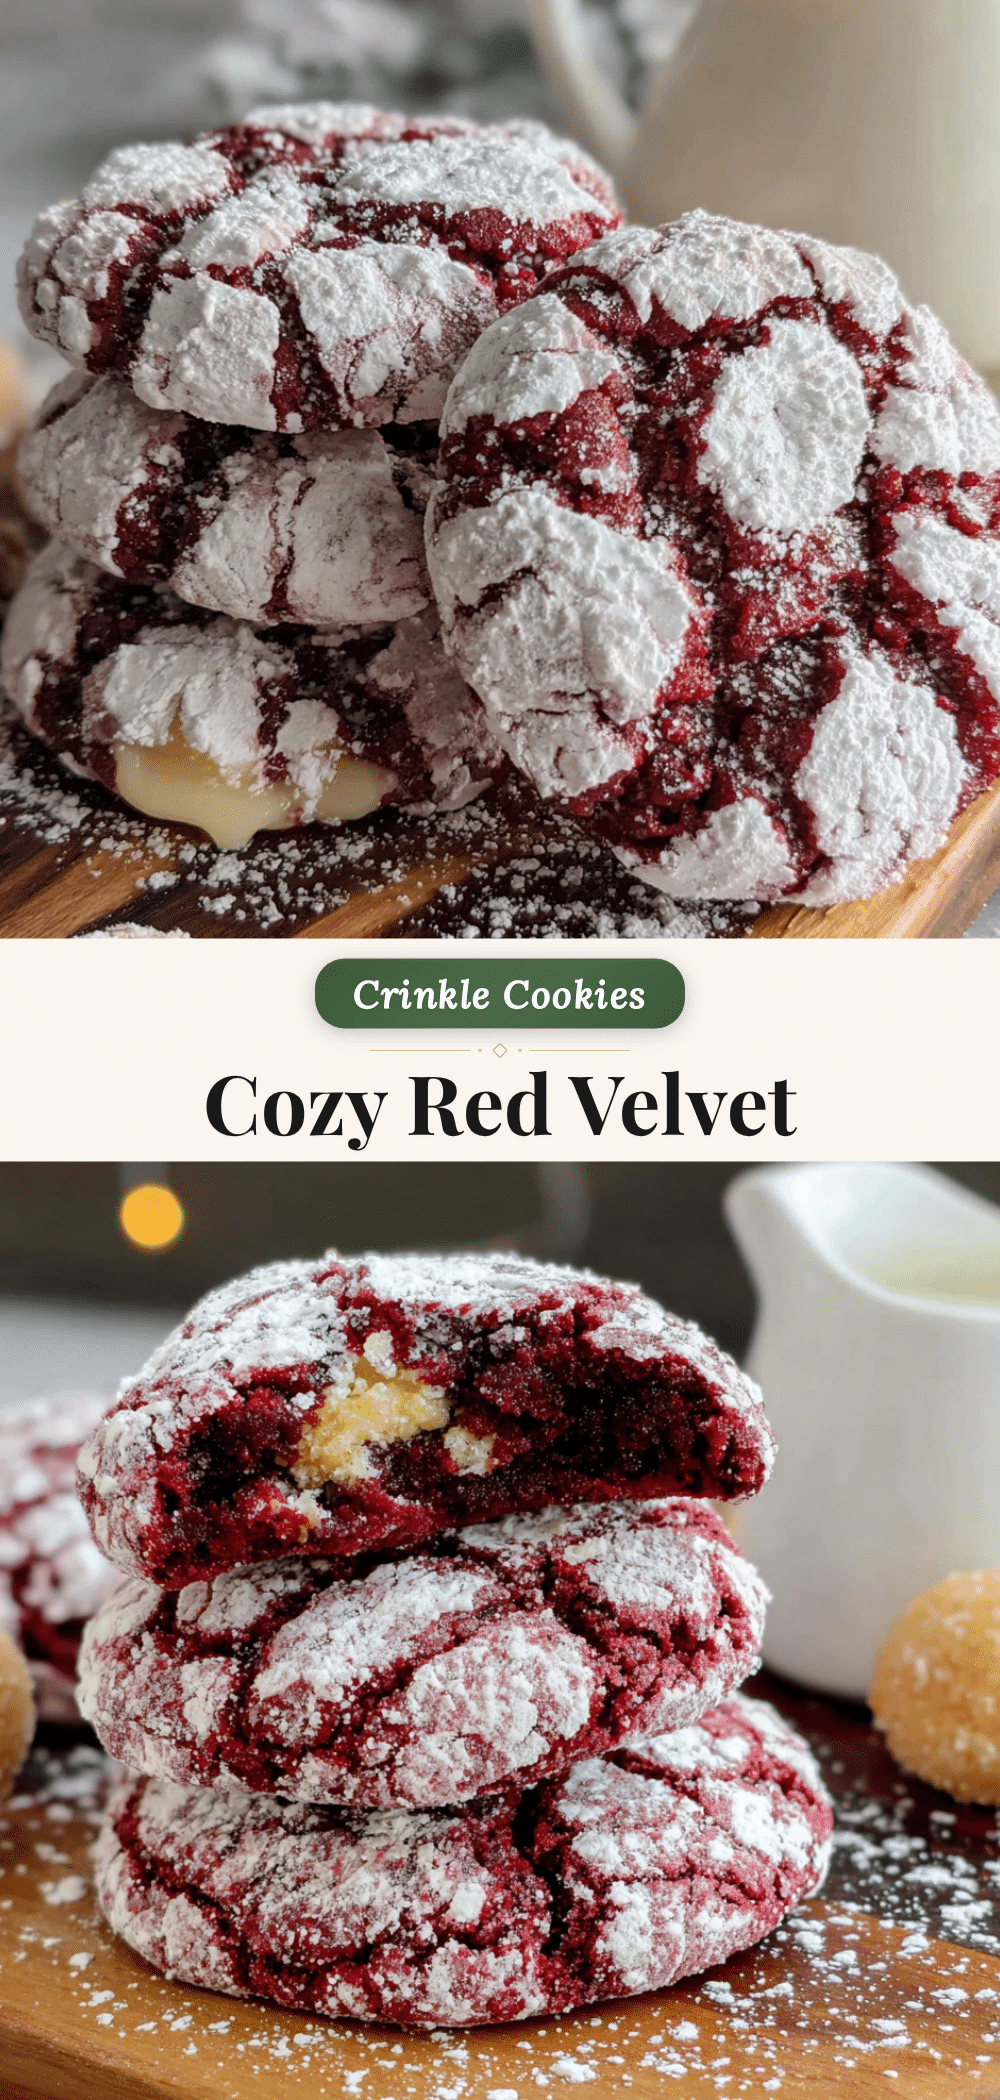
Cozy Red Velvet Crinkle Cookies: Easy Holiday Recipe
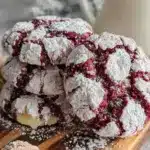
These soft, pillowy red velvet crinkle cookies with a crackled powdered sugar top are the perfect holiday treat. Made with simple pantry ingredients, they’re easy to make and guaranteed to be a crowd-pleaser.
- Prep Time: 15 minutes
- Cook Time: 12 minutes
- Total Time: 1 hour 27 minutes
- Yield: 24 cookies 1x
- Category: Dessert
- Cuisine: American
Ingredients
- 2 ¼ cups (280g) all-purpose flour
- ¼ cup (20g) unsweetened cocoa powder
- 1 tablespoon cornstarch
- 1 teaspoon baking powder
- ½ teaspoon salt
- 2 tablespoons buttermilk powder (optional but recommended)
- ½ cup (113g) unsalted butter, softened
- 1 cup (200g) granulated sugar
- 1 large egg, at room temperature
- 1 teaspoon vanilla extract
- 2 tablespoons milk (whole milk preferred)
- 1 to 1 ½ tablespoons red food coloring (gel preferred)
- ½ cup (60g) powdered sugar, for rolling
Instructions
- Whisk the dry ingredients together. In a medium bowl, combine the flour, cocoa powder, cornstarch, baking powder, salt, and buttermilk powder (if using). Whisk until evenly combined. Set aside.
- Cream the butter and sugar. In a separate large bowl, beat the softened butter and granulated sugar together with an electric mixer on medium speed until light and fluffy, about 2 to 3 minutes. Scrape down the sides of the bowl once or twice.
- Add the egg and vanilla. Crack the egg into the butter mixture and add the vanilla. Beat on medium until fully incorporated, about 30 seconds. The mixture might look slightly curdled—that’s okay.
- Add the milk and food coloring. Pour in the milk and the red food coloring. Beat on low until the color is evenly distributed. If using gel coloring, keep mixing until it’s all one uniform shade of red. Add more coloring if needed.
- Combine wet and dry ingredients. With the mixer on low, gradually add the dry ingredients to the wet mixture. Mix just until the flour disappears. Do not overmix. The dough will be soft and slightly sticky.
- Chill the dough. Cover the bowl with plastic wrap and refrigerate for exactly 1 hour. Do not skip this step.
- Preheat the oven. About 15 minutes before the dough is done chilling, preheat your oven to 350°F (175°C). Line two baking sheets with parchment paper.
- Scoop and roll. Place the powdered sugar in a small bowl. Using a cookie scoop or tablespoon, scoop out rounded balls of dough (about 1.5 tablespoons each). Roll each ball between your palms until smooth, then drop it into the powdered sugar. Roll it around until completely coated. Place the coated balls on the prepared baking sheets, spacing them about 2 inches apart.
- Bake. Bake one sheet at a time in the center of the oven for 10 to 12 minutes. The cookies will look puffy and cracked, and the edges should be set but not browned. The centers will look slightly underdone.
- Cool completely. Let the cookies rest on the baking sheet for 5 minutes. After 5 minutes, transfer them to a wire rack to cool completely. The crinkle effect will become more pronounced as they cool.
Notes
For best results, chill the dough for exactly 1 hour. Be generous with the powdered sugar coating—roll each dough ball until completely covered. Bake one sheet at a time for even heat distribution. Let cookies cool on the baking sheet for 5 minutes before transferring. These cookies taste even better the next day. Store in an airtight container at room temperature for up to 5 days; place a piece of bread in the container to keep them soft. Freeze baked cookies for up to 3 months, or freeze unbaked dough balls for up to 3 months (bake from frozen, adding 2-3 minutes).
Nutrition
- Serving Size: 1 cookie
- Calories: 145
- Sugar: 14
- Sodium: 85
- Fat: 6
- Saturated Fat: 3.5
- Carbohydrates: 22
- Fiber: 1
- Protein: 2
Keywords: red velvet crinkle cookies, holiday cookies, easy cookie recipe, soft cookies, chocolate cookies, Christmas cookies, Valentine's Day cookies