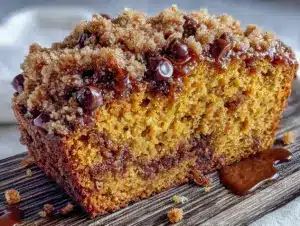
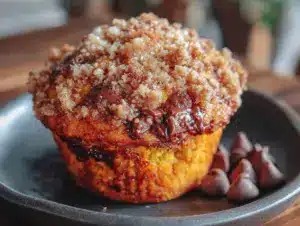
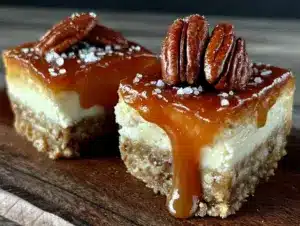
I was digging through a cardboard box in my mother’s basement last October—looking for a Halloween decoration, honestly—when the smell hit me. Not dust or mothballs, but something sweet and warm and impossibly specific. A faint trace of browned butter and toasted pecans still clinging to a tarnished 9×13 pan I hadn’t seen in maybe fifteen years. And suddenly I was eight years old, standing on a step stool in my Aunt Carol’s tiny kitchen, watching her press that same crumbly crust into the bottom of a dish while she hummed along to the radio. She passed away three years ago, and I’d never made her harvest cheesecake bars myself. Not once. I think I was scared they wouldn’t taste the same—or worse, that they would, and I’d miss her all over again.
The pan sat in my trunk for a week before I worked up the nerve to use it. Let me tell you, the first bite was almost too much. The pecan crust had that same sandy, buttery texture I remembered, and the cheesecake filling was just tangy enough to cut through the sweetness. But here’s the thing about chasing a memory through food—you never quite catch it exactly. And that’s okay. My version turned out a little different, a little mine, with a ribbon of salted caramel swirled through the middle because that’s what I had in the pantry that afternoon. Maybe you’ve been there, trying to recreate a dish from someone else’s hands and realizing along the way that you’re allowed to make it your own.
These cozy fall harvest cheesecake bars with pecan crust are exactly that kind of recipe. They’re built for crisp October afternoons, for Thanksgiving potlucks where you want to show up with something that stops conversation, for those quiet evenings when you need a slice of something warm and familiar. I’ve made them four times this season already, and each batch gets a little closer to what I remember—while becoming something I’m proud to call mine.
Why You’ll Love This Recipe
Let me be honest with you—I’ve tested a lot of cheesecake bar recipes over the years, and most of them fall into one of two camps. Either they’re fussy and require a water bath and a springform pan and a whole afternoon of babysitting, or they’re dry and crumbly and taste like cardboard dressed up in cream cheese. These cozy fall harvest cheesecake bars with pecan crust? They’re neither. They’re the Goldilocks of cheesecake bars, and here’s why they work:
- No Water Bath Required: I know, I know—every baking blog tells you a water bath is non-negotiable for creamy cheesecake. But after a particularly disastrous attempt where I sloshed water into my batter (don’t ask), I figured out a better way. A low-and-slow oven with a pan of water on the rack below does the same job without the risk of soggy crust.
- Pecan Crust That Actually Stays Together: Most nut crusts fall apart the second you try to cut them. I spent three batches figuring out the secret—toasting the pecans first and adding just enough melted butter to hold everything together without making it greasy. It’s a game-changer.
- Simple Pantry Ingredients: No weird specialty items. Cream cheese, sugar, eggs, sour cream, pecans, butter, vanilla—you probably have everything except maybe the pecans, and those are easy to find this time of year.
- Perfect for Fall Gatherings: Whether it’s a Friendsgiving, a cozy book club night, or just a Tuesday when you need something sweet, these bars travel well, cut cleanly, and disappear fast.
- That Texture Combination: The crunchy, buttery pecan crust against the silky, tangy cheesecake filling with a ribbon of caramel running through it? Honestly, it’s the kind of dessert that makes people close their eyes after the first bite.
I’ve brought these to three different gatherings this fall, and every single time someone asked for the recipe before they finished their first piece. That’s not bragging—that’s just the kind of recipe this is. It’s comfort food that feels special without making you sweat.
What Ingredients You Will Need
This recipe uses simple, honest ingredients that come together to create something truly special. Most of these are pantry staples, especially if you do any fall baking, and I’ve included notes on substitutions where I’ve tested them personally.
For the Pecan Crust
- 1 ½ cups pecan halves (toasted and cooled) — I prefer Diamond of California pecans for consistent quality, but any brand works. Toast them in a dry skillet over medium heat for 3-4 minutes until fragrant, shaking the pan often so they don’t burn.
- 1 cup all-purpose flour — Spoon and level your flour for best results. Scooping directly from the bag packs it down and gives you too much.
- ¼ cup granulated sugar — Just enough sweetness to balance the nuts.
- ¼ cup packed brown sugar — Adds moisture and a deeper, almost molasses-like flavor that pairs beautifully with pecans.
- ½ teaspoon salt — Don’t skip this. Salt makes the crust taste more toasty and buttery.
- ½ cup unsalted butter, melted and slightly cooled — I use Kerrygold here because the higher butterfat content gives a richer flavor, but any unsalted butter works.
For the Cheesecake Filling
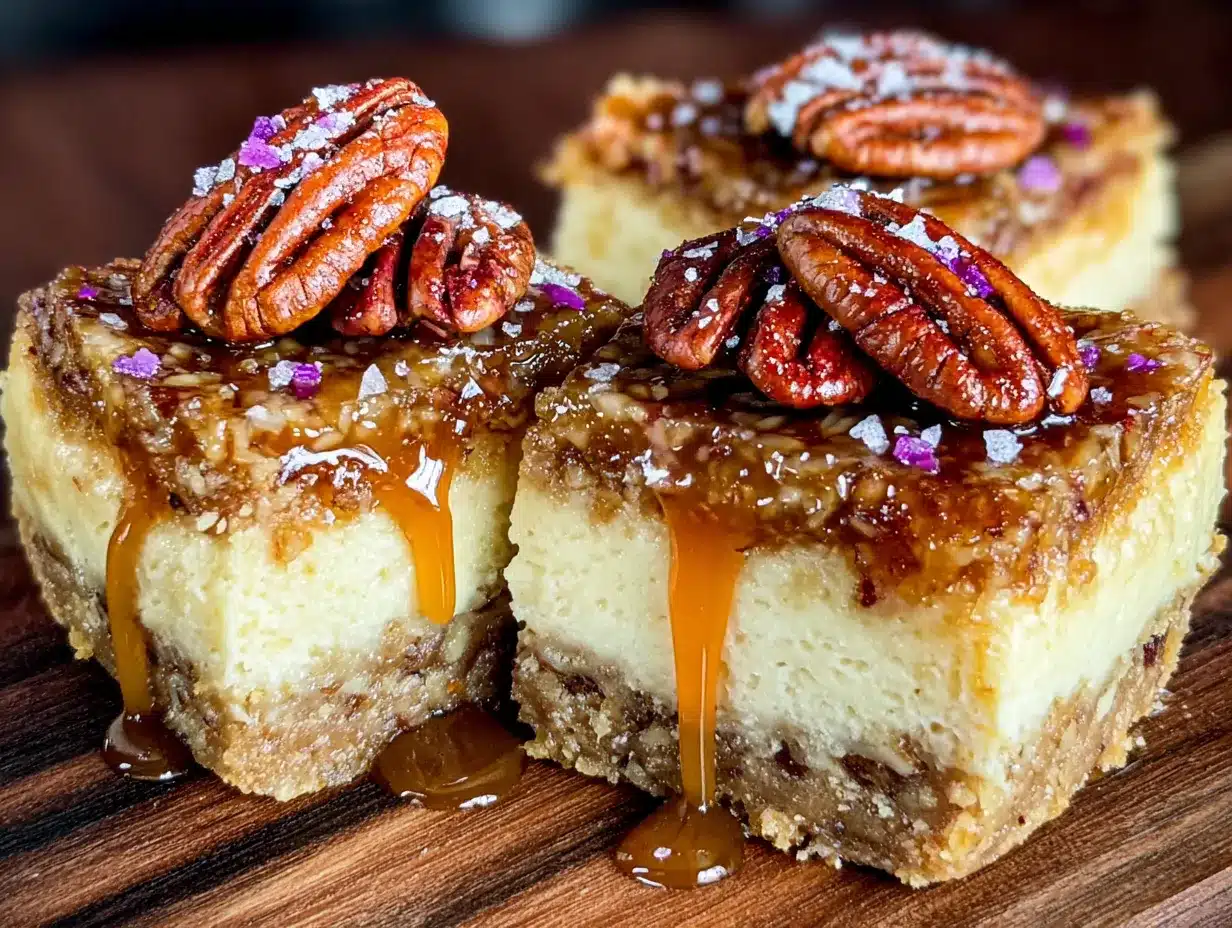
- 24 ounces (three 8-ounce blocks) cream cheese, softened to room temperature — Philadelphia is my go-to for consistent texture. Let it sit on the counter for at least an hour before you start.
- 1 cup granulated sugar
- 3 large eggs, room temperature — Cold eggs will seize up your batter and leave lumps. Place them in a bowl of warm water for 5 minutes if you forgot to take them out ahead of time.
- 1 cup sour cream, room temperature — This is the secret to extra-creamy cheesecake. Full-fat is best, but I’ve tested it with Greek yogurt and it works in a pinch (the texture is slightly less luxurious).
- 2 teaspoons vanilla extract — Use pure vanilla if you can swing it. Imitation works fine, but pure makes a noticeable difference in the final flavor.
- ¼ teaspoon salt
For the Caramel Swirl (Optional but Highly Recommended)
- ½ cup store-bought or homemade caramel sauce — I’m partial to Trader Joe’s sea salt caramel sauce for convenience, but any thick caramel works. If yours is thin, simmer it for 2-3 minutes to reduce it before swirling.
For the Harvest Topping
- ¼ cup pecan halves, toasted — For garnish on top.
- Optional: 2 tablespoons dried cranberries or chopped dried figs — Adds a pop of color and tartness that cuts through the richness.
One quick note about the cream cheese—I’ve tested this with reduced-fat cream cheese and it works, but the texture is noticeably less creamy and the bars don’t set up quite as firmly. If you’re watching calories, I’d recommend using full-fat and just cutting smaller pieces. Trust me on this.
Equipment Needed
You don’t need a fancy bakery setup for these cozy fall harvest cheesecake bars with pecan crust. Here’s what you’ll need:
- 9×13-inch baking pan — Metal or glass both work, but metal gives a slightly crisper crust. If using glass, reduce the oven temperature by 25°F.
- Food processor or rolling pin — For crushing the pecans. A food processor is faster, but a rolling pin and a zip-top bag work just fine if you want to pound out some frustration.
- Electric hand mixer or stand mixer — You need this for the cheesecake filling. Whisking by hand won’t get it smooth enough, and lumps in cheesecake are no fun.
- Mixing bowls — One medium for the crust, one large for the filling.
- Parchment paper — This is non-negotiable for easy removal. Leave overhang on two opposite sides as handles.
- Spatula — A silicone spatula for scraping every last bit of filling into the pan.
- Toothpick or skewer — For swirling the caramel.
- Roasting pan or large baking dish — For creating steam in the oven (optional, but helpful).
I picked up my 9×13 pan at a thrift store for three dollars, and it’s my favorite baking pan. You don’t need expensive equipment—just stuff that works.
Preparation Method
Let me walk you through this step by step. I’ve made these bars enough times to know exactly where things can go wrong, so I’ll flag those spots as we go.
Step 1: Prepare Your Pan and Preheat the Oven
Preheat your oven to 350°F (175°C). Line your 9×13 pan with parchment paper, leaving about 2 inches of overhang on the long sides. These will be your handles later. Lightly spray the parchment with non-stick spray—just a quick mist, not a soaking.
Step 2: Toast the Pecans
Spread 1 ½ cups of pecan halves on a baking sheet and toast them in the preheated oven for 6-8 minutes, stirring halfway through. You’ll know they’re done when they smell amazing and look slightly darker. Watch them carefully—pecans go from toasted to burnt faster than you’d think. Let them cool completely before using. This step wakes up their natural oils and makes the crust infinitely more flavorful.
Step 3: Make the Pecan Crust
In a food processor, pulse the cooled toasted pecans until they’re finely ground—think coarse sand, not powder. Add the flour, both sugars, and salt, and pulse a few times to combine. Drizzle in the melted butter and pulse until the mixture looks like wet sand and holds together when you pinch it. If you don’t have a food processor, chop the pecans very finely by hand, then mix everything in a bowl with a fork.
Press this mixture firmly into the bottom of your prepared pan. I use the bottom of a measuring cup to really pack it down—this prevents crumbling later. Bake the crust at 350°F for 12-14 minutes until it’s lightly golden around the edges. Set it aside to cool while you make the filling. Don’t turn off the oven yet.
Step 4: Lower the Oven Temperature
Reduce your oven temperature to 325°F (160°C). This slower baking is what gives you that silky, crack-free top.
Step 5: Make the Cheesecake Filling
In a large mixing bowl, beat the softened cream cheese with an electric mixer on medium speed until it’s completely smooth—about 2 minutes. Scrape down the sides and bottom of the bowl with a spatula. Add the sugar and beat for another 2 minutes until light and fluffy. Again, scrape the bowl.
Add the eggs one at a time, beating on low speed after each addition just until incorporated. Overbeating at this stage incorporates too much air and leads to cracks. Trust me, I learned this the hard way after three cracked cheesecakes in a row.
Add the sour cream, vanilla extract, and salt, and mix on low until just combined. Give it one final scrape and fold the batter a few times with your spatula to make sure everything is uniform.
Step 6: Assemble the Bars
Pour the cheesecake filling over the cooled crust and spread it into an even layer. If you’re using the caramel swirl, drizzle the caramel sauce over the top in a zigzag pattern, then use a toothpick or skewer to drag it through the filling in figure-eight motions. Don’t over-swirl—you want distinct ribbons of caramel, not a muddy mess.
Step 7: Bake with Steam
Place your pan on the middle rack of the oven. On the rack below, place a roasting pan or large baking dish filled with about 1 inch of hot water. This creates steam that keeps the cheesecake moist and helps prevent cracking. Bake for 45-50 minutes, or until the edges are set but the center still jiggles slightly when you gently shake the pan. It will continue to set as it cools.
Step 8: Cool and Chill
Let the bars cool on a wire rack for 1 hour at room temperature. Then refrigerate uncovered for at least 4 hours, preferably overnight. This is the hardest part—I know you want to dig in right away, but patience pays off here. The bars need time to firm up completely for clean slices.
Step 9: Slice and Serve
Once fully chilled, use the parchment handles to lift the entire block out of the pan. Place it on a cutting board and use a sharp knife to slice into squares. Wipe the knife clean between cuts for the neatest edges. Top with the reserved toasted pecan halves and dried cranberries if using.
Cooking Tips & Techniques
After making these cozy fall harvest cheesecake bars with pecan crust at least a dozen times, I’ve collected a few hard-won lessons. Let me save you some trouble.
Room temperature ingredients matter more than you think. I know it’s annoying to wait, but cold cream cheese creates lumps that no amount of beating will fix. Cold eggs seize up the batter and leave you with a grainy texture. Set everything out on the counter 60-90 minutes before you start. Set a timer if you’re forgetful like me.
Don’t overmix the filling. This was my biggest mistake early on. You want the ingredients just combined—no more. Overmixing incorporates air bubbles that expand during baking and cause cracks. Mix on low speed and stop the second the batter looks smooth.
That jiggle test is your friend. The center should wobble like Jell-O when you shake the pan, not ripple like liquid. If it ripples, give it another 5 minutes. If it’s completely firm, you’ve overbaked it and you’ll get cracks. The edges should be set and slightly puffed.
Cool gradually. Sudden temperature changes cause cracking. Let the bars cool on the counter for a full hour before refrigerating. No shortcuts here. I once stuck a warm cheesecake straight in the fridge and ended up with a canyon running through the middle.
Use a hot knife for clean slices. Run your knife under hot water, dry it off, then slice. Wipe and reheat between cuts. This gives you those beautiful, bakery-style edges that make people think you spent all day on these.
Variations & Adaptations
One of the things I love about this recipe is how flexible it is. Here are some variations I’ve tested and loved:
Gluten-Free Version: Swap the all-purpose flour in the crust with a 1:1 gluten-free flour blend. I’ve used Bob’s Red Mill with great results. The texture is slightly more crumbly but still holds together well.
Pumpkin Spice Twist: Add ½ cup pumpkin puree and 1 teaspoon pumpkin pie spice to the cheesecake filling. Reduce the sour cream to ¾ cup to balance the moisture. This version tastes like fall in every bite and is perfect for Thanksgiving.
Chocolate Drizzle: Instead of caramel, melt ½ cup dark chocolate chips with 1 tablespoon coconut oil and drizzle it over the top after baking. The chocolate-pecan combination is classic for a reason.
Maple Variation: Replace the granulated sugar in the crust with maple sugar (if you can find it) or add 2 tablespoons of maple syrup to the melted butter. Drizzle the finished bars with more maple syrup for a New England-inspired treat.
Dairy-Free Adaptation: Use dairy-free cream cheese (I like Miyoko’s) and coconut cream instead of sour cream. The texture won’t be quite as creamy, but it’s still delicious and satisfies that cheesecake craving.
My personal favorite variation? I made a batch with a swirl of apple butter instead of caramel last month, and it was honestly incredible. The tartness of the apples cut through the richness perfectly. If you have homemade apple butter, this is the time to use it.
Serving & Storage Suggestions
These cozy fall harvest cheesecake bars with pecan crust are best served chilled, straight from the fridge. The cold temperature firms up the texture and makes the flavors pop. I like to let them sit at room temperature for about 10 minutes before serving—just enough to take the chill off without making them soft.
For presentation, arrange the bars on a wooden board or a white platter and scatter a few extra toasted pecans and dried cranberries around them. A dusting of powdered sugar adds a pretty finishing touch, especially if you’re serving them at a holiday gathering.
These bars pair beautifully with a hot cup of coffee, a chai latte, or even a glass of bourbon if you’re feeling festive. For a full dessert spread, serve them alongside a scoop of vanilla bean ice cream or a dollop of whipped cream.
Storage: Keep the bars in an airtight container in the refrigerator for up to 5 days. Place a sheet of parchment paper between layers if stacking. The flavor actually improves after a day or two as the ingredients meld together.
Freezing: These freeze beautifully. Wrap individual bars tightly in plastic wrap, then place them in a freezer-safe bag. They’ll keep for up to 3 months. Thaw overnight in the refrigerator before serving. I always keep a stash in my freezer for unexpected guests or late-night cravings.
One thing to note—the pecan crust can soften slightly after a few days in the fridge. If you’re making these ahead for an event, I recommend baking them no more than two days in advance for the best texture.
Nutritional Information & Benefits
Let’s be real—these are a treat, not a health food. But they’re made with real ingredients, and that counts for something. Here’s the approximate nutritional breakdown per bar (based on 16 servings):
- Calories: 385
- Fat: 28g
- Carbohydrates: 30g
- Protein: 7g
- Fiber: 2g
- Sugar: 22g
Pecans are actually a nutritional powerhouse—they’re packed with healthy monounsaturated fats, magnesium, and antioxidants. Cream cheese provides calcium and protein, and the eggs add B vitamins and choline. Is it a superfood? No. But it’s a dessert made with real food, and that’s something I can feel good about serving to my family.
If you’re watching your sugar intake, you can reduce the sugar in the filling to ¾ cup without affecting the texture too much. The bars will be slightly less sweet, but the tanginess of the cream cheese will shine through more.
Conclusion
These cozy fall harvest cheesecake bars with pecan crust have become my go-to recipe for every autumn gathering, and I think they’ll become yours too. They’re the kind of dessert that feels special without being complicated—the kind that makes people ask for the recipe before they’ve even finished chewing.
What I love most about this recipe is how adaptable it is. Make it with the caramel swirl. Skip the swirl. Add pumpkin. Go gluten-free. Drizzle it with chocolate. However you make it, the foundation is solid—a buttery, nutty crust supporting a silky, tangy cheesecake that tastes like everything good about fall.
I’d love to hear how yours turn out. Did you try a variation I haven’t thought of? Did you serve them at a Thanksgiving dinner and watch them disappear? Drop a comment below and let me know. And if you share a photo on Pinterest, tag me—I love seeing your creations. Happy baking, friends. Here’s to cozy kitchens and the people we cook for.
Frequently Asked Questions
Can I make these cheesecake bars ahead of time?
Absolutely. In fact, I recommend it. These bars need at least 4 hours of chilling time, but they’re even better after a full day in the fridge. You can make them up to 2 days ahead for the best texture, or freeze them for up to 3 months.
Why did my cheesecake filling crack?
Cracks usually happen from overbaking, overmixing, or sudden temperature changes. Make sure you’re not overbeating the filling, bake just until the center jiggles, and cool gradually on the counter before refrigerating. The steam bath helps too.
Can I use a different nut for the crust?
Yes! Walnuts, almonds, or even a mix of pecans and walnuts work beautifully. Toast them first either way. If using almonds, I recommend blanched slivered almonds for a more neutral flavor.
How do I get clean slices?
Use a sharp knife and run it under hot water between each cut. Dry the knife thoroughly before slicing. This prevents the cheesecake from sticking and gives you those beautiful, clean edges.
Can I make this in a different size pan?
You can use an 8×8 pan for thicker bars, but you’ll need to increase the baking time by 10-15 minutes. For a 9-inch round springform pan, the baking time stays about the same. Just keep an eye on it and use the jiggle test to determine doneness.
Pin This Recipe!
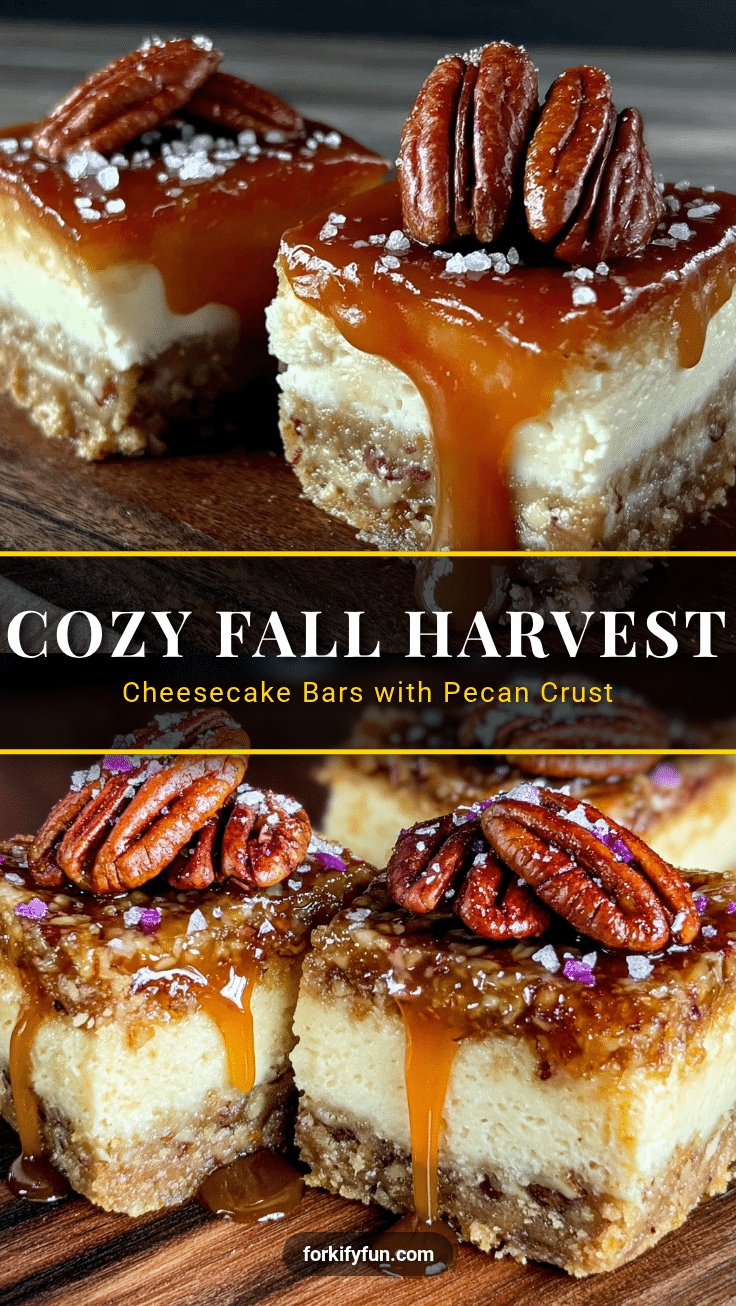
Cozy Fall Harvest Cheesecake Bars with Easy Pecan Crust
These creamy cheesecake bars feature a buttery pecan crust, a silky tangy filling, and an optional salted caramel swirl. Perfect for fall gatherings, they require no water bath and deliver a crunchy, nutty base that stays together beautifully.
- Prep Time: 20 minutes
- Cook Time: 50 minutes
- Total Time: 5 hours 10 minutes (includes chilling)
- Yield: 16 servings 1x
- Category: Dessert
- Cuisine: American
Ingredients
- 1 ½ cups pecan halves, toasted and cooled
- 1 cup all-purpose flour
- ¼ cup granulated sugar
- ¼ cup packed brown sugar
- ½ teaspoon salt
- ½ cup unsalted butter, melted and slightly cooled
- 24 ounces (three 8-ounce blocks) cream cheese, softened to room temperature
- 1 cup granulated sugar
- 3 large eggs, room temperature
- 1 cup sour cream, room temperature
- 2 teaspoons vanilla extract
- ¼ teaspoon salt
- ½ cup store-bought or homemade caramel sauce (optional)
- ¼ cup pecan halves, toasted (for garnish)
- 2 tablespoons dried cranberries or chopped dried figs (optional)
Instructions
- Preheat oven to 350°F (175°C). Line a 9×13-inch baking pan with parchment paper, leaving overhang on the long sides. Lightly spray with non-stick spray.
- Spread 1 ½ cups pecan halves on a baking sheet and toast for 6-8 minutes, stirring halfway. Let cool completely.
- In a food processor, pulse cooled pecans until finely ground (coarse sand texture). Add flour, both sugars, and salt; pulse to combine. Drizzle in melted butter and pulse until mixture holds together when pinched.
- Press crust mixture firmly into the bottom of the prepared pan using the bottom of a measuring cup. Bake at 350°F for 12-14 minutes until lightly golden. Set aside to cool. Reduce oven temperature to 325°F (160°C).
- In a large bowl, beat softened cream cheese with an electric mixer on medium speed until smooth (about 2 minutes). Scrape bowl. Add sugar and beat for another 2 minutes until light and fluffy. Scrape bowl again.
- Add eggs one at a time, beating on low speed after each addition just until incorporated. Add sour cream, vanilla extract, and salt; mix on low until just combined. Fold batter a few times with a spatula.
- Pour cheesecake filling over cooled crust and spread evenly. If using caramel, drizzle caramel sauce in a zigzag pattern, then swirl with a toothpick in figure-eight motions.
- Place pan on middle oven rack. On the rack below, place a roasting pan filled with 1 inch of hot water. Bake for 45-50 minutes until edges are set but center jiggles slightly.
- Cool on a wire rack for 1 hour at room temperature. Refrigerate uncovered for at least 4 hours, preferably overnight.
- Once fully chilled, use parchment handles to lift the block out of the pan. Slice into squares with a sharp knife, wiping clean between cuts. Top with reserved toasted pecan halves and dried cranberries if using.
Notes
Room temperature ingredients are crucial for a smooth filling. Don’t overmix the batter to avoid cracks. The jiggle test is key: center should wobble like Jell-O, not ripple. Cool gradually to prevent cracking. Use a hot knife for clean slices. Bars can be made up to 2 days ahead or frozen for up to 3 months.
Nutrition
- Serving Size: 1 bar
- Calories: 385
- Sugar: 22
- Sodium: 280
- Fat: 28
- Saturated Fat: 14
- Carbohydrates: 30
- Fiber: 2
- Protein: 7
Keywords: cheesecake bars, pecan crust, fall dessert, harvest cheesecake, caramel swirl, Thanksgiving dessert, easy cheesecake bars