“Why can’t we just use black cocoa powder?” my nephew asked, peering over my shoulder as I measured out regular cocoa for what felt like the hundredth batch of cupcakes. I started to explain why that wouldn’t work — something about the color not being dramatic enough, the extra cost, the fact that I’d never tried it that way. Then I stopped. Honestly, I had no good reason. I was just repeating what I’d always done. So I shrugged, handed him the bag of black cocoa I’d been saving for “something special,” and let him pour.
The batter looked like mud. Not the cute kind of mud, either — more like the puddle you accidentally step in after a rainstorm. I was already mentally preparing my apology to the neighbors who’d volunteered to be taste-testers. But you know that feeling when you’re sure something’s going to flop, and then it doesn’t? That first batch came out of the oven looking like velvet — midnight velvet, the kind you’d want to touch. The texture was lighter than any red velvet I’d ever made, and the flavor? Rich without being heavy. My nephew looked at me with this grin that said “I told you so,” and honestly? He was right.
These Black Velvet Halloween Cupcakes are the result of that kitchen moment — a happy accident born from a kid’s simple question. They’re budget-friendly because black cocoa is actually cheaper than the fancy natural cocoa I’d been hoarding, and they use basic pantry ingredients you probably already have. No food coloring, no specialty extracts, no expensive decorations. Just a really good cupcake that happens to look like it belongs at a haunted house. Maybe you’ve been there — trying to make something special for Halloween without spending a fortune or stressing yourself out. These cupcakes are that answer. They’re the ones I keep making year after year, not because they’re easy, but because they actually work.
Why You’ll Love This Recipe
Let me tell you why these cupcakes have become my go-to for every Halloween party, school event, and spooky movie night. I’ve tested this recipe more times than I care to admit — tweaking the flour ratio, adjusting the baking time, even trying different types of cocoa. What I landed on is a cupcake that’s genuinely foolproof.
- Budget-Friendly Ingredients: No expensive food coloring or specialty extracts. Black cocoa powder is surprisingly affordable, and you probably have everything else in your pantry right now.
- Kid-Approved Flavor: These aren’t just “Halloween cupcakes” that taste like sugar and artificial coloring. The black cocoa gives them a deep, almost Oreo-like flavor that kids actually love. My nephew ate three in one sitting.
- No Artificial Dyes: The black color comes entirely from the cocoa powder, not from bottles of food coloring that stain your counters and your kids’ fingers. It’s naturally dark, naturally delicious.
- Perfect for Busy Parents: From start to finish, these take about 35 minutes. Mix the batter, bake for 18 minutes, cool, and frost. No complicated steps, no waiting for ingredients to come to room temperature.
- Crowd-Pleasing Presentation: These cupcakes look impressive without requiring any fancy piping skills. A simple swirl of cream cheese frosting and a sprinkle of edible glitter or a candy spider, and you’ve got bakery-worthy treats.
What makes these different from every other Halloween cupcake recipe out there? It’s the texture. Most black cocoa cupcakes turn out dry because black cocoa has less fat than regular cocoa. I figured out that adding a splash of buttermilk and an extra egg yolk keeps them impossibly moist. They’re not just “good for Halloween” — they’re good cupcakes, period.
I remember the first time I served these at a neighborhood Halloween party. One of the moms pulled me aside and asked where I’d ordered them from. When I said I made them, she didn’t believe me. “They look too perfect,” she said. That’s the thing — these cupcakes look like you spent hours on them, but they come together in under an hour. They’re the kind of recipe that makes you look like a superhero parent without actually having to be one.
What Ingredients You Will Need
This recipe uses simple, everyday ingredients to create something that feels special. The magic really comes from the black cocoa powder — it’s the star of the show, and everything else just supports it.
- Black cocoa powder, 1/2 cup (about 50g) — This is the key ingredient. It’s the same type of cocoa used in Oreos. You can find it at most grocery stores or online. I like the brand Rodelle for its deep color and smooth flavor.
- All-purpose flour, 1 1/2 cups (about 190g) — Regular flour works perfectly here. No need for cake flour or any fancy substitutes. Just scoop and level it properly.
- Granulated sugar, 1 cup (about 200g) — Regular white sugar. You could use coconut sugar for a deeper flavor, but it will change the color slightly.
- Unsalted butter, 1/2 cup (1 stick, about 113g), softened — Make sure it’s truly softened, not melted. Leave it out for about an hour before you start. If you’re in a hurry, microwave it for 10 seconds at a time — but watch it carefully.
- Vegetable oil, 1/4 cup (about 60ml) — This keeps the cupcakes moist. You can use canola or any neutral oil. I’ve also used melted coconut oil in a pinch — just make sure it’s cooled slightly.
- Eggs, 2 large, room temperature — Room temperature eggs incorporate better into the batter. If you forgot to take them out, place them in a bowl of warm water for 5 minutes.
- Egg yolk, 1 extra — This is my secret for extra moist cupcakes. It adds richness without making the batter too heavy.
- Buttermilk, 1 cup (about 240ml) — Buttermilk reacts with the cocoa to create that tender crumb. If you don’t have buttermilk, add 1 tablespoon of vinegar or lemon juice to regular milk and let it sit for 5 minutes.
- Vanilla extract, 2 teaspoons — Pure vanilla is best, but imitation works fine for this recipe. The cocoa is strong enough that you won’t notice the difference.
- Baking soda, 1 teaspoon — This helps the cupcakes rise. Make sure it’s fresh — if it’s been sitting in your cabinet for years, it might not work as well.
- Baking powder, 1/2 teaspoon — For extra lift. Yes, you need both. Trust me on this one.
- Salt, 1/2 teaspoon — Just regular table salt. It balances the sweetness and enhances the chocolate flavor.
- White vinegar, 1 teaspoon — This sounds weird, I know. But it reacts with the baking soda to create extra lightness. You won’t taste it at all.
For the Cream Cheese Frosting:
- Cream cheese, 8 ounces (about 226g), softened — Full-fat is best for stability. Low-fat cream cheese can make the frosting too runny.
- Unsalted butter, 1/4 cup (half a stick, about 56g), softened — Make sure it’s really soft, almost squishy.
- Powdered sugar, 2 cups (about 240g) — Sift it if you want a super smooth frosting. I usually skip this step and it’s still fine.
- Vanilla extract, 1 teaspoon — Same as above, pure or imitation.
- Pinch of salt — Just a tiny bit to cut the sweetness.
For Decoration (Optional but Fun):
- Black edible glitter or sanding sugar — Makes them look magical without much effort.
- Candy spiders or plastic rings — The kids love these. I find them at the dollar store every October.
- Orange sprinkles — For a pop of color against the black cupcakes.
Equipment Needed
You don’t need a professional bakery setup for these cupcakes. I’ve made them in a tiny apartment kitchen and a friend’s camper van (long story), and they turned out great both times.
- Muffin tin — Standard 12-cup size. If you only have a mini muffin tin, just adjust the baking time to about 12 minutes.
- Cupcake liners — I like using black or orange liners for Halloween, but white works too. The batter is dark, so you’ll see it through lighter liners.
- Two mixing bowls — One medium, one large. Glass or metal works best.
- Whisk — For combining dry ingredients. A fork works in a pinch.
- Electric mixer — Handheld or stand mixer. You can do this by hand, but your arm will get tired. I’ve done it both ways, and the mixer is worth the effort.
- Rubber spatula — For scraping down the bowl. A silicone one is best because it doesn’t scratch your bowls.
- Cooling rack — Wire rack for cooling the cupcakes. If you don’t have one, you can use a baking sheet — just flip the cupcakes out onto it.
- Piping bag or zip-top bag — For frosting. You can also just spread it with a knife, but piping looks fancier.
- Measuring cups and spoons — For accurate measurements. I’ve learned the hard way that eyeballing ingredients doesn’t work for baking.
If you’re on a tight budget, skip the piping bag and use a zip-top bag with the corner snipped off. It works just as well, and you don’t have to clean a piping bag afterward.
Preparation Method
Let me walk you through this step by step. I’ve made these cupcakes so many times that I could probably do it in my sleep, but I’ll slow down and explain everything so you get perfect results your first time.
- Preheat your oven to 350°F (175°C). Place the rack in the center position. Line your muffin tin with cupcake liners — this recipe makes exactly 12 cupcakes, so you’ll fill every cup.
- Mix the dry ingredients. In a medium bowl, whisk together the flour, black cocoa powder, baking soda, baking powder, and salt. Make sure there are no lumps of cocoa — black cocoa tends to clump more than regular cocoa. If you see any, press them through a sieve or just break them up with your fingers.
- Cream the butter and sugar. In a large bowl, beat the softened butter and granulated sugar together until light and fluffy. This takes about 3-4 minutes with an electric mixer. You’ll know it’s ready when it looks pale and almost doubled in volume. Don’t rush this step — it’s what gives the cupcakes their tender texture.
- Add the oil and eggs. Beat in the vegetable oil until combined. Then add the eggs one at a time, beating well after each addition. Add the extra egg yolk and the vanilla extract. Scrape down the sides of the bowl with your spatula to make sure everything is evenly mixed.
- Combine the wet and dry ingredients. With the mixer on low speed, add about one-third of the dry ingredients to the butter mixture. Then add half of the buttermilk. Alternate until everything is just combined. The batter will be thick and dark — almost like a chocolate pudding. Add the white vinegar and mix for just a few seconds. Don’t overmix, or the cupcakes will be tough.
- Fill the cupcake liners. Use a cookie scoop or a measuring cup to fill each liner about two-thirds full. This is important — if you fill them too full, they’ll overflow and look messy. If you don’t fill them enough, they’ll be flat and sad. Two-thirds is the sweet spot.
- Bake the cupcakes. Place the muffin tin in the preheated oven and bake for 18-20 minutes. At 18 minutes, insert a toothpick into the center of one cupcake. If it comes out clean or with just a few moist crumbs, they’re done. If it’s wet batter, give them another 2 minutes. The tops should spring back when you gently press them.
- Cool the cupcakes. Let them sit in the pan for 5 minutes. Then transfer them to a wire rack to cool completely. This is crucial — if you try to frost them while they’re still warm, the frosting will melt into a goopy mess. I learned this the hard way at a Halloween party once. Don’t be like me.
- Make the frosting. While the cupcakes are cooling, beat the softened cream cheese and butter together until smooth. Add the powdered sugar one cup at a time, beating on low speed to avoid a sugar cloud. Add the vanilla and salt, then beat on medium-high for about 2 minutes until light and fluffy. If the frosting seems too soft, refrigerate it for 15 minutes before piping.
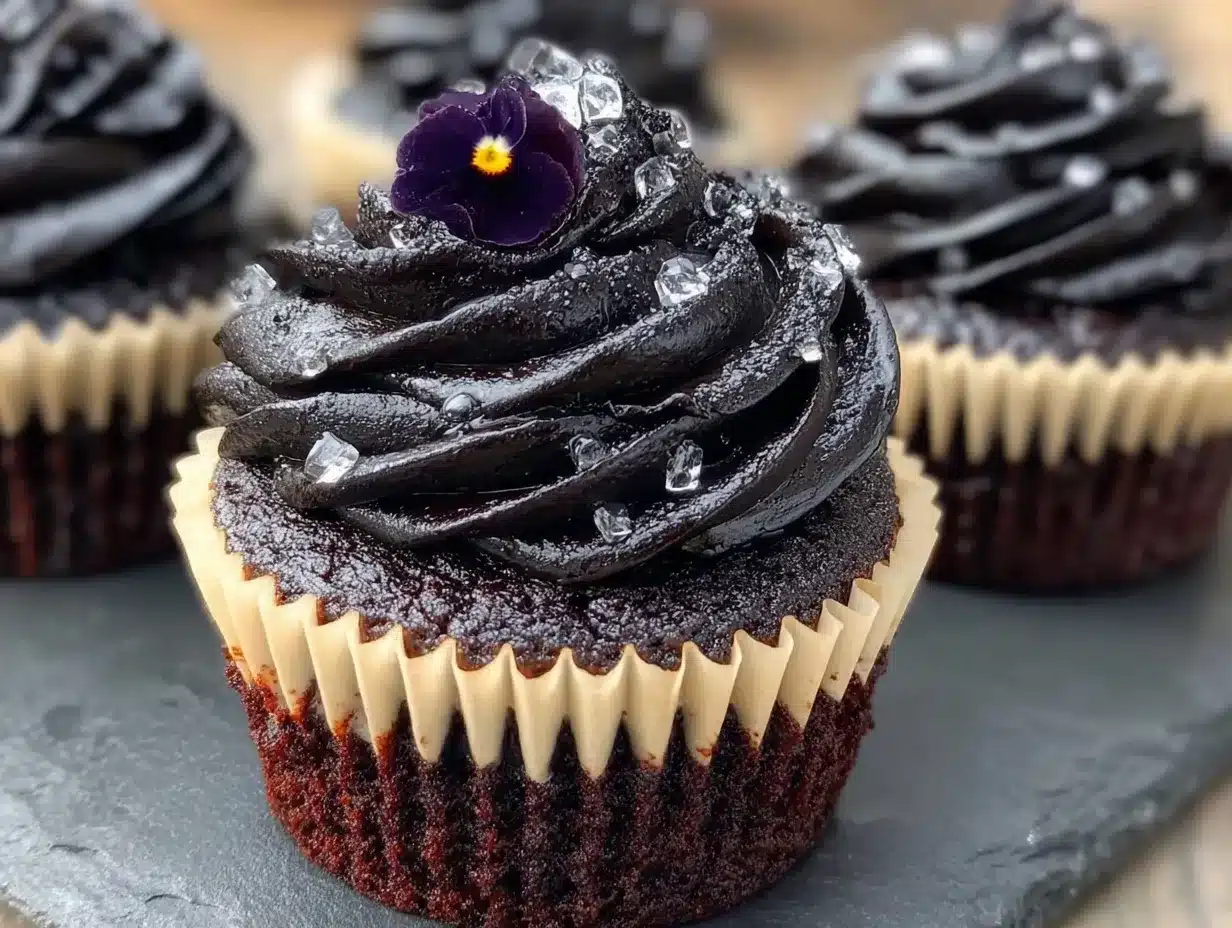
- Frost and decorate. Once the cupcakes are completely cool, pipe or spread the cream cheese frosting on top. Add your decorations — edible glitter, candy spiders, orange sprinkles, whatever you like. The contrast of the white frosting against the black cupcake is what makes these look so dramatic.
Cooking Tips & Techniques
After making these cupcakes dozens of times, I’ve picked up a few tricks that make the process smoother and the results more consistent. Let me share what I’ve learned.
Don’t overmix the batter. This is probably the most common mistake people make with any cupcake recipe. Once you add the flour mixture, mix just until you don’t see any more streaks of flour. Overmixing develops the gluten, which makes the cupcakes dense and rubbery. You want them light and tender, like a cloud.
Use room temperature ingredients. I know, I know — everyone says this, and it feels like an unnecessary step. But cold butter doesn’t cream properly, and cold eggs can make the batter curdle. If you forget to take them out of the fridge, here’s a shortcut: place the eggs in a bowl of warm water for 5 minutes, and microwave the butter for 10 seconds at a time until it’s soft but not melted.
Watch the baking time closely. Every oven is different. My friend’s oven runs hot, so her cupcakes are done at 16 minutes. Mine takes the full 20. Start checking at 16 minutes and go from there. The toothpick test is your friend — use it.
Let the cupcakes cool completely. I cannot stress this enough. I once frosted cupcakes that were still slightly warm, and the frosting slid right off. It was a mess. If you’re in a rush, you can speed up cooling by placing the cupcakes in the refrigerator for 15 minutes.
Pipe the frosting while it’s still soft. Cream cheese frosting firms up as it chills. If you refrigerate it, let it sit at room temperature for 10 minutes before piping. Otherwise, it’ll be too stiff to pipe smoothly.
Make ahead for less stress. You can bake the cupcakes a day ahead and store them in an airtight container. Frost them the day you plan to serve them. The unfrosted cupcakes actually taste better the next day — the flavors have time to meld together. I’ve tested this, and it’s true.
Variations & Adaptations
One of the best things about this recipe is how adaptable it is. Over the years, I’ve tried several variations, and they’ve all been hits.
Gluten-Free Version: Substitute the all-purpose flour with a 1:1 gluten-free baking flour blend. I’ve used Bob’s Red Mill and King Arthur brands with good results. Add an extra tablespoon of buttermilk because gluten-free flours tend to absorb more liquid. The texture will be slightly denser, but still delicious.
Dairy-Free Version: Use a plant-based butter stick (like Earth Balance) and a dairy-free cream cheese (like Violife or Kite Hill). For the buttermilk, add 1 tablespoon of lemon juice to 1 cup of unsweetened almond milk or oat milk. Let it sit for 5 minutes before using. The cupcakes won’t be quite as tender, but they’re still very good.
Spooky Spiderweb Design: Instead of just piping frosting, try this fun design. Pipe a swirl of frosting on each cupcake, then pipe a small circle of black gel icing in the center. Use a toothpick to drag lines from the center outward, creating a web pattern. It looks incredible and takes almost no extra time.
Mini Cupcakes for Parties: Use a mini muffin tin and bake for 10-12 minutes instead of 18-20. This is perfect for Halloween parties where people want to try multiple treats. You’ll get about 24 mini cupcakes from this recipe.
Chocolate Ganache Topping: If you’re not a fan of cream cheese frosting, try a simple chocolate ganache. Heat 1/2 cup of heavy cream until it just simmers, then pour it over 1 cup of dark chocolate chips. Let it sit for 5 minutes, then stir until smooth. Let it cool slightly, then dip the tops of the cupcakes. The dark chocolate against the black cupcake is subtle but elegant.
Serving & Storage Suggestions
These cupcakes are best served at room temperature. The cream cheese frosting softens beautifully, and the cake is at its most tender. If you’ve refrigerated them, let them sit out for about 20 minutes before serving.
For presentation, I like to arrange them on a black or white cake stand. The contrast really pops. Add some fake spiderwebs or plastic spiders around the base for a spooky touch. You can also place them on a platter lined with orange or purple tissue paper.
These cupcakes pair wonderfully with a cold glass of milk or a warm cup of coffee. For Halloween parties, I’ve also served them alongside apple cider — the tartness of the cider balances the sweetness of the cupcakes perfectly.
Storage: Store frosted cupcakes in an airtight container in the refrigerator for up to 3 days. The cream cheese frosting needs to be kept cold. If you’re storing unfrosted cupcakes, keep them in an airtight container at room temperature for up to 3 days, or freeze them for up to 3 months.
Freezing: Unfrosted cupcakes freeze beautifully. Wrap each one individually in plastic wrap, then place them in a freezer bag. When you’re ready to use them, let them thaw at room temperature for about an hour, then frost as usual. I’ve done this for Halloween parties when I wanted to prep ahead, and nobody could tell they weren’t freshly baked.
Reheating: If you want that fresh-from-the-oven warmth, microwave an unfrosted cupcake for about 10 seconds. Don’t microwave frosted cupcakes — the frosting will melt. Instead, let them sit at room temperature for 20 minutes before serving.
One thing I’ve noticed is that these cupcakes actually taste better the next day. The flavors settle and deepen overnight. So don’t stress about making them fresh the day of your event — they’ll be even better if you bake them a day ahead.
Nutritional Information & Benefits
Let’s be real — these are cupcakes, not health food. But they’re made with real ingredients, and there are a few nutritional bright spots worth mentioning.
Estimated per cupcake (with frosting):
- Calories: 320
- Fat: 18g
- Carbohydrates: 38g
- Protein: 4g
- Fiber: 2g
- Sugar: 26g
Black cocoa powder is actually rich in antioxidants — even more so than regular cocoa. It contains flavonoids that can help reduce inflammation and support heart health. Of course, the amount in each cupcake is small, but it’s nice to know there’s something beneficial in there.
The cream cheese frosting provides a small amount of calcium and protein from the dairy. And because these cupcakes use oil instead of all butter, they have a slightly lower saturated fat content than traditional recipes.
Dietary Considerations:
- Contains dairy (butter, buttermilk, cream cheese)
- Contains gluten (all-purpose flour)
- Contains eggs
- Can be made gluten-free and dairy-free with substitutions listed above
- Naturally nut-free (check your specific ingredients for cross-contamination if needed)
I’m not here to tell you these are healthy. They’re a treat, and that’s okay. Halloween is about having fun and enjoying special things. But I feel good knowing they’re made with real ingredients — no artificial colors, no preservatives, nothing weird. Just good food that happens to look spooky.
Conclusion
These Black Velvet Halloween Cupcakes have become a tradition in my house, and I hope they become one in yours too. They’re proof that you don’t need fancy ingredients or complicated techniques to make something truly special. A kid’s simple question — “why can’t we just use black cocoa?” — led me to a recipe that’s simpler, cheaper, and more delicious than anything I’d been making before.
What I love most about these cupcakes is how they bring people together. I’ve made them for Halloween parties, school bake sales, and quiet movie nights at home. Every time, someone asks for the recipe. Every time, someone says “these are the best cupcakes I’ve ever had.” And every time, I smile and think about that afternoon in my kitchen when a nine-year-old taught me something new.
I’d love to hear how these turn out for you! Did you add your own twist? Did your kids help make them? Drop a comment below and let me know. And if you share them on social media, tag me — I want to see your spooky creations. Happy Halloween, and happy baking!
Frequently Asked Questions
Can I use regular cocoa powder instead of black cocoa?
You can, but the cupcakes won’t be black — they’ll be a dark brown. The flavor will also be different. Black cocoa has a distinct Oreo-like taste that regular cocoa doesn’t have. If you’re set on making black cupcakes, I recommend finding black cocoa powder. It’s worth the effort.
Why did my cupcakes turn out dry?
This usually happens from overbaking or overmixing. Check your oven temperature with an oven thermometer — many ovens run hot. Also, make sure you’re measuring your flour correctly. Spoon it into the measuring cup and level it off with a knife. Scooping directly from the bag can pack in too much flour.
Can I make these cupcakes ahead of time?
Absolutely! Bake the cupcakes up to 3 days ahead and store them in an airtight container at room temperature. Make the frosting up to 2 days ahead and keep it refrigerated. Frost the cupcakes the day you plan to serve them for the best presentation.
How do I get the frosting to be super smooth?
Make sure your cream cheese and butter are truly softened — almost room temperature. Beat them together until they’re completely smooth before adding the powdered sugar. If the frosting looks lumpy, it’s usually because the cream cheese was too cold. Let it sit out for another 10 minutes and beat again.
Can I freeze these cupcakes?
Yes! Unfrosted cupcakes freeze beautifully for up to 3 months. Wrap each one individually in plastic wrap and place them in a freezer bag. Thaw at room temperature before frosting. Frosted cupcakes can also be frozen, but the texture of the cream cheese frosting may change slightly after thawing.
Pin This Recipe!
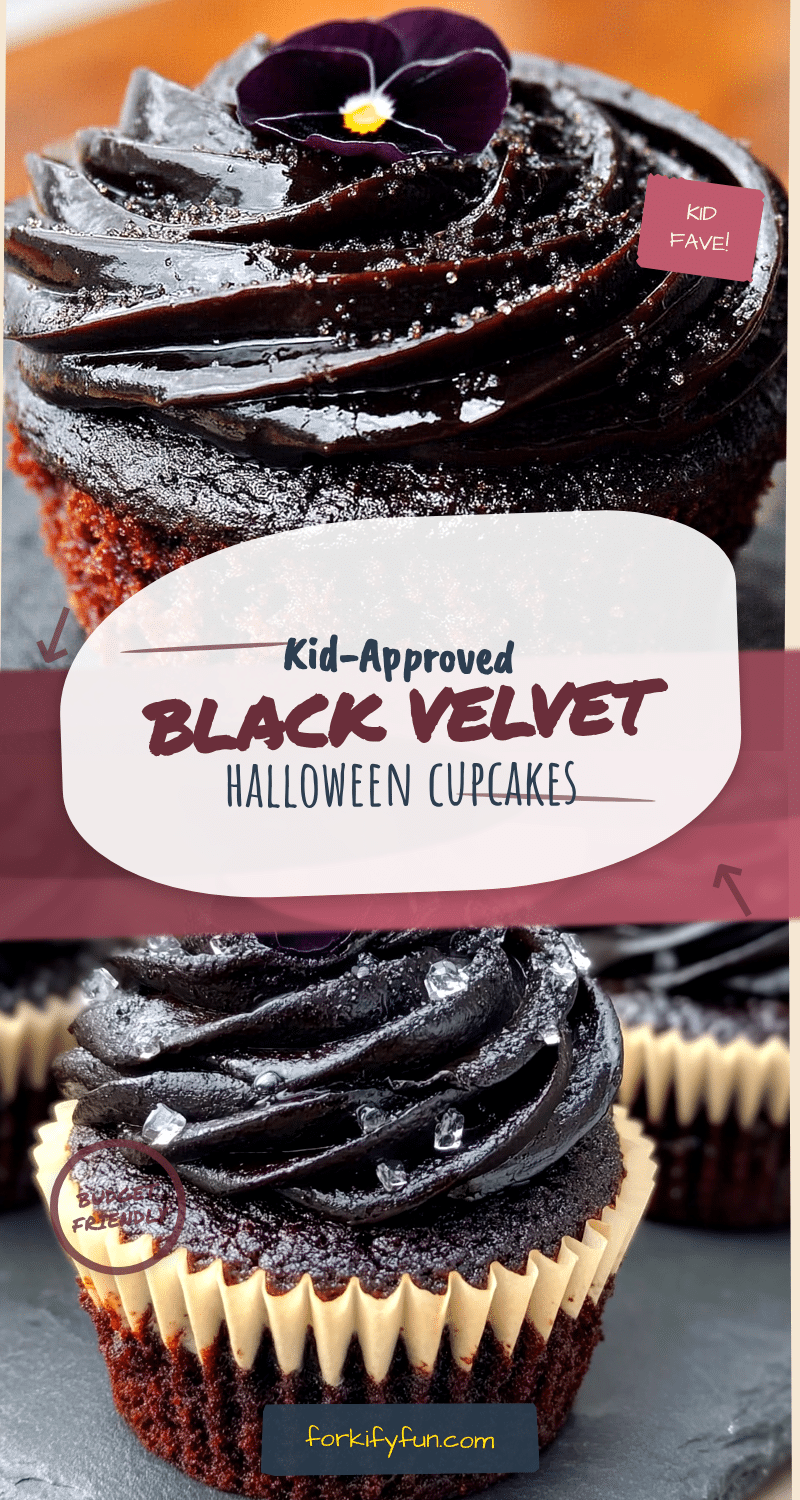
Budget-Friendly Black Velvet Halloween Cupcakes: Easy Kid-Approved Recipe
These Black Velvet Halloween Cupcakes are a budget-friendly, kid-approved treat made with black cocoa powder for a naturally dark color and rich Oreo-like flavor. No artificial dyes needed, and they come together in under an hour.
- Prep Time: 15 minutes
- Cook Time: 18-20 minutes
- Total Time: 35 minutes
- Yield: 12 cupcakes 1x
- Category: Dessert
- Cuisine: American
Ingredients
- 1/2 cup (about 50g) black cocoa powder
- 1 1/2 cups (about 190g) all-purpose flour
- 1 cup (about 200g) granulated sugar
- 1/2 cup (1 stick, about 113g) unsalted butter, softened
- 1/4 cup (about 60ml) vegetable oil
- 2 large eggs, room temperature
- 1 extra egg yolk
- 1 cup (about 240ml) buttermilk
- 2 teaspoons vanilla extract
- 1 teaspoon baking soda
- 1/2 teaspoon baking powder
- 1/2 teaspoon salt
- 1 teaspoon white vinegar
- For the Cream Cheese Frosting:
- 8 ounces (about 226g) cream cheese, softened
- 1/4 cup (half a stick, about 56g) unsalted butter, softened
- 2 cups (about 240g) powdered sugar
- 1 teaspoon vanilla extract
- Pinch of salt
- For Decoration (Optional):
- Black edible glitter or sanding sugar
- Candy spiders or plastic rings
- Orange sprinkles
Instructions
- Preheat your oven to 350°F (175°C). Place the rack in the center position. Line your muffin tin with cupcake liners.
- In a medium bowl, whisk together the flour, black cocoa powder, baking soda, baking powder, and salt. Make sure there are no lumps of cocoa.
- In a large bowl, beat the softened butter and granulated sugar together until light and fluffy, about 3-4 minutes with an electric mixer.
- Beat in the vegetable oil until combined. Add the eggs one at a time, beating well after each addition. Add the extra egg yolk and the vanilla extract. Scrape down the sides of the bowl.
- With the mixer on low speed, add about one-third of the dry ingredients to the butter mixture. Then add half of the buttermilk. Alternate until everything is just combined. Add the white vinegar and mix for just a few seconds. Do not overmix.
- Use a cookie scoop or measuring cup to fill each liner about two-thirds full.
- Bake for 18-20 minutes. At 18 minutes, insert a toothpick into the center of one cupcake. If it comes out clean or with just a few moist crumbs, they’re done. The tops should spring back when gently pressed.
- Let the cupcakes sit in the pan for 5 minutes, then transfer them to a wire rack to cool completely.
- While the cupcakes are cooling, beat the softened cream cheese and butter together until smooth. Add the powdered sugar one cup at a time, beating on low speed. Add the vanilla and salt, then beat on medium-high for about 2 minutes until light and fluffy. If too soft, refrigerate for 15 minutes before piping.
- Once the cupcakes are completely cool, pipe or spread the cream cheese frosting on top. Add decorations as desired.
Notes
Don’t overmix the batter to avoid dense cupcakes. Use room temperature ingredients for best results. Check baking time starting at 16 minutes as ovens vary. Let cupcakes cool completely before frosting. Unfrosted cupcakes can be stored at room temperature for up to 3 days or frozen for up to 3 months. Frosted cupcakes should be refrigerated and are best within 3 days.
Nutrition
- Serving Size: 1 cupcake
- Calories: 320
- Sugar: 26
- Fat: 18
- Carbohydrates: 38
- Fiber: 2
- Protein: 4
Keywords: Halloween cupcakes, black velvet, black cocoa, kid-friendly, budget-friendly, no food coloring, cream cheese frosting