I was standing in the baking aisle last October, staring at a bag of chocolate chips I didn’t actually need, when the weirdest thing happened. A little kid ran past me, clutching a package of those pre-made, chalky meringue cookies, and the crinkle of the plastic bag hit me like a time machine. Suddenly I was seven years old at my Aunt Lou’s kitchen table, watching her pipe little clouds of egg whites onto a baking sheet, her hands moving like she was casting a spell. She’d let me stick candy eyes on them, and I always put them on crooked, making them look more confused than spooky. She passed away a few years back, and I haven’t thought about those afternoons in forever. But right there in the grocery store, I knew I had to figure out how to make them myself, but better — and way more fun. That’s how these Spooky Ghost Meringue Cookie Pops were born. Honestly, they’re the perfect Halloween treat, and maybe you’ve been looking for something just like this that isn’t another sugar bomb covered in frosting.
These aren’t your average meringues. They’re light, airy, and they melt in your mouth, but they’re shaped like adorable little ghosts on a stick. The best part? They’re surprisingly simple to put together. I mean, I messed up my first batch pretty badly — I forgot to wipe the bowl with vinegar, and my egg whites refused to stiffen. It was a whole thing. But once I got the hang of it, it became my favorite Halloween tradition. There’s something almost magical about watching plain white mixture transform into these cute, crisp ghosts with tiny chocolate faces. It’s the kind of recipe that makes you feel like a kitchen wizard, even if you’re just following directions.
These Spooky Ghost Meringue Cookie Pops are perfect for Halloween parties, classroom treats, or just a fun afternoon project with the kids. They’re naturally gluten-free and low in fat, which is always a nice bonus. And let me tell you, the look on people’s faces when they see these little guys on a stick is priceless. It’s like they can’t believe something so cute came out of your own kitchen. So grab your mixer and let’s make some ghosts — I promise it’s easier than you think, and way more rewarding than anything from a bag.
Why You’ll Love This Recipe
I’ve tested this recipe about six times now, and I can honestly say these are the best ghost meringues I’ve ever made. They’re not just cute — they’re genuinely delicious and surprisingly foolproof once you know a few tricks. Here’s why I think you’ll fall in love with them:
- Quick & Easy : The active prep time is only about 20 minutes, and then the oven does all the work. Perfect for busy Halloween weeknights when you’re juggling costumes and candy.
- Simple Ingredients : You probably have everything in your kitchen right now. Egg whites, sugar, vanilla, and a few chocolate chips for the faces. No fancy grocery store runs needed.
- Perfect for Halloween : These are the ultimate spooky-but-sweet treat. They’re great for class parties, trick-or-treat gatherings, or just decorating the dessert table.
- Crowd-Pleaser : Kids absolutely lose their minds over these, and adults love them because they’re not too sweet and they’re naturally gluten-free. I’ve never brought these anywhere without people asking for the recipe.
- Unbelievably Delicious : The texture is what gets everyone. They’re crisp on the outside, with a light, airy center that dissolves on your tongue. It’s pure comfort food magic.
What makes these different from every other meringue recipe out there? It’s the technique. I add a little cornstarch and vinegar to the egg whites, which makes them extra stable and gives them that perfect marshmallowy interior. Plus, the lollipop stick factor makes them way more fun to eat. You don’t just bite into a cookie — you hold a little ghost by its stick and take delicate bites. It’s an experience.
This recipe is the kind that makes you close your eyes after the first bite. It’s comfort food reimagined for Halloween — lighter than a cookie, more fun than a candy bar, and with the same soul-soothing satisfaction. Perfect for impressing guests without any stress, or turning a simple October afternoon into something memorable.
What Ingredients You Will Need
This recipe uses simple, wholesome ingredients to deliver that signature light-as-air texture and sweet vanilla flavor. Most of these are pantry staples, which makes this a great last-minute Halloween project.
For the Meringue Ghosts
- 4 large egg whites, at room temperature (this is crucial — cold eggs won’t whip up as well)
- 1 cup (200g) granulated sugar (I prefer regular white sugar for the cleanest flavor)
- 1/2 teaspoon cream of tartar (this stabilizes the egg whites and helps them hold their shape)
- 1 teaspoon vanilla extract (use pure vanilla if you have it — the flavor difference is noticeable)
- 1 teaspoon cornstarch (the secret ingredient for that soft, marshmallowy center)
- 1/2 teaspoon white vinegar (don’t skip this — it also helps stabilize the meringue)
- Pinch of salt (balances the sweetness)
For the Faces and Decorations
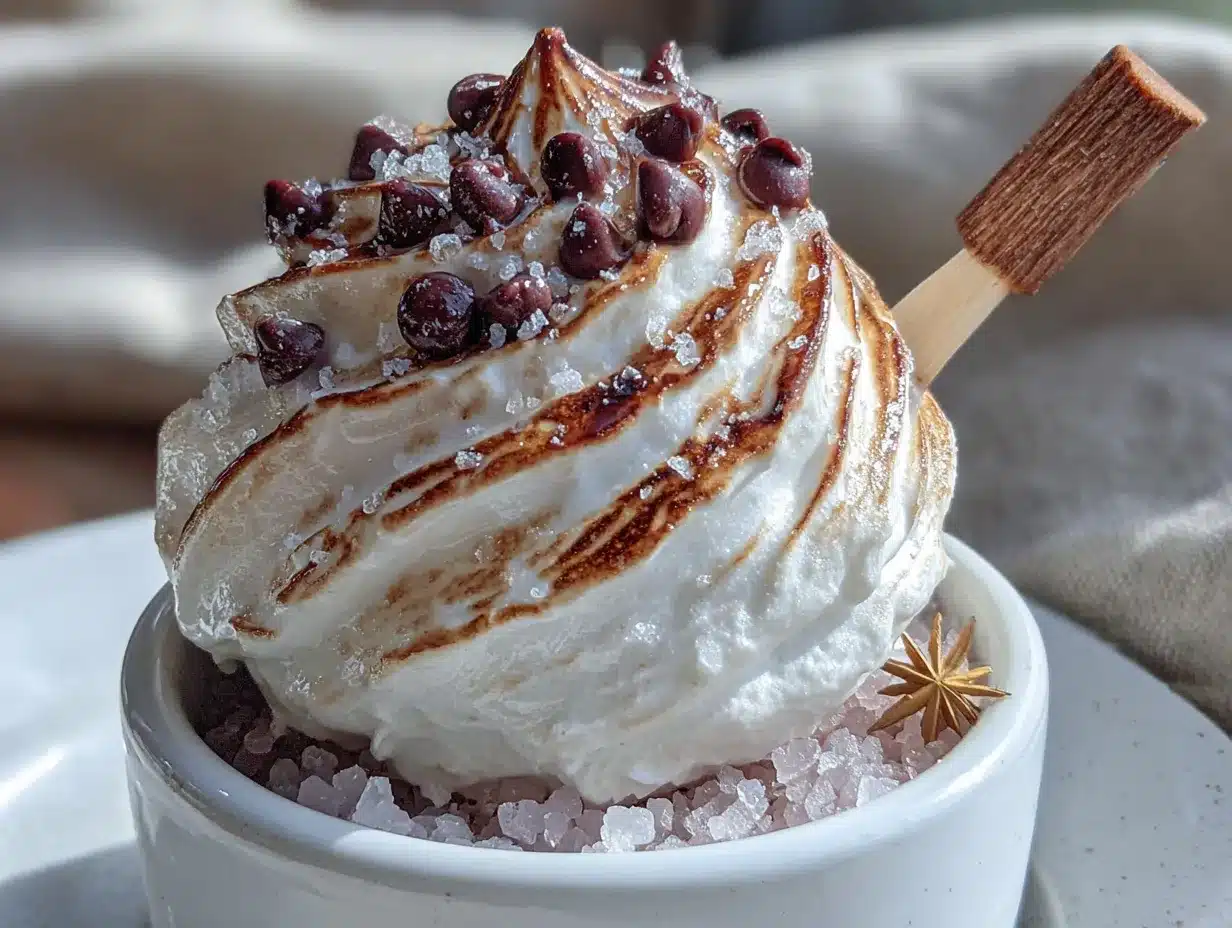
- 1/4 cup mini chocolate chips (for the eyes and mouths — I like Ghirardelli for consistent melting)
- Optional: 1 tablespoon black sanding sugar (for extra spooky sparkle)
- Optional: 1/4 cup white candy melts (for attaching the sticks if you want extra security)
For the Pops
- 12-15 lollipop sticks (6-inch sticks work best — you can find them at craft stores or online)
A quick note on egg whites: Make sure not a speck of yolk gets in there. Even a tiny bit of fat will prevent your egg whites from whipping into stiff peaks. I separate my eggs one at a time into a small bowl, then add them to the mixing bowl. That way, if one breaks, you haven’t ruined the whole batch. Also, room temperature eggs are non-negotiable here. Take them out of the fridge about 30 minutes before you start, or place them in a bowl of warm water for 5 minutes if you’re in a hurry.
For the sugar, I’ve tried using superfine sugar, and it does dissolve a little faster, but regular granulated works perfectly fine. Just make sure you beat the mixture long enough that the sugar dissolves completely — you shouldn’t feel any graininess when you rub a little between your fingers. Trust me, I learned this the hard way with a gritty batch that never quite came together.
Equipment Needed
You don’t need a ton of fancy equipment for these Spooky Ghost Meringue Cookie Pops, which is part of what makes them so great. Here’s what you’ll need:
- Electric stand mixer or hand mixer — You can technically whip egg whites by hand, but I wouldn’t recommend it unless you want a serious arm workout. A stand mixer with the whisk attachment is ideal.
- Large mixing bowl — Glass or metal works best. Avoid plastic bowls, which can retain oils that mess with your egg whites.
- Piping bag with a round tip — I use a Wilton #12 tip, but you can also just snip the corner off a zip-top bag if you’re in a pinch.
- Baking sheets — Two standard half-sheet pans work well.
- Parchment paper — Absolutely necessary. Meringues will stick to regular baking sheets.
- Small offset spatula — Helpful for smoothing the ghosts, but a butter knife works too.
- Small microwave-safe bowl — For melting chocolate chips for the faces.
- Toothpicks — Great for dotting on the chocolate eyes and mouths with precision.
If you don’t have a piping bag, don’t stress. You can use a sturdy zip-top bag with a tiny corner snipped off. Just be careful not to cut too much — you want a small opening. I’ve also used a plastic squeeze bottle in a pinch, though the control isn’t as good. Also, make sure your mixing bowl and whisk attachment are completely clean and dry. Any trace of grease will sabotage your meringue. I wipe mine down with a little lemon juice or vinegar on a paper towel before I start, just to be safe.
Preparation Method
Alright, let’s make some ghosts! I’ll walk you through every step, including the little tricks I’ve picked up from my failed batches.
- Preheat your oven to 200°F (95°C). Yes, that’s very low. We’re not baking these so much as drying them out. Line two baking sheets with parchment paper and set them aside.
- Prepare your workstation. Make sure your bowl and whisk are squeaky clean. Wipe them with a little white vinegar on a paper towel to remove any trace of grease. This is the step I forgot on my first try, and my egg whites never got past the frothy stage. Learn from my mistakes!
- Separate your eggs. Crack each egg white into a small bowl first, then transfer to your mixing bowl. This way, if you get any yolk in one, you only lose that egg, not the whole batch. Let the whites sit at room temperature for about 30 minutes if you haven’t already.
- Start whipping. Beat the egg whites on medium speed until they’re frothy and bubbly, about 1-2 minutes. Add the cream of tartar and salt, then continue beating until soft peaks form. You’ll know it’s ready when the whites are white and foamy, and the peaks flop over when you lift the whisk.
- Add the sugar slowly. With the mixer running on medium-high, add the sugar one tablespoon at a time. I know it’s tedious, but this gradual addition helps the sugar dissolve properly. Keep beating until the mixture is glossy and forms stiff peaks. This usually takes about 5-7 minutes. The mixture should look like marshmallow fluff and feel smooth, not grainy, when you rub a bit between your fingers.
- Add the flavorings. Pour in the vanilla extract, cornstarch, and white vinegar. Beat on low just until combined, about 30 seconds. Don’t overmix or you’ll deflate all that beautiful air you just whipped in.
- Transfer to piping bag. Spoon the meringue into your piping bag fitted with a round tip. If you’re using a zip-top bag, snip about 1/2 inch off one corner. Work quickly — meringue can start to deflate if it sits too long.
- Pipe the ghosts. Hold the piping bag straight up and down, about 1/2 inch above the parchment paper. Pipe a round base, about 2 inches wide, then pull up to create a tall, teardrop shape. For the ghostly “tail,” give a little flick upward as you pull away. Don’t worry if they look a bit uneven — ghosts are supposed to look a little wonky! Space them about 2 inches apart on the baking sheets.
- Insert the lollipop sticks. Gently push a lollipop stick into the bottom of each ghost, about halfway up. The meringue should hold it in place. If it seems unstable, pipe a tiny bit more meringue around the base of the stick to secure it.
- Bake low and slow. Place the baking sheets in the oven and bake for 60-75 minutes. The meringues should be firm to the touch and easily peel off the parchment paper. They shouldn’t be brown at all — if they start to color, your oven is too hot. Turn it down by 25 degrees.
- Cool completely. Turn off the oven and leave the meringues inside with the door slightly ajar for another hour. This gradual cooling prevents cracking. Once they’re completely cool, they should be dry and crisp.
- Add the faces. Melt the mini chocolate chips in a microwave-safe bowl in 20-second bursts, stirring between each, until smooth. Dip a toothpick into the melted chocolate and dot on two eyes and a mouth for each ghost. Get creative — some of mine have surprised “O” mouths, and others have mischievous little grins. Let the chocolate set for about 10 minutes at room temperature, or pop them in the fridge for 5 minutes.
And that’s it! You’ve got yourself a batch of adorable Spooky Ghost Meringue Cookie Pops. The whole process takes about 20 minutes of active work, plus the baking and cooling time. It’s a great afternoon project, especially if you’ve got little helpers who want to stick on the faces.
Cooking Tips & Techniques
I’ve made these ghosts about a dozen times now, and I’ve definitely learned a few things the hard way. Here are my best tips for perfect meringues every time.
Humidity is your enemy. Meringues are basically sugar and egg whites, and sugar attracts moisture like crazy. If it’s a rainy or humid day, your meringues might turn out sticky or chewy instead of crisp. I try to make these on dry days, or I run the air conditioner a little lower to keep the kitchen cool and dry. If you absolutely have to make them on a humid day, add an extra 15 minutes to the baking time.
Don’t rush the sugar. I know it’s tempting to dump all the sugar in at once, but trust me, it makes a difference. Adding it slowly gives the sugar time to dissolve completely. If your meringue feels grainy when you rub it between your fingers, keep beating. Undissolved sugar will cause the meringue to weep (release moisture) while baking, which ruins the texture.
Check your oven temperature. My first batch came out slightly browned because my oven runs hot. I bought an inexpensive oven thermometer, and it was a game-changer. Meringues should bake at a steady 200°F — any hotter and they’ll brown and crack. Any cooler and they’ll take forever to dry out. If your oven runs hot, prop the door open with a wooden spoon handle for the first 30 minutes.
Pipe with confidence. Your first ghost might look a little sad, and that’s okay. The more you pipe, the better you’ll get. I find it helps to imagine you’re drawing a ghost shape in the air. Start with a firm base, pull up smoothly, and give a little flick at the end. If you mess up, just scrape the meringue back into the bag and try again. No harm done!
Store them properly. These meringues are best eaten within 2-3 days, but you can store them in an airtight container at room temperature for up to a week. Don’t refrigerate them — the moisture will make them sticky. If they do get a little soft, you can re-crisp them in a 200°F oven for 10 minutes.
Variations & Adaptations
One of the best things about this recipe is how easy it is to customize. Here are some of my favorite variations:
Chocolate Ghosts: Substitute 2 tablespoons of the granulated sugar with unsweetened cocoa powder. Sift it together with the cornstarch before adding to the egg whites. You’ll get pale brown ghosts with a subtle chocolate flavor that’s perfect for Halloween.
Pumpkin Spice Ghosts: Add 1/2 teaspoon pumpkin pie spice and 1/4 teaspoon cinnamon along with the vanilla. The warm spices give these a cozy fall vibe that’s perfect for October. I made these for a Halloween brunch last year, and they disappeared in minutes.
Vegan Meringue Ghosts: You can actually make meringues without eggs using aquafaba (the liquid from a can of chickpeas). Use 1/2 cup of aquafaba in place of the egg whites, and follow the same whipping process. It takes a little longer to reach stiff peaks, but it works surprisingly well. I’ve tested this twice, and while the texture is slightly different, they’re still delicious and perfectly ghost-shaped.
Mini Ghost Pops: For bite-sized treats, pipe smaller ghosts about 1 inch wide and 1.5 inches tall. Reduce the baking time to 40-50 minutes. These are perfect for party platters or for kids who want to eat a whole ghost without feeling overwhelmed.
Colorful Ghosts: Add a few drops of gel food coloring to the meringue before piping. Purple, green, or orange ghosts are super fun for Halloween. Just fold the color in gently with a spatula to avoid deflating the mixture. I’ve made a batch of rainbow ghosts for a non-Halloween party, and they were a huge hit with the kids.
Serving & Storage Suggestions
These Spooky Ghost Meringue Cookie Pops are best served at room temperature, right after the chocolate faces have set. The contrast between the crisp, airy meringue and the firm chocolate is absolutely perfect. Arrange them standing up in a small vase or a block of styrofoam for a dramatic presentation. I like to put them on a cake stand surrounded by a few fake spiderwebs and plastic spiders for extra Halloween flair.
They pair beautifully with a cup of hot apple cider or a pumpkin spice latte. For a Halloween party, set up a meringue ghost decorating station where guests can pipe on their own faces using melted chocolate or colored icing. It’s a fun activity that doubles as a dessert.
For storage, keep the ghosts in an airtight container at room temperature for up to 5 days. Don’t stack them on top of each other, or the faces might smudge. I layer mine between sheets of parchment paper in a single layer. If you’re making them ahead for a party, you can bake and cool the meringues up to 3 days in advance, then add the chocolate faces the day of the event. The faces stay fresh and crisp this way.
These ghosts also freeze surprisingly well. Place them in a single layer in a freezer-safe container, separated by parchment paper, and freeze for up to 2 months. Thaw at room temperature for about 30 minutes before serving. The texture remains light and airy — I was honestly shocked at how well they held up.
Nutritional Information & Benefits
Per serving (one ghost pop): approximately 45 calories, 0g fat, 11g carbohydrates, 1g protein. These are naturally low in fat and gluten-free, making them a lighter Halloween treat compared to traditional cookies or candy. The egg whites provide a small amount of protein, and the sugar content is moderate for a dessert.
The main health consideration here is the sugar content. While meringues are mostly sugar and air, the portion size is small enough that one or two ghosts won’t derail your diet. I like to think of them as a way to satisfy a sweet craving without eating a whole slice of cake. Plus, since they’re on a stick, you tend to eat them more slowly and mindfully.
For those with dietary restrictions, these are naturally dairy-free, nut-free, and soy-free. The only common allergen is eggs. If you’re making the vegan version with aquafaba, they become completely plant-based. Always check your chocolate chips for dairy if that’s a concern — some brands add milk solids.
I personally appreciate that these don’t have any artificial colors or preservatives. They’re just simple, real ingredients transformed into something magical. It feels good to serve treats that are homemade and wholesome, even when they’re shaped like little ghosts.
Conclusion
These Spooky Ghost Meringue Cookie Pops have become my absolute favorite Halloween tradition. They’re fun to make, adorable to look at, and genuinely delicious to eat. Every time I pipe a new batch, I think about my Aunt Lou and those afternoons at her kitchen table, and I smile. Food has a way of connecting us to the people we love, even after they’re gone.
I hope you give these a try, whether you’re making them for a Halloween party, a classroom treat, or just because you want to do something fun with your kids on a rainy October afternoon. Don’t be afraid to make them your own — add different colors, try new face designs, or experiment with flavors. The best recipes are the ones that evolve with you.
I’d love to hear how your ghosts turn out! Drop a comment below and let me know if you tried any variations, or share a photo on Pinterest and tag me. Happy Halloween, and happy baking!
Frequently Asked Questions
Can I make these meringue ghosts without a piping bag?
Absolutely! You can use a sturdy zip-top bag with a small corner snipped off. Just be careful not to cut too much — you want about a 1/2 inch opening. You can also use a spoon to dollop the meringue into ghost shapes, though they won’t be as tall and defined. They’ll still taste great!
Why did my meringues turn out sticky or chewy?
This usually happens when there’s too much humidity in the air or the meringues weren’t baked long enough. Make sure you’re baking on a dry day, and check that your oven temperature is accurate. If they’re still sticky after the recommended baking time, leave them in the oven (with the heat off and door ajar) for another 30 minutes to continue drying.
Can I use liquid food coloring instead of gel?
I recommend gel food coloring over liquid for meringues. Liquid coloring adds extra moisture, which can deflate your egg whites and make the meringues weep during baking. Gel colors are more concentrated and won’t affect the texture. Just fold them in gently with a spatula.
How far in advance can I make these for a party?
You can bake the meringues up to 3 days ahead of time. Store them in an airtight container at room temperature. Add the chocolate faces the day of your event for the freshest look. If you need to make them even further in advance, freeze the undecorated meringues for up to 2 months.
My meringues cracked while baking. What did I do wrong?
Cracking usually happens when the oven temperature is too high or fluctuates too much. Make sure your oven is at a steady 200°F, and avoid opening the door during baking. Also, turning the oven off and leaving the meringues inside to cool gradually helps prevent cracks from forming as they cool.
Pin This Recipe!
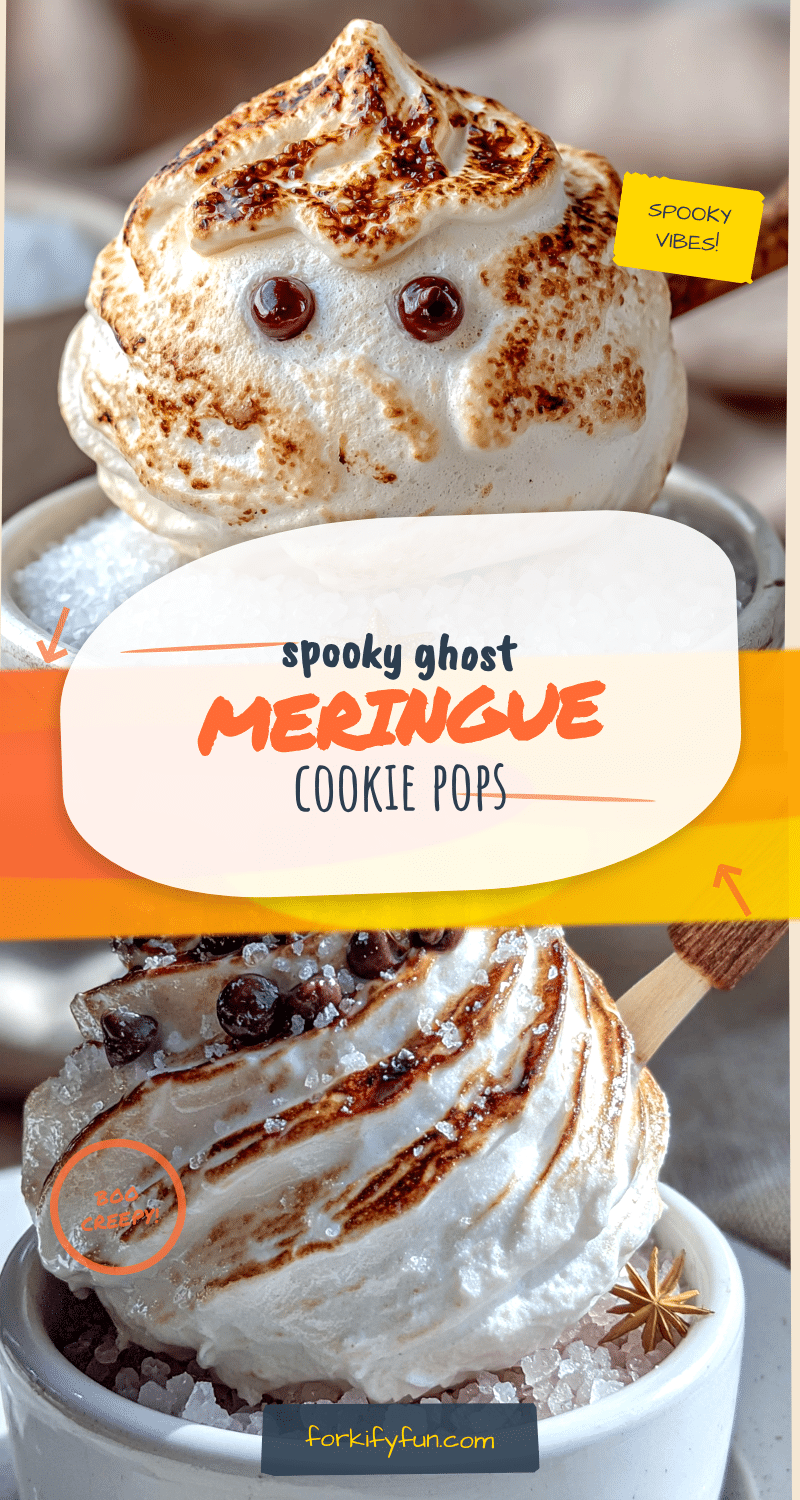
Spooky Ghost Meringue Cookie Pops: Easy Halloween Treat

These light, airy meringue ghosts on a stick are the perfect Halloween treat. They’re naturally gluten-free, low in fat, and surprisingly simple to make with just a few pantry staples.
- Prep Time: 20 minutes
- Cook Time: 60-75 minutes
- Total Time: 1 hour 35 minutes to 1 hour 50 minutes
- Yield: 12-15 servings 1x
- Category: Dessert
- Cuisine: American
Ingredients
- 4 large egg whites, at room temperature
- 1 cup (200g) granulated sugar
- 1/2 teaspoon cream of tartar
- 1 teaspoon vanilla extract
- 1 teaspoon cornstarch
- 1/2 teaspoon white vinegar
- Pinch of salt
- 1/4 cup mini chocolate chips
- Optional: 1 tablespoon black sanding sugar
- Optional: 1/4 cup white candy melts
- 12–15 lollipop sticks (6-inch)
Instructions
- Preheat your oven to 200°F (95°C). Line two baking sheets with parchment paper.
- Prepare your workstation: wipe the bowl and whisk with white vinegar to remove any grease.
- Separate the eggs, placing each white in a small bowl first, then transfer to the mixing bowl. Let whites sit at room temperature for 30 minutes.
- Beat the egg whites on medium speed until frothy and bubbly, about 1-2 minutes. Add cream of tartar and salt, then continue beating until soft peaks form.
- With the mixer running on medium-high, add the sugar one tablespoon at a time. Beat until the mixture is glossy and forms stiff peaks, about 5-7 minutes. The mixture should feel smooth, not grainy.
- Add vanilla extract, cornstarch, and white vinegar. Beat on low just until combined, about 30 seconds.
- Spoon the meringue into a piping bag fitted with a round tip (or a zip-top bag with a 1/2-inch corner snipped off).
- Pipe the ghosts: hold the piping bag straight up, pipe a round base about 2 inches wide, then pull up to create a tall teardrop shape. Give a little flick upward at the end for the ghostly tail. Space them about 2 inches apart on the baking sheets.
- Gently push a lollipop stick into the bottom of each ghost, about halfway up. If unstable, pipe a little more meringue around the base.
- Bake for 60-75 minutes, until firm to the touch and easily peeling off the parchment. They should not brown.
- Turn off the oven and leave the meringues inside with the door slightly ajar for another hour to cool gradually.
- Melt the mini chocolate chips in a microwave-safe bowl in 20-second bursts, stirring between each, until smooth. Dip a toothpick into the melted chocolate and dot on two eyes and a mouth for each ghost. Let the chocolate set for about 10 minutes at room temperature, or 5 minutes in the fridge.
Notes
Humidity is your enemy – make these on a dry day. Don’t rush adding the sugar; add it slowly for proper dissolution. Check your oven temperature with an oven thermometer. Pipe with confidence; imperfect ghosts are charming. Store in an airtight container at room temperature for up to 5 days. Do not refrigerate. If they get soft, re-crisp in a 200°F oven for 10 minutes.
Nutrition
- Serving Size: 1 ghost pop
- Calories: 45
- Sugar: 11
- Sodium: 15
- Carbohydrates: 11
- Protein: 1
Keywords: Halloween, meringue cookies, ghost pops, gluten-free, low-fat, easy Halloween treats, spooky desserts