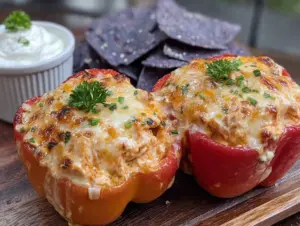
Mike wasn’t trying to impress anyone. I’d stopped by to borrow his truck for an hour, and the smell of hot sauce and cream cheese hit me before I even got through the back door. He was standing over the stove, wearing an old t-shirt with a hole in the collar, just stirring this bubbling mess in a cast iron skillet like it was the most ordinary thing in the world. “You’re staying for lunch,” he said. It wasn’t a question.
I watched him scoop that spicy, creamy chicken mixture into little bell pepper halves, pop them under the broiler, and pull them out all blistered and gorgeous. He didn’t garnish them. He didn’t arrange them on a fancy platter. He just set the baking sheet on a trivet between us and handed me a fork. Honestly, I remember thinking, “This guy has no idea what he just made.” And that’s exactly why this recipe works for hosting — because it’s so ridiculously easy, you can make it look like you spent hours when you really just threw stuff together while talking to your guests.
The thing about hosting is, you want to feed people something that feels special but doesn’t chain you to the kitchen. These stuffed peppers deliver that. They’re basically everything you love about buffalo chicken dip — that tangy, spicy, creamy, cheesy magic — but in a neat little package that people can grab with their hands. No double-dipping drama, no crackers breaking at the worst moment. You know that feeling when you’re hosting and you realize you’ve been standing over the dip bowl for twenty minutes just refilling it? Yeah, this fixes that.
I’ve made these for Super Bowl parties, casual dinner gatherings, and even a birthday potluck where they disappeared before the cake came out. They’re the kind of thing that makes people hover around the kitchen island, asking, “What’s in this?” while they reach for a third one. And honestly, the best part is watching someone take their first bite — that little pause, then the reach for another. That’s the moment this recipe stays with you.
Why You’ll Love This Recipe
Let me tell you why this one earns a permanent spot in your hosting rotation. I’ve tested this recipe at least seven times, tweaking the ratios, trying different peppers, even messing up the cheese pull once (that was a sad day). What I landed on is the perfect balance of ease and wow-factor.
- Party-Ready in 30 Minutes: From start to finish, you’re looking at about half an hour. That leaves you time to actually enjoy your guests instead of sweating in the kitchen.
- Simple Pantry Ingredients: Chicken, cream cheese, hot sauce, cheddar, bell peppers — you probably have most of this stuff already. No fancy grocery store runs required.
- Perfect for Entertaining: These are built for parties. They’re portable, they’re hand-held, and they sit beautifully on a platter without getting sad after ten minutes.
- Always Gets Rave Reviews: I’ve served these to kids, picky eaters, and buffalo wing purists. The peppers disappear every single time.
- Unbelievably Delicious: That first bite gives you the crunch of roasted pepper, the creamy kick of buffalo chicken, and that stretchy cheese pull. It’s next-level comfort food disguised as a finger food.
What makes this different from every other buffalo chicken recipe out there? It’s the texture contrast. The pepper stays slightly firm after roasting, so you get this fresh, sweet crunch against the rich, spicy filling. Most buffalo dips are just a bowl of mush — delicious mush, sure — but these peppers give you something to bite into. Plus, the pepper acts as its own serving vessel, which means less cleanup and more time mingling.
This recipe isn’t just good — it’s the kind that makes you close your eyes after the first bite. It’s comfort food reimagined as party food, with the same soul-soothing satisfaction but in a format that actually works for a crowd. Perfect for impressing guests without stress, or turning a simple snack into something memorable.
What Ingredients You Will Need
This recipe uses simple, straightforward ingredients to deliver that classic buffalo chicken flavor with a fresh twist. Most of these are pantry staples or easy to find at any grocery store.
- Bell Peppers (4 large, any color — I prefer red or orange for sweetness) — These are your edible bowls. Look for peppers that are squat and wide so they stand up straight on the baking sheet. Green peppers work too, but they’re a little more bitter.
- Cooked Chicken (2 cups, shredded or diced) — Rotisserie chicken is my go-to for this. It saves time and adds flavor. You can also use leftover grilled chicken or even canned chicken in a pinch (drain it well).
- Cream Cheese (8 ounces, softened) — This is the backbone of the filling. Full-fat gives the best texture, but reduced-fat works if you’re watching calories. Let it sit out for 20 minutes before mixing so it blends smoothly.
- Frank’s RedHot Sauce (½ cup, or more if you like heat) — I’m partial to Frank’s for that classic buffalo flavor. It’s tangy without being vinegar-heavy. Adjust the amount based on your crowd’s spice tolerance.
- Ranch Dressing (¼ cup) — This balances the heat and adds creaminess. You can use blue cheese dressing instead if you’re a purist, but ranch plays nicer with most palates.
- Shredded Cheddar Cheese (1½ cups, divided) — Sharp cheddar gives the best flavor. I use 1 cup in the filling and save ½ cup for topping. Pre-shredded cheese works, but freshly shredded melts more smoothly.
- Green Onions (3-4, sliced) — For freshness and color. They add a mild onion bite that cuts through the richness.
- Garlic Powder (½ teaspoon) — Don’t use fresh garlic here; it can overpower the other flavors. Garlic powder blends in more subtly.
- Salt and Black Pepper (to taste) — Go easy on the salt since the hot sauce and cheese are already salty.
Ingredient Notes: For the chicken, I usually grab a rotisserie chicken from Costco or my local grocery store. One chicken gives you plenty of meat for this recipe plus leftovers. If you’re using leftover grilled chicken breasts, chop them into small, even pieces so they distribute well in the filling.
Substitution Guidance: Need a dairy-free version? Use dairy-free cream cheese and a plant-based cheddar shred. They melt a little differently but still taste great. For a lower-carb option, these are already pretty keto-friendly — just skip the ranch dressing or use a homemade version without sugar. If you’re feeding vegetarians, substitute the chicken with canned jackfruit (shredded and drained) or a store-bought plant-based chicken substitute.
Equipment Needed
You don’t need a lot of fancy gear for this recipe, which is part of the appeal. Here’s what you’ll want on hand:
- Baking Sheet (rimmed) — A half-sheet pan works perfectly. The rim catches any filling that bubbles over during roasting.
- Large Mixing Bowl — For combining the filling ingredients. Any medium-to-large bowl will do.
- Sharp Knife — A chef’s knife or a good paring knife for cutting the peppers in half and cleaning out the seeds.
- Cutting Board — Preferably a large one so you have room to work with the peppers.
- Small Skillet or Saucepan — For warming the cream cheese mixture if your cream cheese isn’t fully softened. I’ve used a microwave too, but the stovetop gives more control.
- Spatula or Wooden Spoon — For stirring the filling together. A silicone spatula makes scraping the bowl easier.
- Measuring Cups and Spoons — Standard set for the hot sauce, ranch, and seasonings.
- Parchment Paper or Aluminum Foil — For lining the baking sheet. This makes cleanup about a thousand times easier.
Budget-Friendly Options: If you don’t have a rimmed baking sheet, a glass baking dish works just fine. No parchment paper? Give the pan a quick spray of cooking oil instead. I’ve made these in a cast iron skillet before, and they came out great — just watch the cooking time since cast iron holds heat differently.
Preparation Method
- Preheat your oven to 400°F (200°C). Line a rimmed baking sheet with parchment paper or foil for easy cleanup. While the oven heats, get your ingredients ready.
- Prepare the peppers. Cut each bell pepper in half lengthwise through the stem. Scoop out the seeds and white membranes with a spoon. Try to leave the stem attached — it looks prettier on the platter and helps the pepper hold its shape. You should have 8 pepper halves total. Arrange them cut-side up on the prepared baking sheet.
- Make the filling. In a large mixing bowl, combine the softened cream cheese, ½ cup of Frank’s RedHot sauce, ¼ cup of ranch dressing, ½ teaspoon of garlic powder, and a pinch of salt and pepper. Stir until smooth and well combined. Don’t worry if it looks a little lumpy at first — keep stirring and it’ll come together.
- Add the chicken and most of the cheese. Fold in the 2 cups of shredded chicken, 1 cup of shredded cheddar cheese, and the sliced green onions (save a few for garnish). Mix until everything is evenly coated in that creamy, spicy sauce. Taste the filling and adjust the hot sauce or salt if needed. I usually end up adding another tablespoon of hot sauce because I like the kick.
- Stuff the peppers. Spoon the filling evenly into the 8 pepper halves. Don’t be shy — mound it up a little. The filling will settle as it bakes. I use about ¼ cup of filling per pepper half, sometimes a little more depending on the size of the peppers.
- Top with remaining cheese. Sprinkle the remaining ½ cup of shredded cheddar over the stuffed peppers. This gives you that golden, bubbly crust that everyone fights over.
- Bake for 18-22 minutes. Place the baking sheet in the preheated oven and bake until the peppers are tender but still hold their shape, and the cheese is melted and starting to brown in spots. At 20 minutes, the peppers should be fork-tender and the filling should be bubbling around the edges.
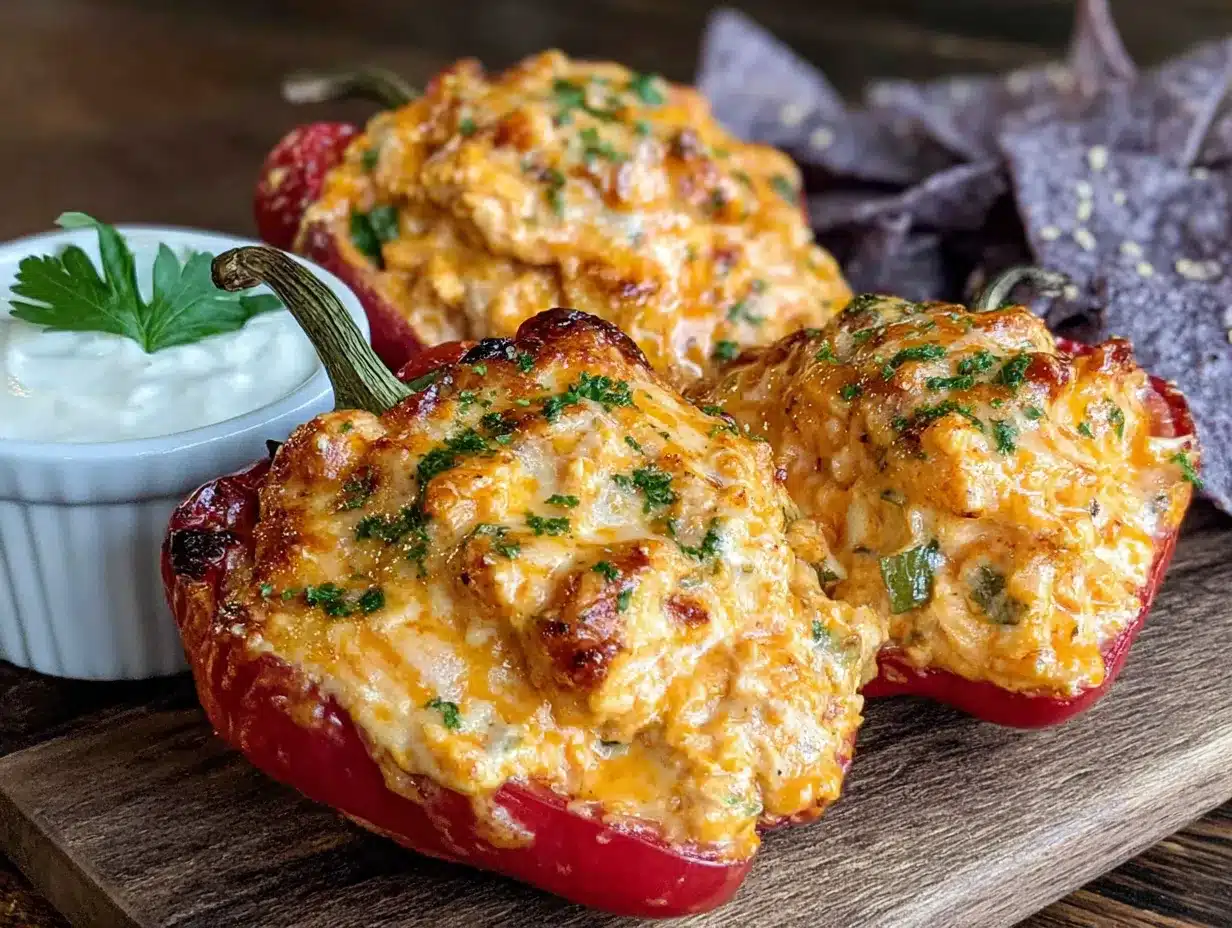
- Broil for 1-2 minutes (optional but recommended). If you want that extra blistered, browned cheese on top, switch the oven to broil for the last minute or two. Watch it carefully — broilers vary wildly, and you don’t want burnt cheese. Pull them out when the cheese is spotty brown and bubbly.
- Let them rest for 5 minutes. This is important. The filling is molten hot straight out of the oven, and letting them rest allows the cream cheese mixture to set up slightly so it doesn’t slide off the pepper when you pick it up.
- Garnish and serve. Sprinkle the reserved sliced green onions over the top. Arrange the stuffed peppers on a platter and serve warm. I like to put a small bowl of extra ranch or blue cheese dressing on the side for dipping.
Sensory Cues: When the peppers are done, they should look slightly wrinkled on the outside but still hold their shape. The cheese should be melted and golden, and the filling should be bubbling up around the edges. If you poke a pepper with a fork, it should slide in easily but the pepper shouldn’t collapse. The smell, honestly, is intoxicating — that tangy hot sauce mixed with roasted pepper and melted cheese.
Prep Ahead Note: You can assemble these peppers up to 24 hours in advance. Just stuff them, cover the baking sheet with plastic wrap, and refrigerate. When you’re ready to bake, add about 5 extra minutes to the cooking time since you’re starting from cold.
Cooking Tips & Techniques
I’ve made this recipe enough times to know where things can go sideways. Here’s what I’ve learned the hard way so you don’t have to.
Don’t overbake the peppers. I did this once when I got distracted by a phone call, and the peppers came out so soft they basically collapsed when I tried to pick them up. You want them tender but with some structure left. Start checking at 18 minutes if your oven runs hot.
Soften your cream cheese properly. Cold cream cheese creates lumpy filling that doesn’t distribute evenly. Leave it on the counter for 20-30 minutes before you start. If you forget (I forget all the time), microwave it in 10-second bursts until it’s soft but not melted.
Use a cookie scoop for even filling. This is a game-changer for hosting. A #20 or #24 scoop gives you uniform portions so every pepper looks the same on the platter. Plus, it’s faster than spooning and scraping.
Watch your hot sauce level. Different hot sauces have different heat levels. Frank’s is pretty mild as far as buffalo sauces go, but if you’re using a spicier brand, cut back to ⅓ cup and taste before adding more. You can always add heat, but you can’t take it out.
Line your pan. I cannot stress this enough. The filling sometimes bubbles over, and scrubbing baked-on cream cheese off a baking sheet is not how you want to spend your post-party evening. Parchment paper or foil saves you.
Keep them warm for serving. If you’re making these for a party and they need to sit out for a while, keep them on a warming tray or in a low oven (200°F) until you’re ready to serve. They’re best warm, when the cheese is still stretchy and the pepper is tender.
Variations & Adaptations
This recipe is surprisingly flexible. Here are a few ways I’ve adapted it depending on the occasion or who’s coming over.
Blue Cheese Lover’s Version: Swap the ranch dressing for blue cheese dressing and crumble ¼ cup of blue cheese over the top before baking. My friend Dave swears by this version, and honestly, it’s incredible if you love that sharp, funky blue cheese kick.
Extra Spicy Buffalo: For heat seekers, add 1 teaspoon of cayenne pepper to the filling and use a spicy buffalo sauce like Melinda’s or Dave’s Insanity. Top with pepper jack cheese instead of cheddar. I made these for a game day party once, and they cleared the room — in a good way.
Loaded Baked Potato Style: Add ½ cup of cooked, crumbled bacon and ¼ cup of chopped chives to the filling. Top with extra cheddar and a dollop of sour cream before serving. This version feels more like a meal than an appetizer.
Vegetarian Version: Substitute the chicken with 2 cups of cooked, shredded jackfruit or a plant-based chicken substitute. The texture is surprisingly similar, and the buffalo sauce carries the flavor. My vegetarian sister-in-law requests these every time she visits.
Keto/Low-Carb Adaptation: These are already pretty low-carb, but you can make them even more keto-friendly by using full-fat cream cheese and skipping the ranch dressing (or using a homemade keto ranch). Serve with celery sticks on the side for dipping.
Mini Appetizer Version: Use mini sweet peppers instead of full-size bell peppers. Cut them in half, remove the seeds, and fill each half with about a tablespoon of filling. Bake for 12-15 minutes. These are perfect for parties where people want to grab and go without committing to a full pepper half.
Serving & Storage Suggestions
These stuffed peppers are best served warm, right after they come out of the oven. The contrast between the slightly firm pepper and the creamy, hot filling is at its peak within the first 15 minutes.
Presentation Tips for Hosting: Arrange the peppers on a large white platter with the cut sides facing up so the cheesy tops are visible. Sprinkle fresh green onions or chopped parsley over the top for color. I like to put a small bowl of ranch dressing in the center of the platter for dipping, with celery sticks and carrot sticks arranged around the edges. It makes the whole thing look intentional and pretty.
What to Serve Alongside: These peppers pair beautifully with a simple green salad if you’re serving them as a light meal. For a party spread, put them next to a veggie tray, some chips and guacamole, and maybe a batch of wings if you’re going full buffalo theme. They also work great alongside grilled meats like burgers or brats.
Storage Instructions: Leftover stuffed peppers keep well in the refrigerator for up to 4 days. Store them in an airtight container. The peppers will soften more as they sit, but the flavor actually gets better after a day — the buffalo sauce really penetrates the pepper.
Reheating Methods: The best way to reheat these is in the oven at 350°F for about 10 minutes. This re-crisps the peppers slightly and melts the cheese back to gooey perfection. The microwave works in a pinch (about 60 seconds per pepper), but the peppers will be softer. I don’t recommend freezing them — the cream cheese filling gets grainy when thawed, and the peppers turn to mush.
Flavor Development: Honestly, these are one of those rare dishes that taste even better the next day. The buffalo sauce and ranch have time to meld together, and the pepper absorbs some of that spicy creaminess. I’ve been known to make a double batch specifically for leftovers.
Nutritional Information & Benefits
Here’s the approximate nutritional breakdown for one stuffed pepper half (based on using full-fat cream cheese, rotisserie chicken, and sharp cheddar):
| Nutrient | Amount per Serving |
|---|---|
| Calories | 210 |
| Protein | 16g |
| Fat | 14g |
| Carbohydrates | 5g |
| Fiber | 1g |
| Sugar | 3g |
| Sodium | 520mg |
Health Benefits: Bell peppers are packed with vitamin C — actually, one red bell pepper has more vitamin C than an orange. They’re also a good source of vitamin A and antioxidants. The chicken provides lean protein, which helps keep you full. The cream cheese and cheddar add calcium, though they’re also the main source of fat and calories in this dish.
Dietary Considerations: This recipe is naturally gluten-free, which makes it a safe choice for guests with celiac disease or gluten sensitivity. It’s also low-carb and keto-friendly as written. The main allergens are dairy (cream cheese, cheddar, ranch) and potentially chicken. If you’re serving a crowd with dietary restrictions, the vegetarian version with jackfruit works great, and dairy-free alternatives are available for most of the ingredients.
My Wellness Perspective: I don’t believe in labeling foods as “good” or “bad.” These stuffed peppers are a treat, and that’s okay. They’re made with real ingredients, they’re satisfying, and they bring people together around the table. That’s a win in my book. If you’re watching portions, one pepper half is a solid serving, and two make a satisfying meal alongside a salad.
Conclusion
These Buffalo Chicken Dip Stuffed Peppers are the kind of recipe that makes hosting feel effortless. They come together in under 30 minutes, they look impressive on a platter, and they disappear faster than just about anything else I’ve ever served at a party. The combination of tender roasted pepper, creamy spicy chicken filling, and that bubbly melted cheese on top is honestly hard to beat.
What I love most about this recipe is how adaptable it is. You can dial the heat up or down, swap in different cheeses, or even make a vegetarian version — and it still works. It’s forgiving, it’s flexible, and it always delivers. Whether you’re hosting a Super Bowl party, a casual dinner with friends, or just want something fun for a weekend snack, these peppers have your back.
I’d love to hear how they turn out for you. Did you add extra hot sauce? Try the blue cheese version? Serve them at a party and watch them disappear? Drop a comment below and let me know — your adaptations might inspire someone else’s next great dish. And if you’re looking for more party-perfect recipes, you might enjoy my crispy garlic chicken or these loaded bacon cheese bombs for your next gathering.
Happy hosting, and don’t forget to save room for seconds!
Frequently Asked Questions
Can I make these Buffalo Chicken Dip Stuffed Peppers ahead of time?
Absolutely! You can assemble the peppers up to 24 hours in advance. Just stuff them, cover the baking sheet with plastic wrap, and refrigerate. When you’re ready to bake, add about 5 extra minutes to the cooking time since you’re starting from cold.
What’s the best way to reheat leftover stuffed peppers?
The oven is your best bet. Reheat them at 350°F for about 10 minutes. This helps the peppers firm up a bit and melts the cheese back to gooey perfection. The microwave works in a pinch but will make the peppers softer.
Can I use different types of cheese in this recipe?
Definitely! Sharp cheddar is my go-to, but you can use Monterey Jack, pepper jack for extra heat, or even a Mexican blend. If you’re feeling fancy, try smoked gouda for a deeper flavor. Just avoid very soft cheeses like mozzarella — they don’t hold up as well in the filling.
How spicy are these stuffed peppers?
With ½ cup of Frank’s RedHot, they have a mild to medium kick — enough to taste the buffalo flavor without overwhelming your guests. If you’re feeding a crowd with varying heat tolerances, start with ⅓ cup of hot sauce and let people add extra at the table.
Can I freeze these stuffed peppers?
I don’t recommend freezing them. The cream cheese filling can become grainy when thawed, and the peppers turn mushy. They’re best made fresh or stored in the fridge for up to 4 days. If you need to prep way ahead, make the filling separately and freeze that, then stuff fresh peppers when you’re ready to bake.
Pin This Recipe!
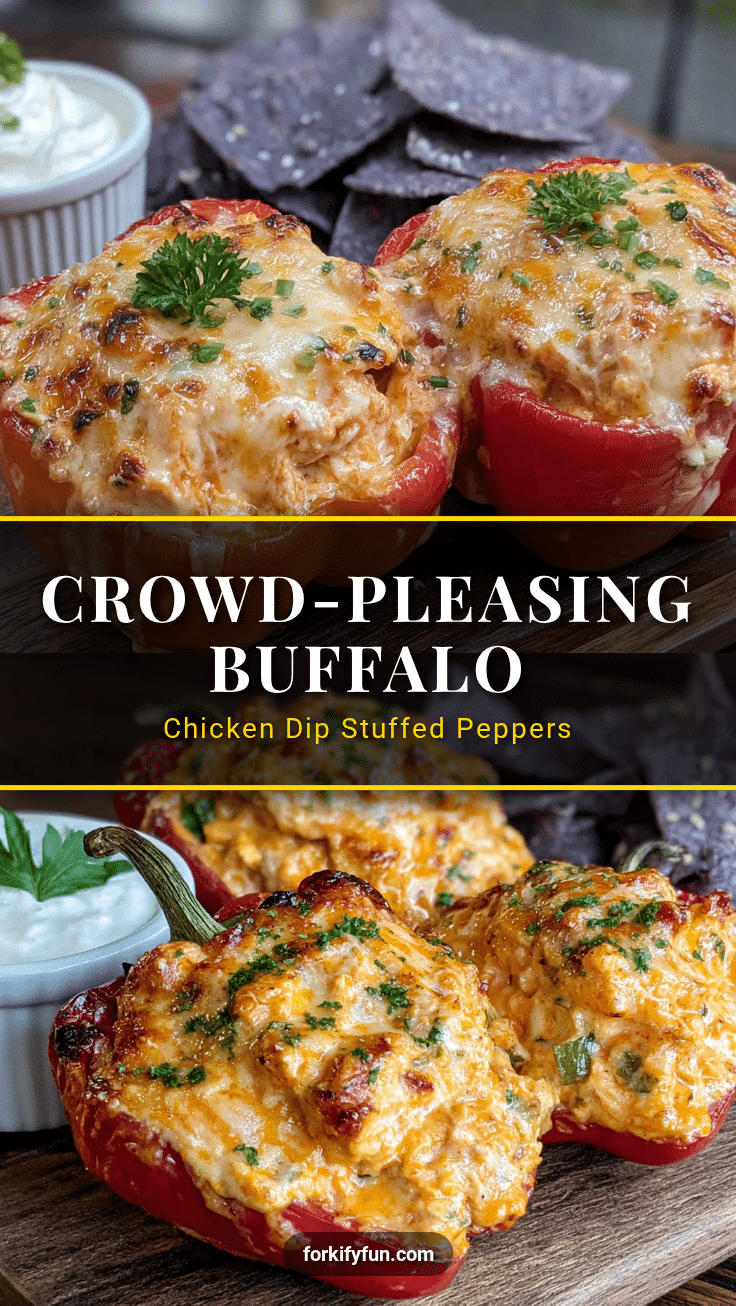
Best Easy Buffalo Chicken Dip Stuffed Peppers

These Buffalo Chicken Dip Stuffed Peppers combine the tangy, spicy, creamy magic of buffalo chicken dip in a neat, hand-held bell pepper half. Ready in 30 minutes, they’re perfect for parties and always get rave reviews.
- Prep Time: 10 minutes
- Cook Time: 20 minutes
- Total Time: 30 minutes
- Yield: 8 servings 1x
- Category: Appetizer
- Cuisine: American
Ingredients
- 4 large bell peppers (red or orange preferred)
- 2 cups cooked chicken (shredded or diced, rotisserie recommended)
- 8 ounces cream cheese, softened
- 1/2 cup Frank’s RedHot sauce (or more to taste)
- 1/4 cup ranch dressing
- 1 1/2 cups shredded cheddar cheese, divided
- 3–4 green onions, sliced
- 1/2 teaspoon garlic powder
- Salt and black pepper to taste
Instructions
- Preheat oven to 400°F (200°C). Line a rimmed baking sheet with parchment paper or foil.
- Cut each bell pepper in half lengthwise through the stem. Remove seeds and membranes. Arrange cut-side up on the prepared baking sheet.
- In a large mixing bowl, combine softened cream cheese, 1/2 cup hot sauce, 1/4 cup ranch dressing, 1/2 teaspoon garlic powder, and a pinch of salt and pepper. Stir until smooth.
- Fold in 2 cups shredded chicken, 1 cup shredded cheddar cheese, and most of the sliced green onions (reserve some for garnish). Mix until evenly coated.
- Spoon the filling evenly into the 8 pepper halves, mounding slightly. Use about 1/4 cup filling per half.
- Sprinkle remaining 1/2 cup shredded cheddar over the stuffed peppers.
- Bake for 18-22 minutes, until peppers are tender but still hold their shape and cheese is melted and starting to brown.
- Optional: Broil for 1-2 minutes for extra browning. Watch carefully.
- Let rest for 5 minutes before serving.
- Garnish with reserved green onions. Serve warm with extra ranch or blue cheese dressing for dipping.
Notes
For best results, soften cream cheese at room temperature for 20-30 minutes. Use a cookie scoop for even filling. Line the pan for easy cleanup. Peppers can be assembled up to 24 hours in advance; add 5 minutes to baking time if starting from cold. Leftovers keep in the refrigerator for up to 4 days; reheat in a 350°F oven for 10 minutes. Not recommended for freezing.
Nutrition
- Serving Size: 1 stuffed pepper hal
- Calories: 210
- Sugar: 3
- Sodium: 520
- Fat: 14
- Saturated Fat: 7
- Carbohydrates: 5
- Fiber: 1
- Protein: 16
Keywords: buffalo chicken dip, stuffed peppers, party appetizer, buffalo chicken, game day food, easy appetizer, gluten-free, low-carb