Standing in the kitchen at 9 PM the night before my daughter’s Halloween class party, staring at a bag of clementines and a bunch of grapes I’d bought for snacks that week. The sign-up sheet said “healthy treat” and I’d completely blanked. No time for the store, no energy for anything elaborate. Then I remembered seeing those little cheese and cracker pumpkins online and thought—wait, can I just swap the cheese for fruit?
Honestly? It worked way better than I expected. My five-year-old wandered in, grabbed one off the tray before I could even finish, and just stood there eating it with this look of pure delight. That’s when I knew I was onto something. These Easy Mini Halloween Fruit Tray Pumpkins are exactly what you need when you want something festive but don’t want to deal with sugar crashes or complicated recipes.
They’re basically two ingredients—clementines and grapes—plus a little cream cheese or peanut butter to hold it all together. That’s it. No baking, no melting, no mess. And somehow they look like the cutest little pumpkins you’ve ever seen sitting on a platter. The kind of thing that makes adults smile and kids actually eat fruit without being asked.
I’ve made these for Halloween parties, school events, and even just as a fun afternoon snack when the October weather turns chilly and you need something bright and cheerful. They disappear fast, I’ll tell you that. And the best part? You probably already have everything you need in your fridge right now.
So if you’re looking for a Halloween treat that feels special without the stress, this is it. No fancy piping bags, no complicated instructions. Just fruit that looks like pumpkins and tastes like fall.
Why You’ll Love This Recipe
Look, I’ve tested a lot of Halloween snacks over the years. Some are adorable but take forever to assemble. Others are quick but look like a hot mess. These little fruit pumpkins hit that sweet spot where they’re both ridiculously cute and embarrassingly easy to make.
- Ready in 10 Minutes: Seriously. Once you get the hang of it, you can whip up a whole tray in under ten minutes. Perfect for those last-minute school parties or when the kids suddenly announce they need a treat for tomorrow.
- Just 3 Ingredients: Clementines, grapes, and a little cream cheese or peanut butter. That’s it. No specialty stores, no weird ingredients you’ll never use again.
- Actually Healthy: Unlike most Halloween treats that are basically sugar bombs, these are just fruit with a tiny bit of protein to hold them together. You can feel good about serving them.
- Kid-Friendly to Make: My little ones love helping with these. They can peel the clementines and push the grapes on top. It’s a great way to get them involved in the kitchen.
- Perfect for Parties: Whether it’s a classroom celebration, a Halloween potluck, or just a fun snack at home, these little pumpkins fit right in. They’re festive without being fussy.
What makes these different from other fruit tray ideas is the texture combination. The juicy, sweet clementine segments paired with the slightly firm, tart grape stem—it just works. And the cream cheese adds this subtle tanginess that ties everything together. It’s not just another fruit platter. It’s a conversation starter.
I’ve brought these to more events than I can count, and every single time someone asks, “Wait, how did you do that?” They think I spent forever on them. I just smile and say nothing. Let them wonder.
What Ingredients You Will Need
This recipe is almost laughably simple in terms of ingredients. But a few small choices can make a big difference in how they look and taste. Here’s what you need and why each one matters.
For the Pumpkin Base
- Clementines (or Mandarin oranges): You want the small, easy-to-peel ones. Look for clementines that are firm and feel heavy for their size—that means they’re juicy. I usually grab a bag of Halos or Cuties, whichever is on sale. One clementine makes one pumpkin, so plan accordingly. For a standard party tray, I’d say 12 to 15 clementines is a good starting point.
- Green grapes: These become the pumpkin stem. You want grapes that are firm and not too large. The smaller ones look more proportional on top of the clementine. Seedless is obviously a must. Red grapes can work too, but the green ones look more like an actual pumpkin stem. I’ve tried both, and green just looks more natural.
For the “Glue”
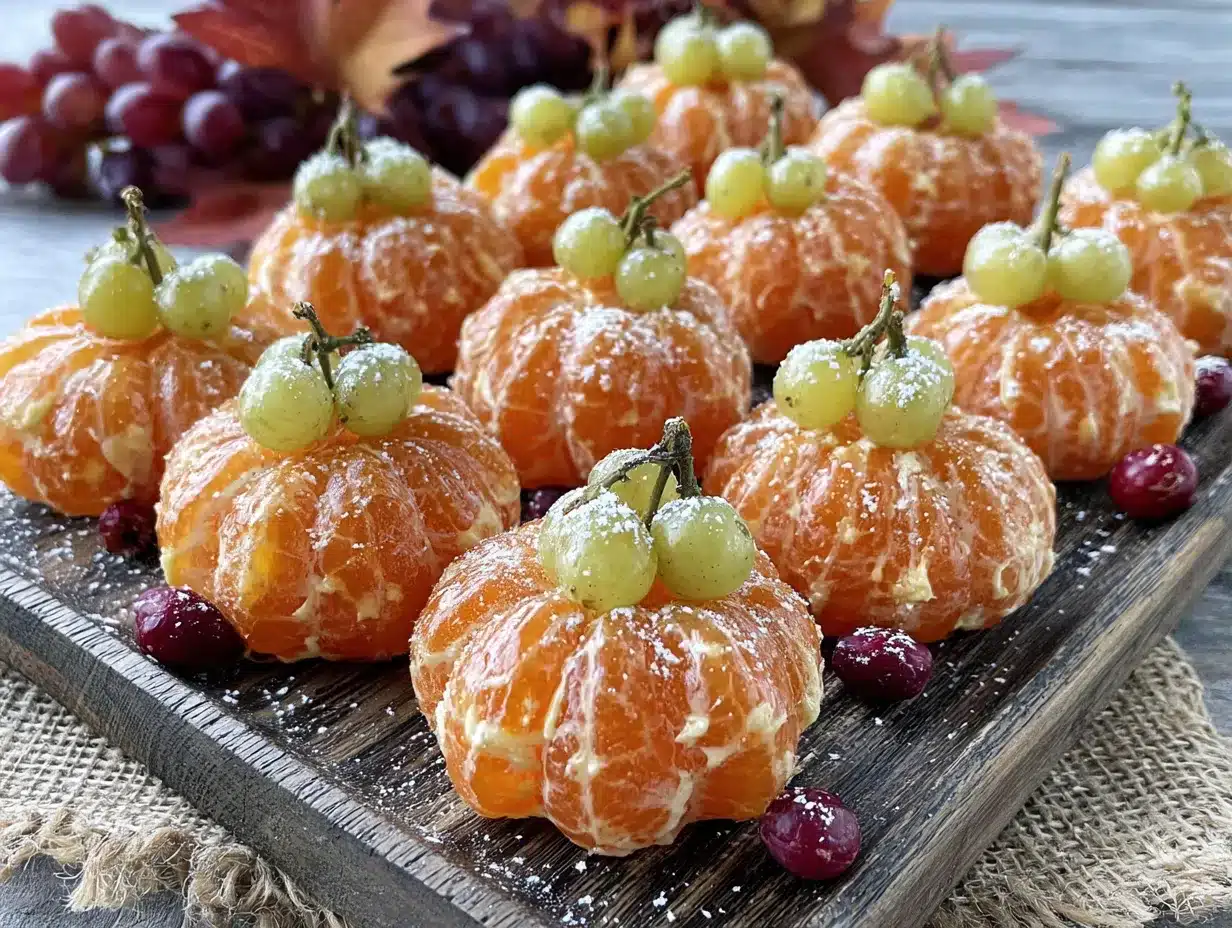
- Cream cheese (softened): This is what holds the grape stem in place. You only need a tiny smear per pumpkin—like, less than half a teaspoon. Let it sit at room temperature for about 15 minutes before you start so it’s spreadable. Full-fat works best for texture, but low-fat is fine too. If you’re dairy-free, you can use a vegan cream cheese or even a thick hummus.
- Peanut butter or almond butter (optional): If you’re not doing cream cheese, a tiny dab of nut butter works great as the adhesive. It also adds a little protein. Just make sure it’s not too runny—natural peanut butter that’s separated can be messy. Stir it well first.
Optional Decorations
- Small mint leaves or parsley: If you really want to go all out, you can tuck a tiny leaf next to the grape stem to look like a pumpkin vine. It’s totally optional, but it does make them look extra cute. I’ve done it for photos, but honestly, they’re adorable without it too.
- Cinnamon stick pieces: Another stem option if you want a more rustic, fall-themed look. Just break a cinnamon stick into small pieces and stick one in the top instead of a grape. It smells amazing too.
That’s it. Three main ingredients, maybe a couple optional extras. The beauty of this recipe is its simplicity. You don’t need anything fancy, and you probably already have most of this in your kitchen right now.
Equipment Needed
The equipment list for this recipe is almost as short as the ingredient list. You really don’t need much, which is part of what makes these so great.
- Cutting board: Any clean cutting board will do. You’ll just be cutting grapes in half, so nothing fancy needed.
- Small knife: A paring knife works best for cutting the grapes cleanly. A serrated knife can also work, but a straight edge gives you a cleaner cut.
- Serving platter or tray: Something flat where you can arrange the pumpkins. A white platter makes the orange color pop nicely. I’ve used everything from a wooden cutting board to a simple ceramic plate.
- Small bowl (optional): For holding the cream cheese or peanut butter while you work. A ramekin works perfectly.
- Butter knife or small spatula (optional): For spreading the cream cheese. Honestly, your finger works just fine too—just wash your hands first.
That’s really all you need. No food processor, no mixer, no special tools. If you’ve got hands and a knife, you’re good to go. I’ve made these in hotel rooms during travel for Halloween events, using just a plastic knife and a paper plate. They turned out great.
Preparation Method
Okay, let’s get into the actual making of these little guys. It’s so simple, but I’ll walk you through every step so you get that perfect pumpkin look.
- Peel the clementines (2-3 minutes): Start by peeling all your clementines. Try to keep them as intact as possible—you want the whole fruit, not separated segments. If a clementine naturally wants to break apart, just gently press it back together. The cream cheese will help hold it. Place each peeled clementine on your serving tray, leaving a little space between them.
- Prepare the “stems” (2 minutes): Take your green grapes and cut them in half lengthwise. You want each half to look like a little oval or teardrop shape. Set them aside on a small plate. One grape half per pumpkin, so match your quantities. If some grapes are really large, you can trim them down a bit—you want them to look proportional to the clementine.
- Soften the cream cheese (1 minute): If you haven’t already, let your cream cheese come to room temperature. Scoop about a tablespoon into a small bowl. You won’t need much—this amount will easily do 12-15 pumpkins. If it’s still a little cold, just microwave it for 5-10 seconds. You want it spreadable but not runny.
- Attach the stems (3-4 minutes): Take a tiny amount of cream cheese—like, the size of a pea—and smear it on the flat cut side of a grape half. Then press it gently onto the top center of a clementine. Hold it for about 5 seconds to let it stick. Repeat for all the pumpkins. The cream cheese acts like edible glue, and it holds surprisingly well once it sets for a minute.
- Add optional vine leaves (1 minute): If you’re using mint leaves or parsley, take a tiny dab of cream cheese and stick a small leaf right next to the grape stem. This step is purely for looks, but it does make them look even more like real mini pumpkins. I usually skip this for everyday snacks and only do it for parties.
- Arrange and serve (1 minute): Once all your pumpkins are assembled, arrange them nicely on your serving tray. You can group them together in a cluster or line them up. I like to scatter a few extra grape halves around the platter for color contrast. Serve immediately or refrigerate until ready.
Pro tip: If you’re making these ahead of time, assemble them on the tray and cover loosely with plastic wrap. Keep them in the fridge for up to 4 hours. The cream cheese will firm up and hold the stems even better. Just let them sit at room temperature for about 10 minutes before serving so the clementines aren’t ice cold.
Sensory cue: When you press the grape onto the cream cheese, you should feel a slight resistance, then a gentle stick. If the grape slides off, you either need more cream cheese or your clementine is too wet on the surface. Pat it dry with a paper towel if needed.
Cooking Tips & Techniques
I’ve made these pumpkins probably fifty times by now, and I’ve learned a few things the hard way. Here are my best tips so you don’t make the same mistakes I did.
Choose the right clementines. Not all clementines are created equal. You want ones that are firm and round, not squishy or flat. The rounder ones look more like pumpkins. If a clementine is too flat on top, the grape stem won’t sit properly. I’ve also found that the ones with slightly looser skin are easier to peel without breaking the fruit apart.
Dry your clementines after peeling. This is a big one. When you first peel a clementine, the surface is often a little damp from the juice. If you try to stick the grape on right away, it’ll slide right off. Let them sit on a paper towel for a minute or two, or gently pat them dry. The cream cheese needs a dry surface to grip onto.
Don’t overdo the cream cheese. You really only need a tiny amount. I’m talking about the size of a small pea. If you use too much, it squishes out the sides when you press the grape on, and it looks messy. Less is definitely more here. You can always add a little more if the grape doesn’t stick.
Cut grapes at the last minute. Cut grapes start to dry out and get a little wrinkly after about 30 minutes. For the best look, cut your grape halves right before you’re ready to assemble. They’ll be plump and fresh-looking, which makes the pumpkins look that much cuter.
Make a test pumpkin first. I always make one test pumpkin to check the proportions. Sometimes the grapes are bigger than I expected, and I need to cut them differently. Sometimes the clementines are smaller. One test run saves you from having to redo a whole tray.
Keep extras handy. Grapes can roll off the counter, clementines can break apart, kids can “accidentally” eat your test pumpkins. Always have a few extra clementines and grapes on hand. Trust me on this one.
Variations & Adaptations
One of the best things about this recipe is how easy it is to adapt. Here are some variations I’ve tried and loved.
Dairy-Free Version
Instead of cream cheese, use a thick nut butter like almond or cashew butter. You can also use sunflower seed butter for a nut-free option. The texture is slightly different, but it holds just as well. I’ve also used hummus in a pinch—sounds weird, but it actually works because it’s thick and savory. Just make sure it’s a smooth hummus, not chunky.
Vegan Option
Same as the dairy-free version—use nut butter or a vegan cream cheese. I like the brand Kite Hill for this. It’s thick enough to hold the grape in place and has a mild flavor that doesn’t compete with the fruit. You can also use a date paste if you want something completely whole-food based.
Different Fruit Bases
If you can’t find clementines, try small tangerines or mandarins. You can even use small apples for a different look—just core them and use a small cookie cutter to make pumpkin shapes. I’ve also seen people use pear halves with a grape stem, and it looks like a little gourd. Super cute.
Savory Version
For a non-dessert option, use small cheese balls or mozzarella pearls as the base. Stick a pretzel stick in the top for the stem and a small basil leaf for the vine. These are great for a Halloween charcuterie board. I made these for a party last year and they were a huge hit with the adults.
Spooky Add-Ons
You can draw little faces on the clementines with edible marker before adding the stem. A tiny ghost face or jack-o-lantern expression makes them even more Halloween-themed. Just be gentle—the clementine skin is delicate. I’ve also dusted them with a little powdered sugar to look like frost, which is fun for a fall-themed party.
Serving & Storage Suggestions
These little pumpkins are best served fresh, but they can hold up for a few hours if needed. Here’s what I’ve learned about serving and storing them.
Serving temperature: Serve them at room temperature or slightly chilled. If they’re straight from the fridge, let them sit out for about 10 minutes first. The clementines are more flavorful when they’re not ice cold. I usually assemble them about 30 minutes before serving and leave them on the counter.
Presentation ideas: Arrange them on a white platter for maximum color contrast. You can scatter some extra grape halves and a few mint leaves around for visual interest. For a Halloween party, I like to put them on a black serving tray with some candy corn scattered around. It looks festive without being over the top.
What to serve with them: These pair beautifully with a warm bowl of creamy white chicken chili for a Halloween dinner spread. The sweetness of the fruit balances the savory, spicy chili perfectly. They also go great alongside a crockpot chicken tortilla soup for a cozy fall meal. If you’re doing a dessert table, set them next to some pumpkin cream cheese muffins for a full pumpkin-themed spread.
Storage: If you have leftovers (unlikely, but possible), store them in an airtight container in the refrigerator for up to 24 hours. The grapes might get a little soft, and the cream cheese will harden, but they’ll still taste fine. Don’t leave them at room temperature for more than 2 hours, especially if you’re using cream cheese.
Reheating: You don’t really reheat these—they’re served cold or at room temperature. If the cream cheese has hardened in the fridge, just let them sit out for 15 minutes before serving. They’ll soften up nicely.
Flavor development: Honestly, these taste best within the first few hours of making them. The clementines are juiciest, the grapes are firmest, and everything just feels fresh. If you’re making them for an event, assemble them as close to serving time as possible for the best texture.
Nutritional Information & Benefits
These little pumpkins are basically fruit with a tiny amount of cream cheese, so they’re pretty darn healthy. Here’s the breakdown for one pumpkin (one clementine with one grape half and a smear of cream cheese).
- Calories: Approximately 45-55 calories per pumpkin
- Carbohydrates: About 10-12 grams (mostly from natural fruit sugars)
- Fiber: 1-2 grams per pumpkin
- Protein: 1 gram (from the cream cheese)
- Fat: 1-2 grams (from the cream cheese)
- Vitamin C: Clementines are packed with it—about 40% of your daily needs per fruit
Health benefits: Clementines are an excellent source of vitamin C, which supports immune health—perfect for cold and flu season. They also contain antioxidants that help fight inflammation. Grapes add a dose of vitamin K and antioxidants too. The cream cheese provides a small amount of calcium and protein.
Dietary considerations: This recipe is naturally gluten-free, nut-free (if you use cream cheese instead of nut butter), and vegetarian. For a vegan option, use a plant-based cream cheese or nut butter. For a lower-sugar version, you can use smaller clementines, but honestly, the sugar in fruit is natural and comes with fiber and nutrients.
Allergen note: Cream cheese contains dairy. If you’re using peanut or almond butter, that introduces tree nuts. Always check with your guests about allergies before serving. I’ve made these with sunflower seed butter for nut-free events and they worked great.
I love that I can serve these at Halloween parties without worrying about sugar crashes or artificial ingredients. They’re a treat that actually nourishes, and that makes me feel good about putting them out.
Conclusion
These Easy Mini Halloween Fruit Tray Pumpkins have become a staple in my fall rotation for good reason. They’re quick, they’re cute, and they make everyone smile. Whether you’re bringing them to a school party, setting them out for a Halloween gathering, or just making a fun afternoon snack with your kids, they deliver every single time.
The best part? You can customize them however you want. Swap the cream cheese for nut butter, use different fruits, add little faces—the possibilities are endless. I’ve made these with my kids, for my kids’ classes, and for adult parties, and they’ve been a hit every single time. There’s something about a mini pumpkin made of fruit that just brings joy.
I’d love to hear how yours turn out! Drop a comment below and let me know if you tried any fun variations. Did you use a different fruit? Did your kids help make them? Share your photos and tag me—I love seeing your creations. And if you’re looking for more easy, healthy Halloween ideas, be sure to check out some of my other recipes. Happy Halloween, and happy snacking!
Frequently Asked Questions
Can I make these fruit pumpkins ahead of time?
Yes, you can assemble them up to 4 hours ahead. Store them in the refrigerator covered loosely with plastic wrap. Let them sit at room temperature for about 10 minutes before serving so the clementines aren’t too cold. The cream cheese will actually hold the stems better after chilling.
What if I can’t find clementines?
No problem! Small tangerines, mandarins, or even small oranges work great. You can also use small apples or pears cut into pumpkin shapes. Just make sure whatever fruit you use is firm and easy to handle. The key is having a round, pumpkin-like shape.
How do I keep the grape stem from falling off?
Make sure your clementine is dry before attaching the grape. Pat it with a paper towel if needed. Use just enough cream cheese to create a sticky surface—about the size of a pea. Press the grape on and hold for 5-10 seconds. If it still falls off, try a tiny bit more cream cheese and make sure the grape cut is flat.
Are these safe for kids with nut allergies?
If you use cream cheese instead of nut butter, these are completely nut-free. Just make sure to check the labels on your cream cheese to ensure it was processed in a nut-free facility if allergies are a concern. You can also use sunflower seed butter as an alternative.
Can I use red grapes instead of green?
You can, but green grapes look more like pumpkin stems. Red grapes work in a pinch, but they don’t have the same visual effect. If you only have red grapes, try cutting them in a way that shows the lighter green interior for a more stem-like appearance. Or use a small piece of cinnamon stick instead for a rustic look.
Pin This Recipe!
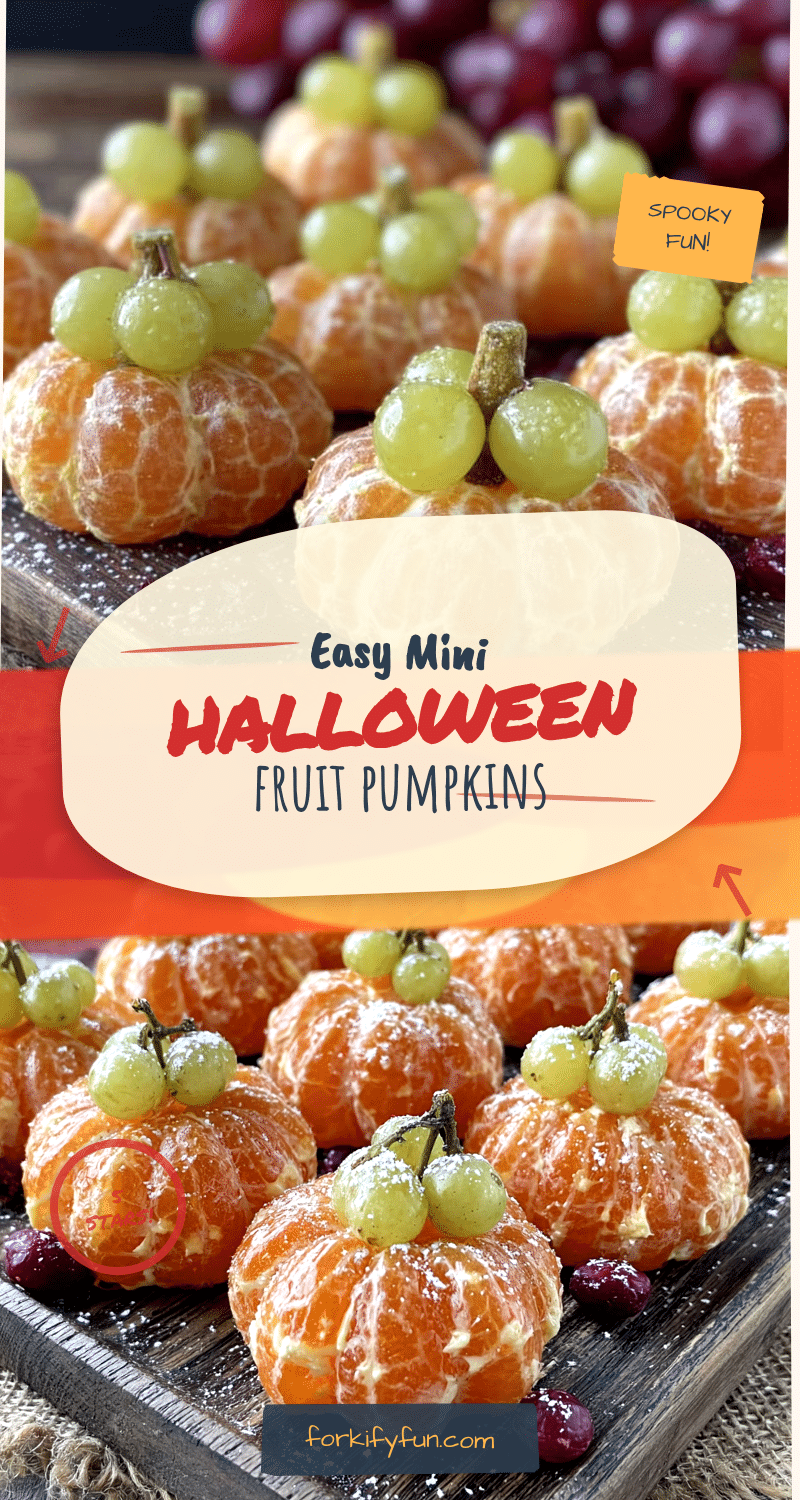
Easy Mini Halloween Fruit Tray Pumpkins: Best Clementine & Grape Idea
These adorable mini pumpkins are made with just clementines, grapes, and a little cream cheese or peanut butter. They’re ready in 10 minutes, healthy, and perfect for Halloween parties, school events, or a fun fall snack.
- Prep Time: 10 minutes
- Cook Time: 0 minutes
- Total Time: 10 minutes
- Yield: 12-15 servings 1x
- Category: Appetizer
- Cuisine: American
Ingredients
- 12–15 clementines (or mandarin oranges)
- 12–15 green grapes (firm, seedless)
- 1 tablespoon cream cheese, softened (or peanut butter/almond butter for dairy-free)
- Optional: small mint leaves or parsley for vine decoration
- Optional: cinnamon stick pieces for rustic stems
Instructions
- Peel the clementines, keeping them as intact as possible. Place on a serving tray.
- Cut green grapes in half lengthwise to create oval or teardrop shapes for stems.
- Soften cream cheese to room temperature (microwave 5-10 seconds if needed).
- Smear a pea-sized amount of cream cheese on the flat cut side of a grape half and press gently onto the top center of a clementine. Hold for 5 seconds to adhere. Repeat for all pumpkins.
- Optional: attach a small mint leaf or parsley next to the grape stem using a tiny dab of cream cheese.
- Arrange pumpkins on a platter and serve immediately or refrigerate until ready.
Notes
Dry clementines with a paper towel after peeling to help the grape stem stick. Cut grapes just before assembling for best appearance. Make a test pumpkin first to check proportions. Store assembled pumpkins in the refrigerator for up to 4 hours; let sit at room temperature 10 minutes before serving.
Nutrition
- Serving Size: 1 pumpkin
- Calories: 50
- Sugar: 9
- Sodium: 15
- Fat: 1.5
- Saturated Fat: 0.5
- Carbohydrates: 11
- Fiber: 1.5
- Protein: 1
Keywords: Halloween fruit tray, clementine pumpkins, healthy Halloween snack, fruit pumpkins, easy Halloween treat, kid-friendly snack