“Mama, can we make the ghosts again?” — that’s what my youngest said the morning after Halloween last year, still sticky from the night before.
I’d spent the whole week making elaborate caramel apples and a cozy pumpkin gnocchi in brown butter sage sauce for our little family dinner, but you know what the kids remembered? The silly little meringue ghosts I’d thrown together in twenty minutes while waiting for the oven to preheat.
Honestly, I almost didn’t make them. I was tired, my feet hurt, and I had a sink full of dishes. But my daughter kept asking, and I remembered seeing these cute ghost meringues floating around Pinterest. I had egg whites, sugar, and a bag of chocolate chips. So I whipped up a batch, piped them into wobbly little ghost shapes, and stuck chocolate chips on for eyes. They came out ridiculous. Some were lopsided. A few looked more like melting snowmen. But the kids shrieked like I’d pulled off actual magic.
These adorable ghost meringue cookies with chocolate chip eyes have become our official post-Halloween tradition now. They’re not fancy, they’re not perfect, and that’s exactly why I love them. They’re the kind of recipe that makes you feel like a kitchen hero even when you’re running on fumes.
So grab your mixer, find your piping bag (or a zip-top bag, no judgement), and let’s make some ghosts that’ll haunt your kitchen in the best way possible.
Why You’ll Love This Recipe
I’ve tested this recipe about seven times now — yes, seven — to get the texture just right. I wanted a ghost that was crisp on the outside, marshmallowy on the inside, and sturdy enough to hold those chocolate chip eyes without tipping over. Here’s why these little guys are worth every minute:
- Quick & Easy : The active prep time is about 15 minutes. The oven does the rest of the work, slowly drying them out while you clean up or sip your coffee.
- Simple Ingredients : You need exactly four things: egg whites, sugar, cream of tartar, and chocolate chips. That’s it. No special trip to the store.
- Perfect for Halloween : Whether it’s a classroom party, a spooky movie night, or just a fun afternoon with the kids, these ghosts are the cutest thing on the dessert table.
- Crowd-Pleaser : Kids go absolutely bonkers for them. Adults pretend to be cool but secretly eat three.
- Unbelievably Delicious : Light, airy, sweet, with little bursts of rich chocolate. It’s like eating a cloud that’s been kissed by a ghost.
What makes this version different from the rest? It’s the technique. I spent a whole afternoon learning the hard way that humidity is the enemy of meringue. I also figured out the perfect oven temperature — low and slow is the secret. No browning, no cracking, just pure white ghosts with perfectly set eyes. This isn’t just another sugar cookie. It’s a foolproof, kid-approved, crowd-wowing recipe that looks way harder than it actually is.
And honestly? That first bite — when you hear that tiny crunch and then feel it melt — it’s the kind of moment that makes you close your eyes and smile. It’s comfort food with a spooky twist.
What Ingredients You Will Need
This recipe uses simple, pantry-friendly ingredients to create something that feels special without any fuss. Each one has a job, and together they make magic.
- 4 large egg whites — at room temperature (this is important! Cold egg whites don’t whip up as high or as stable. Separate them while cold, then let them sit on the counter for 30 minutes before starting)
- 1 cup (200g) granulated sugar — regular white sugar works best. Don’t use powdered sugar or brown sugar here. The granulated sugar dissolves into the egg whites and creates that signature crisp texture
- 1/2 teaspoon cream of tartar — this is the stabilizer. It helps the egg whites hold their shape and prevents them from deflating. If you don’t have it, you can use 1 teaspoon of lemon juice or white vinegar instead
- 1 teaspoon vanilla extract — pure vanilla extract adds warmth and depth. I prefer Nielsen-Massey for its rich flavor, but any good brand works
- 1/3 cup mini chocolate chips — these become the eyes. Mini chips work better than regular-sized because they look more proportional on the ghost’s face. I like Ghirardelli or Enjoy Life for allergy-friendly options
Ingredient Selection Tips:
- For the fluffiest meringues, use eggs that are at least a week old. Fresh eggs have tighter whites that don’t whip up as well. Weird but true!
- If you’re in a humid climate, add an extra tablespoon of sugar to help stabilize the meringue. Humidity is meringue’s worst enemy.
- For a dairy-free version, make sure your chocolate chips are dairy-free. Most dark chocolate chips are naturally dairy-free, but always check the label.
Substitution Guidance:
- No cream of tartar? Use 1 teaspoon of lemon juice or white vinegar. It does the same thing — stabilizes the egg whites.
- Want a different flavor? Swap vanilla extract for peppermint or almond extract. Just use half the amount since they’re stronger.
- Need to avoid chocolate? Use mini M&M’s or candy eyes for the ghost faces. They’re just as cute!
Equipment Needed
You don’t need a fancy kitchen to make these ghosts. Here’s what you’ll need:
- Stand mixer or hand mixer — whisking egg whites by hand is possible but your arm will hate you. A stand mixer with the whisk attachment is ideal. I use my KitchenAid and it whips up the meringue in about 8 minutes flat
- Large mixing bowl — make sure it’s completely clean and dry. Any grease or moisture will ruin your meringue. Glass or metal bowls work best. Plastic bowls can hold onto grease even after washing
- Piping bag with a round tip — a Wilton 1A or 2A tip works great. If you don’t have a piping bag, a zip-top bag with the corner snipped off works perfectly
- Baking sheet lined with parchment paper — parchment is non-negotiable. Meringues stick to everything else. Silpat mats also work well
- Rubber spatula — for folding in the chocolate chips gently
- Cooling rack — for cooling the ghosts completely
Budget-Friendly Options: Skip the piping bag and use a sturdy zip-top bag instead. Just don’t try to pipe too fast or the bag might burst. Ask me how I know.
Maintenance Tip: After making meringues, wash your mixer bowl and whisk attachment with hot soapy water immediately. Dried meringue is stubborn and requires soaking.
Preparation Method
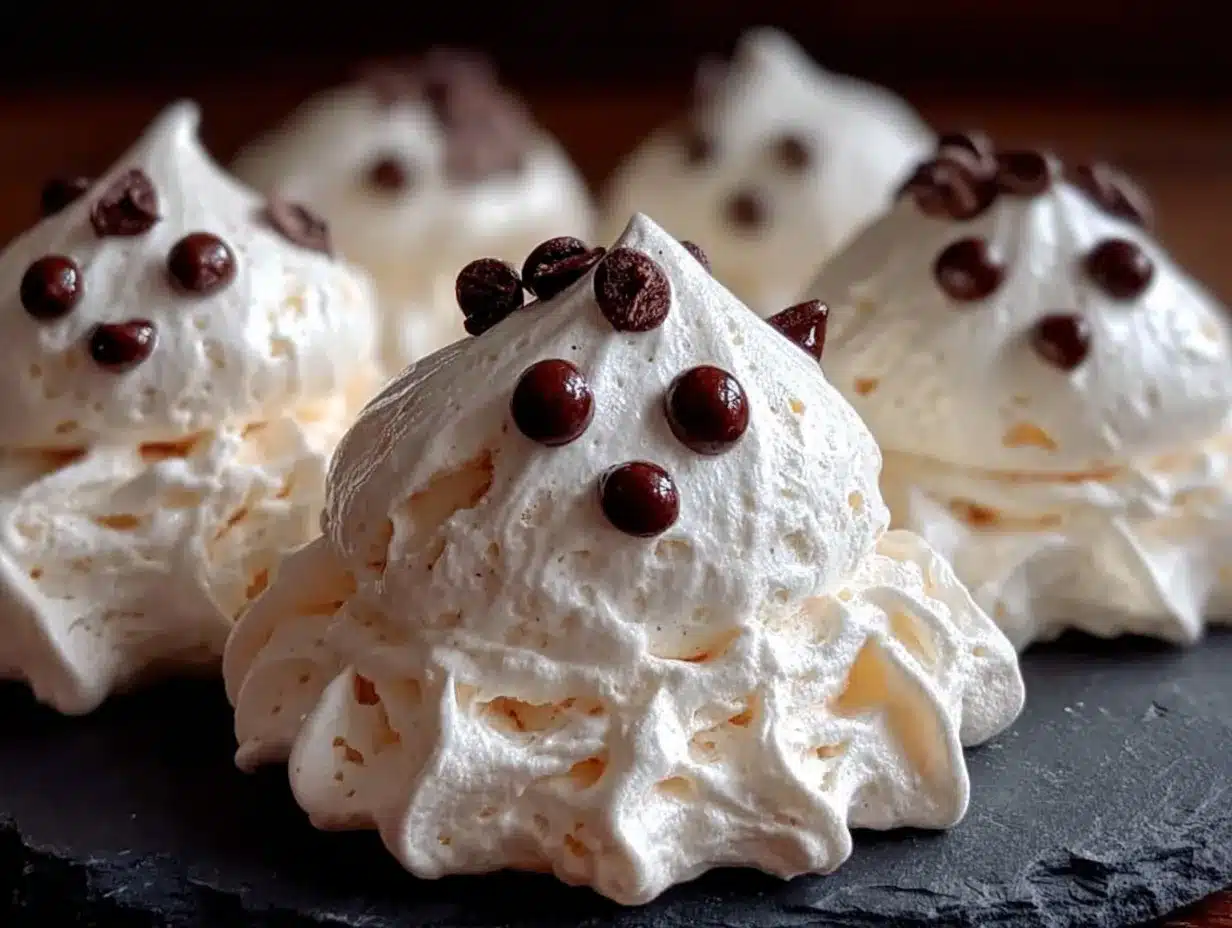
Let me walk you through this step by step. I’ve made every mistake possible so you don’t have to.
- Preheat and prep. Preheat your oven to 200°F (93°C). Yes, that’s low. I know it seems weird, but high heat will brown your ghosts and cause cracks. Line two baking sheets with parchment paper.
- Start whipping the egg whites. Place your room-temperature egg whites and cream of tartar in the clean, dry bowl of your stand mixer. Start on medium speed and whip until soft peaks form — about 2-3 minutes. You’ll know it’s ready when the peaks flop over when you lift the whisk. The mixture should look foamy and white, like bubble bath.
- Add the sugar slowly. With the mixer running on medium-high, add the sugar one tablespoon at a time. I know it’s tedious, but rushing this step will give you grainy meringue. Wait about 15 seconds between each addition. This takes patience, but it’s worth it.
- Whip until stiff peaks. Once all the sugar is in, increase the speed to high and whip for 5-7 minutes. The mixture will become glossy, thick, and white. You’re looking for stiff peaks — when you lift the whisk, the meringue should stand straight up without drooping. Rub a tiny bit between your fingers. If it feels gritty, keep whipping. It should feel smooth, like silk.
- Add vanilla. Pour in the vanilla extract and whip for another 30 seconds until combined. The meringue should be thick enough that it doesn’t move when you tilt the bowl.
- Fold in the chocolate chips. Remove the bowl from the mixer. Using a rubber spatula, gently fold in the mini chocolate chips. Be careful not to deflate the meringue. Use a cutting motion — down through the middle, across the bottom, and up the side. Repeat until just combined. You want the chips evenly distributed without overmixing.
- Fill your piping bag. Spoon the meringue into your piping bag fitted with a round tip. Don’t overfill — about half full is perfect. Twist the top of the bag to close it.
- Pipe the ghosts. Hold the piping bag straight up and down, about 1/2 inch above the parchment paper. Squeeze gently to create a round base, then pull straight up while reducing pressure to create a tall, wobbly ghost shape. Don’t worry if they look imperfect — ghost meringues are supposed to look a little wonky! Leave about 1 inch between each ghost for airflow.
- Add the eyes. Before the meringue sets, gently press two mini chocolate chips into each ghost for eyes. Don’t push too deep or they’ll disappear. Just press until they’re slightly embedded.
- Bake low and slow. Place the baking sheets in the preheated oven. Bake for 1 hour and 30 minutes, then turn off the oven and leave the ghosts inside for another hour. Don’t open the oven door during baking! The residual heat finishes drying them out.
- Cool completely. Remove the ghosts from the oven and let them cool completely on the baking sheets — about 15-20 minutes. They should lift easily off the parchment. If they stick, they need more drying time.
Troubleshooting Tips:
- If your meringue is weeping (little beads of liquid forming), it means the sugar didn’t dissolve fully. Next time, add the sugar more slowly and whip longer.
- If your ghosts crack, the oven was too hot or you opened the door too early. Stick to 200°F and be patient.
- If your ghosts are chewy instead of crisp, they need more drying time. Pop them back in the turned-off oven for another 30 minutes.
Cooking Tips & Techniques
I’ve learned these tricks the hard way — through cracked, weeping, and flat meringues. Here’s everything I wish I’d known from the start.
The Humidity Rule: Don’t make meringues on rainy or humid days. Seriously. The sugar absorbs moisture from the air and your ghosts will turn sticky and chewy. Check your weather forecast before you start. I once made a batch during a thunderstorm and they never crisped up. Never again.
The Bowl Must Be Perfect: Wipe your bowl and whisk with a little lemon juice or vinegar on a paper towel before starting. Any trace of fat or grease will prevent the egg whites from whipping. I learned this after using a bowl that had a tiny smear of butter. The egg whites just sat there, sad and flat.
Room Temperature Matters: Cold egg whites won’t whip to their full volume. Separate your eggs while cold, then let the whites sit on the counter for 30 minutes. Cover the bowl with a paper towel to keep out dust.
The Sugar Test: Rub a tiny bit of meringue between your thumb and forefinger. If it feels smooth, you’re done. If it feels gritty, keep whipping. This is the most reliable test for knowing when the sugar has fully dissolved.
Multitasking Strategy: While the meringue is whipping, line your baking sheets and get your piping bag ready. Once you add the chocolate chips, you need to work fast. Meringue starts to deflate the moment you stop whipping it.
Consistency Is Key: For perfectly shaped ghosts, pipe a small test ghost first. If it spreads too much, your meringue is too thin. Whip it for another minute. If it holds its shape perfectly, you’re ready to go.
Variations & Adaptations
One of the best things about this recipe is how easy it is to customize. Here are some variations I’ve tried and loved.
Vegan Ghost Meringues: Use aquafaba (the liquid from a can of chickpeas) instead of egg whites. One can of chickpeas gives you about 1/2 cup of aquafaba, which equals about 3-4 egg whites. Whip it the same way, but expect it to take a little longer. The texture is slightly different — a bit more marshmallowy — but still delicious.
Peppermint Ghosts: Swap the vanilla extract for 1/2 teaspoon of peppermint extract. The chocolate-mint combo is incredible. I made these for a Christmas party once and they disappeared in minutes.
Colorful Ghosts: Add a few drops of gel food coloring after the stiff peaks form. Pastel pink, lavender, or light blue ghosts are adorable for non-Halloween occasions. Just don’t use liquid food coloring — it can deflate the meringue.
Gluten-Free Option: These are naturally gluten-free! Just make sure your chocolate chips are certified gluten-free if that’s a concern. Most are, but it’s worth checking.
Spooky Shapes: Instead of ghosts, pipe the meringue into small pumpkins (use orange food coloring and a green M&M for the stem) or bats (pipe two small triangles for wings). The possibilities are endless.
My Personal Favorite Variation: I made a batch with crushed freeze-dried raspberries folded in at the end. The tartness cuts through the sweetness perfectly. Plus, the pink speckles look like little ghost freckles — absolutely adorable.
Serving & Storage Suggestions
These ghosts are best served at room temperature. They should be light, crisp, and practically melt in your mouth. Arrange them on a platter with a few fake spiderwebs or around a small pumpkin for a Halloween centerpiece.
Serving Ideas:
- Pile them in a glass jar tied with orange ribbon — makes a great edible gift
- Float them on top of hot chocolate or a copycat Starbucks pumpkin cold foam cold brew for a spooky drink topper
- Serve alongside a cozy slow cooker butternut squash soup with brown butter sage for a sweet-and-savory Halloween dinner
- Pair with a caramel apple cider sangria for an adult Halloween party
Storage Instructions:
- Store in an airtight container at room temperature for up to 2 weeks. Don’t refrigerate — the moisture will make them sticky.
- Do not freeze. Meringues don’t freeze well and will become soggy when thawed.
- Keep away from heat and humidity. A cool, dry pantry is ideal.
Reheating Tips: These don’t need reheating, but if they’ve softened slightly (from humidity), you can pop them back in a 200°F oven for 20 minutes to re-crisp them. Let them cool completely in the turned-off oven.
Flavor Development: These actually taste best the day after baking. The flavors meld together and the texture becomes perfectly crisp. So make them a day ahead!
Nutritional Information & Benefits
Per serving (about 3 ghosts):
- Calories: 85
- Fat: 1g
- Carbohydrates: 18g
- Sugar: 17g
- Protein: 2g
- Sodium: 25mg
Health Benefits:
- Egg whites are pure protein — low in calories and fat
- Dark chocolate chips contain antioxidants
- This is a naturally gluten-free and nut-free dessert
- Compared to cookies or brownies, these are much lighter and lower in calories
Dietary Considerations:
- Gluten-free (check chocolate chip label)
- Nut-free
- Can be made dairy-free with dairy-free chocolate chips
- Can be made vegan with aquafaba
- Contains eggs (unless using aquafaba)
Personal Wellness Perspective: I love that these feel like a treat without being heavy. They satisfy my sweet tooth without making me feel sluggish. Plus, they’re fun to make with kids — it’s quality time that also results in dessert. Win-win.
Conclusion
These adorable ghost meringue cookies with chocolate chip eyes are everything I want in a Halloween recipe. They’re simple enough to make on a busy weeknight, cute enough to impress at a party, and delicious enough that you’ll find yourself making them all year round.
Don’t be afraid to make them your own. Add different flavors, change up the colors, or experiment with different face designs. Some of my favorite ghosts have been the “mistakes” — the ones with three eyes or no eyes at all. They had personality.
I’d love to see your ghost creations! Tag me when you make them, leave a comment below telling me how they turned out, and let me know what variations you tried. Did you add sprinkles? Use candy eyes? Make a whole ghost family? I want to hear about it.
And if your kids ask to make them again the next day — well, that’s how traditions start.
Frequently Asked Questions
Why did my meringue ghosts turn out flat?
Flat meringues usually mean the egg whites weren’t whipped enough or they were overmixed when you added the chocolate chips. Make sure you reach stiff peaks before piping, and fold gently. Also, check that your bowl was completely clean and dry — any grease will prevent the whites from whipping properly.
Can I make these without a piping bag?
Absolutely. Use a sturdy zip-top bag with one corner snipped off. You won’t get as precise shapes, but the ghosts will still look adorable. You can also just spoon dollops onto the baking sheet and shape them slightly with the back of the spoon.
How do I know when the meringue is done baking?
The ghosts should lift easily off the parchment paper without sticking. They should feel dry and crisp on the outside. If they’re still soft or sticky, leave them in the turned-off oven for another 30 minutes. The low-and-slow method is key — don’t rush it.
Can I use liquid food coloring?
I don’t recommend it. Liquid food coloring adds moisture that can deflate your meringue. Use gel or powder food coloring instead. Just a tiny drop goes a long way. I once used liquid coloring and my ghosts turned into sad little puddles.
How far ahead can I make these?
You can make them up to 2 weeks in advance if stored properly. Keep them in an airtight container at room temperature, away from humidity. They actually taste better after a day or two — the texture becomes perfectly crisp and the flavors meld together.
Pin This Recipe!
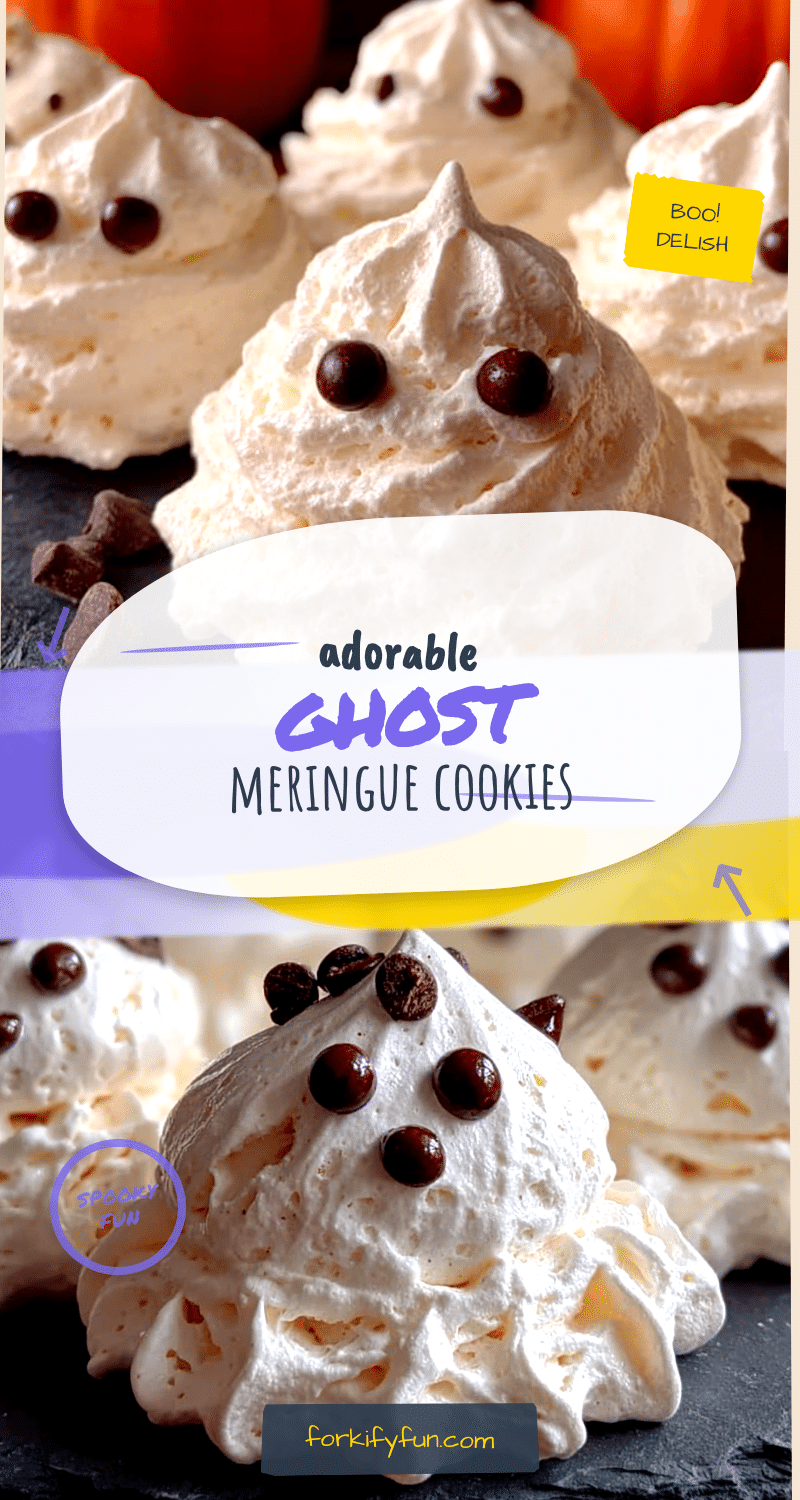
Adorable Ghost Meringue Cookies with Chocolate Chip Eyes
These adorable ghost meringue cookies with chocolate chip eyes are crisp on the outside, marshmallowy on the inside, and sturdy enough to hold those chocolate chip eyes without tipping over. They’re simple enough to make on a busy weeknight, cute enough to impress at a party, and delicious enough that you’ll find yourself making them all year round.
- Prep Time: 15 minutes
- Cook Time: 1 hour 30 minutes
- Total Time: 2 hours 45 minutes
- Yield: 4 servings 1x
- Category: Dessert
- Cuisine: American
Ingredients
- 4 large egg whites, at room temperature
- 1 cup (200g) granulated sugar
- 1/2 teaspoon cream of tartar
- 1 teaspoon vanilla extract
- 1/3 cup mini chocolate chips
Instructions
- Preheat your oven to 200°F (93°C). Line two baking sheets with parchment paper.
- Place room-temperature egg whites and cream of tartar in a clean, dry bowl of a stand mixer. Start on medium speed and whip until soft peaks form, about 2-3 minutes.
- With the mixer running on medium-high, add the sugar one tablespoon at a time, waiting about 15 seconds between each addition.
- Once all the sugar is in, increase the speed to high and whip for 5-7 minutes until stiff peaks form and the mixture is glossy and smooth.
- Add vanilla extract and whip for another 30 seconds until combined.
- Remove the bowl from the mixer. Using a rubber spatula, gently fold in the mini chocolate chips until just combined.
- Spoon the meringue into a piping bag fitted with a round tip. Don’t overfill — about half full is perfect.
- Pipe the ghosts: Hold the piping bag straight up and down, about 1/2 inch above the parchment paper. Squeeze gently to create a round base, then pull straight up while reducing pressure to create a tall, wobbly ghost shape. Leave about 1 inch between each ghost.
- Before the meringue sets, gently press two mini chocolate chips into each ghost for eyes.
- Bake for 1 hour and 30 minutes, then turn off the oven and leave the ghosts inside for another hour. Don’t open the oven door during baking.
- Remove the ghosts from the oven and let them cool completely on the baking sheets, about 15-20 minutes.
Notes
Don’t make meringues on rainy or humid days. Wipe your bowl and whisk with a little lemon juice or vinegar on a paper towel before starting to remove any grease. For the fluffiest meringues, use eggs that are at least a week old. If you’re in a humid climate, add an extra tablespoon of sugar to help stabilize the meringue. These actually taste best the day after baking.
Nutrition
- Serving Size: 3 ghosts
- Calories: 85
- Sugar: 17
- Sodium: 25
- Fat: 1
- Carbohydrates: 18
- Protein: 2
Keywords: ghost meringue cookies, Halloween cookies, meringue ghosts, chocolate chip meringue, easy Halloween dessert, kid-friendly Halloween recipe