I figured a pumpkin bar was just a sheet cake in disguise—same thing, different shape. It took about one bite of these to realize how wrong I was. The first batch I made came out of the oven looking promising enough, all puffed up and smelling like autumn in a pan. But when I cut into them, they collapsed into a dense, wet mess that stuck to the knife and left me staring at crumbs on the counter wondering where I went wrong. That was three years ago, and honestly, I almost gave up on the whole idea.
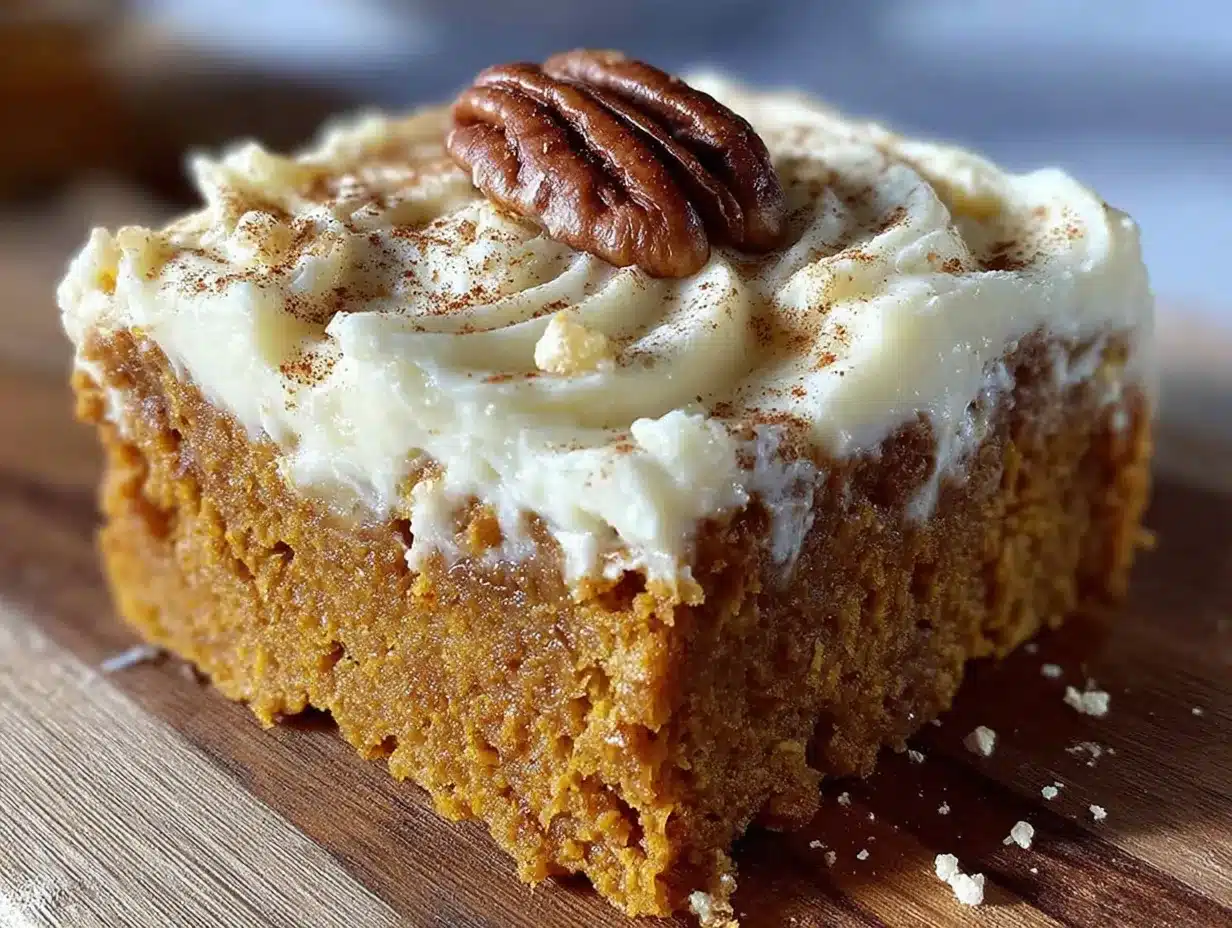
What I learned the hard way is that pumpkin bars aren’t cake. They need a different ratio of wet to dry ingredients, a gentler hand with the mixing, and patience with the cooling process. The texture you’re after is somewhere between a brownie and a muffin—dense but not heavy, moist but not soggy, with that slight give when you press the frosting on top. It took me about eight tries (I kept a notebook, which feels ridiculous to admit) to nail the balance. But these? These are the ones. The cream cheese frosting is the real star here, thick and tangy enough to cut through the sweetness, and it sets up just firm enough that you can stack them without everything sliding apart. That first perfect bite, where the bar holds together and the frosting doesn’t smear into a puddle? That’s the moment I knew I’d finally cracked it.
Why You’ll Love This Recipe
Let me tell you what makes these pumpkin bars different from every other recipe you’ve scrolled past. First off, they actually stay moist without turning into a gluey mess on day two. I tested this specifically because I got tired of desserts that taste amazing fresh but fall apart by the next morning. These hold up beautifully in the fridge for up to five days, which means you can make them ahead for a party without stress.
- Quick & Easy: From start to finish, you’re looking at about an hour. The batter comes together in one bowl with a whisk and a spatula—no stand mixer required.
- Simple Ingredients: Nothing weird here. Canned pumpkin, basic pantry staples, and block cream cheese. You probably have most of this already.
- Perfect for Fall Gatherings: These bars are my go-to for Thanksgiving potlucks, Halloween parties, and those cozy weekend afternoons when you just want something sweet with your coffee.
- Crowd-Pleaser: I’ve brought these to three different gatherings this season, and every single time someone asked for the recipe. Kids love them, adults love them, even my friend who “doesn’t like pumpkin desserts” ate three.
- Unbelievably Delicious: The texture is exactly what you want—soft and tender with that slight density that makes it feel substantial. And the frosting? It’s the perfect balance of tangy and sweet.
What really sets this recipe apart is the technique. Most pumpkin bar recipes use oil and sugar in a way that makes the bars too greasy or too sweet. I swapped in melted butter for better flavor and adjusted the sugar so the pumpkin and spices can actually shine through. The cream cheese frosting uses a higher ratio of cream cheese to butter than most recipes, which gives it that authentic tanginess instead of just tasting like sweet butter. It’s not just another version of pumpkin bars—it’s the version I’d serve to people I actually want to impress.
What Ingredients You Will Need
This recipe uses simple, wholesome ingredients that come together to create something genuinely special. Most of these are pantry staples, especially if you keep basic baking supplies on hand. Here’s what you’ll need and why each one matters.
For the Pumpkin Bars
- 1 ¾ cups (220g) all-purpose flour – Spoon and level it, don’t scoop directly from the bag. Too much flour makes the bars dry and crumbly.
- 1 ½ teaspoons baking powder – Make sure it’s fresh. Old baking powder won’t give you the lift these bars need.
- 1 teaspoon baking soda – Helps the bars rise and gives them that tender crumb.
- 2 teaspoons ground cinnamon – I prefer Saigon cinnamon for its warmth and depth.
- 1 teaspoon ground ginger – Adds a little heat that balances the sweetness.
- ½ teaspoon ground nutmeg – Freshly grated if you have it, but pre-ground works fine.
- ½ teaspoon ground cloves – Go easy here; cloves are strong and can overpower everything else.
- ½ teaspoon salt – Don’t skip this. Salt makes the spices pop and balances the sweetness.
- ½ cup (113g) unsalted butter, melted and slightly cooled – Melted butter gives these bars a richer flavor than oil. Let it cool for a few minutes so it doesn’t cook the eggs when you mix it in.
- 1 cup (200g) packed light brown sugar – Brown sugar adds moisture and a deeper flavor than white sugar alone. Pack it firmly into the measuring cup.
- ¼ cup (50g) granulated sugar – Just enough to balance the molasses notes from the brown sugar.
- 2 large eggs, room temperature – Room temperature eggs incorporate more evenly into the batter. If you’re in a hurry, place them in a bowl of warm water for 5 minutes.
- 1 teaspoon vanilla extract – Pure vanilla extract, not imitation. It makes a noticeable difference.
- 1 can (15 oz) pumpkin puree – Not pumpkin pie filling. Look for 100% pure pumpkin. Libby’s is my go-to brand because it’s consistently thick and not watery.
For the Cream Cheese Frosting
- 8 oz (226g) block cream cheese, softened – This is non-negotiable. Do not use the spreadable kind in a tub. It has too much water and will make your frosting runny. Let it sit on the counter for about 30 minutes before you start.
- ¼ cup (56g) unsalted butter, softened – Same deal—let it come to room temperature so it creams smoothly with the cream cheese.
- 2 cups (240g) powdered sugar, sifted – Sifting prevents lumps. I know it’s an extra step, but lumpy cream cheese frosting is not a good look.
- 1 teaspoon vanilla extract – Again, pure vanilla extract.
- Pinch of salt – Just a tiny pinch to cut the sweetness and bring out the tanginess of the cream cheese.
Equipment Needed
You don’t need a fancy kitchen to make these bars. Here’s what you’ll actually use:
- 9×13-inch baking pan – Metal pans work best for even baking. Glass pans tend to hold heat longer and can overbake the edges before the center is done.
- Parchment paper – Line the pan with parchment paper, leaving an overhang on two sides. This makes it incredibly easy to lift the whole block of bars out after they cool.
- Large mixing bowl – For the dry ingredients.
- Medium mixing bowl – For the wet ingredients.
- Whisk and rubber spatula – A whisk for combining dry ingredients, a spatula for folding the wet into the dry.
- Hand mixer or stand mixer – For the frosting. You can do it by hand with a whisk, but your arm will thank you for using a mixer.
- Offset spatula – Not strictly necessary, but it makes spreading the frosting so much easier and gives you a smooth, even layer.
- Cooling rack – The bars need to cool completely before you frost them. A cooling rack speeds this up and prevents the bottom from getting soggy.
If you don’t have an offset spatula, the back of a spoon works. If you don’t have parchment paper, you can grease the pan well with butter and dust it with flour. Just make sure you get into the corners.
Preparation Method
Let’s walk through this step by step. I’ve included all the little details I wish someone had told me the first time I made these.
Step 1: Preheat and Prepare the Pan
Preheat your oven to 350°F (175°C). Line a 9×13-inch baking pan with parchment paper, leaving about 2 inches of overhang on the long sides. This creates little handles you can use to lift the bars out later. Lightly grease the parchment with cooking spray or a thin layer of butter.
Step 2: Mix the Dry Ingredients
In a large bowl, whisk together the flour, baking powder, baking soda, cinnamon, ginger, nutmeg, cloves, and salt. Whisk for about 20 seconds to make sure everything is evenly distributed. Set this aside.
Step 3: Mix the Wet Ingredients
In a separate medium bowl, whisk together the melted butter, brown sugar, and granulated sugar until smooth. Add the eggs one at a time, whisking well after each addition. Stir in the vanilla extract and pumpkin puree until everything is combined. The mixture should be smooth and glossy, with no streaks of butter or egg.
Step 4: Combine Wet and Dry
Pour the wet ingredients into the bowl with the dry ingredients. Use a rubber spatula to fold them together gently. Don’t overmix—stop as soon as you no longer see streaks of flour. A few tiny lumps are fine. Overmixing develops the gluten and makes the bars tough instead of tender.
Step 5: Bake the Bars
Pour the batter into the prepared pan and spread it into an even layer using the spatula. Bake for 22-26 minutes, or until a toothpick inserted into the center comes out clean or with just a few moist crumbs attached. The edges should be pulling away from the sides of the pan slightly, and the top should look set and lightly golden.
Here’s a tip: check at 22 minutes. Every oven runs a little differently, and overbaked pumpkin bars get dry fast. If the toothpick comes out with wet batter, give it another 2 minutes and check again.
Step 6: Cool Completely
Place the pan on a cooling rack and let the bars cool in the pan for about 20 minutes. Then use the parchment overhang to lift the entire block of bars out of the pan and transfer it to the cooling rack. Let them cool completely—this takes about 1 to 1.5 hours. Do not frost them while they’re still warm, or the frosting will melt into a sad, runny puddle.
Step 7: Make the Cream Cheese Frosting
While the bars cool, make the frosting. In a medium bowl using a hand mixer (or in the bowl of a stand mixer fitted with the paddle attachment), beat the softened cream cheese and butter together on medium speed until smooth and creamy, about 2 minutes. Scrape down the sides of the bowl with a spatula.
Add the sifted powdered sugar, vanilla extract, and pinch of salt. Start mixing on low speed so the sugar doesn’t fly everywhere, then increase to medium and beat for about 2 minutes until the frosting is smooth, thick, and spreadable. If it seems too soft, refrigerate it for 10-15 minutes before using.
Step 8: Frost and Cut
Once the bars are completely cool, spread the frosting evenly over the top using an offset spatula or the back of a spoon. For clean cuts, refrigerate the frosted bars for at least 30 minutes before slicing. Use a sharp knife and wipe it clean between cuts for neat edges.
Cooking Tips & Techniques
I’ve made these bars more times than I care to count, and I’ve picked up a few tricks along the way. Here’s what I wish I’d known from the start.
Don’t skip the cooling step. I know it’s tempting to rush, especially when the kitchen smells amazing and you just want to eat one. But warm bars + cold frosting = disaster. The frosting melts, slides off, and leaves you with a sticky mess. Trust me on this one—I learned the hard way.
Use a kitchen scale for the flour. Volume measurements can be inconsistent depending on how you scoop. If you don’t have a scale, spoon the flour into your measuring cup and level it off with a knife. Don’t scoop directly from the bag—you’ll pack in too much flour and end up with dry bars.
Room temperature ingredients matter. Cold eggs and cold cream cheese don’t mix well. Cold cream cheese creates lumps in the frosting that are nearly impossible to get out. Set everything on the counter about 30 minutes before you start. If you forget, place the eggs in a bowl of warm water for 5 minutes, and microwave the cream cheese in 10-second bursts until it’s soft but not warm.
Toast the spices. This is optional but worth mentioning. If you have a few extra minutes, toast the cinnamon, ginger, nutmeg, and cloves in a dry skillet over medium heat for about 30 seconds until fragrant. It deepens the flavor and makes the bars taste even more autumnal.
Make the frosting first if you’re short on time. The frosting needs the cream cheese and butter to be at room temperature anyway, so you can make it while the bars bake. Just refrigerate it until the bars are cool enough to frost.
Watch your oven temperature. I’ve had ovens that run hot and ovens that run cold. An oven thermometer is a cheap investment that saves a lot of heartache. If your bars are browning too quickly on top but aren’t done in the center, tent them loosely with foil for the last 5-10 minutes of baking.
Variations & Adaptations
One of the best things about this recipe is how flexible it is. Here are some variations I’ve tried and loved.
Gluten-Free Version: Substitute the all-purpose flour with a 1:1 gluten-free baking flour blend that contains xanthan gum. I’ve had good results with King Arthur Measure for Measure. The texture is slightly more delicate, so let the bars cool completely before cutting.
Dairy-Free Version: Use melted coconut oil or a plant-based butter substitute instead of the butter in the bars. For the frosting, use a dairy-free cream cheese alternative like Kite Hill or Miyoko’s. The flavor will be slightly different, but still delicious.
Spice Variations: If you don’t have all the individual spices, substitute 2 ½ teaspoons of pumpkin pie spice for the cinnamon, ginger, nutmeg, and cloves. You can also add a pinch of cardamom or allspice for a more complex flavor profile.
Add Mix-Ins: Fold in ½ cup of chopped pecans, walnuts, or chocolate chips into the batter before baking. For a crunchier topping, sprinkle a handful of pepitas (pumpkin seeds) over the frosting.
Make It a Layer Cake: Double the recipe and bake it in two 9-inch round cake pans. Layer the frosting between the cakes and on top for a stunning fall dessert. Just increase the baking time slightly—about 30-35 minutes.
Lower Sugar Option: Reduce the brown sugar to ¾ cup and the granulated sugar to 2 tablespoons. The bars will be less sweet but still moist. Use a sugar substitute like Swerve in the frosting if you need to cut sugar further.
I once made a batch with a swirl of salted caramel sauce on top before baking. It was messy but incredible. Sometimes the best variations come from happy accidents.
Serving & Storage Suggestions
These pumpkin bars are versatile enough for any occasion. Here’s how to serve and store them for the best results.
Serving Temperature: Serve the bars chilled or at room temperature. Chilled bars cut cleaner and the frosting stays firm. If you prefer a softer texture, let them sit at room temperature for about 15 minutes before serving.
Presentation Ideas: Cut the bars into 24 squares for a party or 12 larger rectangles for a more generous serving. Dust the tops with a light sprinkle of cinnamon or a few flaky sea salt crystals for a professional touch. Arrange them on a wooden board or a cake stand for a beautiful fall display.
Pairing Suggestions: These bars pair beautifully with a hot cup of coffee, a pumpkin chai latte, or a glass of cold milk. For a dessert board, serve them alongside soft pumpkin chocolate chip cookies and pumpkin cream cheese streusel muffins for a full autumn spread.
Storage Instructions: Store the frosted bars in an airtight container in the refrigerator for up to 5 days. If you stack them, place a sheet of parchment paper between layers to prevent sticking. For longer storage, freeze the unfrosted bars for up to 3 months. Wrap them tightly in plastic wrap, then foil, and thaw overnight in the refrigerator before frosting and serving.
Reheating Tips: These bars are best served cold or at room temperature, but if you want a warm treat, microwave a single bar for about 10-15 seconds. The frosting will soften, and the bar will taste like it just came out of the oven.
Flavor Development: The spices actually deepen and meld together after a day in the fridge. I honestly think these bars taste even better on day two. The texture stays moist, and the flavors become more cohesive. If you can resist eating them all immediately, you’ll be rewarded.
Nutritional Information & Benefits
Here’s the approximate nutritional breakdown for one bar (based on 24 servings):
| Nutrient | Amount Per Serving |
|---|---|
| Calories | 215 |
| Total Fat | 11g |
| Saturated Fat | 7g |
| Cholesterol | 45mg |
| Sodium | 180mg |
| Total Carbohydrates | 28g |
| Dietary Fiber | 1g |
| Sugars | 19g |
| Protein | 3g |
These values are estimates and will vary based on ingredient brands and substitutions.
Pumpkin is the real star here nutritionally. It’s packed with vitamin A (from beta-carotene), which supports eye health and immune function. It’s also a good source of fiber and potassium. The cream cheese frosting adds some calcium and a little protein, but let’s be honest—this is a dessert, not a health food. Enjoy it in moderation as part of a balanced diet.
Dietary Considerations: This recipe contains gluten, dairy, and eggs. For gluten-free and dairy-free adaptations, see the Variations section above. It’s naturally nut-free unless you add nuts as a mix-in.
Conclusion
These perfect pumpkin bars with cream cheese frosting are the fall dessert you didn’t know you needed. They’re simple enough for a weekday treat but impressive enough for a holiday table. The texture is spot-on—moist without being heavy, tender without being fragile—and the frosting is the kind of creamy, tangy perfection that makes you close your eyes after the first bite.
What I love most about this recipe is how forgiving it is. You can tweak the spices, swap in gluten-free flour, or add chocolate chips, and it still works. It’s the kind of recipe you’ll come back to year after year, tweaking slightly each time until it becomes yours. That’s the beauty of baking—you start with someone else’s recipe and end up with something that feels like your own.
I’d love to hear how these turn out for you. Did you add anything? Change the spices? Serve them at a party? Drop a comment below and let me know. And if you’re looking for more fall baking inspiration, check out my maple pumpkin sourdough bread or these pumpkin coffee cake with streusel for even more cozy autumn flavors. Happy baking!
FAQs
Can I use fresh pumpkin instead of canned?
Yes, you can use fresh pumpkin puree, but you’ll need to cook and puree it first. Roast a small sugar pumpkin at 400°F for about 45 minutes, scoop out the flesh, and blend until smooth. Fresh pumpkin puree is often more watery than canned, so you may need to drain it in a cheesecloth-lined strainer for about an hour before using it in this recipe.
Why are my pumpkin bars soggy in the middle?
Soggy centers usually happen for one of three reasons: the bars weren’t baked long enough, the pumpkin puree was too watery, or the pan was overcrowded. Make sure your oven is at the right temperature (use an oven thermometer), and drain your pumpkin puree if it looks watery. Also, don’t skip the toothpick test—it’s the best way to know when they’re done.
Can I make these bars ahead of time?
Absolutely. In fact, they taste better the next day. Bake the bars, cool them completely, and store them unfrosted in the refrigerator for up to 2 days. Make the frosting and spread it on the day you plan to serve them. You can also freeze the unfrosted bars for up to 3 months.
How do I get clean cuts when slicing the bars?
Chill the frosted bars in the refrigerator for at least 30 minutes before cutting. Use a sharp chef’s knife, and wipe the blade clean with a damp paper towel between each cut. For the neatest edges, cut the bars into squares while they’re still cold, then let them come to room temperature before serving.
Can I double this recipe?
Yes, this recipe doubles beautifully. Use a half-sheet pan (18×13 inches) and increase the baking time to about 30-35 minutes. You’ll need to double the frosting recipe as well. Just make sure your pan has sides that are at least 1 inch high to prevent overflow.
Pin This Recipe!
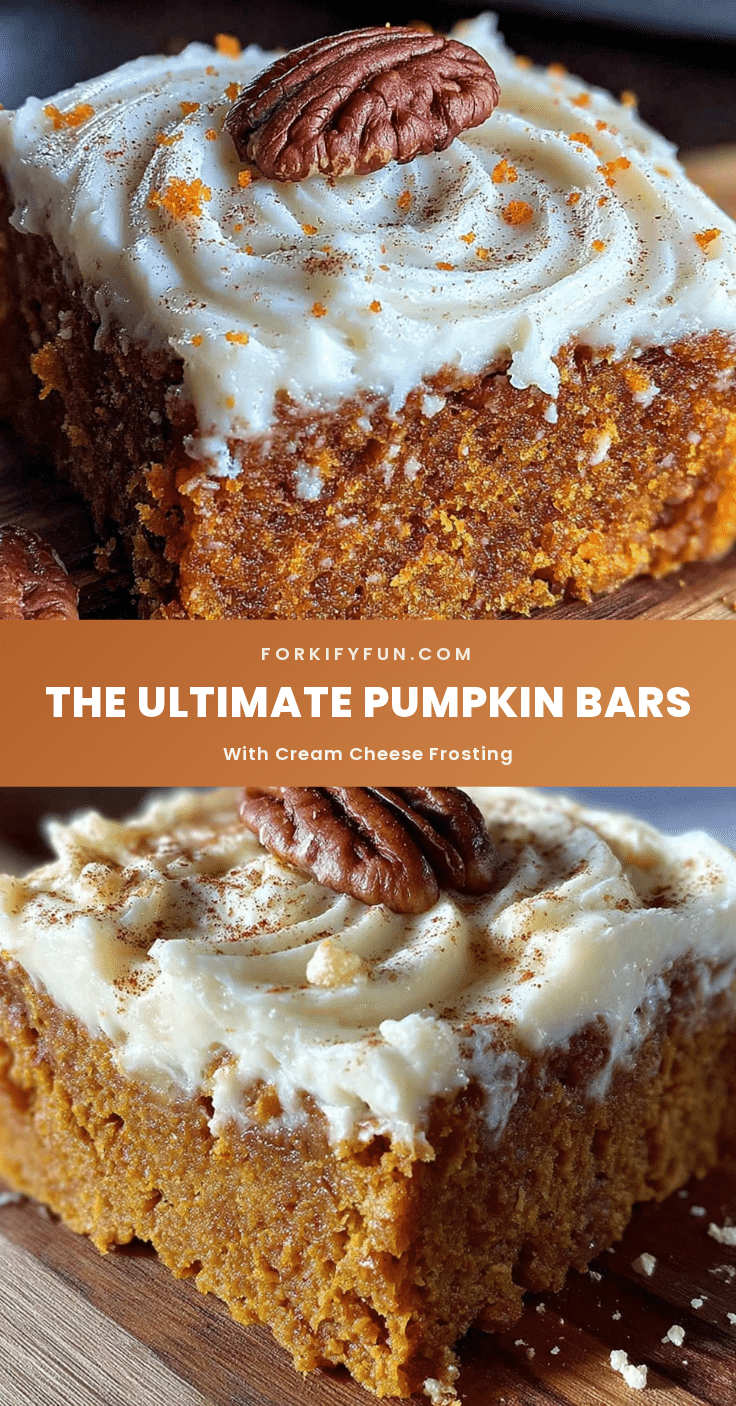
Perfect Pumpkin Bars with Cream Cheese Frosting
These pumpkin bars are moist, tender, and topped with a tangy cream cheese frosting. They’re the perfect fall dessert for any gathering, from Thanksgiving to Halloween parties.
- Prep Time: 20 minutes
- Cook Time: 25 minutes
- Total Time: 1 hour 45 minutes
- Yield: 24 servings 1x
- Category: Dessert
- Cuisine: American
Ingredients
- 1 ¾ cups (220g) all-purpose flour
- 1 ½ teaspoons baking powder
- 1 teaspoon baking soda
- 2 teaspoons ground cinnamon
- 1 teaspoon ground ginger
- ½ teaspoon ground nutmeg
- ½ teaspoon ground cloves
- ½ teaspoon salt
- ½ cup (113g) unsalted butter, melted and slightly cooled
- 1 cup (200g) packed light brown sugar
- ¼ cup (50g) granulated sugar
- 2 large eggs, room temperature
- 1 teaspoon vanilla extract
- 1 can (15 oz) pumpkin puree
- 8 oz (226g) block cream cheese, softened
- ¼ cup (56g) unsalted butter, softened
- 2 cups (240g) powdered sugar, sifted
- 1 teaspoon vanilla extract
- Pinch of salt
Instructions
- Preheat oven to 350°F (175°C). Line a 9×13-inch baking pan with parchment paper, leaving overhang on long sides. Lightly grease parchment.
- In a large bowl, whisk together flour, baking powder, baking soda, cinnamon, ginger, nutmeg, cloves, and salt.
- In a separate medium bowl, whisk together melted butter, brown sugar, and granulated sugar until smooth. Add eggs one at a time, whisking well after each. Stir in vanilla and pumpkin puree until combined.
- Pour wet ingredients into dry ingredients. Fold gently with a rubber spatula until just combined; do not overmix.
- Pour batter into prepared pan and spread evenly. Bake for 22-26 minutes, until a toothpick inserted in center comes out clean or with a few moist crumbs.
- Cool in pan on a rack for 20 minutes, then lift out using parchment and cool completely (about 1-1.5 hours).
- For frosting: Beat softened cream cheese and butter with a hand mixer until smooth, about 2 minutes. Add sifted powdered sugar, vanilla, and salt; beat on low then medium until smooth and spreadable. Refrigerate 10-15 minutes if too soft.
- Spread frosting over cooled bars. Refrigerate at least 30 minutes before slicing. Use a sharp knife, wiping clean between cuts.
Notes
Don’t skip cooling the bars completely before frosting. Use room temperature ingredients for best results. For clean cuts, chill frosted bars for at least 30 minutes. Bars taste even better the next day.
Nutrition
- Serving Size: 1 bar
- Calories: 215
- Sugar: 19
- Sodium: 180
- Fat: 11
- Saturated Fat: 7
- Carbohydrates: 28
- Fiber: 1
- Protein: 3
Keywords: pumpkin bars, cream cheese frosting, fall dessert, pumpkin dessert, easy pumpkin bars