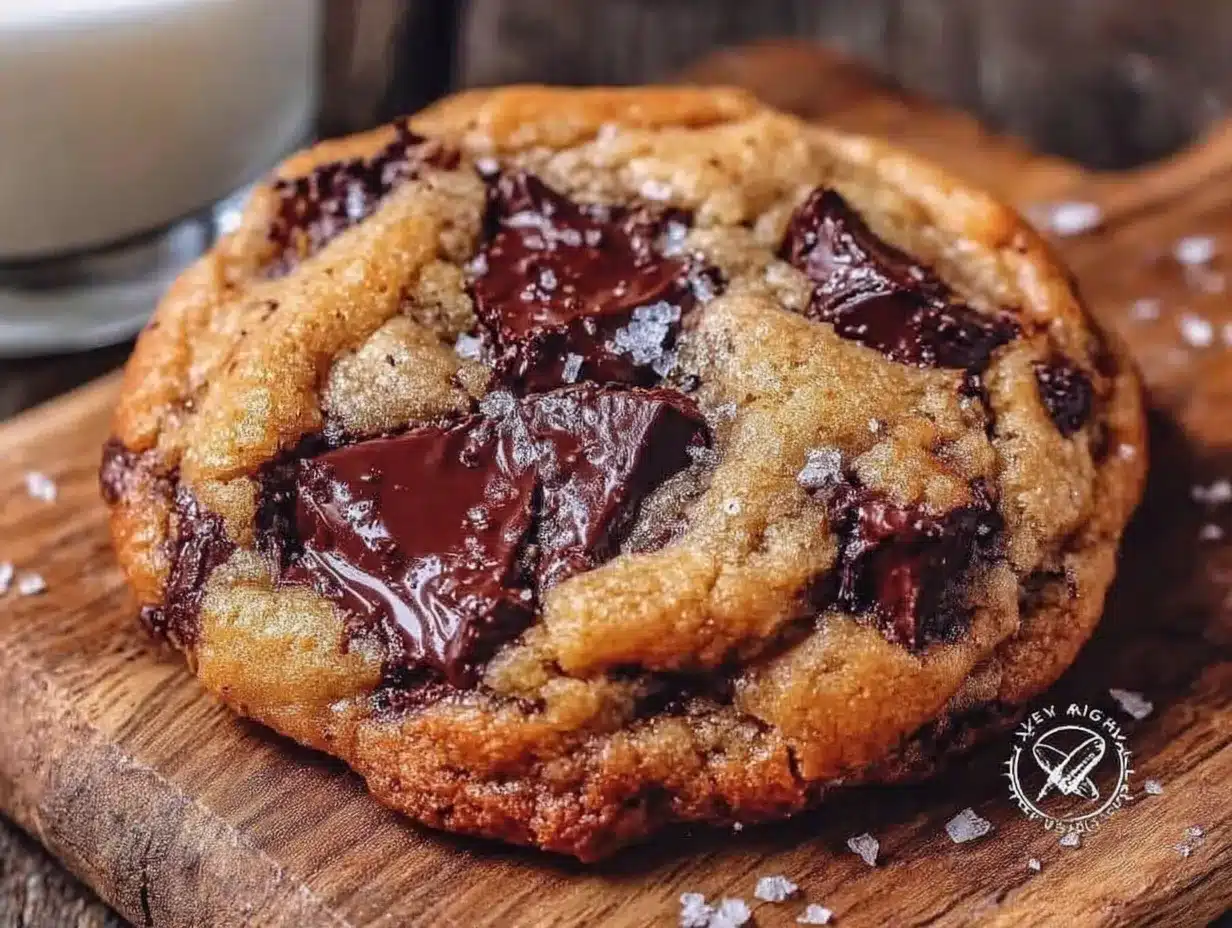
My sister called me a cookie snob last year, and honestly, she wasn’t wrong. I’d spent months chasing that bakery-style cookie—you know the one, with the crinkly edges, the soft center that gives just a little when you press it, and that deep, nutty flavor that makes you close your eyes on the first bite. I tried every trick in the book. Chilling the dough for 24 hours. Using bread flour. Folding in extra chocolate by hand. And every single batch came out fine—good, even—but never that good. The kind of good that makes you wonder if bakery cookies are made with some secret ingredient the rest of us don’t know about.
Turns out, they kind of are. It’s butter. But not just any butter—brown butter. I know, I know, brown butter is everywhere right now, and I was skeptical too. It felt like one of those trendy ingredients that food bloggers hype up just to sound fancy. But then I burnt my first batch (charred it, actually, and my kitchen smelled like burnt popcorn for two days), and something clicked. The second attempt? The butter turned amber, the milk solids settled at the bottom of the pan, and the smell that filled my kitchen was pure, toasty magic. I folded it into my dough, baked a test cookie, and there it was. That bakery-style chew. That deep, almost caramel-like flavor. The cookie I’d been chasing.
These Chewy Brown Butter Chocolate Chip Cookies are the result of trial, error, and a lot of butter. They’re not complicated—just a few smart techniques that make all the difference. And if you’ve been let down by flat, dry, or just-okay cookies before, I get it. This one’s different.
Why You’ll Love This Recipe
I’ve tested this recipe more times than I care to admit. Burned butter, underbaked centers, cookies that spread into one giant pancake—you name it, I’ve messed it up. But each failure taught me something, and what’s left is a cookie that actually delivers on its promises. Here’s why this one stands out:
- Bakery-Style Texture at Home : The combination of melted brown butter and an extra egg yolk creates that signature chew—crispy edges with a soft, almost gooey center that lasts for days.
- No Fancy Equipment Needed : You don’t need a stand mixer or a kitchen scale for this one. A whisk, a bowl, and a baking sheet are all you need. (Though I do recommend a good cookie scoop for even sizing.)
- Deep, Nutty Flavor Without Extra Work : Browning the butter takes about 8 minutes and transforms the entire cookie. It adds a toasty, caramelized richness that regular butter just can’t match.
- Perfect for Gifting or Sharing : These cookies stack beautifully in tins, travel well, and somehow taste even better the next day. They’re my go-to for holiday cookie exchanges and last-minute hostess gifts.
- Simple Ingredients, Big Results : No weird additives, no specialty flours. Just butter, sugar, eggs, flour, and chocolate—elevated by one simple technique.
This isn’t just another chocolate chip cookie recipe. It’s the one I bring to every potluck, the one my neighbors ask for by name, and the one that finally silenced my sister’s cookie snob comments. Once you taste that first bite of brown butter and melted chocolate, you’ll understand why.
What Ingredients You Will Need
This recipe uses simple, everyday ingredients, but each one plays a specific role in creating that bakery-style texture. Here’s what you’ll need and why each ingredient matters:
For the Brown Butter
- 1 cup (2 sticks / 226g) unsalted butter : Unsalted is key here—it lets you control the salt level. I prefer using a good-quality European-style butter like Kerrygold for richer flavor, but any unsalted butter works. The browning process concentrates the flavor, so starting with good butter makes a difference.
For the Cookie Dough
- 2 ¼ cups (280g) all-purpose flour : Spoon and level your flour—don’t scoop directly from the bag. Packed flour leads to dense, dry cookies. If you want a slightly chewier texture, substitute ¼ cup of the flour with bread flour.
- 1 teaspoon baking soda : This helps the cookies spread just enough while keeping them thick. Make sure it’s fresh—test it by dropping a bit into vinegar; it should fizz immediately.
- ½ teaspoon salt : I use fine sea salt. The salt balances the sweetness and enhances the brown butter flavor. If you’re using salted butter, reduce this to ¼ teaspoon.
- 1 cup (200g) packed light brown sugar : Brown sugar adds moisture and that subtle molasses flavor that pairs beautifully with brown butter. Don’t substitute granulated sugar here—the texture won’t be the same.
- ½ cup (100g) granulated sugar : The granulated sugar helps create those crispy edges while the brown sugar keeps the center soft.
- 2 large eggs, room temperature : Room temperature eggs incorporate more evenly into the brown butter, creating a smoother dough. If you forget to take them out ahead of time, place them in a bowl of warm water for 5 minutes.
- 1 large egg yolk : This is the secret to extra chewiness. The extra yolk adds richness and helps the cookies stay soft for days. (Save the white for your morning scramble.)
- 2 teaspoons vanilla extract : Pure vanilla extract, not imitation. The vanilla rounds out the nutty flavor of the brown butter. I’ve tried this with vanilla bean paste too, and it’s lovely—but not necessary.
- 2 cups (340g) semi-sweet chocolate chips or chunks : I prefer a mix of both—chips for even distribution and chunks for those gooey pockets of melted chocolate. Ghirardelli or Guittard are my go-to brands. If you like darker cookies, use bittersweet chocolate instead.
- Flaky sea salt, for finishing (optional but highly recommended) : A sprinkle of flaky salt right after baking takes these cookies to another level. The salt cuts through the sweetness and makes the chocolate taste even richer.
Equipment Needed
- Light-colored saucepan or skillet : A light-colored pan makes it easier to see the butter change color as it browns. Dark pans hide the color change and increase the risk of burning.
- Large mixing bowl : Any large bowl works, but a wide, shallow bowl makes whisking easier.
- Whisk : For combining the brown butter and sugars. A wooden spoon works too, but a whisk incorporates air more evenly.
- Rubber spatula : For folding in the chocolate chips and scraping down the sides of the bowl.
- Baking sheets : I use two rimmed baking sheets and rotate them halfway through baking for even results. If you only have one, let it cool completely between batches—a hot sheet will cause the dough to spread too quickly.
- Parchment paper or silicone baking mats : Parchment paper is my preference because it promotes even browning on the bottom. Silicone mats work too, but the cookies might spread slightly more.
- Cookie scoop (2-tablespoon size) : Not essential, but it makes portioning consistent and quick. A 2-tablespoon scoop gives you that bakery-style size without being comically large.
- Wire cooling rack : For cooling the cookies properly. If you leave them on the hot baking sheet, they’ll continue to cook and might overbake.
Preparation Method
-
Brown the butter. Place the butter in a light-colored saucepan over medium heat. Stir occasionally with a rubber spatula as it melts. The butter will foam up, then subside, and you’ll see small brown specks forming at the bottom of the pan. This takes about 6-8 minutes. Watch closely—once it turns amber and smells nutty, remove it from the heat immediately. Pour it into a heatproof bowl (including all those browned milk solids) and let it cool for 10-15 minutes. It should be warm but not hot when you add it to the sugars.
-
Mix the dry ingredients. In a medium bowl, whisk together the flour, baking soda, and salt. Set aside. This step ensures the leavening agent is evenly distributed so your cookies rise uniformly.
-
Combine the brown butter and sugars. In a large bowl, add the cooled brown butter, brown sugar, and granulated sugar. Whisk vigorously for about 2 minutes until the mixture looks like wet sand and is slightly lighter in color. The sugar granules should start dissolving into the butter—this is what creates those crispy edges.
-
Add the eggs and vanilla. Crack the two whole eggs and the extra yolk into the bowl. Add the vanilla extract. Whisk for another 1-2 minutes until the mixture is smooth, glossy, and slightly thickened. It should look like a thin caramel sauce. If the mixture looks separated or greasy, you might have added the eggs while the butter was too hot—let it cool a bit more next time, but for now, keep whisking until it comes together.
-
Fold in the dry ingredients. Add the flour mixture to the wet ingredients in two additions, folding gently with a rubber spatula after each. Stop as soon as you no longer see streaks of flour. Overmixing at this stage develops gluten and makes the cookies tough.
-
Add the chocolate. Fold in the chocolate chips and chunks until evenly distributed. The dough will be thick and slightly sticky—that’s exactly what you want. If it feels too soft to scoop, pop it in the fridge for 15 minutes.
-
Chill the dough (essential step). Cover the bowl with plastic wrap and refrigerate for at least 30 minutes, or up to 72 hours. Chilling solidifies the brown butter, which prevents the cookies from spreading too thin in the oven. It also allows the flavors to meld—the longer you chill, the deeper the flavor. I’ve found 24 hours is the sweet spot for maximum chewiness.
-
Preheat and prepare. When you’re ready to bake, preheat your oven to 375°F (190°C). Line two baking sheets with parchment paper.
-
Portion the dough. Use a 2-tablespoon cookie scoop to portion the dough into balls. Place them 3 inches apart on the prepared baking sheets—these cookies spread. If you want that bakery-style look, gently press a few extra chocolate chips onto the tops of the dough balls before baking.
-
Bake. Bake one sheet at a time for 10-12 minutes, rotating the pan halfway through. The edges should be golden brown and set, but the centers will still look slightly underdone and puffy. That’s the goal—they’ll continue to set as they cool. For softer cookies, pull them at 10 minutes. For crispier edges, go to 12.
-
Cool and finish. Let the cookies cool on the baking sheet for 5 minutes. This allows them to finish setting without drying out. Then transfer them to a wire rack. While they’re still warm, sprinkle with flaky sea salt if you’re using it. The salt sticks to the warm surface and adds that perfect sweet-salty contrast.
Cooking Tips & Techniques
I’ve made every mistake in the book with these cookies, so let me save you the trouble. Here are the things I wish someone had told me:
Don’t rush the browning process. The first time I made brown butter, I cranked the heat to high and ended up with black specks and a burnt taste. Low and slow is the way to go. Medium heat, constant stirring, and patience. The butter will foam, then calm down, then foam again—that second foam is your cue to watch closely. The milk solids at the bottom should turn a warm amber color, not dark brown.
Measure your flour correctly. This is the most common reason cookies turn out dry or cakey. Use the spoon-and-level method: fluff the flour with a spoon, spoon it into your measuring cup, then level it off with a knife. Don’t scoop directly from the bag—you’ll pack in too much flour and end up with dense cookies.
Chill the dough—no shortcuts. I know it’s tempting to skip this step when you’re craving cookies right now, but the chill time is non-negotiable for that thick, chewy texture. If you bake the dough immediately, the brown butter is still warm and liquid, and the cookies will spread into thin, greasy discs. Thirty minutes is the minimum; overnight is ideal.
Use a cookie scoop for even sizing. Uneven dough balls mean some cookies will be overbaked while others are underdone. A 2-tablespoon scoop gives you consistent results and makes the process way faster. If you don’t have one, use two spoons to portion the dough and roll it into balls with your hands.
Let them rest on the pan. Those 5 minutes on the hot baking sheet are crucial. The residual heat finishes cooking the centers without browning the edges further. If you move them too soon, the centers will collapse and you’ll lose that soft, gooey texture.
Bake one sheet at a time. I know it takes longer, but baking two sheets at once leads to uneven heat distribution. The top sheet will brown faster than the bottom sheet, and you’ll end up with a mix of overbaked and underbaked cookies. Your patience will be rewarded.
Variations & Adaptations
Once you’ve mastered the base recipe, here are some ways to make it your own:
Dark Chocolate Sea Salt Version : Swap the semi-sweet chips for dark chocolate chunks (70% cacao or higher) and increase the flaky salt on top. The bitterness of the dark chocolate balances the sweetness of the brown butter beautifully. I made this version for a dinner party and people literally asked for the recipe before they finished their first cookie.
Gluten-Free Adaptation : Substitute the all-purpose flour with a good 1:1 gluten-free baking flour blend (I like King Arthur’s or Bob’s Red Mill). Add ½ teaspoon of xanthan gum if your blend doesn’t include it. The texture will be slightly more delicate, but the brown butter flavor still shines. Let the dough chill for at least 2 hours—gluten-free dough needs more time to firm up.
Add-In Ideas : Try folding in ½ cup of toasted pecans or walnuts along with the chocolate for extra crunch. Or swap half the chocolate chips for white chocolate and dried cranberries for a festive twist. I’ve also made a version with chopped toffee bits and a sprinkle of smoked sea salt—it’s dangerously good.
Vegan Option : Use vegan butter (Miyoko’s or Country Crock Plant Butter work best) and replace the eggs with flax eggs (2 tablespoons ground flaxseed mixed with 6 tablespoons water, let sit for 5 minutes). The texture won’t be quite as chewy, but the brown butter flavor still comes through. Chill the dough for at least an hour to firm it up.
Small Batch Version : Halve all the ingredients and use one whole egg (skip the extra yolk). Bake 6-8 cookies instead of 24. Perfect for when you’re craving cookies but don’t want a whole batch staring at you from the counter.
Serving & Storage Suggestions
These cookies are best served slightly warm, when the chocolate is still melty and the edges have that perfect snap. Let them cool on the baking sheet for 5 minutes, then transfer to a wire rack. If you want to recreate that just-baked experience later, pop a cookie in the microwave for 10 seconds—it softens the center without drying it out.
For a full dessert spread, serve these alongside a cold glass of milk, a scoop of vanilla bean ice cream, or a warm mug of coffee. They also pair beautifully with a creamy pumpkin cold foam iced latte for a cozy afternoon treat. If you’re hosting, arrange them on a platter with fresh berries and a drizzle of melted chocolate for a simple but impressive presentation.
Storage : Store baked cookies in an airtight container at room temperature for up to 5 days. Place a slice of bread in the container—it absorbs excess moisture and keeps the cookies soft. Replace the bread every other day. Do not refrigerate baked cookies; the cold air dries them out and makes them crumbly.
Freezing the Dough : Scoop the dough into balls, place them on a parchment-lined baking sheet, and freeze until solid (about 2 hours). Transfer the frozen dough balls to a zip-top bag and store for up to 3 months. When you’re ready to bake, place the frozen dough balls on a baking sheet and add 2-3 minutes to the baking time. No need to thaw.
Freezing Baked Cookies : Let the cookies cool completely, then layer them in an airtight container with parchment paper between each layer. Freeze for up to 3 months. Thaw at room temperature for 15 minutes, or warm in a 300°F oven for 5 minutes.
Nutritional Information & Benefits
Let’s be honest—these are cookies, not health food. But knowing what’s in them helps you enjoy them mindfully. Here’s the estimated nutritional breakdown per cookie (based on 24 cookies):
| Nutrient | Amount per Cookie |
|---|---|
| Calories | 210 |
| Total Fat | 12g |
| Saturated Fat | 7g |
| Cholesterol | 35mg |
| Sodium | 150mg |
| Total Carbohydrates | 26g |
| Dietary Fiber | 1g |
| Sugars | 17g |
| Protein | 3g |
On the bright side, dark chocolate contains antioxidants and flavonoids that support heart health in moderation. The brown butter adds a small amount of vitamin A and healthy fats. And if you use dark chocolate chips (70% cacao or higher), you’ll get more antioxidants and less sugar. These cookies are also nut-free and can be made gluten-free with a simple flour swap. For a lower-sugar option, reduce the granulated sugar to ¼ cup and increase the brown sugar to 1¼ cups—the molasses in brown sugar adds sweetness with a lower glycemic impact.
FAQs
Can I use salted butter instead of unsalted?
Yes, but reduce the added salt in the recipe to ¼ teaspoon. The brown butter will still work the same way, but the salt content will be higher. If you’re unsure, start with unsalted—you can always sprinkle flaky salt on top at the end.
Why did my cookies turn out flat?
Flat cookies usually mean one of three things: the butter was too warm when you mixed the dough, the dough wasn’t chilled long enough, or the baking soda is old. Make sure your butter is cooled to room temperature before adding the eggs, and chill the dough for at least 30 minutes. If your baking soda is more than 6 months old, replace it.
Can I make these cookies without browning the butter?
You can, but the flavor won’t be the same. Brown butter adds a nutty, caramelized depth that regular melted butter can’t replicate. If you’re short on time, melt the butter and let it cool, then proceed with the recipe. They’ll still be good cookies—just not these cookies.
How do I get that crinkly, bakery-style top?
The crinkly top comes from the high ratio of brown sugar to granulated sugar, plus the extra egg yolk. Chilling the dough also helps—cold dough creates more contrast between the set edges and the soft center, which causes that signature crackly surface. For extra crinkle, press a few extra chocolate chips into the tops of the dough balls before baking.
Can I double this recipe?
Absolutely. Double all the ingredients and bake in batches. Just be careful when browning the butter—a larger quantity takes longer to brown and can burn more easily. Use a wider pan and stir constantly. The dough freezes beautifully, so I often make a double batch and freeze half for later.
Conclusion
These Chewy Brown Butter Chocolate Chip Cookies are the kind of recipe that earns a permanent spot in your rotation. They’re not fussy or complicated—just a few smart techniques that turn everyday ingredients into something special. The brown butter adds depth, the extra yolk adds chew, and that sprinkle of flaky salt at the end? It’s the little touch that makes people ask, “What did you put in these?”
I’ve made these cookies for birthday parties, holiday cookie exchanges, lazy Sunday afternoons, and late-night cravings. They’ve never disappointed. And honestly, they’ve made me a believer in the power of browning butter—even my sister, the self-proclaimed cookie snob, now asks for the recipe by name.
If you try this recipe, I’d love to hear how it goes. Leave a comment below and let me know what variations you tried, or tag me in your photos—I’m always inspired by how people make recipes their own. And if you’re looking for another sweet treat to bake this week, don’t miss my cozy brown butter snickerdoodle blondies—they use the same browning technique and are just as addictive. Happy baking!
Pin This Recipe!
Easy Chewy Brown Butter Chocolate Chip Cookies

These Chewy Brown Butter Chocolate Chip Cookies have crispy edges, a soft center, and a deep, nutty flavor from browned butter. They’re the bakery-style cookie you’ve been chasing, made with simple ingredients and no fancy equipment.
- Prep Time: 15 minutes
- Cook Time: 10-12 minutes per batch
- Total Time: 1 hour (including 30 minutes chilling)
- Yield: 24 cookies 1x
- Category: Dessert
- Cuisine: American
Ingredients
- 1 cup (2 sticks / 226g) unsalted butter
- 2 ¼ cups (280g) all-purpose flour
- 1 teaspoon baking soda
- ½ teaspoon salt (fine sea salt)
- 1 cup (200g) packed light brown sugar
- ½ cup (100g) granulated sugar
- 2 large eggs, room temperature
- 1 large egg yolk
- 2 teaspoons vanilla extract
- 2 cups (340g) semi-sweet chocolate chips or chunks
- Flaky sea salt, for finishing (optional)
Instructions
- Brown the butter: Place the butter in a light-colored saucepan over medium heat. Stir occasionally with a rubber spatula as it melts. The butter will foam up, then subside, and you’ll see small brown specks forming at the bottom of the pan. This takes about 6-8 minutes. Once it turns amber and smells nutty, remove from heat immediately. Pour into a heatproof bowl (including all browned milk solids) and let cool for 10-15 minutes until warm but not hot.
- Mix the dry ingredients: In a medium bowl, whisk together the flour, baking soda, and salt. Set aside.
- Combine the brown butter and sugars: In a large bowl, add the cooled brown butter, brown sugar, and granulated sugar. Whisk vigorously for about 2 minutes until the mixture looks like wet sand and is slightly lighter in color.
- Add the eggs and vanilla: Crack the two whole eggs and the extra yolk into the bowl. Add the vanilla extract. Whisk for another 1-2 minutes until the mixture is smooth, glossy, and slightly thickened, like thin caramel sauce.
- Fold in the dry ingredients: Add the flour mixture to the wet ingredients in two additions, folding gently with a rubber spatula after each. Stop as soon as no streaks of flour remain.
- Add the chocolate: Fold in the chocolate chips and chunks until evenly distributed. The dough will be thick and slightly sticky.
- Chill the dough: Cover the bowl with plastic wrap and refrigerate for at least 30 minutes, or up to 72 hours. 24 hours is ideal for maximum chewiness.
- Preheat and prepare: When ready to bake, preheat oven to 375°F (190°C). Line two baking sheets with parchment paper.
- Portion the dough: Use a 2-tablespoon cookie scoop to portion the dough into balls. Place them 3 inches apart on the prepared baking sheets. Optionally, press a few extra chocolate chips onto the tops.
- Bake: Bake one sheet at a time for 10-12 minutes, rotating the pan halfway through. Edges should be golden brown and set, centers slightly underdone and puffy.
- Cool and finish: Let cookies cool on the baking sheet for 5 minutes, then transfer to a wire rack. While still warm, sprinkle with flaky sea salt if desired.
Notes
Don’t rush the browning process; use medium heat and stir constantly. Measure flour correctly using the spoon-and-level method. Chilling the dough is essential for thick, chewy cookies. Let cookies rest on the pan for 5 minutes after baking. Bake one sheet at a time for even results.
Nutrition
- Serving Size: 1 cookie
- Calories: 210
- Sugar: 17
- Sodium: 150
- Fat: 12
- Saturated Fat: 7
- Carbohydrates: 26
- Fiber: 1
- Protein: 3
Keywords: brown butter chocolate chip cookies, chewy cookies, bakery-style cookies, easy cookie recipe, chocolate chip cookies