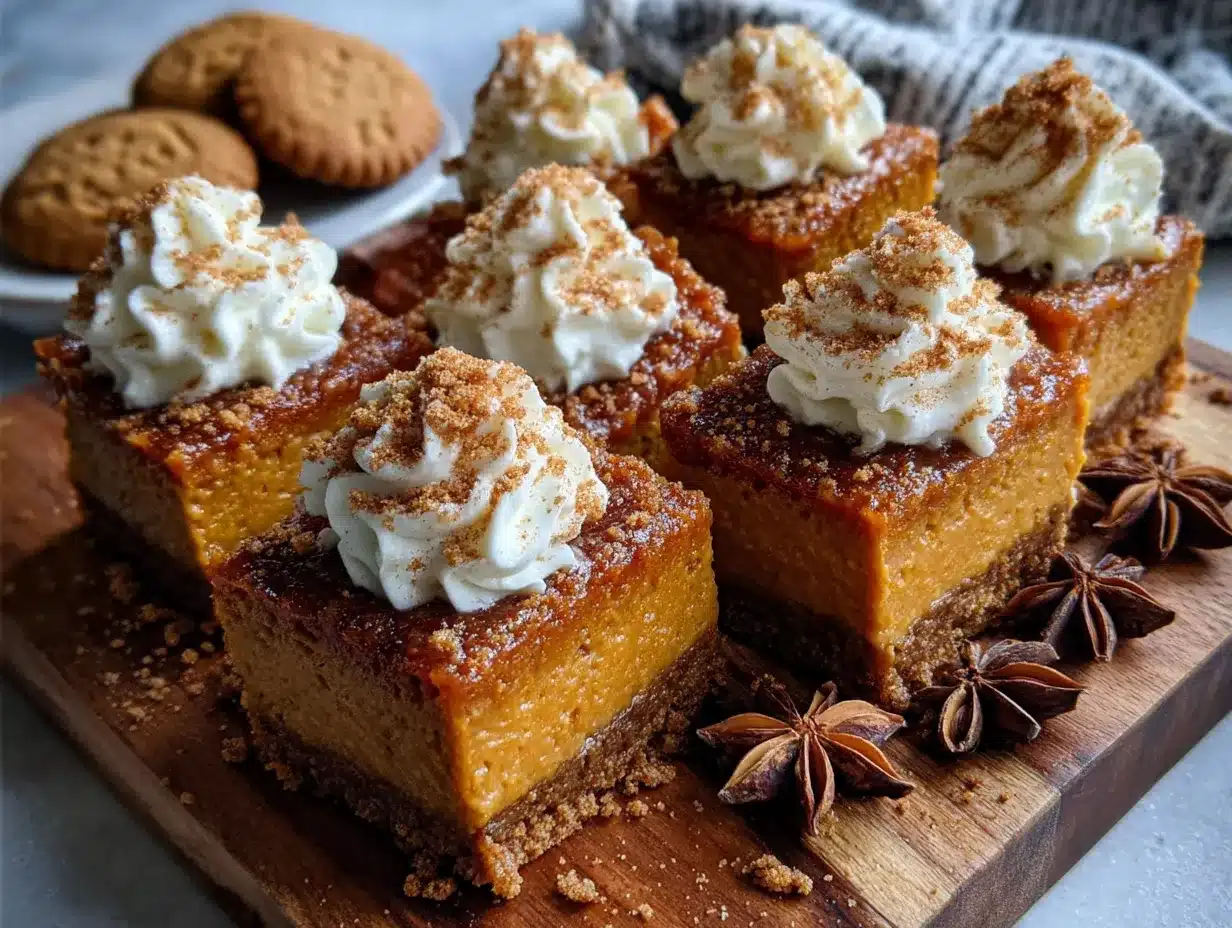
Late October, and the only thing I want is a pan of these easy pumpkin pie bars with gingersnap crust. The kitchen is quiet except for the hum of the oven and the sound of my cat padding across the floor. I’ve got a cup of coffee going cold beside me, and I’m not even mad about it. There’s something about this time of year that makes me want to bake slowly, deliberately—like I’m putting the whole season into a pan.
I first made these bars on a Tuesday that felt like it needed saving. You know those days where nothing goes wrong exactly, but nothing goes right either? That was the day. I had a can of pumpkin puree in the pantry and a bag of gingersnaps I’d picked up on a whim. Honestly, I was just tired of rolling out pie dough. I wanted the flavor of a perfect pumpkin pie without the fuss, the chilling, the crimping. I wanted something that felt like a hug but didn’t require a full afternoon of effort.
So I crushed those cookies into crumbs—smashing them with my hands, letting the spicy-sweet smell fill the air—and pressed them into a pan. I whisked together the filling, poured it over the crust, and slid it into the oven. When I pulled those bars out, golden and set around the edges with a slight jiggle in the center, I knew I’d stumbled onto something worth keeping. They tasted like Thanksgiving, but without the pressure. Like a secret you’d want to share.
These bars are the kind of dessert that makes you close your eyes after the first bite. And that’s really the whole point.
Why You’ll Love This Recipe
Let me be honest with you—I’ve tested a lot of pumpkin bar recipes over the years. Some were too wet. Some had a crust that turned to mush. Some just didn’t have enough of that warm, spiced flavor we all crave when the leaves start turning. These easy pumpkin pie bars with gingersnap crust? They’re the ones I keep coming back to.
- No Pie Crust Drama – Forget rolling, chilling, and hoping your dough doesn’t crack. This gingersnap crust comes together in minutes with just two ingredients. You press it in, and you’re done.
- Perfect Texture Every Time – The filling is creamy, smooth, and just the right amount of dense. It sets beautifully without cracking—no water bath required. Trust me on this one.
- Big Pumpkin Flavor – We’re using real pumpkin puree and a blend of warm spices that tastes like fall in a bite. No bland, watery fillings here.
- Make-Ahead Friendly – These bars actually taste better the next day. The flavors meld together overnight, and the crust stays perfectly crisp. Perfect for holiday prep or a stress-free weekend dessert.
- Crowd-Pleasing Size – A whole pan means plenty to share. They’re perfect for potlucks, Friendsgiving dinners, or just having a slice whenever the craving hits.
This isn’t just another pumpkin dessert recipe. It’s the one that solves the classic pumpkin pie problems—soggy crust, fussy prep, uneven baking—and turns them into something simple and reliable. I’ve made these bars for my family, for neighbors, and for holiday gatherings, and every single time, someone asks for the recipe. That’s the kind of trust you can only build through trial and error in your own kitchen.
What Ingredients You Will Need
This recipe uses simple, everyday ingredients to create something that tastes anything but ordinary. Most of these are pantry staples, especially if you’re already in full fall baking mode. Let me walk you through what you’ll need and why each ingredient matters.
For the Gingersnap Crust
- 2 cups gingersnap cookie crumbs (about 8 ounces or 225 grams) – I prefer using Nabisco or Anna’s ginger thins. You can crush them in a food processor or by hand in a sealed bag. The molasses and ginger in these cookies give the crust a deep, spicy flavor that pairs perfectly with the creamy pumpkin filling.
- 6 tablespoons unsalted butter, melted (85 grams) – This binds the crumbs together and adds richness. Use melted butter, not margarine, for the best texture and flavor.
- 2 tablespoons granulated sugar (25 grams) – Just a touch to balance the spice of the gingersnaps. You can skip this if your cookies are already very sweet.
- Pinch of salt – Helps balance the sweetness and enhances the ginger flavor.
For the Pumpkin Filling
- 1 can (15 ounces or 425 grams) pure pumpkin puree – Make sure you’re buying pumpkin puree, not pumpkin pie filling. The puree is unsweetened and unspiced, giving you full control over the flavor. I like Libby’s for consistent results.
- 1 can (14 ounces or 397 grams) sweetened condensed milk – This is the secret to that silky, creamy texture without having to make a custard from scratch. It adds sweetness and richness all at once.
- 2 large eggs, room temperature – Room temperature eggs blend more smoothly into the filling, creating a uniform texture. Set them out 30 minutes before you start baking.
- 1 teaspoon vanilla extract (5 ml) – A good quality vanilla rounds out the spices and adds depth. I use pure vanilla extract, not imitation.
- 1 ½ teaspoons ground cinnamon (about 4 grams) – The backbone of pumpkin spice. Fresh cinnamon makes a noticeable difference.
- ½ teaspoon ground ginger (about 1 gram) – Adds warmth without overpowering. This complements the gingersnap crust beautifully.
- ½ teaspoon ground nutmeg (about 1 gram) – Freshly grated if you have it, but pre-ground works fine.
- ¼ teaspoon ground cloves (about 0.5 grams) – A little goes a long way. Cloves add that deep, almost floral note that makes pumpkin desserts taste complete.
- ¼ teaspoon salt – Salt amplifies all the other flavors and prevents the dessert from tasting flat.
For the Topping (Optional but Recommended)
- 1 cup heavy cream (240 ml) – For whipping into soft peaks. This adds a light, airy contrast to the dense filling.
- 2 tablespoons powdered sugar (15 grams) – Just enough to sweeten the cream without making it heavy.
- ½ teaspoon vanilla extract (2.5 ml) – For flavor.
- Crushed gingersnaps or cinnamon, for garnish – A little sprinkle on top makes for a beautiful presentation.
Equipment Needed
You don’t need a fancy kitchen to make these easy pumpkin pie bars with gingersnap crust. Here’s what you’ll need:
- 9×9-inch baking pan (23×23 cm) – This size gives you the perfect thickness for bars. An 8×8-inch pan works too, but your bars will be slightly thicker and may need a few extra minutes of baking time.
- Parchment paper – Line your pan with two overlapping strips, leaving some overhang on the sides. This creates “handles” that let you lift the entire pan of bars out cleanly for slicing.
- Food processor or resealable plastic bag – For crushing the gingersnaps. A food processor gives you fine, even crumbs in seconds. A bag and a rolling pin work just as well if you need a little arm workout.
- Mixing bowls – One medium bowl for the crust, one large bowl for the filling.
- Whisk – For combining the filling ingredients smoothly.
- Spatula – For spreading the filling evenly over the crust.
- Measuring cups and spoons – Accuracy matters in baking, so use proper measuring tools.
- Cooling rack – Allows air to circulate under the pan, preventing a soggy bottom.
If you don’t have a food processor, don’t worry. I’ve made these bars many times using the bag-and-rolling-pin method. Just put the cookies in a sturdy zip-top bag, seal it, and go to town with a rolling pin or even a heavy skillet. It’s oddly satisfying.
Preparation Method
Let me walk you through this step by step. I’ve made these bars dozens of times, and I’ve learned a few tricks along the way that make the process smoother and the results more consistent.
Step 1: Preheat and Prepare the Pan
Preheat your oven to 350°F (175°C). Line your 9×9-inch baking pan with parchment paper, leaving about 2 inches of overhang on two opposite sides. This is your secret weapon for lifting the bars out cleanly later. Lightly grease the parchment with butter or nonstick spray to be safe.
Step 2: Make the Gingersnap Crust
Place the gingersnap cookies in your food processor and pulse until you have fine, even crumbs. You should have about 2 cups. If you’re crushing by hand, place the cookies in a sealed bag and crush them with a rolling pin until no large pieces remain. Transfer the crumbs to a medium bowl. Add the melted butter, sugar, and salt, and stir with a fork until every crumb is moistened. The mixture should look like wet sand and hold together when you squeeze it in your fist.
Step 3: Press the Crust into the Pan
Pour the crumb mixture into your prepared pan. Use the bottom of a measuring cup or a flat-bottomed glass to press the crumbs down firmly and evenly. Don’t skimp on this step—a tightly packed crust holds together better after baking. Press it all the way into the corners and make sure the surface is level. Bake the crust for 10 minutes at 350°F (175°C). This pre-baking step ensures the crust stays crisp and doesn’t get soggy from the wet filling. Set it aside to cool slightly while you make the filling.
Step 4: Make the Pumpkin Filling
In a large bowl, whisk together the pumpkin puree and sweetened condensed milk until smooth. There should be no streaks of white remaining. Add the eggs one at a time, whisking well after each addition. Stir in the vanilla extract. In a small bowl, combine the cinnamon, ginger, nutmeg, cloves, and salt. Add the spice mixture to the pumpkin mixture and whisk until fully incorporated. The filling will be thick, smooth, and a beautiful deep orange color.
Step 5: Assemble and Bake
Pour the pumpkin filling over the pre-baked crust. Use a spatula to spread it evenly, making sure it reaches all four corners. Gently tap the pan on the counter a few times to release any air bubbles. Bake at 350°F (175°C) for 40 to 45 minutes. The bars are done when the edges are set and slightly puffed, and the center jiggles just a little when you gently shake the pan. A knife inserted about 1 inch from the center should come out mostly clean. If the center still looks very wet and loose, give it another 5 minutes and check again.
Important note: Don’t overbake these bars. The filling will continue to set as it cools. Overbaking can cause cracks and a dry texture. That slight jiggle in the center is your friend.
Step 6: Cool and Chill
Place the pan on a wire rack and let it cool completely at room temperature. This takes about 1 to 2 hours. Once it’s cool, cover the pan with plastic wrap or foil and refrigerate for at least 4 hours, but overnight is better. Chilling allows the filling to fully set and makes slicing much easier. It also lets the flavors meld together beautifully.
Step 7: Slice and Serve
Once chilled, use the parchment overhang to lift the entire block of bars out of the pan. Place it on a cutting board. Use a sharp knife to slice into squares. For clean cuts, wipe the knife clean between each slice. I like to cut them into 16 squares (4 rows by 4 rows), but you can make them larger or smaller depending on your crowd.
Top each bar with a dollop of whipped cream and a sprinkle of crushed gingersnaps or cinnamon. Serve cold or at room temperature.
Cooking Tips & Techniques
After making these easy pumpkin pie bars with gingersnap crust more times than I can count, I’ve picked up a few things that make a real difference. Let me share them with you so you can skip the trial and error.
Don’t skip the parchment paper. I know it seems like an extra step, but trust me—trying to pry these bars out of an unlined pan is a recipe for frustration. The parchment handles make lifting them out effortless, and you get clean, beautiful squares every time.
Use room temperature ingredients. Cold eggs can cause the filling to seize up or become lumpy. Set your eggs out on the counter about 30 minutes before you start. If you’re in a hurry, place them in a bowl of warm (not hot) water for 5 minutes.
Press the crust firmly. This is the most common mistake I see. If the crust is too loose, it will crumble when you try to cut or eat the bars. Use the bottom of a measuring cup and really lean into it. You want the crumbs to be compacted and uniform.
Watch the edges. The edges of the filling will set faster than the center. If you notice the edges browning or puffing up too much before the center is done, tent the pan loosely with foil for the last 10 minutes of baking.
Patience is key. I know it’s hard to wait, but these bars truly need that full chilling time. If you try to cut them too soon, the filling will be soft and messy. Give them at least 4 hours in the fridge, and you’ll be rewarded with perfect, clean slices.
One more thing – I once tried to rush the cooling process by putting the hot pan directly in the fridge. Don’t do that. The sudden temperature change can cause the filling to crack. Let it come to room temperature first, then chill.
Variations & Adaptations
One of the best things about this recipe is how easily it adapts to different tastes and dietary needs. Here are some variations I’ve tried and loved.
Gluten-Free Version
Use gluten-free gingersnap cookies for the crust. Many brands are naturally gluten-free, but always check the label. The rest of the ingredients are naturally gluten-free, so this is an easy swap that doesn’t compromise flavor or texture.
Dairy-Free Version
Replace the butter in the crust with melted coconut oil or a dairy-free butter alternative. For the filling, use a can of full-fat coconut milk instead of sweetened condensed milk. The texture will be slightly less creamy, but still delicious. Top with coconut whipped cream for a fully dairy-free dessert.
Pumpkin Spice Latte Twist
Add 1 tablespoon of instant espresso powder to the pumpkin filling along with the spices. This gives the bars a subtle coffee flavor that pairs beautifully with the ginger and cinnamon. It’s my personal favorite variation for a cozy afternoon treat.
Nutty Crust Variation
Replace half of the gingersnap crumbs with finely chopped pecans or walnuts. Toast the nuts first for extra flavor. This adds a wonderful crunch and a slightly different flavor profile that works surprisingly well with pumpkin.
Mini Bar Bites
Make these in a mini muffin tin for bite-sized treats. Press the crust into greased mini muffin cups, fill with pumpkin mixture, and bake for about 15 to 18 minutes. These are perfect for holiday parties or lunchbox surprises. If you’re looking for more healthy after-school snack ideas, these mini bars fit right in.
Serving & Storage Suggestions
These easy pumpkin pie bars with gingersnap crust are incredibly versatile when it comes to serving. Here’s how I like to enjoy them.
Serving Temperature: I prefer these bars cold, straight from the fridge. The filling is firm and creamy, and the crust stays crisp. They’re also lovely at room temperature if you let them sit out for about 15 minutes. Avoid serving them warm, as the filling won’t be fully set.
Presentation: A dollop of freshly whipped cream is the classic topping, and for good reason. The light, airy cream balances the dense, spiced filling perfectly. Add a sprinkle of cinnamon or crushed gingersnaps for a beautiful finish. For a more decadent treat, drizzle with caramel sauce or a little warm maple syrup.
Pairings: These bars are wonderful on their own, but they also pair beautifully with a hot cup of coffee or spiced chai tea. For a full fall dessert spread, serve them alongside a salted caramel apple crumble bar for a stunning duo. They also go well with vanilla ice cream or a scoop of ginger gelato.
Storage: Store the bars in an airtight container in the refrigerator for up to 5 days. Place a sheet of parchment paper between layers to prevent sticking. The flavors actually deepen and improve after a day or two in the fridge.
Freezing: These bars freeze beautifully. Once they’re fully chilled and sliced, place the individual bars on a baking sheet and freeze until solid, about 1 hour. Transfer the frozen bars to a freezer-safe container or zip-top bag, separating layers with parchment paper. They’ll keep for up to 3 months. To thaw, transfer a bar to the refrigerator overnight or let it sit at room temperature for about 30 minutes.
Reheating: I don’t recommend reheating these bars, as the filling becomes soft and loses its structure. If you prefer a warm dessert, try serving them at room temperature with a warm caramel sauce instead.
Flavor Development: Here’s a little secret—these bars are actually better on day two. The spices mellow and meld together, and the crust absorbs just a hint of moisture from the filling, making it perfectly tender but still crisp. If you can plan ahead, make them a day before you need them.
Nutritional Information & Benefits
While these easy pumpkin pie bars with gingersnap crust are definitely a treat, they do offer some nutritional perks worth noting. Here’s an approximate breakdown per bar (based on 16 servings):
| Nutrient | Amount Per Bar |
|---|---|
| Calories | 210 |
| Total Fat | 10g |
| Saturated Fat | 6g |
| Cholesterol | 55mg |
| Sodium | 180mg |
| Total Carbohydrates | 28g |
| Dietary Fiber | 2g |
| Sugars | 18g |
| Protein | 4g |
| Vitamin A | 80% DV |
| Calcium | 10% DV |
| Iron | 6% DV |
Pumpkin is packed with vitamin A, which supports eye health and immune function. It’s also a good source of fiber, which helps with digestion and keeps you feeling satisfied. The ginger in the crust and filling has natural anti-inflammatory properties and can help settle the stomach. Of course, this is still a dessert, so enjoy it in moderation as part of a balanced diet.
If you’re watching your sugar intake, you can reduce the sugar in the crust slightly, but the sweetened condensed milk is essential for the filling’s texture. For a lower-sugar option, try using a sugar-free sweetened condensed milk alternative.
Conclusion
These easy pumpkin pie bars with gingersnap crust have become my go-to fall dessert for a reason. They deliver everything I love about pumpkin pie—the creamy filling, the warm spices, that unmistakable taste of autumn—without any of the stress. No rolling pins, no blind baking, no worrying about a cracked top. Just simple, honest baking that tastes like it took all day.
What I love most about this recipe is how shareable it is. I’ve brought these bars to potlucks, dropped them off for friends, and served them at Thanksgiving dinner. Every time, someone asks for the recipe. And I love telling them how easy it is. It’s the kind of dessert that makes you look like a hero without feeling like you worked for it.
I hope you give these bars a try and make them your own. Maybe you’ll add a pinch more cinnamon, or top them with a drizzle of caramel, or serve them alongside a creamy pumpkin cold foam iced latte for the ultimate fall experience. However you make them, I think you’ll fall in love with how simple, delicious, and satisfying they are.
If you make these easy pumpkin pie bars with gingersnap crust, I’d love to hear about it. Drop a comment below and let me know how they turned out, or share your own twist on the recipe. Did you add a different spice? Try a new topping? I’m always looking for new ideas to test in my kitchen. Happy baking, friends!
Frequently Asked Questions
Can I use a store-bought graham cracker crust instead of making a gingersnap crust?
You can, but the flavor will be completely different. The gingersnap crust is what makes these bars special—the spicy, molasses notes complement the pumpkin filling perfectly. If you’re in a pinch, a graham cracker crust will work, but I strongly recommend sticking with the gingersnaps for the best results.
Why did my pumpkin filling crack on top?
Cracks usually happen from overbaking or a sudden temperature change. Make sure you remove the bars from the oven while the center still has a slight jiggle. Also, let the bars cool gradually at room temperature before refrigerating. If cracks do appear, don’t worry—a generous swirl of whipped cream covers them beautifully.
Can I make these bars without sweetened condensed milk?
Sweetened condensed milk is key to the creamy, dense texture of these bars. If you need a substitute, you can make a homemade version by simmering whole milk and sugar until reduced, but it’s not a quick process. For a dairy-free option, canned coconut cream mixed with a little maple syrup can work, though the texture will be slightly different.
How do I know when the bars are done baking?
The edges should be set and slightly puffed, and the center should jiggle just a little when you gently shake the pan. A knife inserted about 1 inch from the center should come out mostly clean. The center will continue to set as the bars cool, so don’t wait for it to look fully firm in the oven.
Can I double this recipe for a larger crowd?
Absolutely! Double all the ingredients and bake in a 9×13-inch pan. You’ll need to increase the baking time by about 10 to 15 minutes, so keep an eye on it. The same doneness cues apply—edges set, center slightly jiggly. This is a great option for holiday gatherings or big parties.
Pin This Recipe!
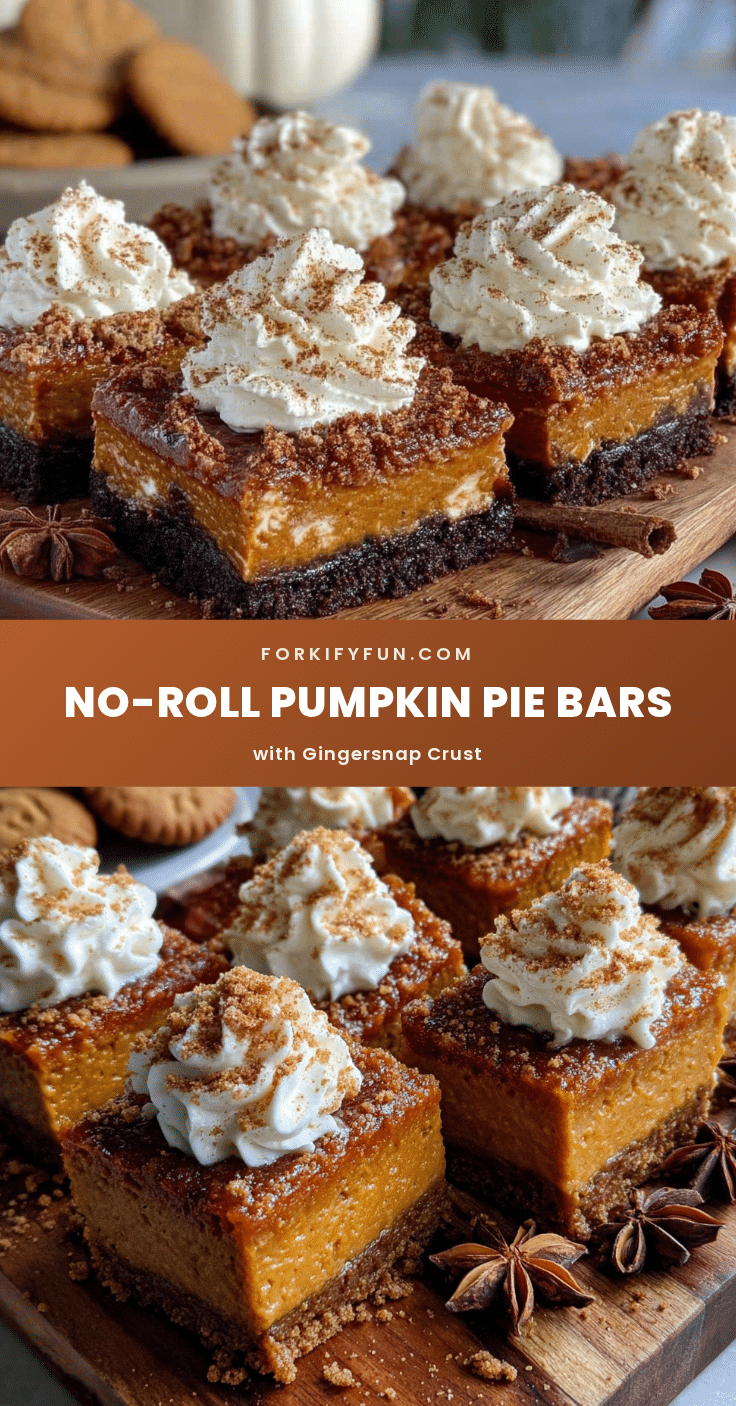
Easy Pumpkin Pie Bars with Gingersnap Crust – Best Fall Dessert
These easy pumpkin pie bars with a spicy gingersnap crust deliver all the flavor of classic pumpkin pie without the fuss. Creamy, perfectly spiced, and topped with whipped cream, they’re the ultimate fall dessert for any occasion.
- Prep Time: 20 minutes
- Cook Time: 45 minutes
- Total Time: 5 hours 5 minutes (includes chilling)
- Yield: 16 servings 1x
- Category: Dessert
- Cuisine: American
Ingredients
- 2 cups gingersnap cookie crumbs (about 8 ounces or 225 grams)
- 6 tablespoons unsalted butter, melted (85 grams)
- 2 tablespoons granulated sugar (25 grams)
- Pinch of salt
- 1 can (15 ounces or 425 grams) pure pumpkin puree
- 1 can (14 ounces or 397 grams) sweetened condensed milk
- 2 large eggs, room temperature
- 1 teaspoon vanilla extract (5 ml)
- 1 ½ teaspoons ground cinnamon (about 4 grams)
- ½ teaspoon ground ginger (about 1 gram)
- ½ teaspoon ground nutmeg (about 1 gram)
- ¼ teaspoon ground cloves (about 0.5 grams)
- ¼ teaspoon salt
- 1 cup heavy cream (240 ml) (for topping, optional)
- 2 tablespoons powdered sugar (15 grams) (for topping, optional)
- ½ teaspoon vanilla extract (2.5 ml) (for topping, optional)
- Crushed gingersnaps or cinnamon, for garnish (optional)
Instructions
- Preheat your oven to 350°F (175°C). Line a 9×9-inch baking pan with parchment paper, leaving about 2 inches of overhang on two opposite sides. Lightly grease the parchment with butter or nonstick spray.
- Make the crust: Place gingersnap cookies in a food processor and pulse until fine crumbs form. Transfer to a medium bowl. Add melted butter, sugar, and a pinch of salt. Stir with a fork until every crumb is moistened and the mixture holds together when squeezed.
- Press the crumb mixture firmly and evenly into the prepared pan using the bottom of a measuring cup or flat-bottomed glass. Bake for 10 minutes at 350°F (175°C). Set aside to cool slightly.
- Make the filling: In a large bowl, whisk together pumpkin puree and sweetened condensed milk until smooth. Add eggs one at a time, whisking well after each. Stir in vanilla extract.
- In a small bowl, combine cinnamon, ginger, nutmeg, cloves, and salt. Add the spice mixture to the pumpkin mixture and whisk until fully incorporated.
- Pour the filling over the pre-baked crust. Use a spatula to spread evenly. Gently tap the pan on the counter to release air bubbles.
- Bake at 350°F (175°C) for 40 to 45 minutes, until edges are set and center jiggles slightly when shaken. A knife inserted 1 inch from the center should come out mostly clean.
- Cool the pan on a wire rack at room temperature for 1 to 2 hours. Then cover and refrigerate for at least 4 hours, preferably overnight.
- Once chilled, use the parchment overhang to lift the bars out of the pan. Slice into 16 squares with a sharp knife, wiping the blade clean between cuts.
- For the optional topping: Whip heavy cream, powdered sugar, and vanilla extract until soft peaks form. Serve each bar with a dollop of whipped cream and a sprinkle of crushed gingersnaps or cinnamon.
Notes
Don’t overbake; the center should still jiggle slightly. Chilling overnight is recommended for best flavor and texture. For gluten-free, use gluten-free gingersnaps. For dairy-free, substitute butter with coconut oil and use full-fat coconut milk instead of sweetened condensed milk.
Nutrition
- Serving Size: 1 bar
- Calories: 210
- Sugar: 18
- Sodium: 180
- Fat: 10
- Saturated Fat: 6
- Carbohydrates: 28
- Fiber: 2
- Protein: 4
Keywords: pumpkin pie bars, gingersnap crust, fall dessert, easy pumpkin bars, Thanksgiving dessert, pumpkin dessert, no-roll pie crust