Sunday morning, 7:12 AM. The kitchen is still dark, the coffee maker is sputtering its first few drops, and there are two very spotted bananas on the counter—the kind you almost threw away yesterday but didn’t. That’s when I spotted the half-can of pumpkin puree hiding behind the milk. And just like that, I knew what I was making. No mixer. No fuss. Just one bowl, a wooden spoon, and the quiet satisfaction of something coming together exactly as it should.
This easy one-bowl pumpkin banana bread isn’t a recipe I developed for a blog post or a photoshoot. It came from a real, lazy Sunday where I didn’t want to wash extra dishes or dig out the stand mixer from the back of the cabinet. I wanted something warm, spiced, and comforting—but I also wanted to stay in my pajamas a little longer. So I grabbed a bowl, mashed the bananas with a fork (honestly, the most satisfying part), stirred in the pumpkin, and kept going. No electric beaters, no complicated steps, just the simple rhythm of stirring.
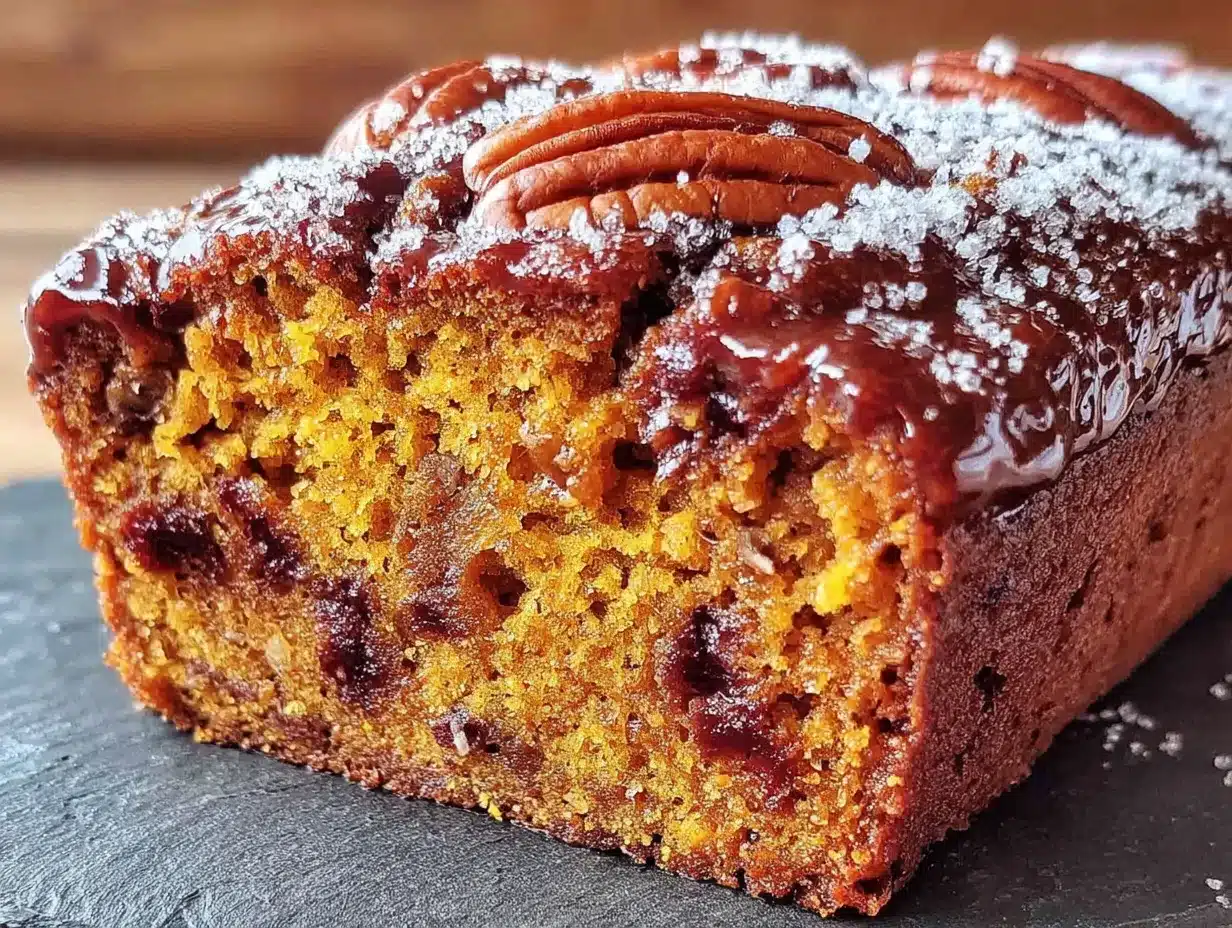
The result? A loaf that’s impossibly moist, perfectly spiced, and tastes like fall wrapped in a slice of bread. The pumpkin keeps it tender, the banana adds natural sweetness, and the whole thing comes together in about ten minutes of active work. It’s the kind of recipe that makes you feel like you’ve got your act together—even when you’re still in your slippers. And honestly, that’s the best kind of baking.
Why You’ll Love This Recipe
I’ve tested this recipe more times than I care to admit. The first few loaves were good, but they weren’t great. One was too dense. Another was too sweet. And one—let’s not talk about it—sank right in the middle like a sad little crater. But after tweaking the flour ratio, adjusting the baking time, and finding the perfect balance of pumpkin to banana, I landed on this version. And it’s the one I make every single time now.
- No mixer required. You don’t need a stand mixer, a hand mixer, or any fancy equipment. Just a bowl and a spoon. That’s it.
- One bowl cleanup. This is the kind of recipe where you use one bowl, one spoon, and a loaf pan. Less dishes means more time to actually enjoy the bread.
- Perfect for busy mornings or lazy weekends. It comes together in under 10 minutes of prep. While it bakes, you can sip your coffee, read a book, or—let’s be real—stare at the oven door waiting for it to be done.
- Made with simple, pantry-friendly ingredients. Canned pumpkin, ripe bananas, flour, sugar, eggs, oil, and spices. You probably have most of these in your kitchen right now.
- Incredibly moist and tender. The combination of pumpkin and banana creates a texture that’s soft, tender, and stays moist for days. No dry crumb here.
- A total crowd-pleaser. I’ve brought this to brunches, given it to neighbors, and packed it in lunchboxes. It gets devoured every single time. Kids love it, adults love it, and no one ever guesses how easy it was to make.
What makes this recipe different from other pumpkin banana breads? It’s the texture. Most versions are either too dense (all pumpkin, no fluff) or too wet (all banana, no structure). This one hits the sweet spot—light enough to feel like a treat, but sturdy enough to hold a slice of butter without falling apart. Plus, the spices are perfectly balanced. Not too much cinnamon, not too little nutmeg. Just right.
This isn’t just another quick bread recipe. It’s the one you’ll come back to again and again. The one you’ll memorize. The one that makes you look like a baking pro even when you’re just stirring things together in your pajamas.
What Ingredients You Will Need
This recipe uses simple, wholesome ingredients that work together to create a loaf that’s moist, flavorful, and completely satisfying. No weird ingredients, no special trips to the store—just the good stuff you probably already have on hand.
- Ripe bananas (about 2 large or 3 medium) – The riper, the better. You want them spotty brown and soft. That’s where the natural sweetness and moisture live. If your bananas aren’t quite ripe enough, you can pop them in a 300°F oven for 10-15 minutes until the skins darken. Let them cool before using.
- Pumpkin puree (1 cup) – Make sure you grab pure pumpkin puree, not pumpkin pie filling. Pumpkin pie filling has added sugar and spices, which will throw off the balance. I usually go with Libby’s, but any brand works. If you have leftover puree after making this, try adding it to a batch of creamy chocolate peanut butter overnight oats for a fall twist.
- Granulated sugar (¾ cup) – Adds just the right amount of sweetness without overpowering the pumpkin and banana. You can reduce it to ½ cup if your bananas are extra ripe and sweet.
- Light brown sugar (¼ cup, packed) – This adds a subtle molasses flavor and helps keep the bread moist. Don’t skip it—it makes a difference.
- Large eggs (2, room temperature) – Room temperature eggs incorporate more easily into the batter and create a better texture. If you forgot to take them out of the fridge, place them in a bowl of warm water for 5 minutes.
- Vegetable oil (⅓ cup) – Oil keeps this bread incredibly moist. You can use canola oil, avocado oil, or any neutral-flavored oil. Melted coconut oil works too, but make sure it’s cooled slightly before adding.
- Vanilla extract (1 teaspoon) – Pure vanilla extract adds warmth and depth. Imitation vanilla works in a pinch, but pure is always better.
- All-purpose flour (1¾ cups) – Spoon and level your flour for the most accurate measurement. Scooping directly from the bag can pack in too much flour and make the bread dense. For a gluten-free option, use a 1:1 gluten-free flour blend.
- Baking soda (1 teaspoon) – This is the main leavening agent. Make sure it’s fresh—test it by dropping a little into vinegar; if it fizzes, it’s good to go.
- Baking powder (½ teaspoon) – A little extra lift to keep the bread light and tender.
- Salt (½ teaspoon) – Balances the sweetness and enhances all the flavors. Don’t skip it.
- Ground cinnamon (1½ teaspoons) – The star spice in this bread. It’s warm, cozy, and pairs beautifully with both pumpkin and banana.
- Ground nutmeg (½ teaspoon) – Adds a subtle, slightly sweet warmth. Freshly grated nutmeg is amazing if you have it.
- Ground ginger (¼ teaspoon) – A tiny amount adds a gentle kick. It’s not overpowering, just enough to make the spices feel complete.
- Optional add-ins (½ cup) – Chocolate chips, chopped walnuts, or pecans are all excellent choices. I’m partial to dark chocolate chips, but a handful of toasted pecans adds a lovely crunch.
Equipment Needed
One of the best things about this recipe is how little equipment it requires. You don’t need a stand mixer, a food processor, or anything fancy. Here’s what you’ll need:
- Large mixing bowl – Any large bowl will do. I use a ceramic one because it feels nice, but glass, stainless steel, or plastic all work fine.
- Wooden spoon or rubber spatula – A wooden spoon is great for mashing the bananas and mixing the batter. A rubber spatula works too, especially for scraping down the sides.
- Fork or potato masher – For mashing the bananas. A fork is my go-to, but a potato masher works faster.
- 9×5-inch loaf pan – This is the standard size for a loaf of bread. If you only have an 8×4-inch pan, the bread will take a few minutes longer to bake and will be slightly taller.
- Parchment paper – Lining the pan with parchment paper makes lifting the bread out so much easier. Plus, cleanup is a breeze.
- Cooling rack – Letting the bread cool completely on a wire rack prevents the bottom from getting soggy. If you don’t have one, you can use the upside-down loaf pan trick (just make sure it’s elevated).
- Measuring cups and spoons – For accurate measurements. A kitchen scale is even better for the flour, but measuring cups work perfectly fine.
If you don’t have a loaf pan, you can bake this batter in a 9×9-inch square pan for about 25-30 minutes. It won’t be as tall, but it’ll still taste amazing. You can also make muffins—just fill lined muffin tins about ¾ full and bake for 18-22 minutes.
Preparation Method
Preheat your oven to 350°F (175°C). Line a 9×5-inch loaf pan with parchment paper, leaving some overhang on the long sides so you can lift the bread out easily. Lightly grease the parchment with cooking spray or a little butter.
- Mash the bananas. In your large mixing bowl, add the two ripe bananas. Use a fork or potato masher to mash them until they’re mostly smooth with a few small lumps. You want some texture, not a complete liquid. This should take about 30 seconds.
- Add the wet ingredients. To the mashed bananas, add the pumpkin puree, granulated sugar, brown sugar, eggs, vegetable oil, and vanilla extract. Stir everything together with your wooden spoon or spatula until it’s well combined and smooth. Don’t overmix—just stir until you don’t see any streaks of egg or oil.
- Mix the dry ingredients separately (in the same bowl). This is the one-bowl magic trick. Sprinkle the flour, baking soda, baking powder, salt, cinnamon, nutmeg, and ginger evenly over the top of the wet mixture. Use your spoon to gently stir the dry ingredients into the wet ingredients, starting from the center and working your way outward. Stir just until the flour disappears. A few small lumps are totally fine—overmixing will make the bread tough.
- Fold in any add-ins. If you’re using chocolate chips, nuts, or anything else, gently fold them in now. Use about 10-12 strokes, just until they’re evenly distributed.
- Pour the batter into the prepared pan. Use your spatula to scrape every last bit of batter into the pan. Smooth the top gently—it doesn’t need to be perfect. The bread will dome as it bakes anyway.
- Bake for 50-60 minutes. Place the pan in the center of the preheated oven. Bake until a toothpick inserted into the center comes out clean or with just a few moist crumbs. If the top is browning too quickly (around the 40-minute mark), tent the pan loosely with aluminum foil.
- Cool in the pan for 10 minutes. Set the pan on a wire rack and let it cool for about 10 minutes. This helps the bread set and makes it easier to remove.
- Transfer to the wire rack to cool completely. Use the parchment overhang to lift the bread out of the pan. Place it directly on the wire rack and let it cool completely—at least 1 hour—before slicing. I know it’s hard to wait, but slicing too early can make the bread crumbly.
Cooking Tips & Techniques
I’ve made this bread more times than I can count, and I’ve learned a few things along the way. Here are my best tips for getting perfect results every time.
Don’t overmix the batter. This is the number one mistake I see with quick breads. Stir just until the flour disappears. Overmixing develops the gluten, which makes the bread dense and tough. A few lumps are your friend.
Use room temperature eggs. Cold eggs can cause the batter to seize up slightly, making it harder to mix evenly. If you forgot to take them out ahead of time, place them in a bowl of warm water for 5 minutes. Problem solved.
Check for doneness with a toothpick. Every oven runs a little differently. Start checking at the 50-minute mark. Insert a toothpick into the center of the bread. If it comes out clean or with just a few moist crumbs, it’s done. If it’s still wet, give it 5 more minutes and check again.
Let it cool completely. I know it smells amazing, and you want a slice right now. But slicing warm bread can cause it to crumble and fall apart. Let it cool completely on a wire rack—about 1 to 1.5 hours. Trust me, it’s worth the wait.
Toast leftover slices. If you have any bread left after day one (rare, but possible), toast a slice and spread it with a little butter. The toasting brings out the spices and gives the edges a slight crunch. It’s almost better than fresh.
Adjust for altitude. If you’re baking at high altitude (above 3,000 feet), you may need to reduce the sugar by a tablespoon and increase the flour by a tablespoon. Also, check the bread 5-10 minutes earlier than the recipe suggests.
Variations & Adaptations
This recipe is incredibly versatile. Here are some of my favorite ways to change it up.
- Gluten-free version. Substitute the all-purpose flour with a 1:1 gluten-free baking flour blend. I’ve used Bob’s Red Mill and King Arthur with great results. The texture will be slightly more tender, but still delicious.
- Vegan version. Replace the eggs with two flax eggs (2 tablespoons ground flaxseed + 6 tablespoons water, let sit for 5 minutes). Use a plant-based milk instead of the eggs, and swap the oil with melted coconut oil or applesauce. The bread will be a bit denser but still moist and flavorful.
- Lower sugar option. Reduce the granulated sugar to ½ cup and the brown sugar to 2 tablespoons. The bananas and pumpkin provide plenty of natural sweetness, so you won’t miss it much. You can also use a sugar substitute like monk fruit or stevia, but follow the package instructions for conversion.
- Chocolate chip pumpkin banana bread. Fold in ½ cup of semi-sweet or dark chocolate chips. The chocolate pairs beautifully with the warm spices. I’ve also used white chocolate chips for a sweeter version.
- Nutty crunch. Add ½ cup of toasted pecans or walnuts. Toast them in a dry skillet over medium heat for 3-4 minutes until fragrant, then chop them roughly before folding into the batter.
- Spice it up. Add ¼ teaspoon of ground cloves or allspice for a deeper, more complex spice profile. A pinch of cardamom is also lovely.
- Streusel topping. Mix ¼ cup flour, ¼ cup brown sugar, 2 tablespoons cold butter, and ½ teaspoon cinnamon until crumbly. Sprinkle over the batter before baking for a crunchy, sweet topping.
Serving & Storage Suggestions
This bread is wonderful on its own, but it’s even better with a little something extra. Serve it slightly warm with a pat of salted butter melting into the slice. Or spread a thin layer of cream cheese for a tangy contrast. If you’re feeling fancy, drizzle a simple glaze made from ½ cup powdered sugar and 1-2 tablespoons of milk over the top.
For a cozy breakfast or brunch, pair a slice with a creamy pumpkin cold foam iced latte for the ultimate fall combo. Or serve it alongside a perfect fresh peach cobbler for a dessert spread that screams autumn.
Storage: Store the bread in an airtight container at room temperature for up to 4 days. The moisture from the pumpkin and banana actually helps it stay soft longer than regular banana bread. If your kitchen is warm, you can refrigerate it, but let it come to room temperature before serving for the best texture.
Freezing: This bread freezes beautifully. Wrap the cooled loaf (or individual slices) tightly in plastic wrap, then in a layer of aluminum foil. Freeze for up to 3 months. To thaw, leave it on the counter for a few hours or pop a slice in the microwave for 20-30 seconds.
Reheating: For a just-baked experience, reheat slices in a 300°F oven for 5-7 minutes, or in the toaster for a slightly crisp edge. The microwave works in a pinch, but the texture will be softer.
Nutritional Information & Benefits
Here’s an approximate nutritional breakdown per slice (based on 10 slices, without add-ins):
- Calories: 245
- Total Fat: 9g
- Saturated Fat: 1.5g
- Cholesterol: 37mg
- Sodium: 280mg
- Total Carbohydrates: 38g
- Dietary Fiber: 2g
- Sugars: 19g
- Protein: 4g
This bread offers some nice nutritional perks. Pumpkin is packed with vitamin A (beta-carotene) and fiber, which supports eye health and digestion. Bananas provide potassium and vitamin B6, which are great for heart health and energy. The eggs add a little protein, and the oil provides healthy fats. While this is certainly a treat, it’s a more nourishing one than most store-bought baked goods.
If you’re watching your sugar intake, the lower-sugar variation works well. For a higher protein option, you can add a scoop of unflavored protein powder (reduce the flour by ¼ cup to compensate).
Allergen note: This recipe contains eggs, wheat (gluten), and optional nuts. For dairy-free, use a plant-based milk and ensure your chocolate chips are dairy-free.
Conclusion
This easy one-bowl pumpkin banana bread is the kind of recipe that proves you don’t need fancy equipment or complicated techniques to bake something truly delicious. It’s forgiving, adaptable, and always delivers a moist, tender loaf that tastes like you spent hours in the kitchen—when really, you just stirred a few things together in one bowl.
I love this recipe because it’s honest. It doesn’t pretend to be something it’s not. It’s simple, it’s comforting, and it’s exactly what you want on a lazy Sunday morning or a busy weekday afternoon. Whether you’re baking for your family, a neighbor, or just yourself (no judgment), this bread is guaranteed to make someone’s day a little warmer.
Now I want to hear from you. Have you tried making pumpkin banana bread before? What’s your favorite add-in—chocolate chips, nuts, or something else entirely? Drop a comment below and let me know. And if you make this recipe, tag me in your photos—I love seeing your baking adventures!
Frequently Asked Questions
Can I use frozen bananas for this recipe?
Absolutely! Frozen bananas work great. Just thaw them completely at room temperature or in the microwave. They’ll be very soft and might release some liquid. Drain off any excess liquid before mashing, and proceed with the recipe as written.
Can I make this bread without pumpkin?
You can, but it won’t be the same recipe. If you want a plain banana bread, simply omit the pumpkin and increase the oil to ½ cup. You might also want to add an extra ¼ cup of flour to compensate for the missing moisture. But honestly, the pumpkin adds so much moisture and flavor—I’d recommend keeping it.
Why did my bread sink in the middle?
A sunken middle usually means the bread was underbaked or the oven temperature was too low. Make sure your oven is properly preheated to 350°F and that you’re using an oven thermometer to verify the temperature. Also, avoid opening the oven door during the first 30 minutes of baking, as the cold air can cause the bread to collapse.
Can I use whole wheat flour instead of all-purpose?
Yes, but the texture will be denser and slightly nuttier. I recommend using a mix of half whole wheat and half all-purpose for the best results. If you use 100% whole wheat, add an extra tablespoon of milk or water to keep the bread from drying out.
How do I know when the bread is done baking?
Insert a toothpick or a thin knife into the center of the loaf. If it comes out clean or with just a few moist crumbs (not wet batter), it’s done. The top should be golden brown and spring back when lightly touched. If the toothpick comes out with wet batter, bake for another 5 minutes and check again.
Pin This Recipe!
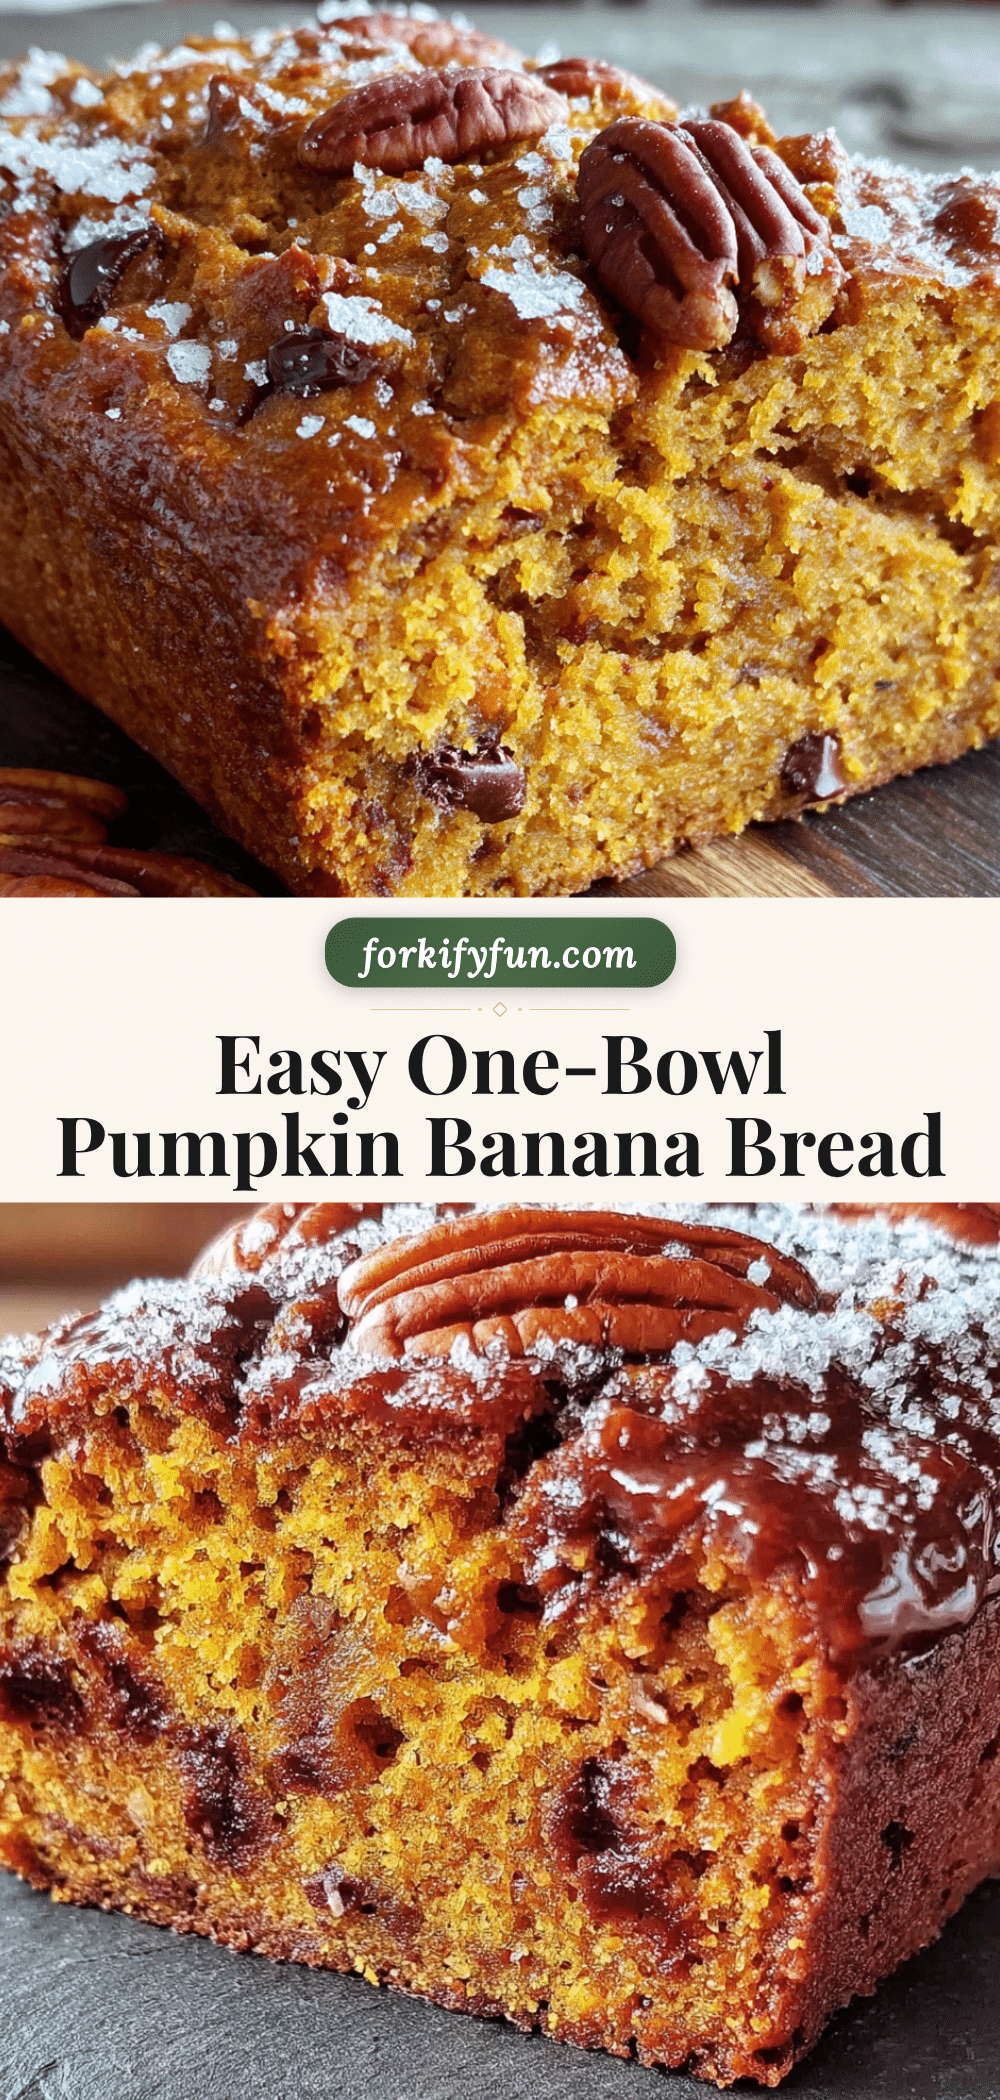
Easy One-Bowl Pumpkin Banana Bread (No Mixer) Best Recipe
This easy one-bowl pumpkin banana bread is incredibly moist, perfectly spiced, and comes together in about ten minutes of active work. No mixer required, just one bowl and a wooden spoon for a delicious fall treat.
- Prep Time: 10 minutes
- Cook Time: 55 minutes
- Total Time: 1 hour 5 minutes
- Yield: 10 servings 1x
- Category: Quick Bread
- Cuisine: American
Ingredients
- 2 large ripe bananas (or 3 medium)
- 1 cup pumpkin puree (not pumpkin pie filling)
- ¾ cup granulated sugar
- ¼ cup light brown sugar, packed
- 2 large eggs, room temperature
- ⅓ cup vegetable oil (or canola, avocado, or melted coconut oil)
- 1 teaspoon vanilla extract
- 1¾ cups all-purpose flour (spooned and leveled)
- 1 teaspoon baking soda
- ½ teaspoon baking powder
- ½ teaspoon salt
- 1½ teaspoons ground cinnamon
- ½ teaspoon ground nutmeg
- ¼ teaspoon ground ginger
- ½ cup optional add-ins: chocolate chips, chopped walnuts, or pecans
Instructions
- Preheat oven to 350°F (175°C). Line a 9×5-inch loaf pan with parchment paper, leaving overhang on the long sides. Lightly grease the parchment.
- In a large mixing bowl, mash the ripe bananas with a fork or potato masher until mostly smooth with a few small lumps.
- Add pumpkin puree, granulated sugar, brown sugar, eggs, vegetable oil, and vanilla extract. Stir until well combined and smooth.
- Sprinkle flour, baking soda, baking powder, salt, cinnamon, nutmeg, and ginger evenly over the wet mixture. Stir gently until just combined; a few lumps are fine. Do not overmix.
- If using add-ins, gently fold them in with about 10-12 strokes.
- Pour batter into the prepared loaf pan and smooth the top.
- Bake for 50-60 minutes, until a toothpick inserted into the center comes out clean or with a few moist crumbs. If browning too quickly, tent with foil at 40 minutes.
- Cool in the pan for 10 minutes, then lift out using parchment and transfer to a wire rack to cool completely (at least 1 hour) before slicing.
Notes
For best results, use very ripe bananas. Do not overmix the batter. Let the bread cool completely before slicing to prevent crumbling. Store in an airtight container at room temperature for up to 4 days. Freezes well for up to 3 months.
Nutrition
- Serving Size: 1 slice
- Calories: 245
- Sugar: 19
- Sodium: 280
- Fat: 9
- Saturated Fat: 1.5
- Carbohydrates: 38
- Fiber: 2
- Protein: 4
Keywords: pumpkin banana bread, one bowl, no mixer, easy, fall recipe, moist bread