Sunday afternoon, the couch was already claimed, and the only thing I wanted was this layered taco dip. Not the fancy kind with a million steps, but the kind you can throw together during a commercial break and still feel like you’ve done something right. The kind that disappears before halftime, leaving only smudges of sour cream on the edges of the bowl.
I remember the first time I made it for a group. It was a last-minute decision, the kind born from a fridge full of odds and ends and a sudden wave of people showing up. I had a block of cream cheese, a can of refried beans, and a bag of shredded lettuce staring back at me. Honestly, I wasn’t sure it would work. But something about layering those simple ingredients felt right, like building a little edible promise of a good time.
This dip isn’t about being complicated. It’s about being exactly what you need it to be: hearty, cool, spicy, and creamy all at once. It’s the kind of recipe that makes you look like you planned ahead when you really just got lucky with your grocery run. And once you taste that cold, crunchy bite with a warm chip, you’ll understand why it’s the first thing to go.
So grab your biggest platter and a bag of your favorite chips. This one’s for the moments that matter, no stress required.
Why You’ll Love This Recipe
I’ve tested this dip more times than I can count, tweaking the layers and ratios until it felt just right. It’s not just another recipe you’ll find online—it’s the one I bring to every potluck, every game day, every lazy Sunday hangout. Here’s why it works every single time.
- Quick & Easy: Comes together in under 20 minutes, perfect for last-minute guests or halftime cravings.
- Simple Ingredients: No fancy grocery trips needed; you likely already have everything in your kitchen.
- Perfect for Game Day: Great for football parties, Super Bowl gatherings, or any casual get-together.
- Crowd-Pleaser: Always gets rave reviews from kids and adults alike.
- Unbelievably Delicious: The texture and flavor combo is next-level comfort food.
What makes this dip different? It’s the balance. The creamy layers aren’t too heavy, the salsa isn’t too watery, and the cheese stays exactly where it should be. I’ve learned the hard way that a soggy dip is a sad dip. This version stays firm and scoopable, even after sitting out for a while. It’s the kind of recipe that makes you close your eyes after the first bite—comfort food reimagined, faster and with the same soul-soothing satisfaction.
Perfect for impressing guests without stress, or turning a simple snack into something memorable.
What Ingredients You Will Need
This recipe uses simple, wholesome ingredients to deliver bold flavor and satisfying texture without the fuss. Most are pantry staples, but a few fresh items make all the difference.
- Refried beans (1 can, 16 oz) – The base layer. Use traditional or vegetarian, your choice. I prefer Rosarita for a smooth, creamy texture.
- Cream cheese (8 oz, softened) – Adds richness and helps the dip hold its shape. Let it sit out for 30 minutes before mixing.
- Sour cream (1 cup) – For that cool, tangy layer. Full-fat works best, but Greek yogurt is a fine swap.
- Taco seasoning (1 packet, or 2 tbsp homemade) – The flavor backbone. I use McCormick for consistency, but homemade is easy: chili powder, cumin, garlic powder, onion powder, paprika, salt, and pepper.
- Salsa (1 cup) – Choose your heat level. I like a medium chunky salsa for texture. Drain it slightly to avoid a watery dip.
- Shredded lettuce (2 cups) – Adds crunch. Iceberg or romaine works best.
- Shredded cheddar cheese (1.5 cups) – Sharp cheddar is my go-to. Pre-shredded is fine, but freshly grated melts better and tastes richer.
- Diced tomatoes (1 cup) – Fresh or canned (drained). Cherry tomatoes work great in a pinch.
- Sliced black olives (1/2 cup) – Adds a briny pop. Optional but highly recommended.
- Fresh jalapeños (2-3, sliced) – For heat. Remove seeds if you want less spice.
- Green onions (1/4 cup, sliced) – For a mild onion finish.
- Fresh cilantro (1/4 cup, chopped) – Optional, but brightens everything up.
- Tortilla chips – For serving. Thick, sturdy chips are best for scooping.
Equipment Needed
You don’t need much for this one, which is part of the beauty.
- Large platter or 9×13 dish – A clear glass dish shows off the layers nicely. I’ve used a wooden board in a pinch, but glass is easier to serve from.
- Hand mixer or stand mixer – For blending the cream cheese layer. A fork works too, but a mixer makes it silky smooth.
- Spatula – For spreading layers evenly.
- Cutting board and knife – For prepping veggies.
- Measuring cups and spoons – For precision, though eyeballing works after the first time.
If you don’t have a hand mixer, just soften the cream cheese really well and whisk by hand. It’s a small workout, but worth it.
Preparation Method
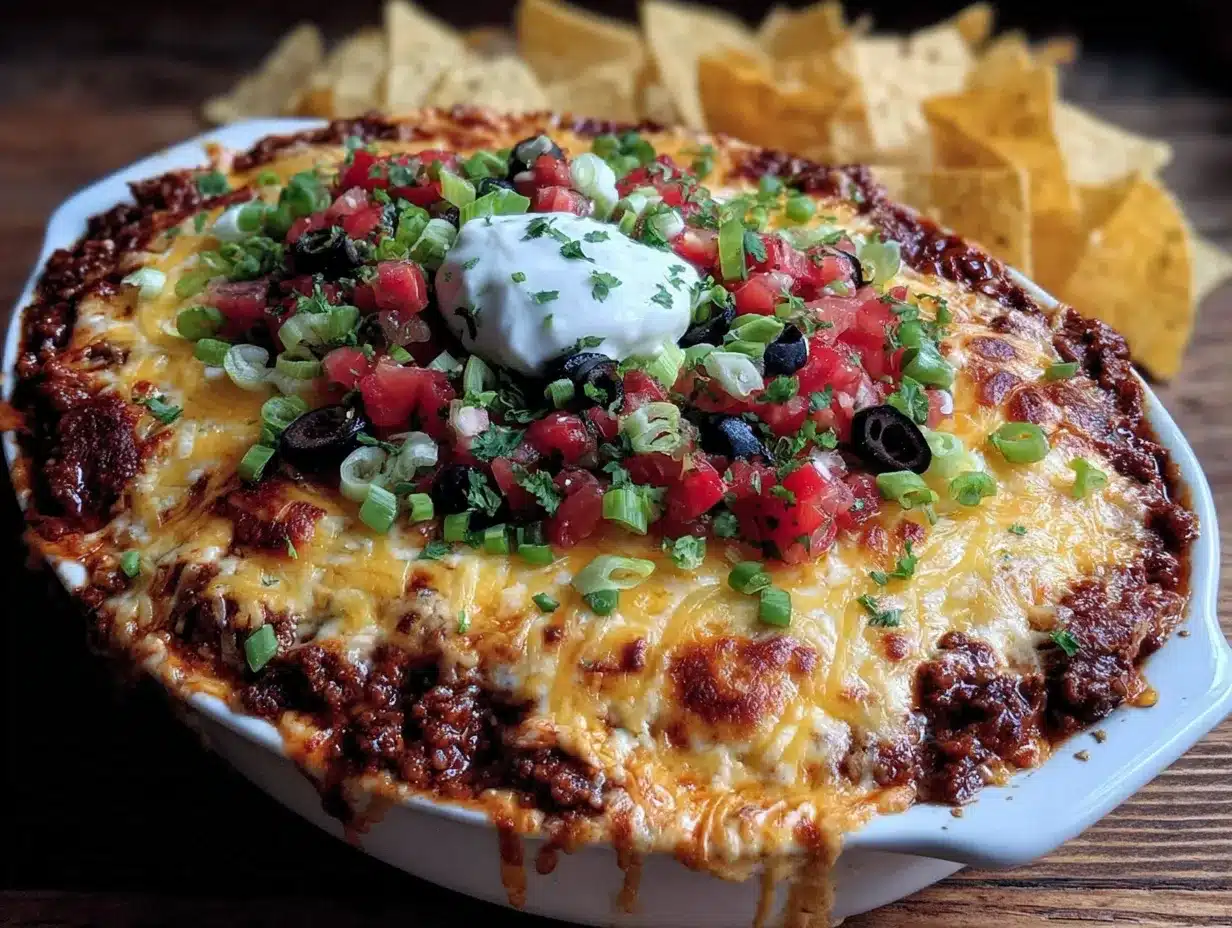
- Soften the cream cheese – Take it out of the fridge 30 minutes before starting. If you’re in a rush, microwave it in 10-second bursts until just soft (don’t melt it!).
- Make the cream cheese base – In a medium bowl, beat the softened cream cheese with a hand mixer until smooth. Add the sour cream and taco seasoning, then beat again until fully combined. It should be light and fluffy, like a savory frosting. (Taste it here—adjust seasoning if needed.)
- Spread the refried beans – Using a spatula, spread the can of refried beans evenly across the bottom of your platter or dish. It’s okay if it’s a little thick; this is the anchor layer.
- Add the cream cheese layer – Gently spread the cream cheese mixture over the beans. Take your time to make it even—this prevents the salsa from sinking in later.
- Layer the salsa – Spoon the salsa over the cream cheese layer. Spread it gently, leaving a small border around the edges so the layers show. If your salsa is watery, drain it first in a fine-mesh sieve.
- Add the shredded lettuce – Sprinkle the lettuce evenly over the salsa. It should cover the whole surface like a green blanket.
- Top with cheese – Sprinkle the shredded cheddar over the lettuce. Don’t be shy—this is the crown.
- Add the toppings – Scatter the diced tomatoes, sliced black olives, jalapeños, green onions, and cilantro over the cheese. Make it look intentional, like a work of art.
- Chill (optional but recommended) – Cover and refrigerate for at least 30 minutes before serving. This helps the layers set and makes scooping easier. If you’re in a rush, serve immediately—it’s still amazing.
- Serve – Place the platter on the table with a big bowl of tortilla chips. Watch it disappear.
Sensory cue: When you spread the cream cheese layer, it should feel like frosting a cake—smooth and yielding. The salsa should look glossy but not weepy. The finished dip should look like a striped party in a dish.
Cooking Tips & Techniques
I’ve made this dip more times than I can count, and I’ve made every mistake in the book. Here’s what I’ve learned.
Don’t skip softening the cream cheese. Cold cream cheese creates lumps that never quite smooth out. Trust me, I’ve tried to rush it, and the dip looked like cottage cheese. Not cute.
Drain your salsa. This is the number one tip for avoiding a soggy dip. Too much liquid makes the layers slide around and turns the lettuce limp. A quick drain in a sieve saves the day.
Layer with intention. Spread each layer gently, especially the cream cheese over the beans. If you press too hard, they’ll mix together, and you’ll lose the beautiful stripes. Think of it like building a lasagna—gentle hands.
Let it rest. The dip tastes better after 30 minutes in the fridge. The flavors meld, the layers settle, and the chips scoop up everything perfectly. If you serve it right away, it’s still good, but the rested version is next-level.
Use sturdy chips. Thin tortilla chips will break under the weight of the dip. Go for thick, restaurant-style chips or scoop-shaped ones. Your guests will thank you.
Variations & Adaptations
This dip is a blank canvas. Here are a few ways to make it your own.
- Spicy Southwest: Add a layer of seasoned ground beef or chorizo between the beans and cream cheese. Also, mix in a can of drained corn and black beans for extra texture. This version is a meal on its own.
- Guacamole Layer: Spread a layer of guacamole over the cream cheese before adding the salsa. It adds richness and a fresh, buttery note. I’ve done this for parties and it’s always a hit.
- Low-Carb / Keto: Skip the refried beans and use a layer of seasoned cream cheese mixed with shredded chicken. Serve with pork rinds or cucumber slices instead of chips.
- Vegan: Use vegan cream cheese, vegan sour cream, and a dairy-free cheddar shred. Most refried beans are naturally vegan, but double-check the label. It’s surprisingly good.
- Breakfast Dip: Swap the taco seasoning for a little cumin and smoked paprika, and serve with warm flour tortillas or toasted baguette slices. It’s a weird but wonderful brunch move.
I once made a version with leftover smoked brisket on top, and it was the best thing I’ve ever put in my mouth. Don’t be afraid to experiment.
Serving & Storage Suggestions
Serve this dip cold or at room temperature—I prefer it cold for the contrast with warm chips. Arrange the chips around the platter or in a separate bowl. A few extra jalapeño slices on top make it look intentional.
What to serve with it: Tortilla chips are classic, but it’s also great with crunchy veggies (bell peppers, celery, cucumber rounds) or warm pita chips. If you’re feeling fancy, serve it alongside some flavorful smoked brisket nachos for a full spread. And if you want to keep the party going, a batch of crispy buffalo chicken dip stuffed pretzel bites would be the perfect companion.
Storage: Cover the platter tightly with plastic wrap or transfer leftovers to an airtight container. It keeps in the fridge for up to 3 days. The lettuce will soften a bit, but it’s still delicious. Don’t freeze it—the texture will suffer.
Reheating: This dip is best enjoyed cold. If you want it warm, microwave individual portions for 20-30 seconds, but know the layers will blend. Alternatively, serve it cold and let the chips warm it up in your mouth.
Flavor development: The dip actually gets better after a day in the fridge. The flavors meld together, and the cream cheese layer absorbs the taco seasoning beautifully. Just add fresh lettuce and tomatoes right before serving if you’re prepping ahead.
Nutritional Information & Benefits
Per serving (about 1/8 of the dip, without chips):
- Calories: 280
- Protein: 10g
- Fat: 18g
- Carbohydrates: 15g
- Fiber: 4g
- Sugar: 4g
Health benefits: Refried beans are a great source of fiber and plant-based protein, which helps keep you full. Cream cheese and sour cream provide calcium and healthy fats for energy. The fresh veggies (lettuce, tomatoes, jalapeños) add vitamins A and C, plus antioxidants. It’s not a health food, but it’s a balanced indulgence.
Dietary considerations: This recipe is naturally gluten-free if you use certified gluten-free taco seasoning and chips. For a lower-fat version, use reduced-fat cream cheese and sour cream. It’s also easy to make vegetarian or vegan with simple swaps.
Potential allergens: Dairy (cream cheese, sour cream, cheddar).
I love that this dip feels like a treat but still has some redeeming qualities. It’s the kind of snack you can feel good about serving, even if you eat way too much of it.
Conclusion
This easy layered taco dip is the kind of recipe that makes you the hero of any party without breaking a sweat. It’s quick, forgiving, and endlessly customizable. Whether you’re hosting a Super Bowl watch party, a casual dinner with friends, or just need a snack that feels special, this dip delivers every single time.
I love it because it reminds me of the best kind of gatherings: low-pressure, full of laughter, and centered around good food. It’s not about perfection—it’s about sharing something delicious with people you care about.
So go ahead, make it your own. Swap the beans for something else, add extra heat, or pile on the toppings. And when you do, come back and tell me how it turned out. Drop a comment below, share a photo, or tag me on social media. I can’t wait to see your version!
Until next time, happy dipping.
Frequently Asked Questions
Can I make this dip ahead of time?
Yes! You can assemble the entire dip (except the lettuce and fresh tomatoes) up to 24 hours in advance. Cover and refrigerate. Add the lettuce and tomatoes just before serving to keep them crisp.
How do I keep the dip from getting watery?
Drain your salsa well and avoid watery toppings. Also, let the dip rest in the fridge for at least 30 minutes before serving—this helps the layers set and reduces moisture separation.
Can I use homemade taco seasoning?
Absolutely. Mix 1 tablespoon chili powder, 1 teaspoon cumin, 1 teaspoon garlic powder, 1/2 teaspoon onion powder, 1/2 teaspoon paprika, 1/2 teaspoon salt, and 1/4 teaspoon black pepper. It’s fresher and lets you control the spice level.
What if I don’t have a large platter?
A 9×13 baking dish works perfectly. You can also use a large pie plate or even a rimmed serving tray. The key is to have enough surface area for all the layers to shine.
How do I make this dip spicier?
Use hot salsa, add extra fresh jalapeños (with seeds), or mix a teaspoon of cayenne pepper into the cream cheese layer. You can also top it with pickled jalapeños for a tangy kick.
Pin This Recipe!

Easy Layered Taco Dip: The Best Game Day Appetizer

This easy layered taco dip is the perfect game day appetizer—creamy, crunchy, and full of flavor. It comes together in under 20 minutes with simple ingredients and is always a crowd-pleaser.
- Prep Time: 15 minutes
- Cook Time: 0 minutes
- Total Time: 15 minutes
- Yield: 8 servings 1x
- Category: Appetizer
- Cuisine: Mexican
Ingredients
- 1 can (16 oz) refried beans
- 8 oz cream cheese, softened
- 1 cup sour cream
- 1 packet (or 2 tbsp) taco seasoning
- 1 cup salsa, drained
- 2 cups shredded lettuce
- 1.5 cups shredded cheddar cheese
- 1 cup diced tomatoes
- 1/2 cup sliced black olives
- 2–3 fresh jalapeños, sliced
- 1/4 cup sliced green onions
- 1/4 cup chopped fresh cilantro (optional)
- Tortilla chips for serving
Instructions
- Soften the cream cheese by letting it sit at room temperature for 30 minutes, or microwave in 10-second bursts until just soft.
- In a medium bowl, beat the softened cream cheese with a hand mixer until smooth. Add the sour cream and taco seasoning, then beat until fully combined and fluffy.
- Spread the refried beans evenly across the bottom of a large platter or 9×13 dish.
- Gently spread the cream cheese mixture over the beans, taking care not to press too hard.
- Spoon the drained salsa over the cream cheese layer, leaving a small border around the edges.
- Sprinkle the shredded lettuce evenly over the salsa.
- Top with the shredded cheddar cheese.
- Scatter the diced tomatoes, sliced black olives, jalapeños, green onions, and cilantro over the cheese.
- Cover and refrigerate for at least 30 minutes before serving (optional but recommended).
- Serve with tortilla chips.
Notes
For best results, drain the salsa to avoid a watery dip. Let the dip rest in the fridge for at least 30 minutes to allow layers to set. Use sturdy tortilla chips for scooping.
Nutrition
- Serving Size: 1/8 of dip (without
- Calories: 280
- Sugar: 4
- Sodium: 650
- Fat: 18
- Saturated Fat: 10
- Carbohydrates: 15
- Fiber: 4
- Protein: 10
Keywords: layered taco dip, game day appetizer, easy dip, taco dip, party dip


