That first crackle of a graham cracker under the spoon—the one that breaks just right, not into dust but into a satisfying little crunch—still takes me straight to the edge of my aunt’s fire pit in late August. The air was always thick with woodsmoke and the sticky sweetness of melted marshmallow, and you’d sit there, half-burned tongue and all, waiting for that perfect, gooey bite. I never wanted the feeling to end, but let’s be honest, building a fire just for a s’more is a whole production. So, I did what any slightly impatient, dessert-obsessed person would do. I brought the campfire inside.
This isn’t about replacing the real thing—nothing ever will. It’s about capturing that same, messy joy in a way that fits a busy Labor Day weekend. You know, when you want the payoff without the smoke in your eyes. These Easy Mini S’mores Icebox Cakes are my little shortcut to that feeling. They’re tiny, they’re cold, and they somehow taste exactly like a summer night.
Why You’ll Love This Recipe
I’ve tested this idea more times than I care to count. The first version was a soggy mess. The second was too hard. But this one? This is the one I bring to every potluck. It’s the kind of dessert that disappears before the burgers are even done.
- No-Bake and Almost Effortless: You don’t even need to turn on the oven. If you can layer ingredients in a jar, you can make this. It’s the perfect Labor Day recipe when you’d rather be outside.
- Made with Simple Ingredients: We’re talking graham crackers, chocolate pudding, marshmallows, and cream. That’s it. No fancy grocery store run required.
- Perfect for a Crowd: These individual servings mean no slicing, no mess, and no fighting over the last piece. Everyone gets their own little jar of happiness.
- Unbelievably Creamy and Crunchy: The magic is in the texture. The pudding soaks into the graham crackers just enough to make them cake-like, while the whipped cream keeps everything light. It’s a cold, creamy, crunchy dream.
- Make-Ahead Magic: You can put these together the night before. Honestly, they taste even better on day two. That makes them the ultimate stress-free dessert for your holiday cookout.
What Ingredients You Will Need
This recipe uses simple, everyday ingredients to build layers of flavor and texture. You probably already have most of them in your pantry. The key is using quality chocolate pudding—it makes all the difference.
- Graham Crackers (about 12 full sheets): The backbone of our s’more. I prefer the classic Honey Maid brand for their sturdy texture. You’ll break them into squares that fit your jars. (Pro tip: if you can’t find them, digestive biscuits work in a pinch, but the flavor is a little different.)
- Instant Chocolate Pudding Mix (1 box, 3.9 oz): This is our shortcut to a silky, rich chocolate layer. I’ve tried making it from scratch, and honestly, the instant stuff gives you that nostalgic, diner-style pudding that just works here. Use the kind you cook on the stove if you prefer a thicker texture.
- Cold Whole Milk (2 cups): For the pudding. Whole milk gives the richest, creamiest result, but 2% will work just fine. Don’t use skim—it gets a little watery.
- Heavy Whipping Cream (1 cup): We’re making our own whipped cream because it’s so much better than the stuff in a can. It adds a light, airy cloud between the layers. If you’re in a pinch, you can use Cool Whip, but fresh is worth the two minutes it takes.
- Powdered Sugar (2 tablespoons): Just a touch to sweeten the cream. It dissolves instantly, so no gritty texture.
- Vanilla Extract (1/2 teaspoon): A little goes a long way in the whipped cream. It rounds out the sweetness and adds that “homemade” taste.
- Mini Marshmallows (1 1/2 cups): For that classic s’more chew. I use mini ones because they distribute evenly and soften perfectly in the fridge. If you only have big ones, give them a quick snip with kitchen scissors.
- Optional Toppings: A sprinkle of flaky sea salt, a drizzle of melted chocolate, or a few extra crushed graham crackers for crunch.
Equipment Needed
You don’t need a pastry chef’s kitchen for this one. A few basic tools and you’re golden.
- 4 (8 oz) Mason Jars or Small Glasses: I use wide-mouth mason jars because they’re cute and portable. Any small glass, ramekin, or even a tumblr will work. Just make sure they’re clear so you can see the layers.
- Medium Mixing Bowls (2): One for the pudding, one for the whipped cream.
- Whisk or Electric Hand Mixer: You can whisk the cream by hand, but a hand mixer makes it a two-minute job. I’ve done it with a fork before—it’s a workout, but it works.
- Measuring Cups and Spoons: Standard stuff for accuracy.
- Spatula: For scraping every last bit of that pudding into the jars. Waste not, want not.
- Small Offset Spatula or Butter Knife: For spreading the layers evenly.
Preparation Method
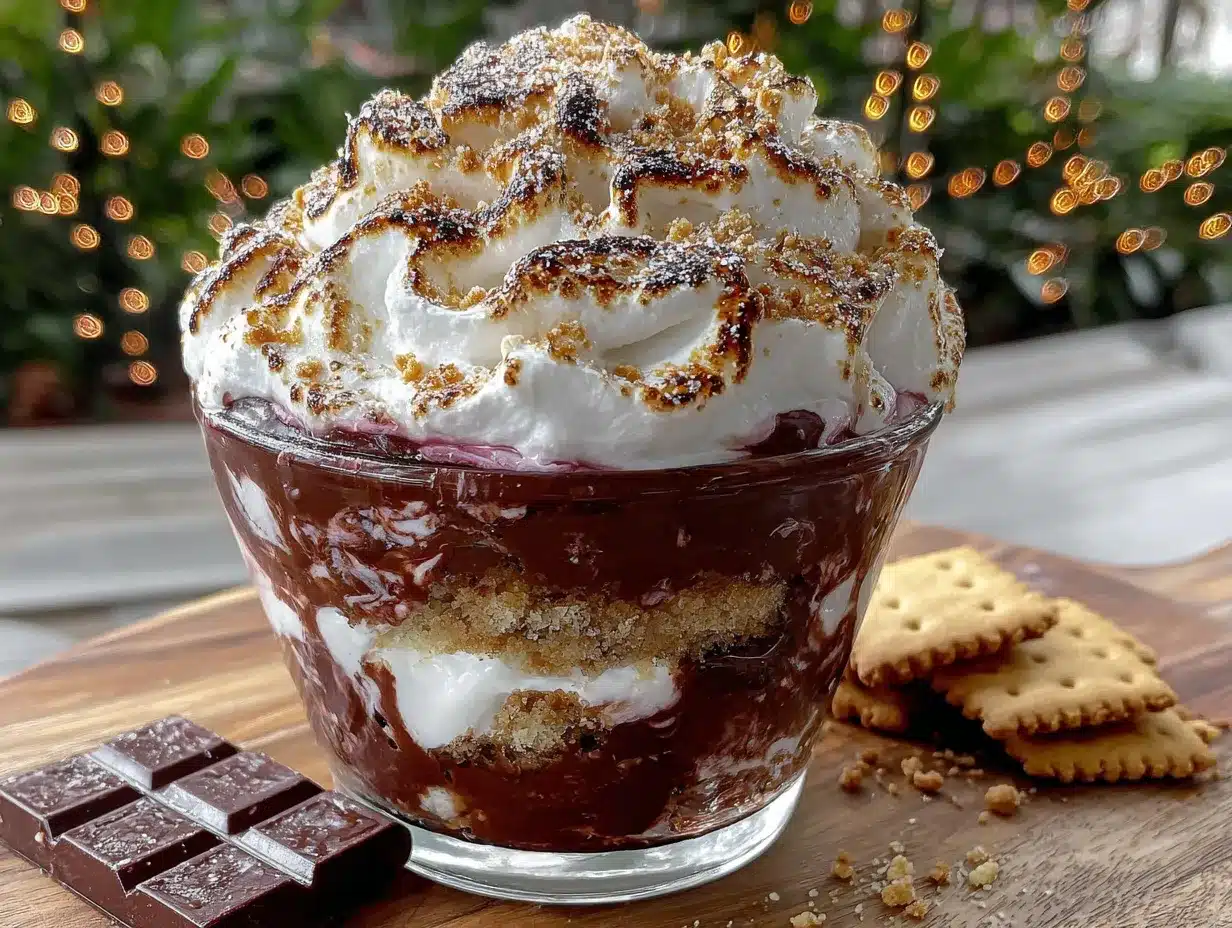
This is the fun part. It’s like building a tiny, edible sandcastle. Take your time, and don’t stress about perfection—the messy layers are part of the charm.
- Make the Pudding (5 minutes): In a medium bowl, whisk together the instant chocolate pudding mix and 2 cups of cold whole milk. Whisk for about 2 minutes until it starts to thicken. It will be loose at first, but don’t worry. Let it sit for 5 minutes to set up completely. While it sits, move on to step 2.
- Whip the Cream (3 minutes): In a separate medium bowl (or the bowl of your stand mixer), pour in 1 cup of cold heavy whipping cream. Add 2 tablespoons of powdered sugar and 1/2 teaspoon of vanilla extract. Using your hand mixer, beat on medium-high speed until soft peaks form. You’re looking for a texture that’s thick but still billowy—like a cloud. Stop before it turns into butter. (I learned that lesson the hard way.)
- Prep the Crackers (2 minutes): Break your graham crackers into squares that fit snugly inside your jars. You’ll need about 3 squares per jar, depending on the size. Set them aside.
- Layer 1: The Cracker Base (2 minutes): Place one graham cracker square at the bottom of each jar. Press it down gently so it sits flat. This is your foundation.
- Layer 2: The Pudding (3 minutes): Spoon about 2 tablespoons of the chocolate pudding over the cracker in each jar. Spread it evenly with the back of your spoon or a small offset spatula. It doesn’t need to be perfect.
- Layer 3: The Marshmallows (1 minute): Sprinkle a small handful of mini marshmallows over the pudding layer. Don’t go overboard—you need room for the next layers.
- Layer 4: The Cream (3 minutes): Add a generous dollop of your whipped cream over the marshmallows. Use about 2 tablespoons per jar. Spread it gently to the edges.
- Repeat the Layers (5 minutes): Now, do it all over again. Add another graham cracker square, another 2 tablespoons of pudding, another sprinkle of marshmallows, and another dollop of cream. You should have two full layers of everything.
- Top with a Final Cracker and Marshmallow (2 minutes): For the crowning glory, place one last graham cracker square on top. Add a few extra mini marshmallows and a drizzle of leftover chocolate pudding if you have any. This is the part that makes it look like a real s’more.
- Chill (at least 4 hours, preferably overnight): This is the hardest step. Cover each jar with a lid or plastic wrap and place them in the refrigerator. The graham crackers need time to soften and absorb the pudding. Trust me, the wait is worth it. After 4 hours, they’re good. After 8 hours, they’re magic. The crackers turn into a soft, cake-like layer that just melts in your mouth.
Cooking Tips & Techniques
I’ve made these little cakes more times than I can count, and I’ve learned a few things along the way. Here’s how to get it right every time.
- Don’t Skip the Chill Time: I know it’s tempting to dig in right away. But if you eat them too soon, the graham crackers will be crunchy, and the layers won’t have melded together. The magic happens in the fridge. Patience, my friend.
- Use Cold Ingredients for the Cream: If your cream isn’t cold, it won’t whip properly. I stick my bowl and beaters in the freezer for 10 minutes before I start. It makes a huge difference.
- Watch Your Whipped Cream: Don’t walk away from your mixer. Whipped cream goes from perfect to butter in about 15 seconds. When you see soft peaks forming, stop. It should hold its shape but still look soft and luscious.
- Make It Your Own: I’ve tried adding a layer of peanut butter between the cracker and pudding, and it was incredible. You can also use white chocolate pudding or even a layer of fresh berries. Don’t be afraid to experiment.
- The Soggy Cracker Problem: If you’re worried about your crackers getting too soft (some people like them with a little bite), you can toast them in a dry pan for a minute before layering. It gives them a little more structure.
Variations & Adaptations
This recipe is a blank canvas. Here are a few ways I’ve twisted it up over the years.
- The S’mores Dip Twist: Instead of individual jars, layer everything in a small baking dish. Skip the chilling step and broil it for 2-3 minutes until the marshmallows are golden and bubbly. Serve it with extra graham crackers for dipping. It’s a total crowd-pleaser.
- Peanut Butter S’mores: Add a thin layer of creamy peanut butter on top of the first graham cracker. The salty-sweet combo with the chocolate is next level. I did this for a party once, and people lost their minds.
- Berry S’mores: Add a layer of fresh raspberries or sliced strawberries between the pudding and the cream. The tartness cuts through the sweetness perfectly. It’s like a summer berry s’more.
- Vegan & Dairy-Free Version: Use a high-quality vegan graham cracker (like Annie’s or a gluten-free brand), a dairy-free chocolate pudding (made with oat or coconut milk), and a can of full-fat coconut cream for the whipped layer. It’s just as creamy and delicious.
- Gluten-Free Option: This one is easy. Just swap the regular graham crackers for a gluten-free version. Schär makes a good one. Everything else is naturally gluten-free.
Serving & Storage Suggestions
These little cakes are best served cold, straight from the fridge. The texture is perfect—creamy, slightly soft, with just a hint of crunch from the graham cracker.
- Serving: Pop the lid off the jar and serve immediately. You can add a final garnish of flaky sea salt, a drizzle of chocolate syrup, or a few extra mini marshmallows on top. They’re great for a Labor Day picnic, a backyard barbecue, or even a fancy dinner party.
- Storage: Keep them covered in the refrigerator for up to 3 days. The graham crackers will continue to soften, but they stay delicious. I actually prefer them on day two—the flavors have really melded together.
- Freezing: You can freeze these, but the texture of the cream changes a little. If you do freeze them, let them thaw in the fridge for about an hour before serving. I wouldn’t recommend it for the best experience, but it works in a pinch.
- Make-Ahead Tip: These are the ultimate make-ahead dessert. Assemble them the night before your party, and you’ll have zero stress on the day of. Just pull them out, add a garnish, and you’re done.
Nutritional Information & Benefits
Let’s be real—these are a treat. They’re not a health food, and that’s okay. But here’s what’s in them.
- Estimated Per Serving (1 jar): Calories: 380, Fat: 22g, Carbs: 44g, Protein: 6g, Sugar: 32g. These numbers are approximate and depend on your specific ingredients.
- Health Benefits: The milk and cream provide a good dose of calcium and vitamin D. The dark chocolate in the pudding has antioxidants. And honestly, the mental health benefit of enjoying a little dessert is real. Balance is key.
- Dietary Considerations: This recipe is vegetarian. It contains dairy and gluten. For a vegan version, see the variations section. It’s also easy to make nut-free by skipping the peanut butter variation.
- Personal Note: I love that these are portion-controlled. You get your own little jar, so there’s no temptation to go back for a second slice. It’s a small, satisfying indulgence that feels special without being over the top.
Conclusion
These Easy Mini S’mores Icebox Cakes are more than just a dessert. They’re a little moment of summer, captured in a jar. They’re the taste of a campfire without the smoke, the joy of a s’more without the mess. I love how simple they are, and I love how they make people smile.
I hope you give them a try this Labor Day weekend. Make them your own. Add a little peanut butter, throw in some berries, or just keep it classic. Whatever you do, don’t forget to share them with the people you love. That’s what this holiday is all about, right?
I’d love to hear how yours turn out. Drop a comment below and let me know what twist you tried. Did you add something crazy? Did your kids love them? Tell me everything. And if you’re looking for another easy, no-bake treat, you might also love my creamy chocolate peanut butter overnight oats for a quick breakfast. Happy Labor Day, friends!
Frequently Asked Questions
Can I use a different type of pudding?
Absolutely. White chocolate, butterscotch, or even vanilla pudding would work great. The chocolate is the classic s’mores flavor, but don’t be afraid to mix it up.
How long do these last in the fridge?
They’re best within 3 days. After that, the graham crackers get very soft, and the cream can start to separate. I promise they won’t last that long, though.
Can I make these in a large dish instead of jars?
Yes! Just layer everything in a 9×9 baking dish or a trifle bowl. You’ll need to adjust the chilling time slightly—give it at least 6 hours. Scoop it out like a pudding cake.
Do I have to use instant pudding?
No, you can use cooked pudding if you prefer. Just make sure it’s completely cool before you start layering. Warm pudding will melt the cream and make everything runny.
Can I toast the marshmallows on top?
You can, but it’s tricky with the jars. If you want that toasted flavor, use a kitchen torch to lightly brown the top marshmallows just before serving. It adds a lovely smoky note.
Pin This Recipe!
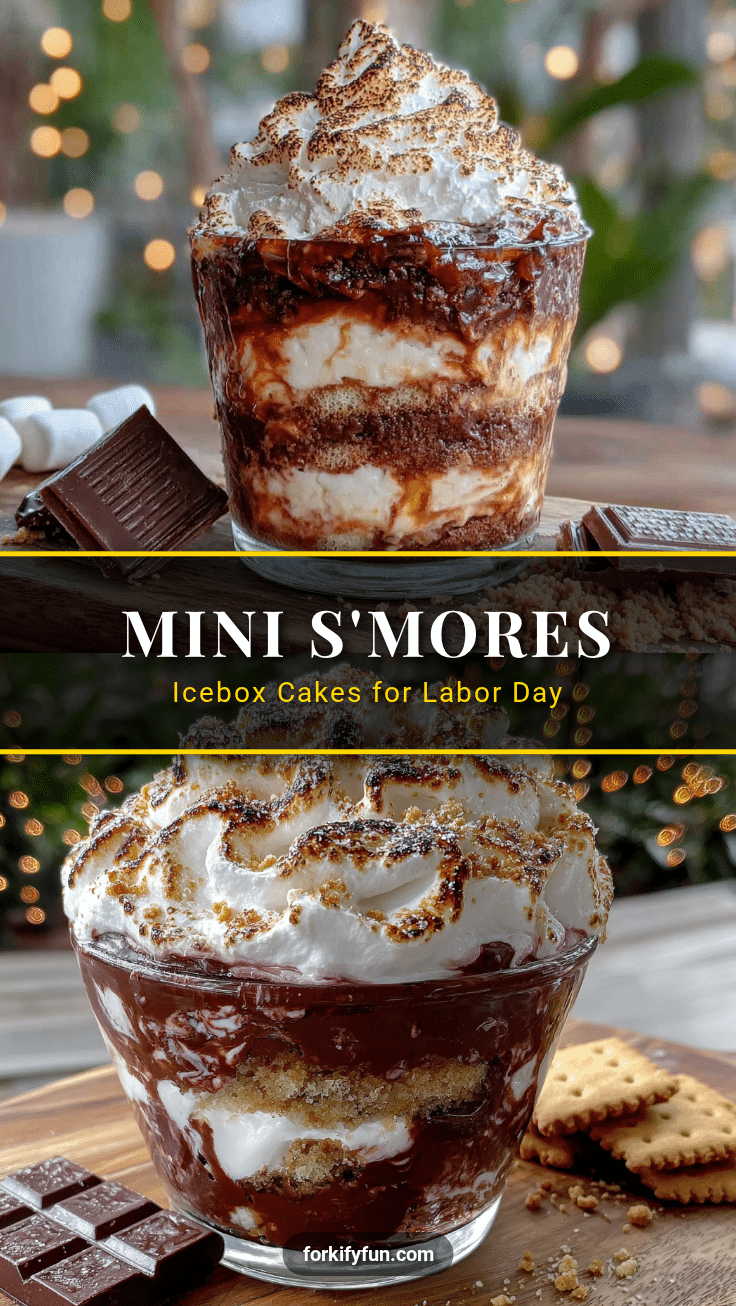
Easy Mini Smores Icebox Cakes for Labor Day

These no-bake mini s’mores icebox cakes capture the joy of a campfire s’more in a jar. Layered with graham crackers, chocolate pudding, marshmallows, and whipped cream, they’re the perfect make-ahead dessert for a Labor Day weekend cookout.
- Prep Time: 20 minutes
- Cook Time: 0 minutes
- Total Time: 4 hours 20 minutes (includes chilling)
- Yield: 4 servings 1x
- Category: Dessert
- Cuisine: American
Ingredients
- 12 full sheets graham crackers (about 3 squares per jar)
- 1 box (3.9 oz) instant chocolate pudding mix
- 2 cups cold whole milk
- 1 cup heavy whipping cream
- 2 tablespoons powdered sugar
- 1/2 teaspoon vanilla extract
- 1 1/2 cups mini marshmallows
- Optional: flaky sea salt, melted chocolate, crushed graham crackers for topping
Instructions
- Make the Pudding: In a medium bowl, whisk together the instant chocolate pudding mix and 2 cups of cold whole milk. Whisk for about 2 minutes until it starts to thicken. Let it sit for 5 minutes to set up completely.
- Whip the Cream: In a separate medium bowl, combine 1 cup of cold heavy whipping cream, 2 tablespoons of powdered sugar, and 1/2 teaspoon of vanilla extract. Beat with a hand mixer on medium-high speed until soft peaks form. Stop before it turns into butter.
- Prep the Crackers: Break the graham crackers into squares that fit snugly inside your jars. You’ll need about 3 squares per jar.
- Layer 1 – Cracker Base: Place one graham cracker square at the bottom of each jar. Press it down gently.
- Layer 2 – Pudding: Spoon about 2 tablespoons of chocolate pudding over the cracker in each jar. Spread evenly.
- Layer 3 – Marshmallows: Sprinkle a small handful of mini marshmallows over the pudding layer.
- Layer 4 – Cream: Add a generous dollop (about 2 tablespoons) of whipped cream over the marshmallows. Spread gently to the edges.
- Repeat Layers: Add another graham cracker square, another 2 tablespoons of pudding, another sprinkle of marshmallows, and another dollop of cream. You should have two full layers.
- Top with Final Cracker and Marshmallow: Place one last graham cracker square on top. Add a few extra mini marshmallows and a drizzle of leftover chocolate pudding if desired.
- Chill: Cover each jar with a lid or plastic wrap and refrigerate for at least 4 hours, preferably overnight. The graham crackers will soften and absorb the pudding.
Notes
Don’t skip the chill time—the graham crackers need to soften for the best texture. Use cold ingredients for the cream to whip properly. For a vegan version, use dairy-free pudding, coconut cream, and vegan graham crackers. These can be stored in the refrigerator for up to 3 days.
Nutrition
- Serving Size: 1 jar
- Calories: 380
- Sugar: 32
- Sodium: 320
- Fat: 22
- Saturated Fat: 13
- Carbohydrates: 44
- Fiber: 1
- Protein: 6
Keywords: s'mores, icebox cake, no-bake dessert, Labor Day, mini dessert, mason jar dessert, chocolate pudding, marshmallow, graham cracker