“Mom, can I just have a lunchable today?” My six-year-old asked this with the kind of desperate hope that usually means she’s expecting a no. I was standing there, staring into the fridge, wondering how we’d gotten to the point where pre-packaged plastic trays felt like a treat. And honestly? I almost caved. But then I remembered the block of sharp cheddar in the drawer and the box of buttery crackers in the pantry. I grabbed a small container, sliced the cheese into chunky squares, tossed in some grapes and a handful of almonds, and called it done. She looked at it like I’d handed her a treasure chest. That was the moment I realized we didn’t need the plastic tray. We just needed the easy homemade bento box with cheese and crackers.
That first one was a mess, honestly. The crackers got a little soggy from the grapes, and I forgot to separate the cheese from the fruit. But she ate every bite and asked for another one the next day. So I started paying attention. I figured out which crackers held up best, how to keep everything fresh, and what combinations made her actually finish her lunch instead of trading it away. Over time, this became our go-to. Not just for school lunches, but for picnics, road trips, and those afternoons when everyone needs a snack that feels like a meal. It’s not fancy. It’s not complicated. It’s just good food packed in a way that makes sense.
What I love most about this easy homemade bento box with cheese and crackers is that it adapts to whatever you have. You don’t need a special container or a trip to the store. You just need a little creativity and the willingness to let your kid (or yourself) pick what goes in. It’s the kind of lunch that feels like a win for everyone. No packaging, no preservatives, and no fights over what’s for lunch. Just a simple, satisfying meal that comes together in minutes.
Why You’ll Love This Recipe
I’ve tested this concept dozens of times with my own family, and I can tell you it never gets old. The beauty of this lunch is that it’s not really a recipe in the traditional sense. It’s more like a formula you can tweak based on what you have, what you like, and how much time you have. And that’s exactly why it works so well.
- Quick & Easy: This comes together in under 10 minutes. No cooking, no heating, no fuss. Perfect for busy mornings when you’re packing lunches at lightning speed.
- Simple Ingredients: You probably already have everything you need. Cheese, crackers, fruit, veggies, maybe some nuts or protein. No special grocery trips required.
- Perfect for Busy Days: Great for school lunches, work lunches, picnics, road trips, or even a lazy afternoon snack plate. It travels beautifully.
- Crowd-Pleaser: Kids love the interactive nature of building their own bites. Adults love the balanced, satisfying combination. It’s a win-win.
- Unbelievably Customizable: The texture and flavor combos are endless. You can go sweet, savory, or a mix of both. It never gets boring.
What sets this apart from just throwing random snacks in a bag is the intentionality. I’ve learned through trial and error that separating moist ingredients from crunchy ones keeps everything fresh. I’ve discovered that certain cheeses pair better with specific crackers. I’ve figured out that adding a small treat—like a few dark chocolate chips or a mini cookie—makes the whole lunch feel special without going overboard. This isn’t just another lunch idea. It’s a system that works, tested by a mom who has packed a lot of lunches.
And honestly? There’s something deeply satisfying about opening a container and seeing all those colorful components lined up. It feels like a little gift you give yourself (or your kid) in the middle of the day. It’s comfort food reimagined—simple, fresh, and made with care.
What Ingredients You Will Need
This recipe uses simple, wholesome ingredients that come together to create a balanced, satisfying meal. The key is choosing ingredients that complement each other in texture and flavor. Here’s what you’ll need to build the perfect easy homemade bento box with cheese and crackers.
For the Cheese Selection
- Sharp cheddar cheese, cut into cubes (adds bold flavor and creamy texture; I prefer Cabot or Tillamook for consistent quality)
- Colby Jack or Monterey Jack cheese, sliced or cubed (mild and melty; great for kids who prefer less intense flavors)
- Baby bell cheese wheels (fun to unwrap and portion-controlled; kids love the red wax)
- String cheese, cut into bite-sized pieces (easy to eat and always a hit with little ones)
- Optional: Brie or goat cheese (for a more grown-up version; pairs wonderfully with fruit and honey)
For the Crackers
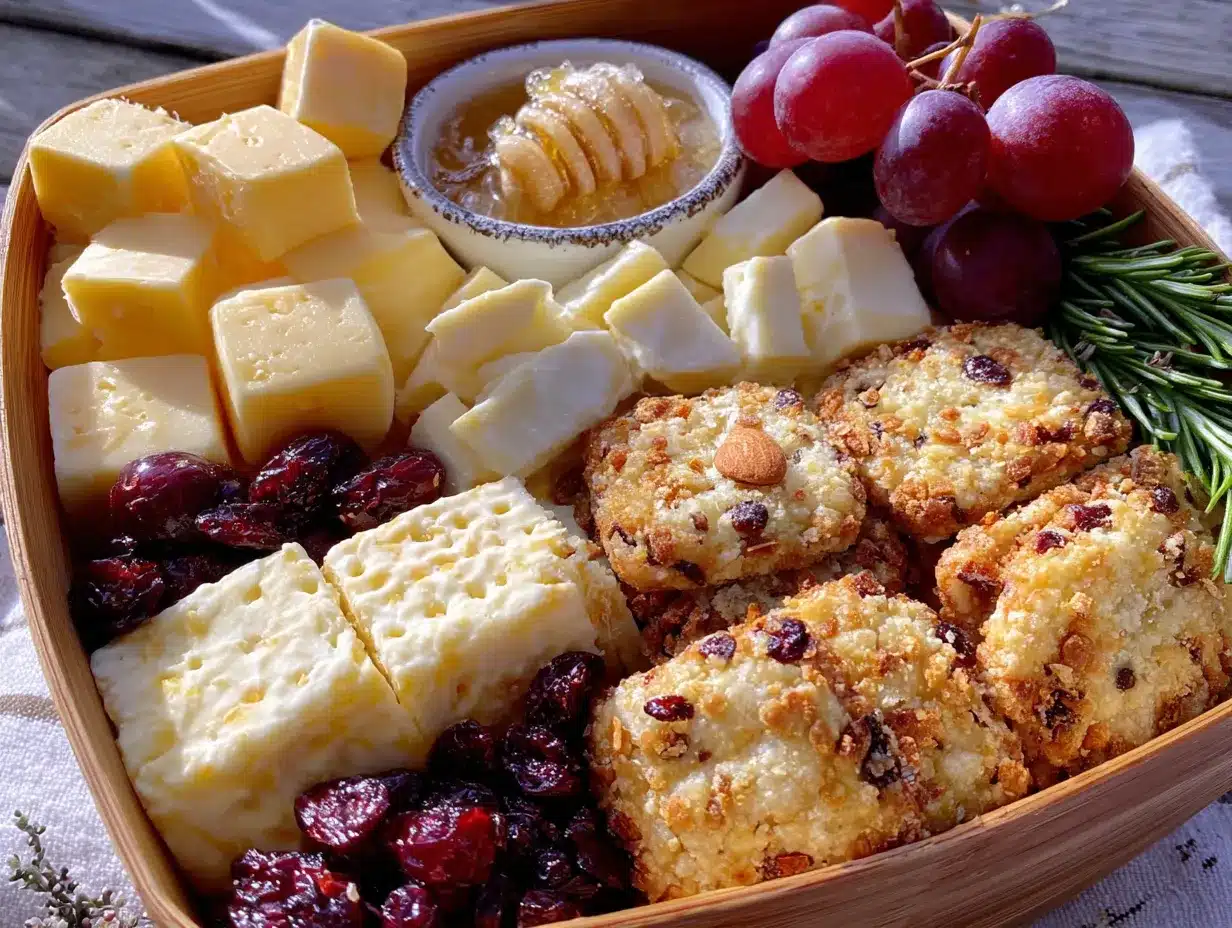
- Butter crackers like Ritz or Club crackers (rich and flaky; perfect with sharp cheese)
- Whole wheat or multigrain crackers (adds fiber and a nutty flavor; I like Triscuit or Wheat Thins)
- Water crackers or rice crackers (light and crispy; good for pairing with soft cheeses)
- Pretzel crisps or mini pretzels (adds a salty crunch that contrasts beautifully with sweet fruit)
- Gluten-free crackers (use your favorite brand; most work well with this setup)
For the Fruit
- Red or green grapes, washed and dried thoroughly (moisture is the enemy of crispy crackers; dry them well)
- Apple slices, tossed in a little lemon juice (prevents browning and adds a bright note)
- Fresh berries like strawberries, blueberries, or raspberries (sweet and juicy; use a small silicone cup to separate from crackers)
- Dried fruit like apricots, cranberries, or mango strips (chewy and sweet; no moisture issues)
- Seasonal options like sliced peaches or pear wedges (when in season, these are amazing)
For the Vegetables (Optional but Recommended)
- Baby carrots or carrot sticks (crunchy and sweet; pair well with ranch dip)
- Cucumber slices, patted dry (refreshing and hydrating; use a small container to keep separate)
- Cherry tomatoes, halved (burst of flavor; good for older kids and adults)
- Bell pepper strips (colorful and sweet; red and yellow are the sweetest)
For the Protein Boost
- Sliced turkey or ham, rolled up (adds staying power; use nitrate-free options if possible)
- Hard-boiled egg, halved or sliced (classic bento addition; cook to your preference)
- Almonds, cashews, or walnuts (adds healthy fats and crunch; watch for nut-free school policies)
- Hummus or cream cheese for dipping (use a small leak-proof container)
For the Treat (Optional)
- Dark chocolate chips or a small square of chocolate (a little sweetness goes a long way)
- A mini cookie or two (makes the lunch feel special)
- Yogurt-covered raisins or dried fruit (sweet and chewy)
Equipment Needed
You don’t need much to put together a great bento box. Here’s what I use and recommend based on years of lunch-packing experience.
- A bento box or compartmentalized lunch container (I love the PlanetBox brand for durability, but any container with dividers works. If you don’t have one, use small silicone muffin cups inside a regular container to separate items.)
- A sharp knife and cutting board (for slicing cheese and fruit. A good knife makes all the difference—I use a Victorinox chef’s knife.)
- Small silicone cups or paper muffin liners (perfect for keeping moist items like grapes or dip separate from dry crackers)
- A small leak-proof container for dips or wet ingredients (I use the little round containers from a set I bought on Amazon; they’re dishwasher safe and never leak)
- An ice pack (if you’re packing cheese or other perishables for school or work, a reusable ice pack is a must)
- Optional: A small cookie cutter (for cutting cheese into fun shapes—my daughter loves star-shaped cheddar)
If you’re just starting out, don’t overthink the equipment. A simple lunch container with a few dividers will do the trick. The goal is separation, not perfection.
Preparation Method
This is where the magic happens. Follow these steps to build a beautiful, balanced easy homemade bento box with cheese and crackers that stays fresh and delicious until lunchtime.
- Wash and dry all produce thoroughly. This is the most important step. Any moisture on grapes, berries, or vegetables will make your crackers soggy. I pat everything dry with a clean kitchen towel or paper towels. Let berries air dry for a few minutes if you have time.
- Slice the cheese. Cut your cheese into uniform cubes or slices—about 1-inch pieces work well for little hands and easy stacking on crackers. If you’re using string cheese, pull it apart into strips and cut those in half. For baby bell cheese, just leave them whole; the unwrapping is half the fun.
- Prepare the fruit. For grapes, leave them whole or halve them lengthwise for younger kids. For apples, slice into thin wedges and toss with a squeeze of lemon juice to prevent browning. Berries can go in whole. Dried fruit needs no prep—just toss it in.
- Prep the vegetables (if using). Peel and slice carrots into sticks. Cut cucumber into rounds or half-moons. Slice bell peppers into strips. Pat everything dry again before packing.
- Arrange the bento box. Start by placing the crackers in one section. Put cheese cubes or slices in another section. Place fruit and vegetables in separate compartments or use silicone cups to keep them contained. If you’re including a dip or spread, put it in a small leak-proof container.
- Add the protein and treat. Roll up sliced meat and place it in an empty section. Add nuts or seeds in a small cup. Tuck in a small treat like a few chocolate chips or a mini cookie—it’s the little surprise that makes lunch feel special.
- Pack it tight. Fill the compartments as full as possible without cramming. A tightly packed bento box keeps items from shifting around and getting crushed. If there’s empty space, add a few extra crackers or a handful of berries to fill the gap.
- Add an ice pack and refrigerate. If you’re packing this for later, place an ice pack on top or underneath the container and store it in the fridge until you’re ready to go. For school lunches, I pack everything the night before and grab it in the morning.
Pro tip: If you’re packing crackers and moist ingredients together, use a small silicone cup to create a barrier. This keeps crackers crunchy and fruit fresh. I learned this the hard way after too many soggy lunchboxes.
Cooking Tips & Techniques
I’ve made every mistake you can imagine with bento boxes. Crackers that turned to mush. Cheese that dried out. Fruit that turned brown and sad. But each failure taught me something, and now I’ve got a system that works every time.
Keep moisture separate. This is the golden rule of bento packing. Wet ingredients like grapes, berries, and cucumber slices release moisture over time. If they touch crackers, you’ll end up with a sad, soggy mess. Use silicone cups, paper liners, or compartmentalized containers to keep everything in its place.
Choose sturdy crackers. Not all crackers are created equal. Thin, delicate crackers like saltines will crumble and break. Go for sturdier options like Triscuits, Wheat Thins, or buttery Ritz-style crackers. They hold up better to transport and stacking.
Let cheese come to room temperature. Cold cheese doesn’t have as much flavor. If you’re packing lunch for later, the cheese will warm up naturally by lunchtime. But if you’re eating right away, let the cheese sit out for 10-15 minutes before serving. The difference is remarkable.
Use a variety of textures. The best bento boxes have a mix of crunchy, creamy, chewy, and juicy elements. Think about how each bite will feel. A crunchy cracker topped with creamy cheese and a juicy grape? That’s a perfect bite.
Don’t overpack. It’s tempting to fill every inch of the container, but a little breathing room helps prevent crushing. Leave just enough space for items to shift slightly without getting smashed.
Prep in batches. I like to wash and cut fruit and veggies for the whole week on Sunday. I store them in separate containers in the fridge. Then, when I’m packing lunch, I just grab and go. It saves so much time on busy mornings.
Variations & Adaptations
One of the best things about this easy homemade bento box with cheese and crackers is how easy it is to change up. Here are some of my favorite variations.
The Mediterranean Bento: Swap cheddar for feta or mozzarella balls. Use pita chips instead of crackers. Add cucumber, cherry tomatoes, kalamata olives, and a small container of hummus. It’s like a mini Greek salad in lunch form.
The Sweet & Savory Bento: Pair sharp cheddar with apple slices and a drizzle of honey (pack the honey in a small container). Add almonds or walnuts for crunch. This combination is absolutely addictive and feels fancy without any extra effort.
The Protein-Packed Bento: Double up on protein with hard-boiled eggs, rolled turkey slices, and cheese cubes. Add edamame or chickpeas for plant-based protein. This version keeps everyone full until dinner.
The Kid-Friendly Bento: Use mild cheese like Colby Jack or mozzarella string cheese. Add butter crackers, grapes, baby carrots, and a small treat like a yogurt-covered raisin or a mini cookie. Keep it simple and familiar.
The Seasonal Bento: In summer, use fresh peaches, berries, and heirloom cherry tomatoes. In fall, add sliced pears, dried cranberries, and a sprinkle of cinnamon on the apple slices. In winter, go for citrus segments and pomegranate seeds. Let the seasons guide your choices.
The Grown-Up Bento: Use aged gouda or brie with water crackers. Add dried figs, marcona almonds, and a small square of dark chocolate. It’s basically a charcuterie board you can eat at your desk.
Serving & Storage Suggestions
This bento box is designed to be eaten cold or at room temperature. Here’s how to serve and store it for the best experience.
Serving Temperature: I prefer to serve this at room temperature. The cheese has more flavor, the crackers stay crunchy, and the fruit tastes sweeter. If you’re packing for later, the ingredients will naturally come to room temperature within an hour or two. If you’re eating right away, let the cheese sit out for 10-15 minutes before serving.
Presentation: Arrange the components in a visually appealing way. Group similar colors together. Place the treat in a spot that feels like a little surprise. A well-arranged bento box is more satisfying to eat—trust me, I’ve tested this theory extensively with my daughter.
Complementary Dishes: This bento box is a complete meal on its own, but you can pair it with a cup of soup or a small salad for a heartier lunch. For a picnic, add some honey ricotta crostini or a simple fruit salad on the side.
Storage Instructions: Store the assembled bento box in the refrigerator for up to 24 hours. Keep an ice pack on top if you’re packing for school or work. Do not freeze—the texture of the cheese and fruit will suffer.
Reheating: This bento box is meant to be eaten cold or at room temperature. No reheating needed. If you’ve included a hard-boiled egg, you can eat it cold or let it come to room temperature.
Flavor Development: The flavors actually meld together nicely after a few hours in the fridge. The cheese absorbs a bit of the fruit’s sweetness, and the crackers take on a subtle savory note. It’s still delicious the next day, though the crackers may be slightly less crunchy.
Nutritional Information & Benefits
This easy homemade bento box with cheese and crackers is naturally balanced and packed with nutrients. Here’s a rough estimate for a typical serving (based on 2 ounces of cheese, 1 ounce of crackers, 1 cup of fruit, and 1/4 cup of nuts).
Estimated Nutritional Values (per serving):
- Calories: 450-550 (depending on cheese and cracker choices)
- Protein: 18-22 grams
- Carbohydrates: 35-45 grams
- Fat: 25-35 grams
- Fiber: 5-8 grams
- Calcium: 20-30% of daily value
Health Benefits: Cheese is an excellent source of calcium and protein, which support bone health and muscle function. Fruit provides essential vitamins, antioxidants, and natural energy. Nuts add healthy fats and fiber that keep you full longer. Whole grain crackers offer complex carbohydrates for sustained energy.
Dietary Considerations: This recipe is naturally vegetarian. For a gluten-free version, use gluten-free crackers. For a dairy-free version, use plant-based cheese alternatives or skip the cheese and add extra protein like turkey or hummus. For a nut-free version (school-friendly), omit nuts and seeds and add extra fruit or vegetables instead.
Potential Allergens: This recipe contains dairy (cheese) and gluten (crackers). It may contain nuts depending on your choices. Always check labels and adjust for your specific dietary needs.
My Personal Perspective: I love that this lunch feels indulgent but is actually quite balanced. It’s not about restriction—it’s about eating real food that makes you feel good. And honestly, having a little treat in there makes the whole meal feel like a reward, not a chore.
Conclusion
This easy homemade bento box with cheese and crackers has become a staple in our house for good reason. It’s simple, flexible, and genuinely satisfying. Whether you’re packing lunch for a picky eater, yourself, or a whole family, this approach works. You don’t need fancy ingredients or special equipment. You just need a little creativity and the willingness to try new combinations.
I love that this recipe grows with you. My daughter started with simple cheddar and butter crackers. Now she asks for brie with fig jam and almonds. She’s developing her own palate, and this bento box gives her the freedom to explore flavors in a low-pressure way. That’s pretty special, if you ask me.
So go ahead—raid your fridge, grab your favorite crackers, and build a bento box that makes you smile. Mix it up based on what looks good at the store or what’s about to go bad in your produce drawer. There are no rules here, just delicious possibilities. If you try this, I’d love to hear about your favorite combinations. Drop a comment below and share what you packed. And if you’re looking for more easy lunch ideas, check out our make-ahead breakfast sandwiches or our no-bake energy balls for more grab-and-go goodness.
Frequently Asked Questions
Can I make this bento box the night before?
Absolutely. I actually prefer to pack it the night before so I can grab it and go in the morning. Just keep it refrigerated with an ice pack if you’re packing for later. The crackers may lose a tiny bit of crunch, but using sturdy crackers and separating moist ingredients helps a lot.
How do I keep crackers from getting soggy?
The key is separation. Use silicone cups, paper liners, or compartmentalized containers to keep crackers away from moist ingredients like grapes, berries, and cucumber slices. Also, make sure all fruit and vegetables are thoroughly dried before packing. A little effort goes a long way.
What are the best cheeses for a bento box?
Hard and semi-hard cheeses work best because they hold their shape and don’t get too soft at room temperature. Sharp cheddar, Colby Jack, gouda, and Swiss are all excellent choices. Soft cheeses like brie or goat cheese are fine for same-day eating but can get messy if packed for later.
Is this lunch healthy enough for kids?
Yes! This bento box is naturally balanced with protein, healthy fats, fiber, and carbohydrates. You control the portions and ingredients, so you can tailor it to your child’s needs. Skip the treat if you want, or add extra vegetables. It’s way healthier than most pre-packaged lunch options.
Can I use this for a nut-free school lunch?
Definitely. Simply omit nuts and seeds and replace them with extra fruit, vegetables, or a different protein like rolled turkey slices or a hard-boiled egg. Always check your school’s specific allergy policies and adjust accordingly. The beauty of this recipe is its flexibility.
Pin This Recipe!
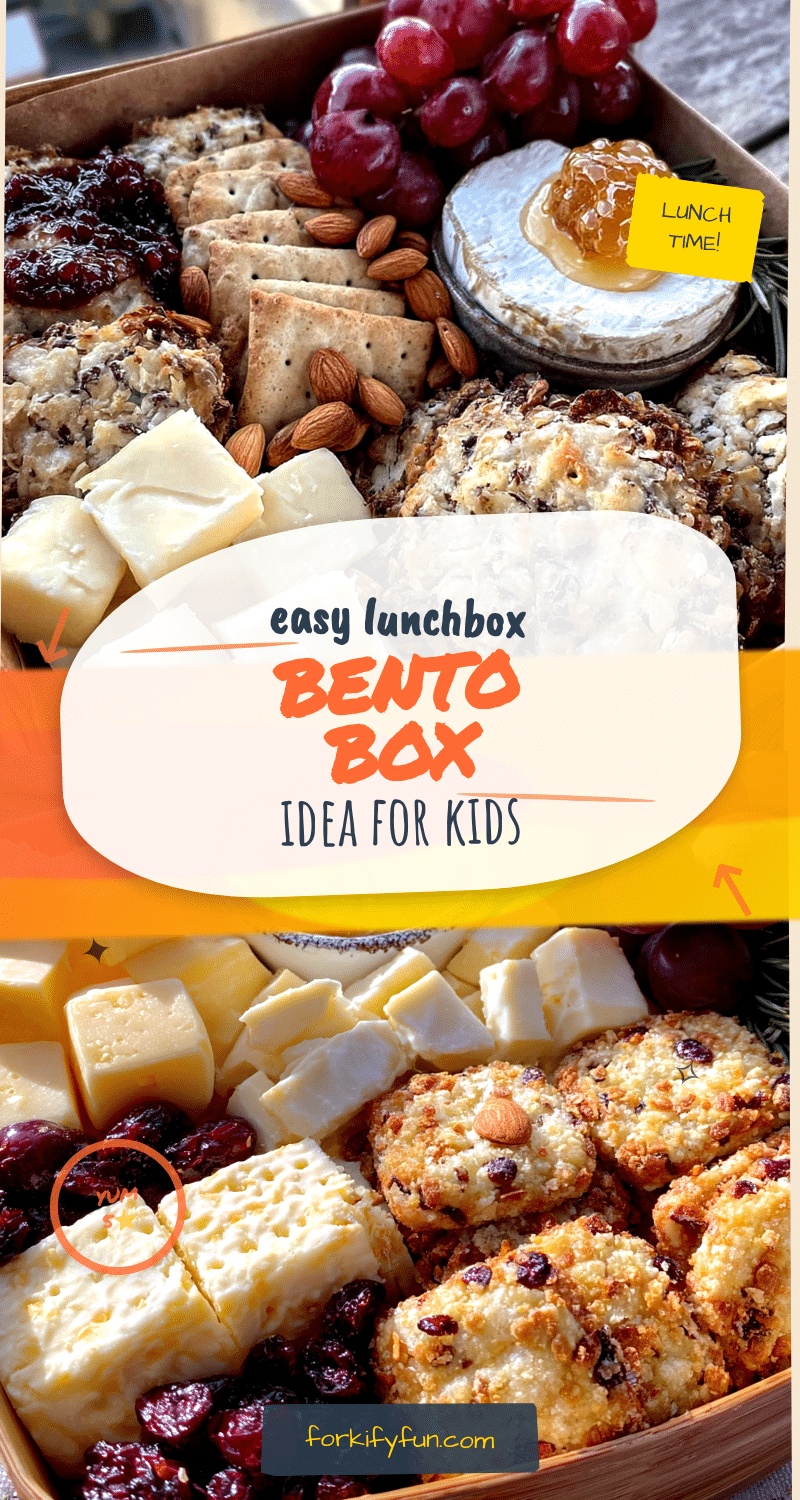
Easy Homemade Bento Box – Best Cheese & Crackers Lunch
A simple, customizable bento box with cheese, crackers, fruit, and optional veggies and protein. Perfect for school lunches, picnics, or busy days.
- Prep Time: 10 minutes
- Cook Time: 0 minutes
- Total Time: 10 minutes
- Yield: 1 serving
- Category: Lunch
- Cuisine: American
Ingredients
- Sharp cheddar cheese, cut into cubes
- Colby Jack or Monterey Jack cheese, sliced or cubed
- Baby bell cheese wheels
- String cheese, cut into bite-sized pieces
- Optional: Brie or goat cheese
- Butter crackers like Ritz or Club crackers
- Whole wheat or multigrain crackers
- Water crackers or rice crackers
- Pretzel crisps or mini pretzels
- Gluten-free crackers
- Red or green grapes, washed and dried thoroughly
- Apple slices, tossed in a little lemon juice
- Fresh berries like strawberries, blueberries, or raspberries
- Dried fruit like apricots, cranberries, or mango strips
- Seasonal options like sliced peaches or pear wedges
- Baby carrots or carrot sticks
- Cucumber slices, patted dry
- Cherry tomatoes, halved
- Bell pepper strips
- Sliced turkey or ham, rolled up
- Hard-boiled egg, halved or sliced
- Almonds, cashews, or walnuts
- Hummus or cream cheese for dipping
- Dark chocolate chips or a small square of chocolate
- A mini cookie or two
- Yogurt-covered raisins or dried fruit
Instructions
- Wash and dry all produce thoroughly.
- Slice the cheese into uniform cubes or slices (about 1-inch pieces).
- Prepare the fruit: leave grapes whole or halve, slice apples and toss with lemon juice, leave berries whole.
- Prep the vegetables (if using): peel and slice carrots, cut cucumber into rounds, slice bell peppers into strips. Pat dry.
- Arrange the bento box: place crackers in one section, cheese in another, fruit and vegetables in separate compartments or silicone cups.
- Add the protein and treat: roll up sliced meat, add nuts in a small cup, tuck in a small treat.
- Pack it tight to prevent shifting.
- Add an ice pack and refrigerate until ready to serve.
Notes
Keep moisture separate to prevent soggy crackers. Use sturdy crackers. Let cheese come to room temperature for best flavor. Prep ingredients in batches for quick assembly.
Nutrition
- Serving Size: 1 bento box
- Calories: 450550
- Sugar: 1520
- Sodium: 400600
- Fat: 2535
- Saturated Fat: 1015
- Carbohydrates: 3545
- Fiber: 58
- Protein: 1822
Keywords: bento box, cheese and crackers, lunch, easy lunch, school lunch, picnic, no-cook