I packed my kid the same sad sandwich for lunch every single day for two years before I realized I was the problem, not him. The uneaten crusts, the untouched apple slices, the whole lunchbox coming back practically full — I kept blaming his picky phase. But honestly? I was phoning it in. One Tuesday morning, staring at a bunch of bananas going brown and a bag of grapes, I grabbed some skewers and started threading fruit onto them in color order. He ate every single piece. These Easy Rainbow Fruit Kabobs for Kids Lunch didn’t just save me from lunchbox guilt — they turned the midday meal into something he actually looked forward to.
There’s no secret trick here, no fancy equipment. It’s just fruit on a stick arranged like a rainbow. But something about the colors, the skewer, the hands-on eating — it clicks for kids in a way a boring fruit salad never does. I’ve made these for school lunches, birthday parties, and lazy weekend snacks, and they never fail. The best part? You can prep them in ten minutes flat while your coffee brews.
This isn’t a recipe that needs perfect execution. Some days my rainbow is missing a color because I ran out of blueberries. That’s fine. The point is making fruit fun enough that kids actually eat it — and trust me, once you see an empty lunchbox come home, you’ll never go back to the sad sandwich routine.
Why You’ll Love This Recipe
These rainbow fruit kabobs aren’t just cute — they actually solve the real problem of getting kids to eat fruit. I’ve tested these on my own picky eater, on neighbor kids, and at playdates. The results are consistent: kids eat fruit when it’s on a stick and looks like a rainbow.
- Quick & Easy : Comes together in under 10 minutes. Slice, thread, pack — done. Perfect for chaotic weekday mornings when you’re running on coffee and hope.
- Simple Ingredients : No fancy grocery trips. Use whatever fruit you have on hand. Strawberries, grapes, blueberries, pineapple, melon — it’s all fair game.
- Perfect for Lunchboxes : These kabobs fit perfectly in standard lunch containers. No leaks, no mess, no complaints. Great for school, daycare, picnics, or road trips.
- Crowd-Pleaser : I’ve yet to meet a kid who turns down fruit on a stick. Even the pickiest eaters get curious when they see a rainbow.
- Unbelievably Fun : Let’s face it — kids eat with their eyes first. A rainbow of colors on a skewer is way more exciting than a bag of apple slices.
What makes this recipe different from every other fruit kabob out there? The color-first approach. I don’t just throw random fruit on a skewer. I arrange it in rainbow order — red, orange, yellow, green, blue, purple — so each kabob is a visual treat. And I’ve learned which fruits hold up best in a lunchbox (no mushy bananas, I’m looking at you).
This is the kind of recipe that makes you feel like a good parent without actually trying that hard. It’s comfort food for the lunchbox — healthy, colorful, and guaranteed to come back empty.
What Ingredients You Will Need
This recipe uses simple, fresh fruit to create a rainbow effect that kids love. The ingredients are flexible, but I’ve listed my go-to fruits for each color of the rainbow. These are all pantry-friendly and easy to find at any grocery store.
- Red fruits : Fresh strawberries, hulled and halved (or quartered if large). You can also use raspberries or watermelon chunks. Strawberries hold up best in a lunchbox without getting mushy.
- Orange fruits : Mandarin orange segments, peeled (canned in juice works in a pinch). Diced mango or cantaloupe also works. I prefer mandarins because they’re naturally portioned and don’t brown.
- Yellow fruits : Fresh pineapple chunks or golden kiwi slices. Banana slices work too, but they brown quickly — use only if eating immediately. Pineapple is my top choice for its firm texture and sweet flavor.
- Green fruits : Green grapes, halved lengthwise for smaller kids. Honeydew melon cubes or sliced green apple (tossed in lemon juice to prevent browning) are great alternatives. Grapes are the easiest — no prep needed beyond halving.
- Blue fruits : Fresh blueberries are the obvious choice. They’re perfectly sized, don’t need cutting, and hold up beautifully in a lunchbox. No good substitute here — blueberries are the star of the blue section.
- Purple fruits : Purple grapes, halved, or blackberries. Diced plum works too. Purple grapes are my go-to because they’re firm, sweet, and kids love them.
Pro tip from my kitchen : I always use fresh fruit, not canned (except mandarins in juice). Fresh fruit has better texture and doesn’t leak sugary syrup into the lunchbox. If you’re prepping the night before, keep cut fruit in separate airtight containers in the fridge, then assemble in the morning. This prevents the fruit from drying out or getting soggy.
Substitution guidance : Missing a color? No problem. Use whatever fruit you have. The rainbow effect works with 4-5 colors too. For a tropical twist, add kiwi, mango, and dragon fruit. In winter, swap in clementines, pomegranate seeds, and frozen thawed mango chunks. The key is variety — the more colors, the more fun.
Equipment Needed
You don’t need much for this recipe. Here’s what I use:
- Wooden skewers : 6-inch or 8-inch skewers work best for lunchboxes. I prefer round wooden skewers — they’re sturdy and kids can grip them easily. You can also use reusable plastic skewers or silicone straws for a zero-waste option. Just make sure the tips aren’t too sharp.
- Cutting board : A large cutting board gives you space to organize fruit by color before threading. I use a bamboo board that doesn’t dull my knives.
- Sharp paring knife : A small, sharp knife makes quick work of hulling strawberries and halving grapes. Nothing fancy needed — just something that cuts cleanly.
- Small bowls or containers : I sort my cut fruit into small bowls by color before assembling. This makes the threading process fast and organized. Muffin tins work great for this too.
- Lunchbox container : A rectangular container that fits the skewers flat is ideal. I use a bento-style box with a lid that seals tight. You can also wrap each kabob in parchment paper or beeswax wrap for a zero-plastic option.
Budget-friendly tip : Don’t buy special skewers. Regular wooden skewers from the grocery store are cheap and work perfectly. If you’re concerned about sharp ends, snip them off with kitchen shears before threading fruit. You can also use sturdy drinking straws as skewers — kids love the novelty.
Preparation Method
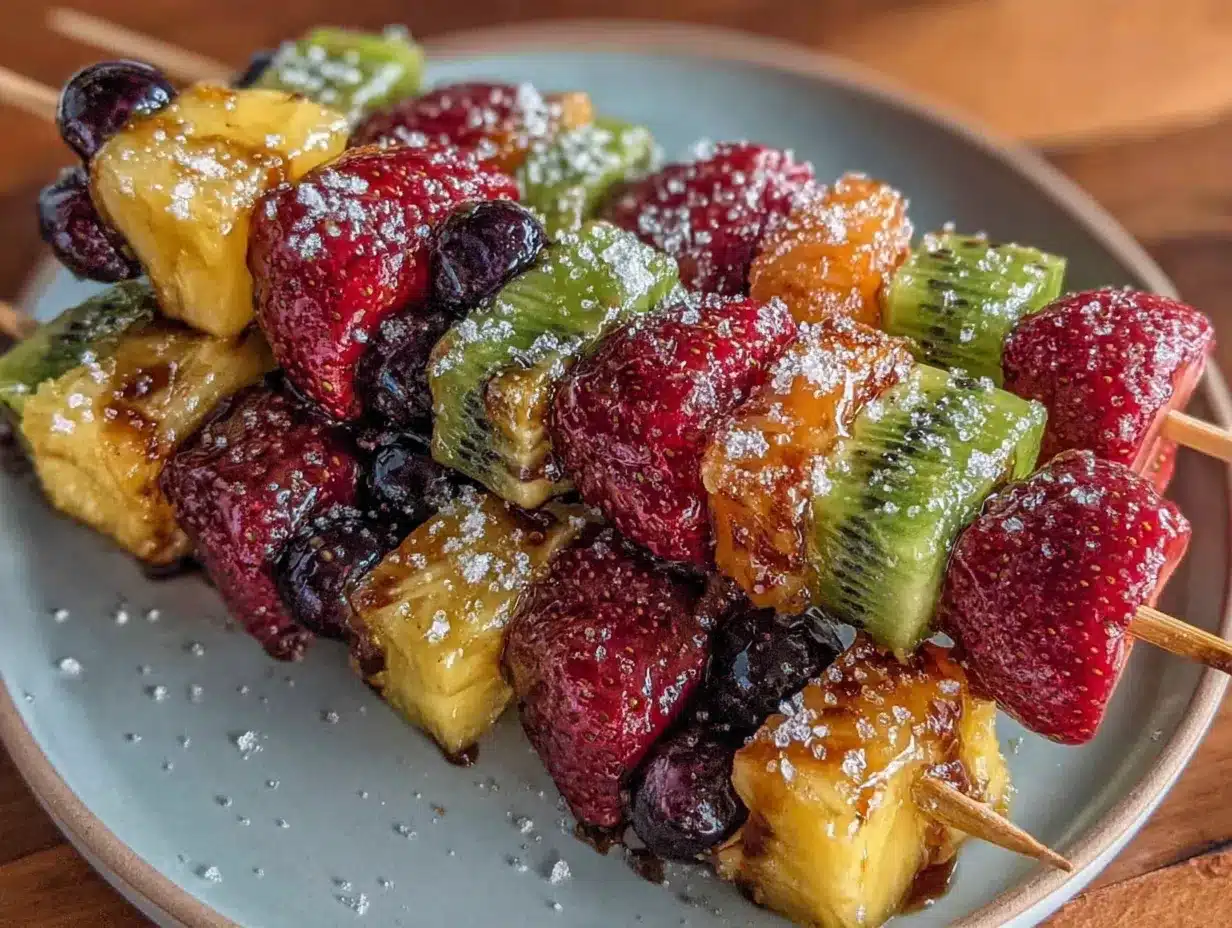
This recipe is all about assembly. Follow these steps for perfect rainbow kabobs every time.
- Wash and dry all fruit (2 minutes). Rinse strawberries, grapes, blueberries, and any other fruit under cool water. Pat dry with a clean kitchen towel or paper towels. Wet fruit makes the skewers slippery and can lead to soggy kabobs in the lunchbox. Take the extra 30 seconds to dry them thoroughly — it makes a difference.
- Prep the fruit (5 minutes). Hull the strawberries and halve or quarter them depending on size. You want pieces about 1 inch wide. Halve the green and purple grapes lengthwise — this prevents choking hazards for younger kids and makes them easier to thread. Peel mandarin oranges and separate into segments. Cut pineapple into 1-inch chunks. Leave blueberries whole. If using apple slices, toss them in a little lemon juice to prevent browning.
- Sort fruit by color (1 minute). Arrange your prepared fruit in rainbow order: red (strawberries), orange (mandarins), yellow (pineapple), green (grapes), blue (blueberries), purple (purple grapes). This visual organization makes the assembly step fast and foolproof. I use a muffin tin with each color in a different cup — my kid loves helping with this part.
- Thread the skewers (5 minutes for 6 kabobs). Take a wooden skewer and start with a red fruit piece. Thread it onto the skewer, pushing it about 1 inch from the bottom. Follow with an orange piece, then yellow, green, blue, and finally purple. Leave about 1 inch of empty skewer at the top for easy handling. Repeat with remaining skewers. For younger kids (under 4), use shorter skewers or silicone straws and thread only 3-4 pieces per kabob.
- Check for stability (30 seconds). Gently shake each kabob to make sure the fruit is secure. If any pieces are loose, push them closer together. The fruit should be snug but not squished. If a piece falls off, just re-thread it — no big deal.
- Pack for lunch (1 minute). Place each kabob in a lunchbox container. If stacking, separate layers with parchment paper to prevent sticking. Add a small ice pack if packing the night before or if the lunchbox won’t be refrigerated. Seal the container and store in the fridge until ready to pack.
- Add optional extras (optional, 1 minute). For dipping, pack a small container of yogurt, honey, or nut butter on the side. My kid loves a tiny cup of vanilla Greek yogurt for dipping. Just make sure the container is leak-proof — nobody wants yogurt all over their lunchbox.
Sensory cues to watch for : The fruit should look bright and fresh, not dull or weeping juice. When threading, the skewer should slide through cleanly without splitting the fruit. If a strawberry is too soft, it will squish — use firmer berries instead. The finished kabob should look like a vibrant rainbow, with each color clearly visible and the fruit pieces evenly spaced.
My personal efficiency tip : I prep all the fruit the night before and store each color in a separate airtight container in the fridge. In the morning, I just thread and pack. This cuts the morning routine down to 5 minutes flat. I also make extra kabobs on Sunday and store them in the fridge for grab-and-go lunches all week — they stay fresh for 3-4 days.
Cooking Tips & Techniques
After making these kabobs dozens of times, I’ve learned a few tricks that make the process smoother and the results better. Here’s what I wish someone had told me.
Choose firm fruit : Soft, overripe fruit squishes when you thread it onto a skewer. Strawberries should be firm, not mushy. Grapes should be crisp, not wrinkly. Pineapple should be golden and fragrant but not soft. Firm fruit holds its shape and looks prettier in the lunchbox.
Cut uniform pieces : Try to cut fruit into similar-sized pieces — about 1 inch across. This makes the kabobs look neat and ensures each bite has a balanced mix of flavors. Uneven pieces lead to wobbly kabobs and frustrated kids.
Don’t overcrowd the skewer : Leave a little space between each fruit piece. If you pack them too tightly, the fruit gets squished and the kabob looks messy. About 1/4 inch between pieces is perfect — enough to see each color clearly but not so much that the kabob looks sparse.
Snip the sharp ends : Wooden skewers have pointy tips that can be a safety hazard for young kids. Use kitchen shears to snip off the sharp point before threading fruit. You can also use flat-end skewers or silicone straws for toddlers.
My biggest failure : The first time I made these, I used banana slices for the yellow section. By lunchtime, they had turned brown and mushy. My kid refused to eat them. Now I stick with pineapple or mango for yellow — they hold up beautifully and stay bright. Learn from my mistake: avoid bananas in packed lunches unless you’re eating them immediately.
Timing strategy : If you’re packing lunch the night before, assemble the kabobs and store them in an airtight container in the fridge. Add a small piece of damp paper towel to the container to keep the fruit from drying out. In the morning, just grab and go. For best texture, eat within 24 hours.
Variations & Adaptations
This recipe is endlessly customizable. Here are some variations I’ve tried and loved.
- Tropical Rainbow : Swap the traditional fruits for mango, kiwi, pineapple, papaya, and dragon fruit. This version feels like a vacation in a lunchbox. My kid calls these “island kabobs” and requests them for summer camp lunches.
- Berry Blast : Use all berries — strawberries, raspberries, blueberries, blackberries, and golden raspberries if you can find them. This version is packed with antioxidants and naturally sweet. The only downside is that raspberries are delicate, so thread them gently.
- Winter Rainbow : In cold months, use clementines, pomegranate seeds, kiwi, apple chunks (tossed in lemon juice), and frozen thawed mango. Pomegranate seeds add a fun pop of color and crunch. My kid loves the “jewel” look of these winter kabobs.
- Dairy-Free Dipping Option : Skip the yogurt dip and pack a small container of coconut cream, nut butter, or a squeeze of lime juice instead. These add flavor without dairy. My favorite is a simple almond butter dip — just stir in a little honey until smooth.
- Savory-Sweet Combo : Add small cubes of mild cheddar cheese or mozzarella between the fruit pieces. The salty cheese balances the sweet fruit beautifully. This turns the kabob into a more substantial snack that doubles as a mini meal.
My personal favorite variation : I make “holiday kabobs” for special occasions. For Valentine’s Day, I use only red and pink fruits — strawberries, raspberries, and watermelon. For Halloween, I use orange and black fruits — mandarins, mango, and blackberries. It’s a small touch that makes lunch feel festive without any extra effort.
Serving & Storage Suggestions
These kabobs are best served cold or at room temperature. Here’s how to make them work for your routine.
Serving temperature : Serve straight from the fridge for a refreshing, crisp bite. If packing for lunch, the fruit will come to room temperature by lunchtime, which is perfectly fine. Avoid leaving them out for more than 2 hours at room temperature — fruit spoils quickly, especially cut fruit.
Presentation ideas : Arrange the kabobs in a single layer in a lunchbox container. For a party platter, fan them out on a large plate with a bowl of yogurt dip in the center. You can also stand them upright in a tall glass or jar for a fun, colorful display — perfect for birthday parties or playdates.
Complementary dishes : These kabobs pair beautifully with a fresh rainbow pinwheel wrap with creamy hummus for a complete lunch. For a heartier meal, serve alongside easy no-bake peanut butter oat energy balls for protein and staying power. A side of cheese cubes or a hard-boiled egg rounds out the meal nicely.
Storage instructions : Store assembled kabobs in an airtight container in the refrigerator for up to 3 days. Place a slightly damp paper towel in the container to maintain humidity and prevent fruit from drying out. Do not wash the fruit before storing — wash and dry thoroughly before assembling, then store the finished kabobs.
Freezer instructions : Freezing is not recommended for most fruits used in these kabobs. Frozen fruit becomes mushy when thawed and loses its texture. If you want to prep ahead, freeze individual fruit pieces on a baking sheet, then transfer to a freezer bag. Thaw in the fridge overnight and assemble in the morning.
Reheating tips : No reheating needed! These are served cold or at room temperature. If the fruit has been refrigerated, let it sit at room temperature for 10-15 minutes before serving to take the chill off. Cold fruit can be less flavorful, so a short rest helps the natural sweetness shine.
How flavors develop : These kabobs are best eaten within 24 hours of assembly. The fruit flavors are brightest when fresh. After a day in the fridge, the fruit may release some juice and the colors may dull slightly. Still perfectly edible, but not as vibrant. For the best experience, assemble the morning of serving.
Nutritional Information & Benefits
These rainbow fruit kabobs are a nutritional powerhouse disguised as a fun snack. Here’s what you’re getting in each serving.
Estimated nutritional values per kabob (using standard fruit portions): Approximately 60-80 calories, 15-20g carbohydrates, 1-2g fiber, 0g fat, 0g protein. These values vary based on the specific fruits used. A kabob with more berries will be lower in sugar; one with more pineapple will be higher.
Health benefits of key ingredients : Strawberries are packed with vitamin C and antioxidants. Blueberries are famous for their brain-boosting properties. Pineapple contains bromelain, an enzyme that aids digestion. Grapes provide hydration and natural energy. Mandarin oranges deliver a hefty dose of immune-supporting vitamin C. Together, this rainbow of fruit provides a wide range of vitamins, minerals, and phytonutrients that support overall health.
Dietary considerations : This recipe is naturally gluten-free, dairy-free, vegan, and nut-free (depending on any dips you add). It’s Whole30-friendly, paleo-friendly, and suitable for most dietary restrictions. The only potential allergen is fruit itself — some people with oral allergy syndrome may need to avoid certain raw fruits.
Potential allergens : The fruit itself is allergen-free, but cross-contamination can occur if you use cutting boards or knives that have touched allergens. Always use clean equipment. If packing with a dip, check the dip’s ingredients for common allergens like dairy, nuts, or soy.
My wellness perspective : I love that this recipe gets kids excited about eating whole foods. It’s not about restricting anything — it’s about making healthy choices fun and accessible. When my kid asks for “rainbow sticks” instead of a packaged snack, I feel like I’m winning at parenting. And honestly, I eat these too. They’re the perfect afternoon pick-me-up when I need something sweet but healthy.
Conclusion
These Easy Rainbow Fruit Kabobs for Kids Lunch have genuinely changed how I think about packing lunches. They’re not fancy or complicated — they’re just fruit on a stick, arranged by color. But that small shift in presentation makes all the difference between a lunch that comes back half-eaten and one that comes back completely empty.
I love that this recipe is flexible enough to work with whatever fruit is in season or on sale. Some weeks it’s strawberries and blueberries; other weeks it’s mango and kiwi. The rainbow concept works with any combination, and that makes it sustainable for busy families. You don’t need a special grocery trip — just use what you have.
If you try these kabobs, I’d love to hear how they went over with your kids. Did they eat the whole thing? Did they have a favorite color? Did you come up with a fun variation I haven’t tried? Drop a comment below and let me know. And if you’re looking for more lunchbox inspiration, check out our easy make-ahead freezer breakfast sandwiches for mornings when you need something hearty, or our fresh turkey and cream cheese pinwheel rolls for another lunchbox-friendly option.
Happy lunch packing, friends. May your lunchboxes come back empty and your kids ask for more rainbows.
Frequently Asked Questions
Can I make these fruit kabobs the night before?
Yes, absolutely. Assemble the kabobs and store them in an airtight container in the refrigerator. Add a slightly damp paper towel to the container to keep the fruit from drying out. They’ll stay fresh for up to 24 hours. For best results, add any delicate fruits like raspberries or banana slices just before serving.
What fruits should I avoid for lunchbox kabobs?
Avoid bananas — they brown and turn mushy within a few hours. Also skip very soft fruits like overly ripe peaches or nectarines that squish easily. Apples are fine if tossed in lemon juice to prevent browning. Stick with firm fruits like strawberries, grapes, pineapple, and melon for the best texture in a packed lunch.
How do I make these safe for toddlers?
For toddlers under 4, use shorter skewers or silicone straws instead of wooden skewers. Cut all fruit into small, safe pieces — halve grapes lengthwise and quarter them if needed, cut strawberries into small chunks, and avoid whole blueberries. Always snip off sharp ends of wooden skewers. Supervise young children while eating.
Can I use frozen fruit for these kabobs?
Frozen fruit is not recommended for packed lunches because it becomes mushy when thawed. However, you can use frozen fruit that has been fully thawed and patted dry if you’re serving the kabobs immediately at home. For lunchboxes, stick with fresh fruit for the best texture and appearance.
How long do these fruit kabobs last in the fridge?
Assembled kabobs will stay fresh in an airtight container in the refrigerator for up to 3 days. The fruit may release some juice after the first day, and colors may dull slightly, but they’re still perfectly edible. For the best flavor and appearance, eat within 24 hours of assembly.
Pin This Recipe!
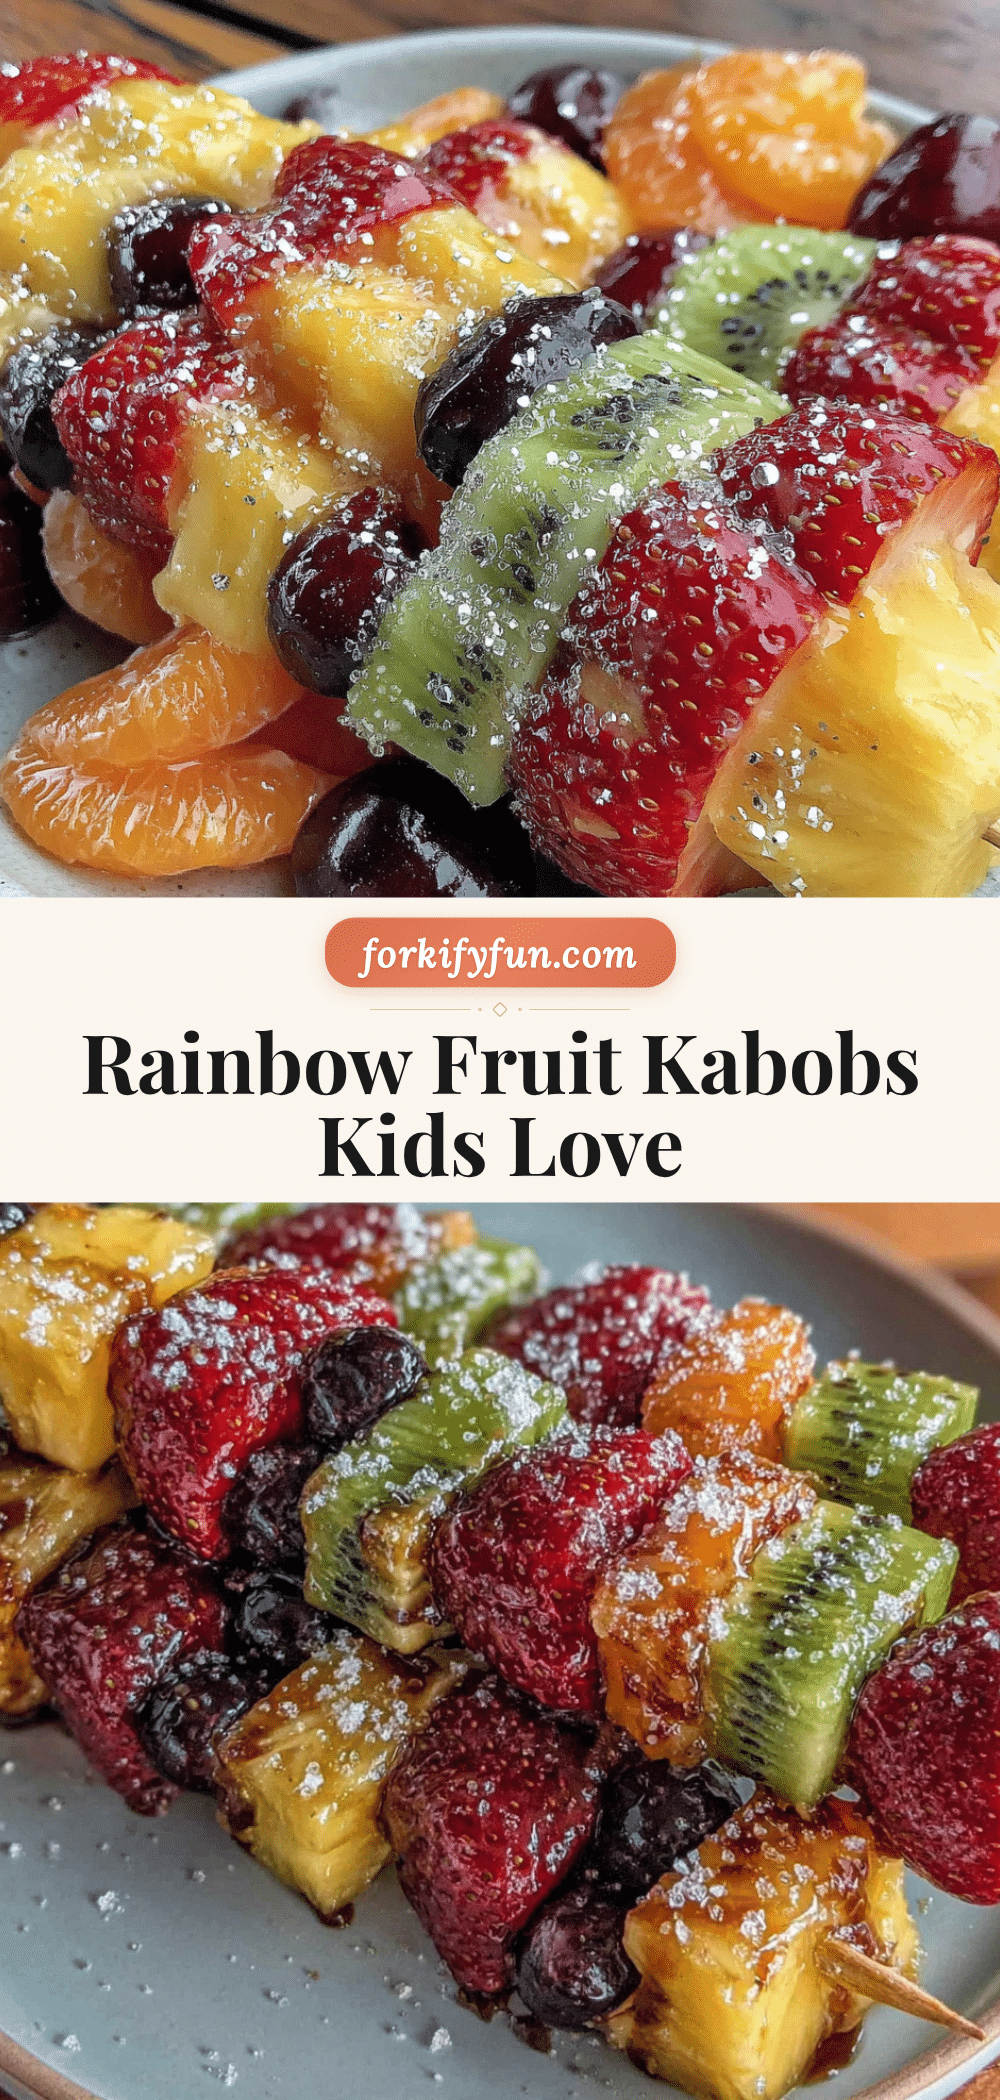
Easy Rainbow Fruit Kabobs: Perfect Lunch Idea
These Easy Rainbow Fruit Kabobs for Kids Lunch turn fruit into a fun, colorful snack that kids actually eat. Arranged in rainbow order on a skewer, they’re quick to prep, perfect for lunchboxes, and guaranteed to come back empty.
- Prep Time: 10 minutes
- Cook Time: 0 minutes
- Total Time: 10 minutes
- Yield: 6 servings
- Category: Snack
- Cuisine: American
Ingredients
- Red fruits: Fresh strawberries, hulled and halved (or quartered if large)
- Orange fruits: Mandarin orange segments, peeled (canned in juice works in a pinch)
- Yellow fruits: Fresh pineapple chunks or golden kiwi slices
- Green fruits: Green grapes, halved lengthwise for smaller kids
- Blue fruits: Fresh blueberries
- Purple fruits: Purple grapes, halved, or blackberries
Instructions
- Wash and dry all fruit (2 minutes). Rinse strawberries, grapes, blueberries, and any other fruit under cool water. Pat dry with a clean kitchen towel or paper towels.
- Prep the fruit (5 minutes). Hull the strawberries and halve or quarter them depending on size. Halve the green and purple grapes lengthwise. Peel mandarin oranges and separate into segments. Cut pineapple into 1-inch chunks. Leave blueberries whole.
- Sort fruit by color (1 minute). Arrange your prepared fruit in rainbow order: red (strawberries), orange (mandarins), yellow (pineapple), green (grapes), blue (blueberries), purple (purple grapes).
- Thread the skewers (5 minutes for 6 kabobs). Take a wooden skewer and start with a red fruit piece. Thread it onto the skewer, pushing it about 1 inch from the bottom. Follow with an orange piece, then yellow, green, blue, and finally purple. Leave about 1 inch of empty skewer at the top.
- Check for stability (30 seconds). Gently shake each kabob to make sure the fruit is secure. If any pieces are loose, push them closer together.
- Pack for lunch (1 minute). Place each kabob in a lunchbox container. If stacking, separate layers with parchment paper. Add a small ice pack if packing the night before.
- Add optional extras (optional, 1 minute). For dipping, pack a small container of yogurt, honey, or nut butter on the side.
Notes
Use firm fruit to avoid squishing. Cut uniform pieces about 1 inch across. Snip sharp ends of skewers for safety. Avoid bananas in packed lunches as they brown quickly. Prep fruit the night before and store in separate containers for quick morning assembly. Kabobs stay fresh for up to 3 days in the fridge, but best within 24 hours.
Nutrition
- Serving Size: 1 kabob
- Calories: 70
- Sugar: 12
- Carbohydrates: 17
- Fiber: 2
- Protein: 1
Keywords: rainbow fruit kabobs, kids lunch, healthy snack, fruit skewers, lunchbox ideas, easy fruit recipe, rainbow food