I want wings right now. Not just any wings—the kind where the skin shatters when you bite into it, and the garlic-parmesan coating sticks to your fingers in that salty, greasy way that feels illegal to enjoy this much. I have everything except the patience to wait for them. It’s Thursday, which means nothing special, except that I decided weeks ago Thursday is wing night in this house. No takeout. No delivery. Just me, a baking sheet, and a ridiculous amount of parmesan cheese.
These Crispy Parmesan Garlic Tailgate Wings happened because I got tired of soggy wings. You know the ones—where the skin turns rubbery under sauce, and you’re left chewing through sadness. I wanted the crunch of a deep-fried wing without the mess of a fryer. So I spent a few weekends testing methods, burning my fingers, and eating more wings than I’d like to admit. Turns out, the secret is a technique called “baking powder magic” and a two-step cooking process that gives you that golden, crackly skin every single time.
The funny thing is, I wasn’t even trying to make a game day recipe. I was just hungry. But now, every time football season rolls around, these wings show up. They’re the ones people hover around, the ones that disappear before the dip even makes it to the table. And honestly? That’s the best kind of recipe—the one you didn’t plan, but can’t stop making.
Why You’ll Love This Recipe
I’ve tested this recipe more times than I care to count. Burnt wings, undercooked wings, wings that stuck to the pan like glue—I’ve made every mistake so you don’t have to. Here’s why these Crispy Parmesan Garlic Tailgate Wings are worth every bit of effort:
- Incredibly Crispy Without Frying : The baking powder trick creates a dry surface that crisps up beautifully in the oven. No deep fryer needed, no greasy stovetop cleanup.
- Simple Ingredients : Chicken wings, parmesan, garlic, butter, and a few pantry staples. That’s it. No weird additives or hard-to-find items.
- Perfect for Game Day : Whether you’re hosting a Super Bowl party or just watching the Thursday night game solo, these wings deliver that tailgate energy without leaving your kitchen.
- Always a Crowd-Pleaser : I’ve brought these to potlucks, barbecues, and casual get-togethers. They vanish fast. Kids and adults fight over the last one.
- Next-Level Flavor : The garlic butter soaks into the crispy skin, while the parmesan creates a savory crust that’s salty, nutty, and completely addictive. It’s comfort food that actually delivers.
What makes these different from every other wing recipe out there? It’s the technique. Most recipes just toss wings in sauce and bake, leaving you with sad, flabby skin. I spent weeks perfecting the dry-brine method, the temperature timing, and the butter-to-cheese ratio. These wings are tested, retested, and family-approved. They’re not just another version—they’re the version I’d serve to anyone who asked.
The first time I made these, I closed my eyes after the first bite. That’s the kind of recipe this is. It’s crispy, garlicky, cheesy, and exactly what you want when you’re craving something indulgent. Perfect for impressing guests without stress, or turning a simple Thursday into something memorable.
What Ingredients You Will Need
This recipe uses simple, honest ingredients to create wings that taste like they came from your favorite sports bar. Most of these are pantry staples, and the rest are easy to find at any grocery store.
For the Wings
- 2 pounds chicken wings (drumettes and flats, separated) — Look for fresh, not frozen, for best texture. If using frozen, thaw completely and pat very dry.
- 1 tablespoon baking powder — This is the secret to crispy skin. Use aluminum-free baking powder to avoid a metallic taste.
- 1 teaspoon salt — Fine sea salt works best for even distribution.
- ½ teaspoon black pepper — Freshly ground, if you have it.
- ½ teaspoon garlic powder — Not garlic salt. We want pure garlic flavor.
- ½ teaspoon onion powder — Adds depth without overpowering.
For the Garlic Parmesan Coating
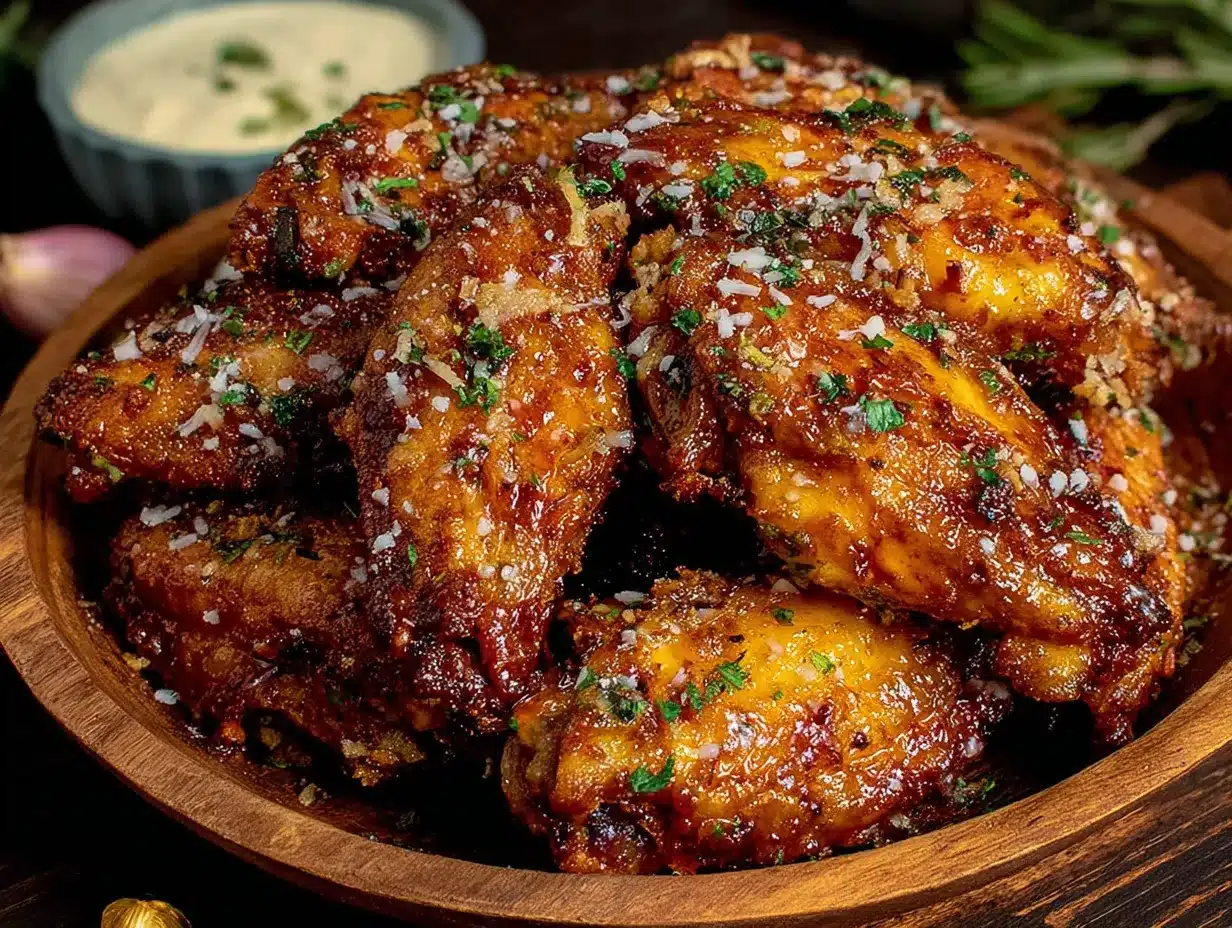
- ¼ cup unsalted butter — Melted. I use Kerrygold for its rich flavor, but any good-quality butter works.
- 4 cloves garlic, minced — Fresh garlic is non-negotiable here. Pre-minced jarred garlic won’t give you the same punch.
- ½ cup grated parmesan cheese — The kind in the green can? Hard no. Use freshly grated parmesan from a wedge. It melts better and tastes infinitely better.
- 2 tablespoons fresh parsley, chopped — For color and freshness. Optional but highly recommended.
- ¼ teaspoon red pepper flakes (optional) — Adds a subtle heat that balances the richness.
Ingredient Tips & Substitutions
For the best results, I recommend using fresh, high-quality parmesan. I’ve tried this with pre-shredded cheese, and it just doesn’t melt the same way. If you’re dairy-free, you can substitute the butter with a plant-based alternative and use a vegan parmesan, though the texture will be slightly different. For a gluten-free option, these wings are naturally gluten-free as long as your baking powder is certified gluten-free.
If you want extra heat, add a pinch of cayenne pepper to the dry rub. For a milder version, skip the red pepper flakes entirely. The beauty of this recipe is how customizable it is.
Equipment Needed
You don’t need a fancy kitchen to make these wings. Here’s what you’ll need:
- Baking sheet — A rimmed baking sheet is essential to catch any drips. I use a half-sheet pan.
- Wire rack — This fits inside the baking sheet and allows air to circulate around the wings, ensuring even crispiness. If you don’t have one, you can flip the wings halfway through cooking.
- Mixing bowls — One large bowl for tossing the wings with the dry rub, and one small bowl for the garlic butter.
- Chef’s knife and cutting board — For mincing garlic and chopping parsley.
- Microplane or box grater — For grating fresh parmesan. A microplane gives you that fluffy, melt-in-your-mouth texture.
- Tongs — For flipping the wings without tearing the skin.
- Paper towels — For patting the wings dry. This step is crucial, so don’t skip it.
If you don’t have a wire rack, don’t panic. Just line your baking sheet with parchment paper and flip the wings halfway through baking. They won’t be quite as crispy, but they’ll still be delicious. I’ve made these in a pinch without a rack, and they were still devoured.
Budget-friendly tip: A basic wire cooling rack from any kitchen store works perfectly. You don’t need an expensive one.
Preparation Method
Let’s get cooking. This method takes a little time, but most of it is hands-off baking. The result is worth every minute.
Step 1: Prep the Wings
Preheat your oven to 250°F (120°C). Line a baking sheet with foil and place a wire rack on top. Pat the chicken wings completely dry with paper towels. This is the most important step—moisture is the enemy of crispy skin. If the wings are even slightly damp, they’ll steam instead of crisp.
In a large bowl, whisk together the baking powder, salt, pepper, garlic powder, and onion powder. Add the wings and toss until every piece is evenly coated. The mixture should look like a light dusting, not a thick paste.
Step 2: Low-Temp Bake
Place the wings in a single layer on the wire rack, making sure they don’t touch. Bake at 250°F for 30 minutes. This low heat dries out the skin slowly, allowing the baking powder to work its magic. The wings will look pale and slightly puffy—that’s normal.
After 30 minutes, remove the wings from the oven. Increase the oven temperature to 425°F (220°C). Let the wings rest at room temperature while the oven heats up. This rest period helps the skin relax before the final high-heat blast.
Step 3: High-Temp Crisp
Once the oven reaches 425°F, return the wings to the oven. Bake for another 40-45 minutes, flipping halfway through, until the skin is golden brown and crispy. The wings should look like they came out of a fryer—crackling and gorgeous.
Here’s a sensory cue: when you flip them, the skin should feel firm and slightly puffed. If it still feels soft, give them another 5 minutes. Every oven runs differently, so trust your eyes and hands more than the timer.
Step 4: Make the Garlic Butter
While the wings bake, melt the butter in a small saucepan over low heat. Add the minced garlic and cook for 1-2 minutes until fragrant. Be careful not to brown the garlic—it should be soft and aromatic, not crispy. Remove from heat and stir in the red pepper flakes if using.
Grate the parmesan cheese and chop the parsley. Have them ready by the stove.
Step 5: Toss and Serve
As soon as the wings come out of the oven, transfer them to a large bowl. Pour the garlic butter over the hot wings and toss immediately. The heat will help the butter soak into the crispy skin. Sprinkle the grated parmesan and parsley over the top and toss again until every wing is coated.
Serve immediately, while the cheese is still melty and the skin is shatteringly crisp. I like to pile them on a platter with extra parmesan on the side and some celery sticks for crunch.
Cooking Tips & Techniques
I’ve made every mistake in the book with wings. Here’s what I learned so you don’t have to repeat my failures.
Don’t skip the drying step. The first time I made these, I was in a hurry and patted the wings only once. They came out of the oven with patchy, soggy skin. Now I use three paper towels per batch and press firmly. Dry wings = crispy wings.
Baking powder is not baking soda. I accidentally used baking soda once, and the wings tasted metallic and bitter. Double-check your label. Aluminum-free baking powder is the gold standard here.
Let the wings rest between temperatures. That 10-minute rest while the oven heats up isn’t just for convenience. It allows the moisture to redistribute, so the final high heat can crisp the skin without steaming it. I learned this from a chef friend who swears by it.
Flip carefully. Use tongs and be gentle. The skin is delicate at this stage, and tearing it means losing that perfect crunch. I’ve definitely mangled a few wings in my time—they still tasted great, but they weren’t pretty.
Work in batches if needed. Crowding the pan traps steam and ruins crispiness. If you’re making a big batch for a party, use two baking sheets or cook in shifts. Your patience will be rewarded.
Timing tip: Start the wings about an hour before you want to eat. The low-temp bake takes 30 minutes, then the high-temp bake takes 40-45 minutes, plus a few minutes for tossing. Plan accordingly, and you’ll have hot, crispy wings right when you need them.
Variations & Adaptations
This recipe is a fantastic base for experimentation. Here are some ways I’ve adapted it over the years.
Spicy Buffalo Version: After tossing the wings in garlic butter, add ¼ cup of your favorite hot sauce (Frank’s RedHot is my go-to) and toss again. The butter mellows the heat, while the hot sauce adds that classic buffalo tang. It’s like having two recipes in one.
Lemon Herb Twist: Replace the garlic with 2 tablespoons of lemon zest and add 1 tablespoon of fresh thyme leaves to the butter. Finish with extra parsley and a squeeze of lemon juice. The citrus cuts through the richness beautifully—perfect for summer gatherings.
Air Fryer Method: I’ve tested these in an air fryer, and they work great. Cook at 375°F for 20-25 minutes, shaking the basket halfway through. The skin gets incredibly crispy in less time. Just make sure not to overcrowd the basket.
Dairy-Free Option: Use a high-quality vegan butter and a dairy-free parmesan alternative. The texture will be slightly different, but the flavor is still fantastic. I’ve made these for friends with dairy sensitivities, and they didn’t miss a thing.
Smoked Paprika Kick: Add 1 teaspoon of smoked paprika to the dry rub for a subtle smoky depth. It pairs beautifully with the garlic and parmesan, giving the wings a almost barbecue-like complexity.
My personal favorite variation? I once added a tablespoon of truffle oil to the garlic butter. It was ridiculous and indulgent, and everyone at the party asked for the recipe. Sometimes the best experiments happen on a whim.
Serving & Storage Suggestions
These wings are best served immediately, while the skin is still crackling and the cheese is melted. I pile them on a large platter, sprinkle with extra parmesan and parsley, and add a bowl of ranch or blue cheese dressing on the side. Celery sticks and carrot slices add a fresh crunch that balances the richness.
For a full game day spread, pair these wings with crispy buffalo chicken dip stuffed pretzel bites for the ultimate snack lineup. Or, if you’re in the mood for something heartier, serve them alongside flavorful smoked brisket nachos with pickled jalapeños and white queso for a true feast.
If you have leftovers (unlikely, but possible), store them in an airtight container in the refrigerator for up to 3 days. The skin will soften, but the flavor remains. To reheat, place the wings on a wire rack in a 375°F oven for 10-12 minutes. This restores some of the crispiness. Avoid the microwave—it turns the skin rubbery.
You can also freeze the baked, uncoated wings for up to 2 months. Let them cool completely, then place them in a freezer-safe bag. When you’re ready to eat, thaw in the refrigerator overnight, then reheat in a 400°F oven for 15 minutes before tossing with the garlic butter and parmesan. The flavors actually develop nicely over time, so frozen wings taste almost as good as fresh.
Nutritional Information & Benefits
These wings are indulgence, but they’re not without some redeeming qualities. Here’s the approximate nutritional breakdown per serving (about 5-6 wings):
- Calories: 450-500
- Protein: 35g
- Fat: 32g
- Carbohydrates: 3g
- Fiber: 0g
- Sugar: 0g
Chicken wings are a good source of high-quality protein, which supports muscle repair and keeps you feeling full. Garlic is known for its anti-inflammatory properties and may support heart health. Parmesan cheese provides calcium and a small amount of protein, though it’s also high in sodium—so enjoy in moderation.
This recipe is naturally low-carb and keto-friendly, making it a great option for those watching their carbohydrate intake. It’s also gluten-free as long as your baking powder is certified gluten-free. If you have dairy sensitivities, the substitutions mentioned earlier work well.
I’m not a nutritionist, but I believe in balance. These wings are a treat, not an everyday meal. Pair them with a big salad or some roasted vegetables, and you’ve got a satisfying, well-rounded plate.
Conclusion
These Crispy Parmesan Garlic Tailgate Wings are the kind of recipe that becomes a staple. They’re simple enough for a weeknight, impressive enough for a party, and delicious enough to make you forget about takeout entirely. The crispy skin, the savory garlic butter, the salty parmesan—every bite is exactly what you want from a wing.
I love this recipe because it’s forgiving. You can tweak the spices, swap the cheese, or change the cooking method, and it still works. It’s a recipe that grows with you, adapting to your tastes and your kitchen. That’s the kind of cooking I believe in—flexible, approachable, and always delicious.
I’d love to hear how these turn out for you. Did you add extra garlic? Try a different cheese? Burn a batch and start over? (I’ve been there.) Leave a comment below and share your experience. And if you’re looking for more game day inspiration, check out flavorful hatch green chili smash burgers for another crowd-pleasing option. Happy cooking, and enjoy every crispy, garlicky bite.
Frequently Asked Questions
Can I make these wings in an air fryer?
Absolutely. Cook the wings at 375°F for 20-25 minutes, shaking the basket halfway through. The skin gets incredibly crispy in less time. Just make sure not to overcrowd the basket—work in batches if needed.
Why did my wings turn out soggy?
Soggy wings usually mean the skin wasn’t dry enough before baking. Pat the wings thoroughly with paper towels—use multiple layers and press firmly. Also, make sure your baking powder is fresh and aluminum-free. Old baking powder loses its effectiveness.
Can I use frozen wings?
Yes, but thaw them completely in the refrigerator first. Then pat them very dry before coating. Frozen wings release more moisture during baking, which can interfere with crispiness. Thawing and drying are essential.
How do I make these wings spicier?
Add ½ teaspoon of cayenne pepper to the dry rub, or toss the finished wings with ¼ cup of hot sauce along with the garlic butter. For extra heat, serve with a side of sriracha or your favorite hot sauce.
Can I prepare these wings ahead of time?
You can bake the wings through the low-temp step (250°F for 30 minutes) up to 24 hours in advance. Store them in the refrigerator, then finish with the high-temp bake (425°F for 40-45 minutes) just before serving. This makes game day prep much easier.
Pin This Recipe!
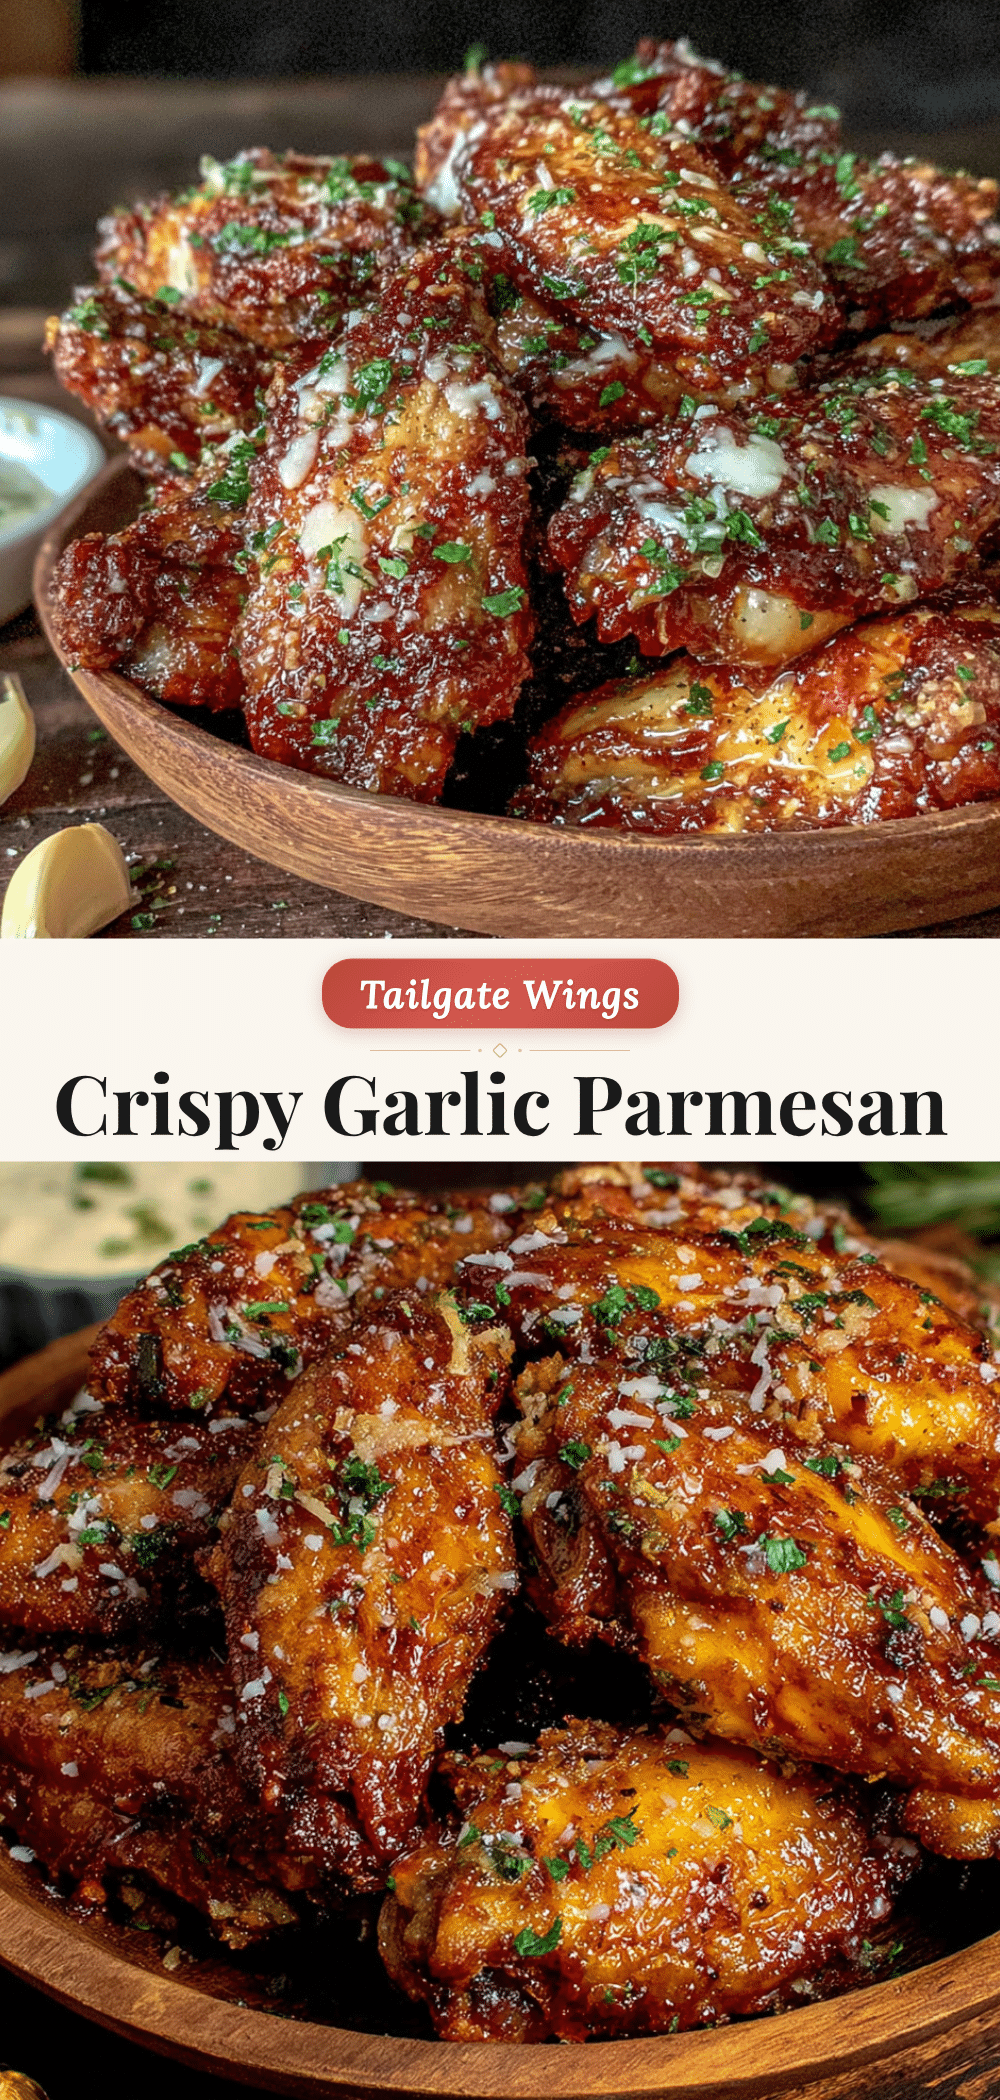
Crispy Parmesan Garlic Tailgate Wings

These oven-baked wings feature shatteringly crispy skin coated in garlic butter and freshly grated parmesan. Perfect for game day or any day you crave indulgent, crunchy wings without the mess of deep frying.
- Prep Time: 15 minutes
- Cook Time: 1 hour 15 minutes
- Total Time: 1 hour 30 minutes
- Yield: 4 servings 1x
- Category: Appetizer
- Cuisine: American
Ingredients
- 2 pounds chicken wings (drumettes and flats, separated)
- 1 tablespoon baking powder (aluminum-free)
- 1 teaspoon fine sea salt
- ½ teaspoon freshly ground black pepper
- ½ teaspoon garlic powder
- ½ teaspoon onion powder
- ¼ cup unsalted butter
- 4 cloves garlic, minced
- ½ cup freshly grated parmesan cheese
- 2 tablespoons fresh parsley, chopped
- ¼ teaspoon red pepper flakes (optional)
Instructions
- Preheat oven to 250°F (120°C). Line a baking sheet with foil and place a wire rack on top.
- Pat chicken wings completely dry with paper towels.
- In a large bowl, whisk together baking powder, salt, pepper, garlic powder, and onion powder. Add wings and toss until evenly coated.
- Place wings in a single layer on the wire rack, not touching. Bake at 250°F for 30 minutes.
- Remove wings from oven. Increase oven temperature to 425°F (220°C). Let wings rest at room temperature while oven heats.
- Return wings to oven and bake at 425°F for 40-45 minutes, flipping halfway through, until golden brown and crispy.
- While wings bake, melt butter in a small saucepan over low heat. Add minced garlic and cook 1-2 minutes until fragrant. Remove from heat and stir in red pepper flakes if using.
- Transfer hot wings to a large bowl. Pour garlic butter over wings and toss immediately. Sprinkle with grated parmesan and parsley, then toss again until coated.
- Serve immediately.
Notes
Pat wings very dry for crispiest skin. Use aluminum-free baking powder. Let wings rest between temperature changes. For extra heat, add cayenne to dry rub or toss with hot sauce. Leftovers can be reheated in a 375°F oven for 10-12 minutes.
Nutrition
- Serving Size: 5-6 wings
- Calories: 475
- Sodium: 800
- Fat: 32
- Saturated Fat: 12
- Carbohydrates: 3
- Protein: 35
Keywords: crispy wings, parmesan garlic wings, tailgate wings, game day recipe, oven baked wings, buffalo wings alternative