The snap of an almond nail against your front teeth is the whole point of these spooky witch finger cookies for Halloween. Everything else—the buttery shortbread crumble, the faint sweetness, the way the jam at the “knuckle” catches the kitchen light—is just supporting actor. I made these one October afternoon when my niece announced she was “too old for candy corn” but still wanted something that made her friends gasp. And honestly, nothing delivers a theatrical gasp like a plate of dismembered-looking fingers, right?
I remember shaping the first one and thinking, this is either going to be brilliant or deeply concerning. Turns out, it’s both. There’s something almost meditative about rolling almond-shaped dough into knobby finger forms, pressing a slivered almond into the tip for a nail, and watching the dough puff just enough in the oven to look grotesquely realistic. The green-tinted almond nails? Pure genius. They look like something you’d scrape off a dungeon floor, but they taste like toasted marzipan.
These spooky witch finger cookies for Halloween have become my non-negotiable contribution to every October gathering. They’re the recipe that makes people stop mid-conversation, point, and laugh nervously. And that’s really what Halloween baking should do—make you smile while questioning your life choices.
Why You’ll Love This Recipe
I’ve tested these spooky witch finger cookies for Halloween across three different ovens (including a finicky rental apartment one that runs 25 degrees hot), and they hold up every single time. Here’s why they’ve earned a permanent spot in my fall rotation:
- Comically Easy to Make : The dough comes together in one bowl with no electric mixer required. I’m serious—your hands do all the work, which feels appropriately hands-on for something this creepy.
- Pantry-Friendly Ingredients : Butter, flour, sugar, egg, vanilla, almond extract, and jam. You probably have everything except maybe the almond slivers, which are a dollar at any grocery store.
- Perfect for Halloween Parties : These spooky witch finger cookies for Halloween steal the show at potlucks, school events, and grown-up costume parties alike. Adults lose their minds over them even more than kids do.
- Zero Fancy Equipment : No cookie cutters, no piping bags, no specialty pans. Just your hands and a baking sheet. That’s it.
- Shockingly Realistic : The green almond nails, the red jam “blood” at the knuckle, the slight wrinkling at the joints—people genuinely hesitate before taking a bite. That hesitation is the whole fun.
What makes these different from every other creepy cookie recipe out there is the texture. Most “witch finger” recipes produce cookies that spread into blobs during baking. Mine stays defined because the dough is intentionally dry and chilled thoroughly. You get sharp knuckles, distinct nail beds, and a crumbly shortbread bite that doesn’t taste like raw dough or burn on the bottom. I spent three batches getting the almond-to-dough ratio right so the nail stays attached without sliding off mid-bake. That’s the kind of obsessive testing you’re getting here.
These are the cookies that make you close your eyes after the first bite, then immediately reach for another one while pretending to be grossed out. It’s comfort food with a horror-movie twist—exactly what Halloween should taste like.
What Ingredients You Will Need
This recipe uses simple, straightforward ingredients to build a buttery shortbread base that holds its shape perfectly. The “scary” elements come from clever assembly, not exotic ingredients.
- Unsalted butter (1 cup, softened) – Use good-quality butter here since it’s the dominant flavor. I prefer Kerrygold or Plugrà for the richness, but any unsalted brand works. Salted butter will make the cookies taste salty since we’re adding salt separately.
- Powdered sugar (1/2 cup) – Powdered sugar gives the shortbread its melt-in-your-mouth texture without the graininess of granulated sugar. Don’t substitute granulated here—the texture won’t be right.
- Large egg (1, room temperature) – The egg binds the dough and adds a tiny bit of structure. Take it out of the fridge 30 minutes before starting.
- Vanilla extract (1 teaspoon) – Pure vanilla adds warmth and depth. Imitation works fine too, but pure gives a cleaner flavor.
- Almond extract (1/2 teaspoon) – This is the secret ingredient that makes the cookies taste like they belong in a witch’s kitchen. It gives a subtle marzipan note that pairs beautifully with the almond nails.
- All-purpose flour (2 1/4 cups) – Standard AP flour works perfectly. No need for bread flour or cake flour here. Spoon and level your flour—scooping directly from the bag packs it down and yields dry cookies.
- Salt (1/4 teaspoon) – Just enough to balance the sweetness and enhance the buttery flavor. I use fine sea salt.
- Whole blanched almonds (about 40-45 slivers) – These become the fingernails. Blanched almonds (skin removed) look more realistic than skin-on almonds. I’ve used both, and the blanched ones have a smoother, more nail-like appearance. You’ll need one sliver per cookie.
- Green food coloring (gel or liquid) – For tinting the almond nails. Gel coloring gives a more intense shade without thinning the color. I use Wilton Leaf Green, but any green works. Start with a tiny drop—you can always add more.
- Red jam or jelly (about 3 tablespoons) – Strawberry, raspberry, or any red jam works for the “blood” at the knuckle. Seedless jam looks cleaner, but seeded jam adds a disturbing texture that some people love. I’ve used both and prefer seedless for the visual shock value.
Ingredient substitution notes: For a dairy-free version, use plant-based butter sticks (not spreadable tub butter). The texture will be slightly less tender but still delicious. For a gluten-free option, swap the all-purpose flour with a 1:1 gluten-free baking flour blend. I’ve tested this with Bob’s Red Mill 1:1 and King Arthur Measure for Measure—both worked, though the cookies were a touch more crumbly. If you can’t find blanched almonds, skin-on almonds work fine; they just look less like real fingernails. Toast them lightly first for extra flavor.
Equipment Needed
You don’t need much for these spooky witch finger cookies for Halloween, which is part of their charm.
- Large mixing bowl – Any bowl big enough to hold the dough. I use a ceramic mixing bowl my grandmother gave me, but metal or glass works fine.
- Baking sheets (2) – Standard half-sheet pans work perfectly. Line them with parchment paper for easy cleanup and to prevent sticking.
- Parchment paper – Non-negotiable. The cookies release cleanly, and the bottoms bake evenly. Avoid wax paper—it will melt in the oven.
- Small bowl – For mixing the green food coloring with the almond slivers. Any small dish works.
- Pastry brush or small spoon – For applying the green tint to the almonds. A brush gives more even coverage, but a spoon works in a pinch.
- Cooling rack – Essential for letting the cookies cool completely before adding the jam. If you don’t have one, transfer the cookies to a plate and let them cool at room temperature—just expect slightly softer bottoms.
- Butter knife or offset spatula – For spreading the jam. A butter knife gives you more control for that “blood” look.
Budget-friendly note: If you don’t have parchment paper, lightly grease your baking sheets with butter or non-stick spray. The cookies might spread slightly more, but they’ll still work. And if you don’t have a pastry brush, use a clean fingertip to dab the green coloring onto the almonds. It’s not fancy, but it gets the job done.
Preparation Method
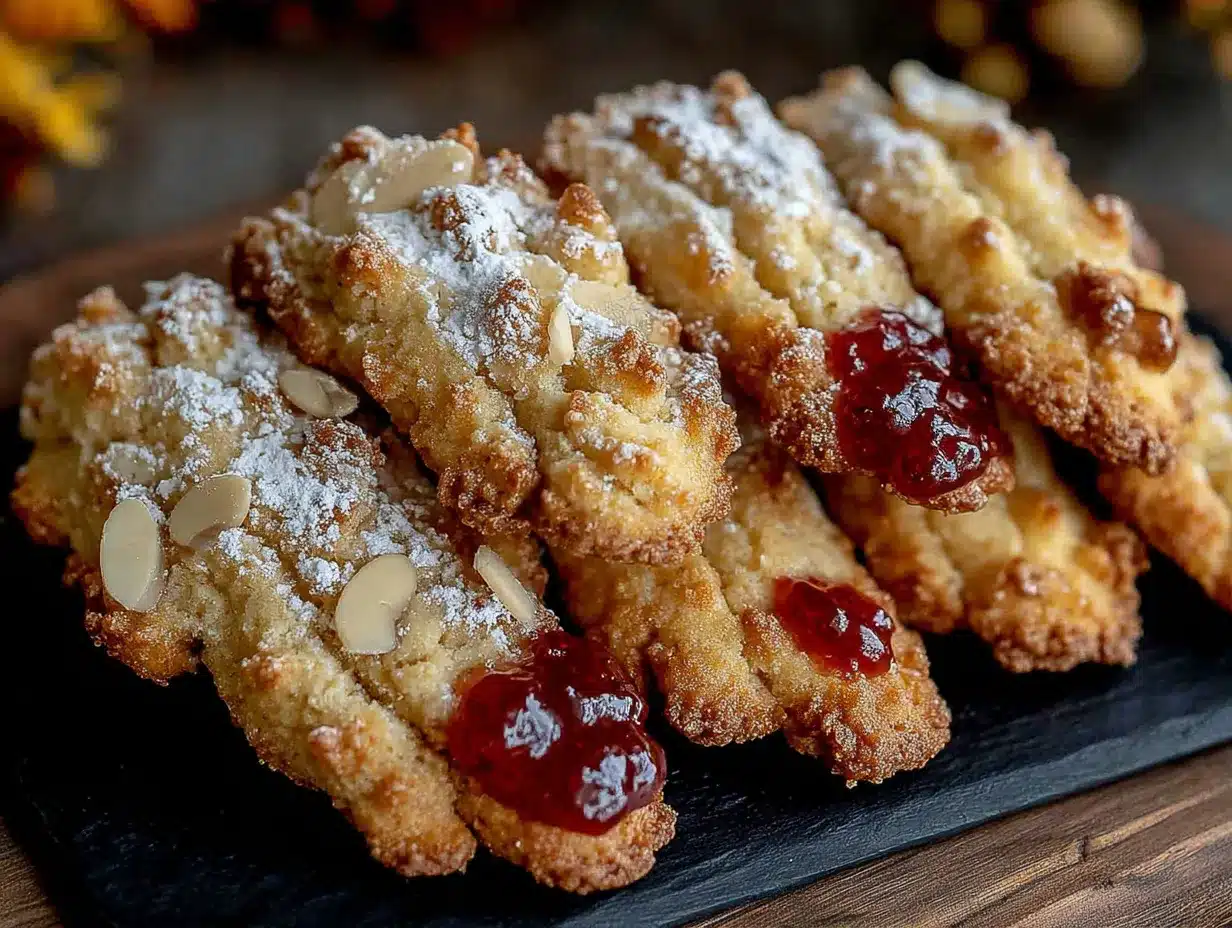
This recipe makes about 35-40 cookies, depending on how thick you roll them. The total active time is about 30 minutes, plus 1 hour of chilling and 12-14 minutes of baking.
- Make the dough. In a large mixing bowl, beat the softened butter with a wooden spoon until it’s creamy and smooth—about 2 minutes. Add the powdered sugar and beat until light and fluffy, another 2 minutes. Crack in the egg, pour in the vanilla and almond extracts, and mix until everything comes together. It might look slightly curdled at this point—that’s fine. Add the flour and salt, then mix with your hands until a soft dough forms. It should be pliable but not sticky. If it sticks to your fingers, add an extra tablespoon of flour.
- Chill the dough. Wrap the dough in plastic wrap and flatten it into a disc. Refrigerate for at least 1 hour. This step is crucial—warm dough spreads into shapeless blobs instead of defined fingers. I once skipped this step because I was in a hurry, and my “fingers” looked like deformed potatoes. Learn from my mistake.
- Prepare the almond nails. While the dough chills, place the almond slivers in a small bowl. Add 2-3 drops of green food coloring and stir until the almonds are evenly tinted. You want a sickly green shade—think swamp witch, not St. Patrick’s Day. Set aside to dry on a paper towel.
- Shape the fingers. Preheat your oven to 325°F (165°C) and line your baking sheets with parchment paper. Remove the dough from the fridge. Pinch off a piece about the size of a walnut—roughly 1 tablespoon. Roll it between your palms into a finger shape: slightly thicker at the base, tapering toward the tip, with a flat bottom. Place it on the baking sheet. Use the back of a butter knife to press 2-3 horizontal lines across the middle for knuckles. Don’t press too deep—just enough to create indentations. Repeat with the remaining dough, spacing the fingers about 1 inch apart on the sheets.
- Attach the nails. Press one green-tinted almond sliver onto the tip of each finger, pointy end facing outward. Gently press the almond into the dough so it stays put during baking. If the almond feels loose, dab a tiny bit of water underneath it to help it stick.
- Bake the cookies. Bake for 12-14 minutes, or until the cookies are just set and the edges are barely golden. The bottoms should be light golden brown. Don’t overbake—these spooky witch finger cookies for Halloween are meant to be tender and crumbly, not hard. Let them cool on the baking sheet for 5 minutes, then transfer to a cooling rack.
- Add the “blood.” Once the cookies are completely cool (this takes about 15-20 minutes), spoon a small amount of red jam into the knuckle indentations. Use the back of a spoon or a butter knife to press it into the creases. The jam should look like dried blood pooling at the joints. Don’t overdo it—a little goes a long way. Too much jam makes the cookies soggy and ruins the creepy aesthetic.
- Serve immediately or store. The cookies are best eaten within 24 hours, when the jam is still glossy and the almond nails are perfectly crunchy. Arrange them on a platter with the fingers overlapping slightly for maximum shock value.
Sensory cue: When you press the knuckles into the dough, you should feel the dough give slightly but hold its shape. If the dough feels too soft and the indentations disappear, pop it back in the fridge for 15 minutes. When the cookies are done baking, they should smell like butter and toasted almonds—not burnt sugar. The tops will be pale, not golden. That’s the sign of a properly baked shortbread.
Cooking Tips & Techniques
I’ve made these spooky witch finger cookies for Halloween at least a dozen times, and I’ve collected a few hard-won lessons along the way.
The chilling is not optional. I cannot stress this enough. The first time I made these, I was impatient and only chilled the dough for 20 minutes. The fingers spread into flat, unrecognizable blobs. The knuckles disappeared. The almonds slid off. It was a disaster. The dough needs that full hour in the fridge to firm up the butter, which keeps the cookies from spreading during baking. If your kitchen is warm (above 75°F), chill the shaped fingers on the baking sheet for an extra 15 minutes before baking.
Use a light hand with the jam. I learned this the hard way when I dolloped too much raspberry jam onto a batch, and the cookies turned into sticky, soggy messes within an hour. The jam should be a thin smear, not a pool. Think of it as accent makeup, not a foundation layer. If you’re serving these at a party, add the jam right before serving to keep the cookies crisp.
Perfect the nail placement. The almond sliver should sit at the very tip of the finger, with the pointed end extending slightly past the dough. If you press it too far into the dough, it looks like a stubbed toe instead of a fingernail. If you leave it too exposed, it falls off during baking. Aim for about 1/4 inch of the almond visible beyond the dough tip. And make sure the almond is pressed firmly into the dough—a gentle tap with your fingertip usually does the trick.
Multitasking strategy: While the dough chills, tint your almonds and line your baking sheets. While the cookies bake, clean your workspace and set out the jam. This way, you’re never standing around waiting. The total active time is only about 30 minutes, but those 30 minutes are concentrated effort. Use the downtime wisely.
Variations & Adaptations
These spooky witch finger cookies for Halloween are endlessly customizable. Here are a few ways I’ve adapted them over the years.
Vegan version: Substitute the butter with vegan butter sticks (like Earth Balance or Miyoko’s), replace the egg with a flax egg (1 tablespoon ground flaxseed mixed with 3 tablespoons water, let sit for 5 minutes), and use a plant-based jam. The texture is slightly less tender but still delicious. I tested this for a friend’s vegan Halloween party, and nobody noticed the difference.
Chocolate-dipped witch fingers: After the cookies cool, dip the base of each finger in melted dark chocolate and let it set on parchment paper. The chocolate looks like dirt or “grave soil” and adds a rich contrast to the buttery shortbread. I did this for a “Witch’s Graveyard” dessert table, and it was the first thing to disappear.
Spiced witch fingers: Add 1/2 teaspoon of cinnamon, 1/4 teaspoon of nutmeg, and a pinch of cloves to the flour mixture. The warm spices give the cookies a cozy fall flavor that pairs beautifully with the almond extract. This variation is especially good if you’re serving these at a Thanksgiving-adjacent Halloween party.
Gluten-free adaptation: Swap the all-purpose flour with a 1:1 gluten-free baking blend. I’ve tested this with both Bob’s Red Mill and King Arthur brands. The dough will be slightly more fragile, so handle it gently when shaping. Chill the shaped fingers for an extra 15 minutes before baking to help them hold their form.
Bloody knuckle variation: Instead of red jam at the knuckles, use a dab of red gel food coloring mixed with a drop of water. This creates a more “fresh blood” look that’s disturbingly realistic. Just be warned—it stains everything it touches, so serve these on disposable platters.
Serving & Storage Suggestions
These spooky witch finger cookies for Halloween are best served at room temperature, arranged on a black or dark-colored platter for maximum contrast. I like to scatter a few whole almonds around the plate (tinted green, of course) to look like “discarded nails.” It’s a small touch that always gets a reaction.
Serving temperature: Room temperature is ideal. The shortbread is tender and crumbly, the almond nails are crunchy, and the jam is slightly tacky. If you refrigerate them, the butter firms up and the cookies lose their melt-in-your-mouth texture. Take them out of the fridge 20 minutes before serving if you’ve stored them cold.
Storage instructions: Store in an airtight container at room temperature for up to 3 days. Layer them between sheets of parchment paper to prevent the jam from smearing. Do not stack them more than two layers deep—the weight can crush the almond nails. If you’re making them ahead for a party, bake and store the cookies without the jam, then add the jam the day of serving. The cookies stay fresh for up to 5 days without the jam.
Freezer instructions: Freeze the shaped, unbaked fingers on a parchment-lined baking sheet until solid (about 2 hours), then transfer to a freezer bag. Bake directly from frozen, adding 2-3 minutes to the baking time. The almond nails should be added after freezing but before baking. I’ve done this for last-minute Halloween gatherings, and it works beautifully.
Flavor development: These cookies actually taste better the day after baking. The almond extract mellows out, the butter flavor deepens, and the shortbread becomes even more tender. If you can resist eating them all on day one, you’re in for a treat on day two.
Pairing suggestions: Serve these alongside a creamy slow cooker white chicken chili for a savory-sweet Halloween dinner combo. Or pair them with a cozy maple pecan snickerdoodles for a full cookie spread. For drinks, hot apple cider or a spiced apple cider donut (minus the donut) makes a perfect non-alcoholic pairing. For adults, a dark stout beer or a bourbon-spiked hot chocolate complements the almond and butter notes beautifully.
Nutritional Information & Benefits
Let’s be honest—these spooky witch finger cookies for Halloween are a treat, not a health food. But here’s what you’re working with per cookie (based on 38 cookies):
- Calories: Approximately 110 calories per cookie
- Fat: 7g (4g saturated)
- Carbohydrates: 11g (4g sugar)
- Protein: 2g
- Fiber: 0.5g
- Sodium: 35mg
Health highlights: Almonds are a good source of vitamin E, magnesium, and healthy monounsaturated fats. The butter provides vitamin A and a small amount of calcium. The jam contributes a tiny bit of fruit antioxidants, though honestly, we’re not here for the health benefits. These are cookies. They’re meant to be enjoyed in moderation as part of a balanced life.
Dietary considerations: This recipe contains dairy (butter), eggs, gluten (flour), and tree nuts (almonds). For a dairy-free version, use vegan butter. For a gluten-free version, use a 1:1 gluten-free flour blend. For an egg-free version, use a flax egg. The almond nails can be replaced with slivered sunflower seeds for a nut-free option, though they won’t look as realistic.
My personal perspective: I believe in enjoying seasonal treats without guilt. Halloween comes once a year. Make these cookies, share them with people you love, and don’t stress about the nutritional breakdown. Life is too short to count calories in a witch finger cookie.
Conclusion
These spooky witch finger cookies for Halloween are the kind of recipe that makes people stop and stare—then laugh, then grab three. They’re creepy enough to impress at a costume party but delicious enough that nobody’s leaving them on the plate. The buttery shortbread, the crunchy almond nail, the little smear of red jam at the knuckle—it all comes together in a way that’s equal parts ridiculous and wonderful.
What I love most about this recipe is how it brings people together. There’s something about shaping dough into disembodied fingers that makes everyone want to join in. Kids love rolling the fingers and pressing in the almonds. Adults love the shock value of serving them. And everyone loves eating them. That’s the magic of Halloween baking—it turns something simple into a shared experience.
I’d love to hear how yours turn out! Did you add any creative variations? Did your guests scream or laugh? Drop a comment below and share your spooky creations. And if you’re looking for more Halloween-friendly recipes, check out my creamy one-pot pumpkin pasta with sausage for a savory option, or these baked spiced apple cider donuts for another fall favorite. Happy haunting, and happy baking!
Frequently Asked Questions
Can I make these witch finger cookies ahead of time?
Yes! Bake the cookies without the jam up to 3 days in advance and store them in an airtight container at room temperature. Add the jam the day you plan to serve them for the best texture and appearance. You can also freeze the unbaked shaped fingers for up to 3 months.
Why did my cookies spread into blobs?
The most common reason is insufficient chilling. The dough needs at least 1 hour in the fridge to firm up the butter. If your kitchen is warm, chill the shaped fingers on the baking sheet for an extra 15 minutes before baking. Also, make sure you’re using the correct amount of flour—too little flour causes spreading.
Can I use a different nut instead of almonds for the nails?
Absolutely! Slivered sunflower seeds work for a nut-free option, though they look less realistic. You can also use whole cashews (cut in half lengthwise) for a larger, more dramatic nail. Pistachios add a natural green tint that saves you a step. Just keep in mind that different nuts have different bake times—watch them closely to prevent burning.
How do I get the almond nails to stay on during baking?
Press the almond sliver firmly into the dough at the tip of the finger. The dough should slightly encase the base of the almond. If the almond still feels loose, dab a tiny bit of water underneath it before pressing it in. Avoid using too much pressure, though—you don’t want to flatten the finger shape.
What kind of jam works best for the “blood”?
Seedless strawberry or raspberry jam works best because it has a smooth, glossy texture that looks like blood. Avoid jelly, which is too thin and runny. For a darker, more “dried blood” look, use blackberry jam or mix a drop of red food coloring into a tablespoon of strawberry jam. For a truly disturbing effect, use a thin layer of chocolate sauce mixed with a drop of red coloring—it looks alarmingly realistic.
Pin This Recipe!
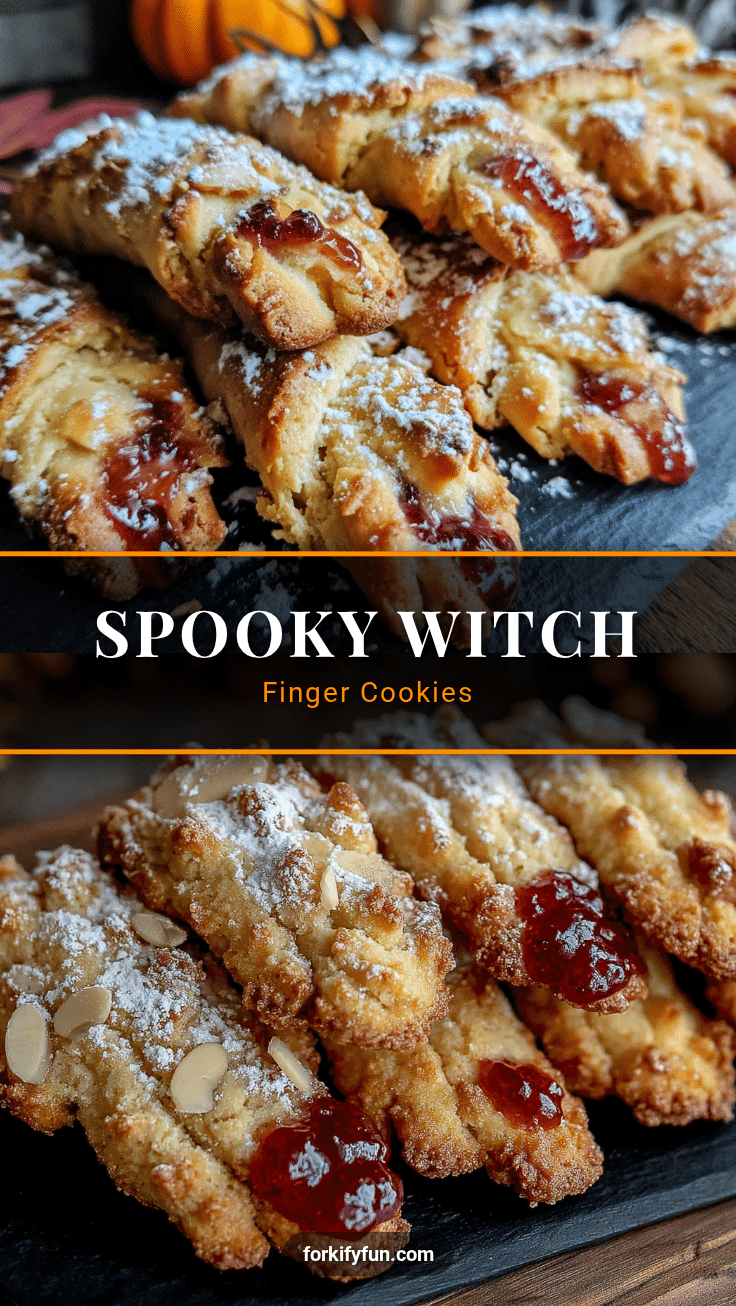
Easy Spooky Witch Finger Cookies for Halloween

Buttery shortbread cookies shaped like witch fingers with green almond nails and red jam ‘blood’ at the knuckles. Perfectly creepy and delicious for Halloween parties.
- Prep Time: 30 minutes
- Cook Time: 12-14 minutes
- Total Time: 1 hour 45 minutes (includes 1 hour chilling)
- Yield: 35-40 cookies 1x
- Category: Dessert
- Cuisine: American
Ingredients
- 1 cup unsalted butter, softened
- 1/2 cup powdered sugar
- 1 large egg, room temperature
- 1 teaspoon vanilla extract
- 1/2 teaspoon almond extract
- 2 1/4 cups all-purpose flour
- 1/4 teaspoon salt
- 40–45 whole blanched almond slivers
- Green food coloring (gel or liquid)
- 3 tablespoons red jam or jelly (seedless strawberry or raspberry)
Instructions
- Make the dough: In a large mixing bowl, beat the softened butter with a wooden spoon until creamy and smooth, about 2 minutes. Add the powdered sugar and beat until light and fluffy, another 2 minutes. Crack in the egg, pour in the vanilla and almond extracts, and mix until combined. Add the flour and salt, then mix with your hands until a soft dough forms. It should be pliable but not sticky. If it sticks to your fingers, add an extra tablespoon of flour.
- Chill the dough: Wrap the dough in plastic wrap and flatten into a disc. Refrigerate for at least 1 hour.
- Prepare the almond nails: While the dough chills, place the almond slivers in a small bowl. Add 2-3 drops of green food coloring and stir until evenly tinted. Set aside to dry on a paper towel.
- Shape the fingers: Preheat oven to 325°F (165°C) and line baking sheets with parchment paper. Pinch off a piece of dough about the size of a walnut (roughly 1 tablespoon). Roll between your palms into a finger shape: slightly thicker at the base, tapering toward the tip, with a flat bottom. Place on the baking sheet. Use the back of a butter knife to press 2-3 horizontal lines across the middle for knuckles. Repeat with remaining dough, spacing fingers about 1 inch apart.
- Attach the nails: Press one green-tinted almond sliver onto the tip of each finger, pointy end facing outward. Gently press into the dough so it stays put during baking. If loose, dab a tiny bit of water underneath to help it stick.
- Bake the cookies: Bake for 12-14 minutes, until just set and edges are barely golden. Let cool on the baking sheet for 5 minutes, then transfer to a cooling rack.
- Add the ‘blood’: Once cookies are completely cool (about 15-20 minutes), spoon a small amount of red jam into the knuckle indentations. Use the back of a spoon or butter knife to press it into the creases.
- Serve immediately or store: Best eaten within 24 hours. Arrange on a platter with fingers overlapping for maximum shock value.
Notes
Chilling the dough is crucial to prevent spreading. Add jam just before serving for best texture. For a vegan version, use vegan butter, a flax egg, and plant-based jam. For gluten-free, use a 1:1 gluten-free flour blend.
Nutrition
- Serving Size: 1 cookie
- Calories: 110
- Sugar: 4
- Sodium: 35
- Fat: 7
- Saturated Fat: 4
- Carbohydrates: 11
- Fiber: 0.5
- Protein: 2
Keywords: witch finger cookies, Halloween cookies, shortbread cookies, spooky cookies, almond cookies, Halloween dessert, creepy cookies


